
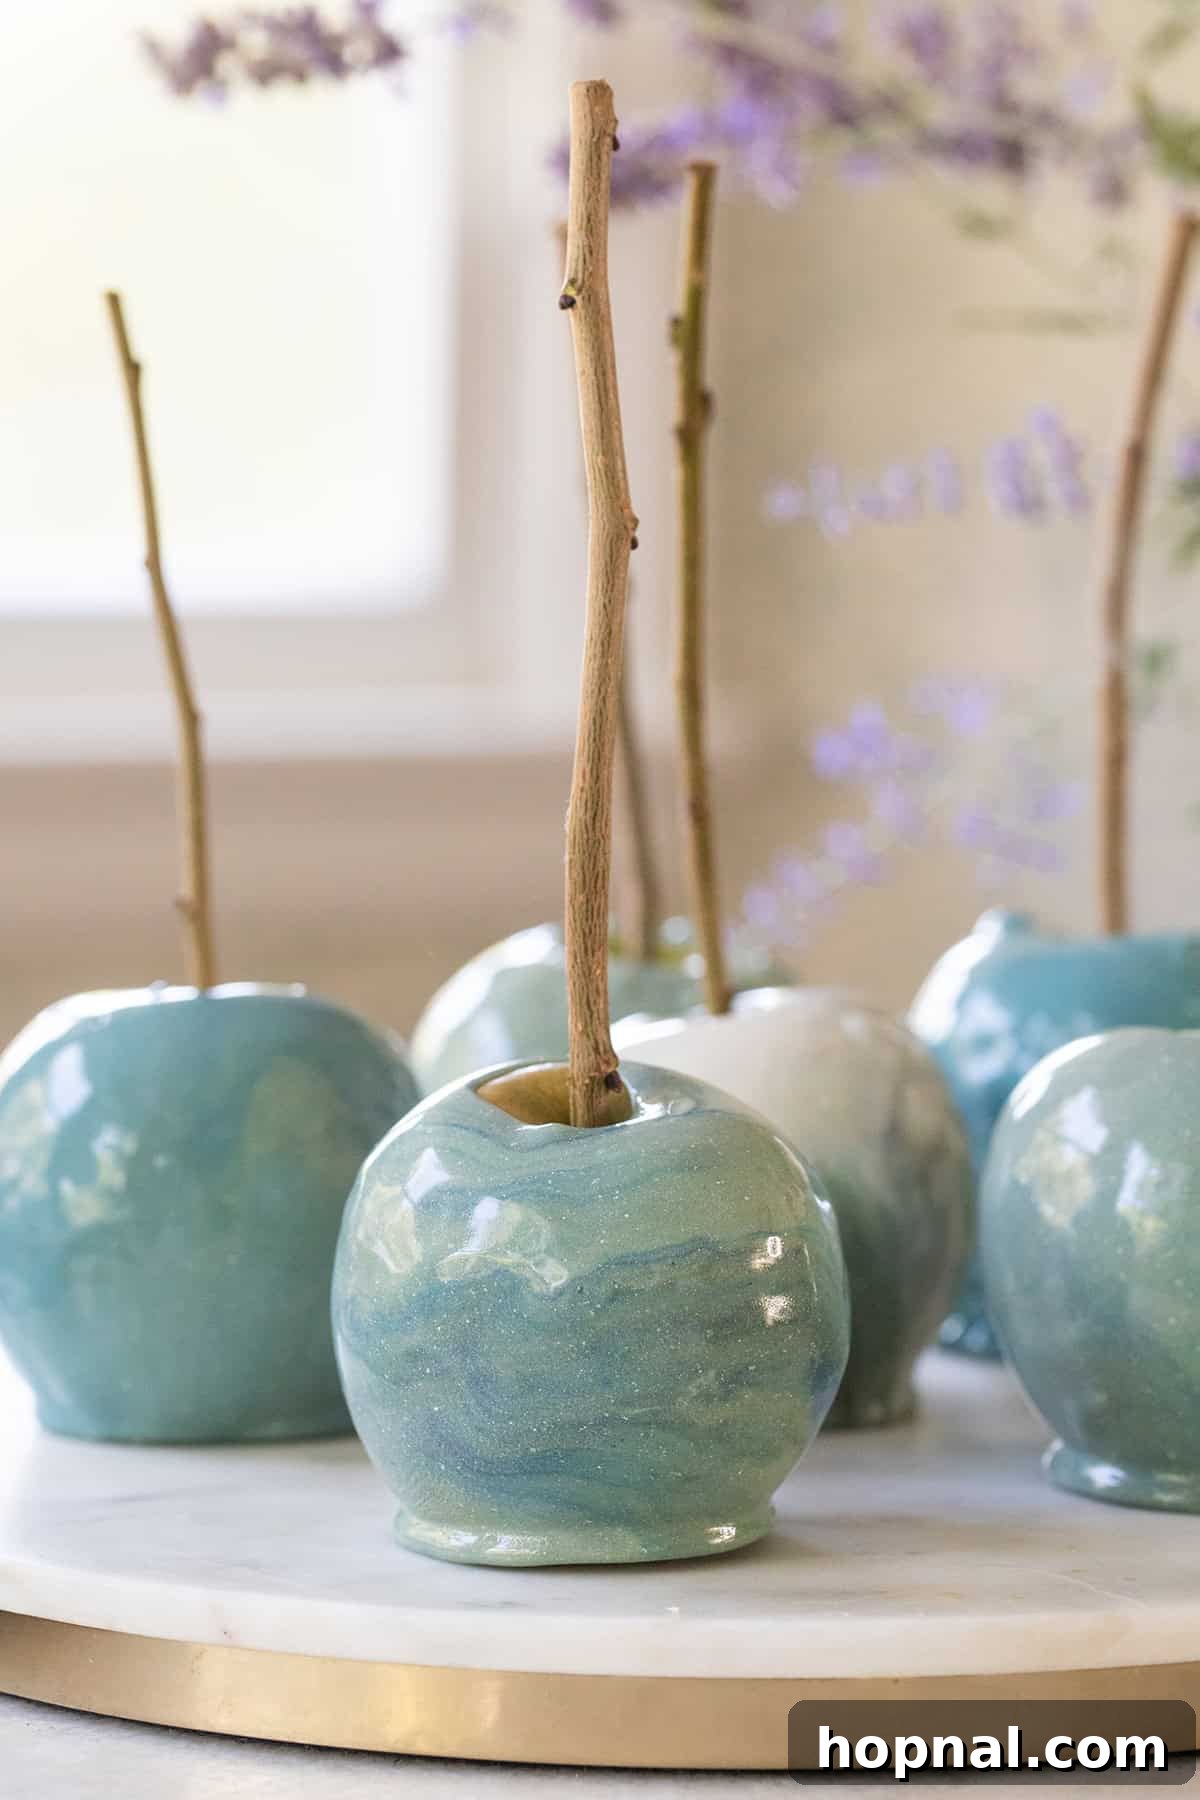
The Ultimate Guide to Making Stunning Marbled Candy Apples
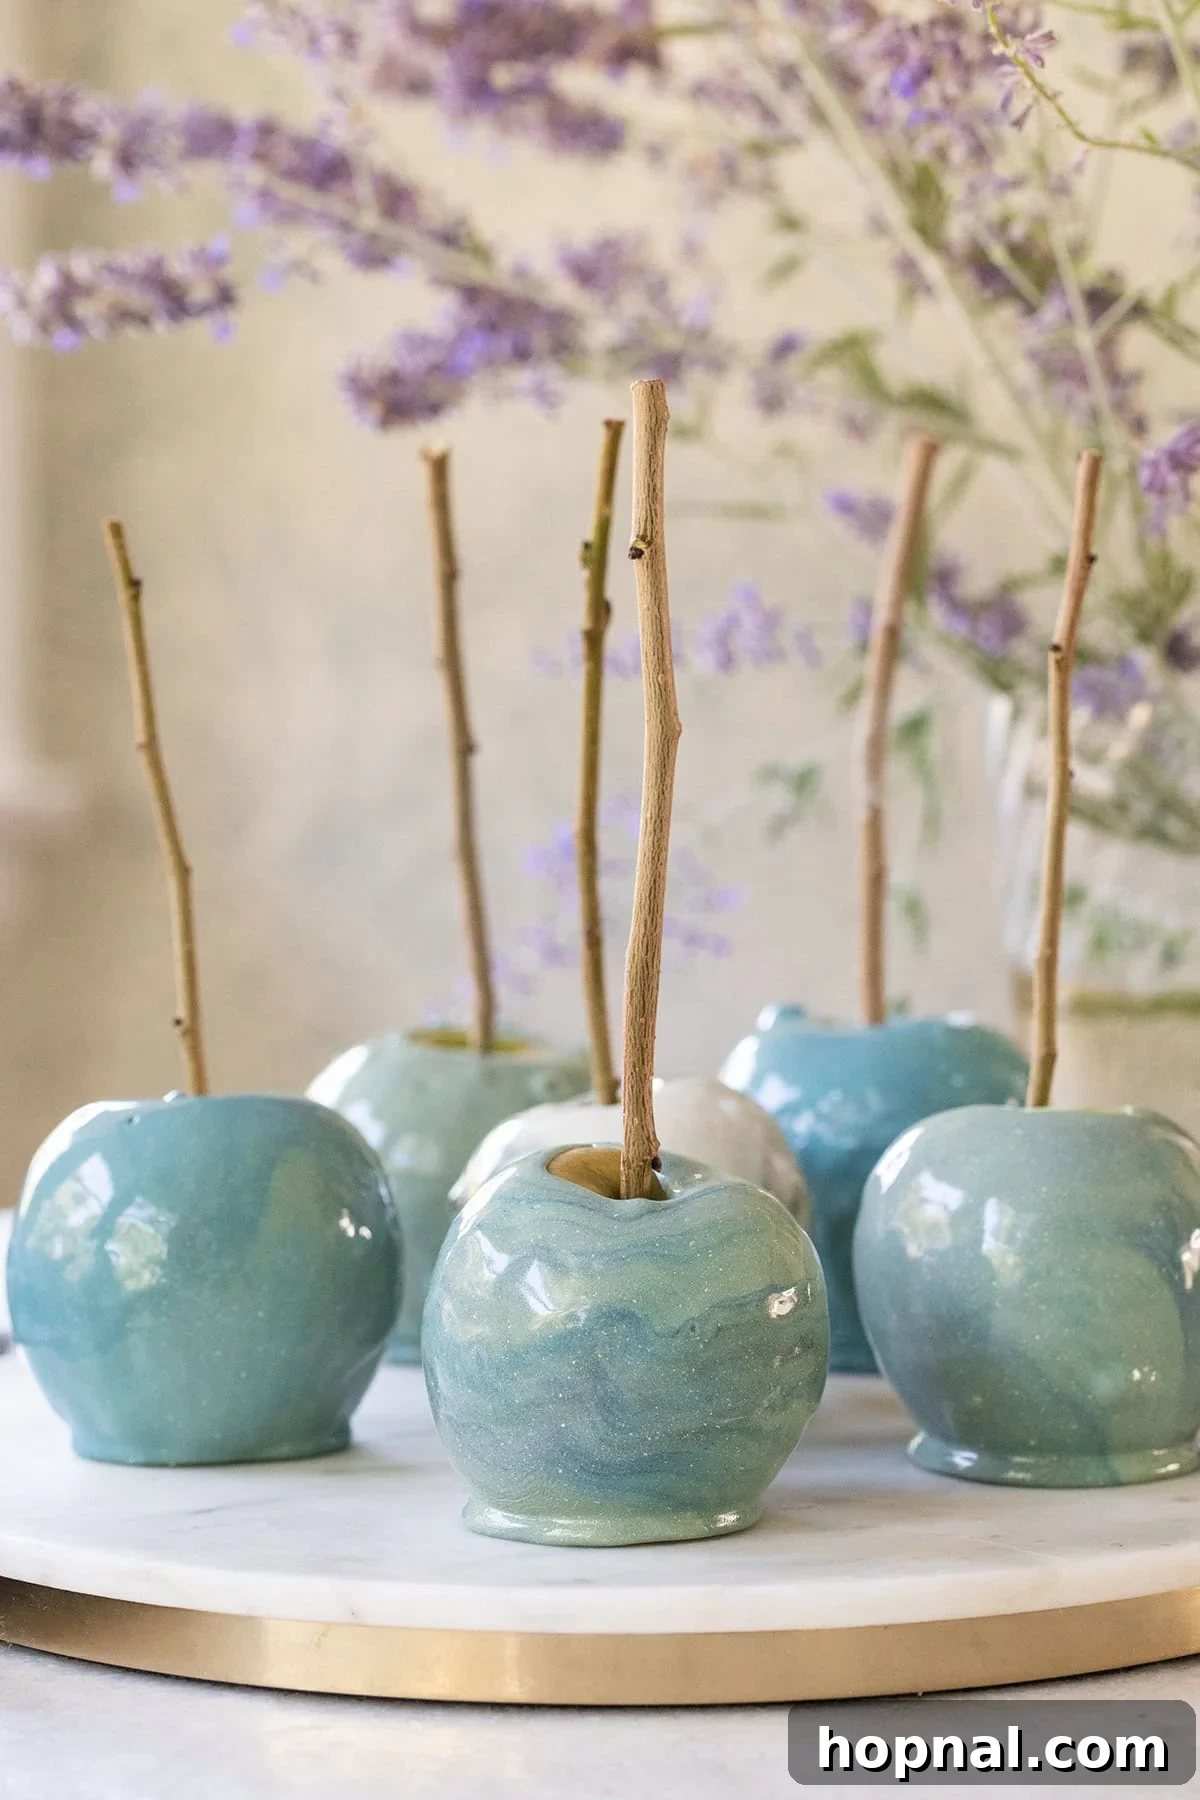
Candy apples are a beloved classic, instantly evoking feelings of nostalgia and festive joy. More than just a simple sweet treat, they offer a delightful symphony of textures and flavors – a vibrant, glossy, and impossibly crunchy coating encasing a crisp, juicy apple within. While traditional candy apples are charming, imagine elevating this experience with a mesmerizing marbled finish, transforming a familiar favorite into a true work of edible art. These visually captivating delights are perfect for adding a whimsical, custom touch to any year-round gathering, from spirited Halloween parties and cozy fall festivals to vibrant summer picnics and elegant holiday celebrations. They are guaranteed to be a conversation starter and a memorable highlight for your guests.
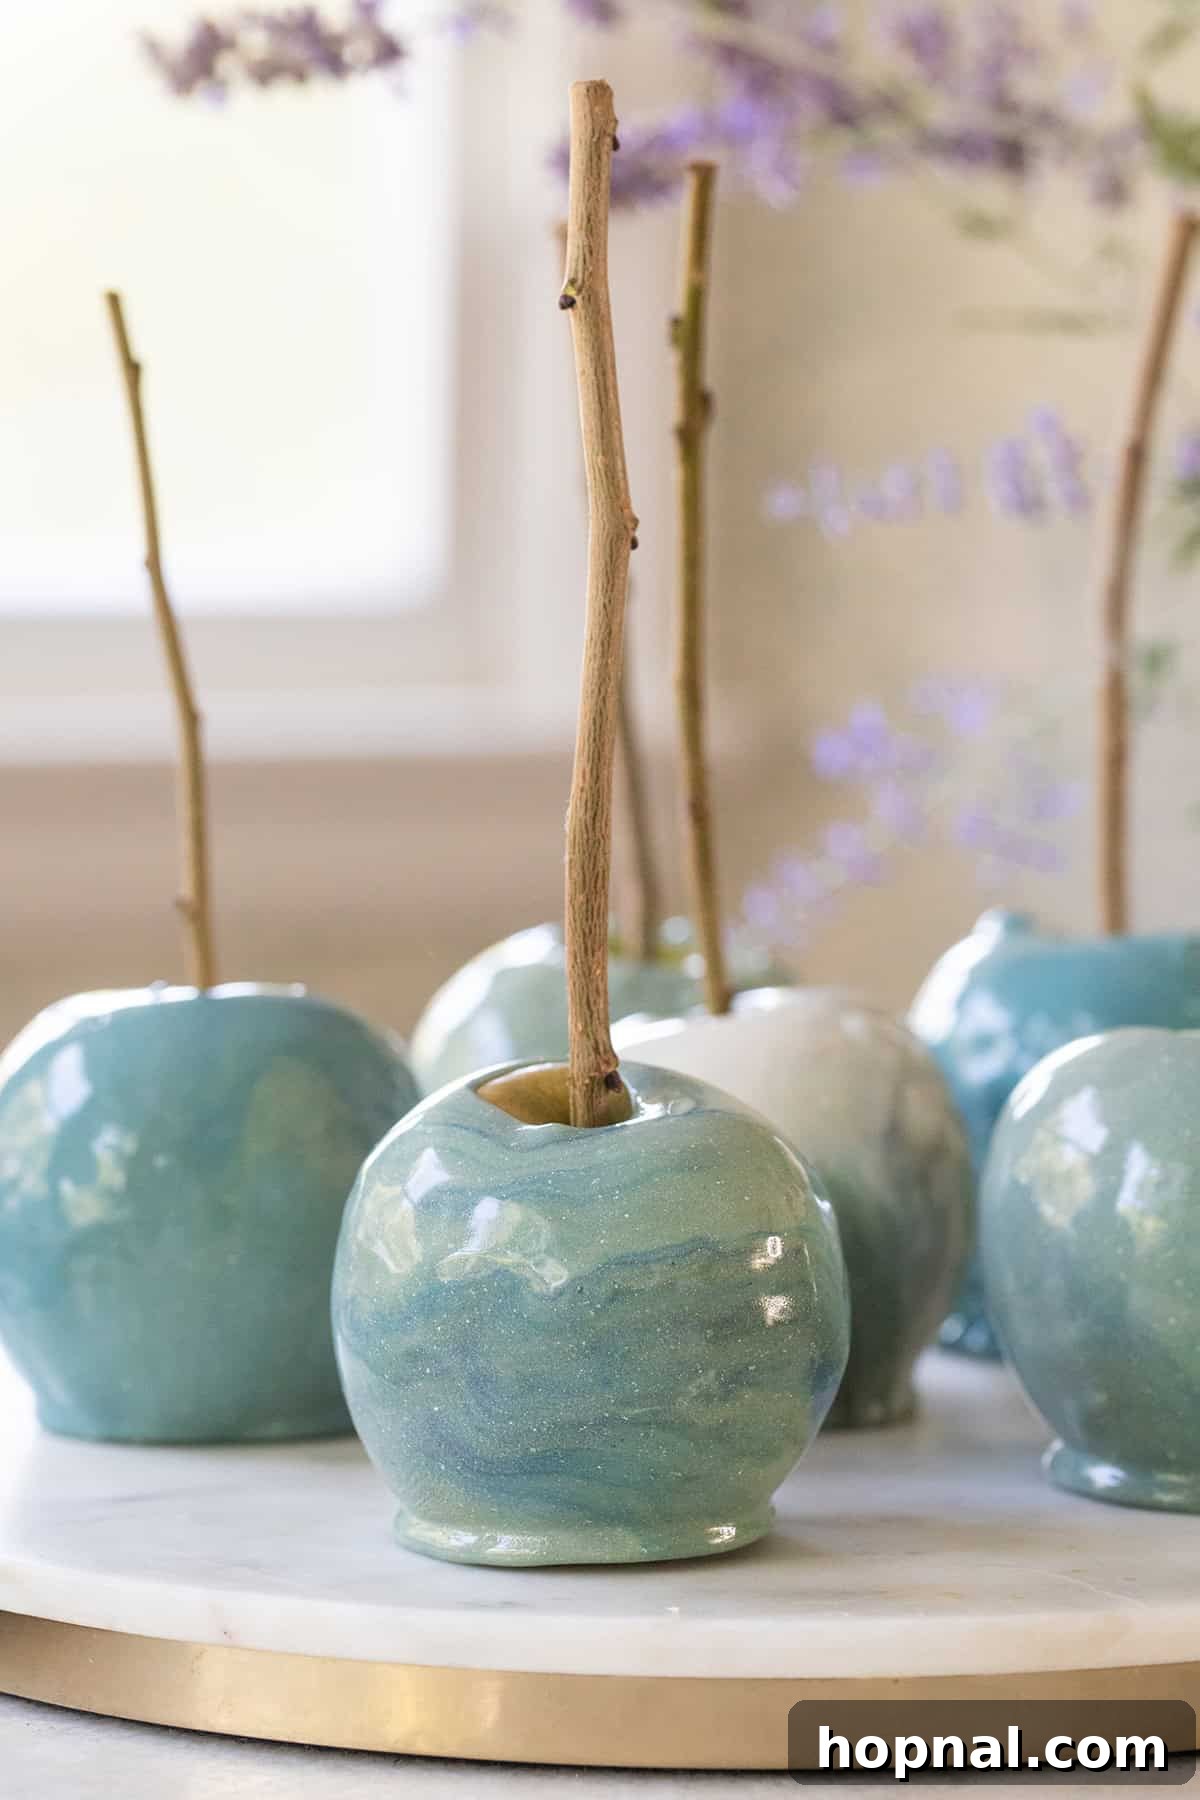
The allure of homemade marbled candy apples is undeniable, and we’re thrilled to share just how simple it is to achieve such breathtaking results. Every time we craft a batch, we’re utterly captivated by their stunning appearance – they truly are a feast for the eyes before even being a treat for the palate. We’re confident these beautiful confections will be an absolute sensation at any autumn event, adding a touch of sophisticated fun that homemade treats often lack. The entire process, while requiring attention to detail, is surprisingly straightforward, especially when armed with a reliable candy thermometer and a keen eye on the sugar temperature, which is the cornerstone of a perfect, hard-crack candy shell.
Beyond their ease of creation, one of the most exciting aspects of marbled candy apples is their incredible versatility and customizable nature. You possess complete creative freedom to choose any combination of colors, allowing you to perfectly match your fall decor, integrate them into a spooky Halloween theme, or align them with the specific palette of any party you’re hosting. This personalization makes each apple a unique masterpiece. If you’re a fan of elegant, marbled confections, you might also find inspiration in our guide on how to create a show-stopping marble drip cake, another stunning dessert designed to impress.
Essential Ingredients for Crafting Marbled Candy Apples
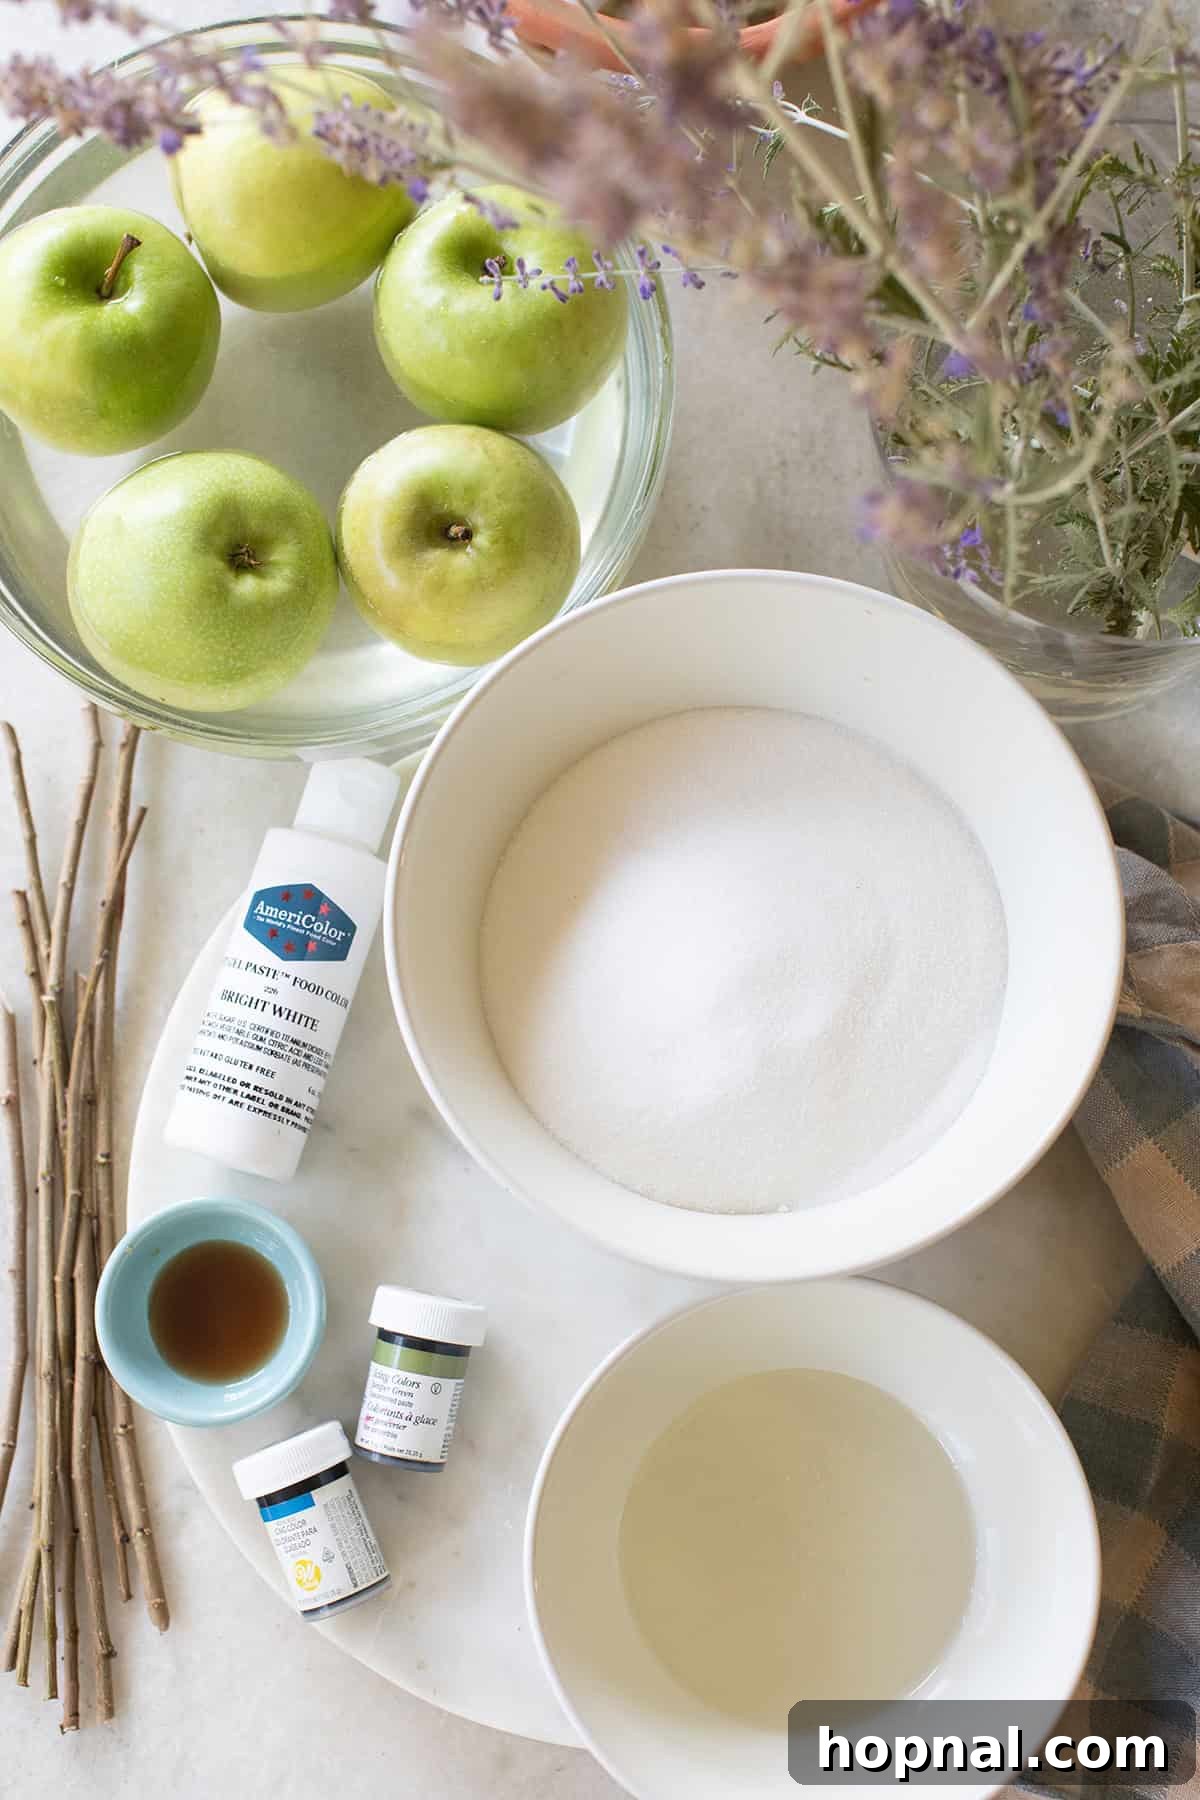
To successfully embark on your candy apple crafting journey, selecting the precise ingredients is paramount. Each component plays a vital role in achieving that perfect balance of sweetness, crispness, and the visually stunning marbled effect:
- Granny Smith Apples: These tart, firm green apples are the quintessential choice for candy apples. Their pronounced tartness offers a brilliant counterpoint to the intense sweetness of the candy coating, ensuring the treat is never cloyingly sweet. Furthermore, their sturdy texture holds up exceptionally well during the rigorous dipping process, and their bright green hue provides an excellent backdrop for your colorful marbling.
- Granulated Sugar: The foundation of your hard, crystalline candy shell. When subjected to high heat, granulated sugar undergoes a magical transformation, becoming a clear, molten liquid that eventually hardens into a sparkling, glass-like coating around the apple.
- Light Corn Syrup: A non-negotiable ingredient that acts as a powerful anti-crystallization agent. Corn syrup contains glucose, which helps to prevent the granulated sugar from recrystallizing, ensuring your candy shell remains perfectly smooth, glossy, and free from any undesirable grainy texture. It also contributes to the candy’s overall chewiness and shine.
- Water: Essential for dissolving the sugar and corn syrup into a uniform solution. The water eventually evaporates during the cooking process, allowing the sugar mixture to concentrate and reach the critical “hard crack” stage necessary for a firm candy coating.
- Vanilla Extract: Imparts a classic, warm, and inviting flavor to the candy coating, creating a familiar and comforting taste. However, this is also an excellent opportunity for creative substitution, allowing you to infuse your candy apples with unique and exciting flavor profiles.
- White Food Coloring: This ingredient is absolutely crucial for creating a dynamic and striking marbled effect. By establishing an opaque white base for your candy coating, any additional colors you introduce will truly pop, appearing vibrant and distinct against the white. Without it, your secondary colors might simply blend into a less defined, muddier hue.
- Gel Food Coloring: Select 2-3 contrasting gel colors to achieve your desired aesthetic for the marbled design. Gel food colorings are highly concentrated, meaning a small amount goes a long way in delivering intense, brilliant hues without significantly altering the consistency of your candy mixture. The possibilities for color combinations are boundless, enabling you to match any theme or mood.
Indispensable Supplies for Flawless Candy Apple Production
Beyond carefully selected ingredients, having the right tools on hand is paramount for a smooth, safe, and successful candy apple creation process. These essential supplies will simplify each step and help you achieve perfectly coated, beautifully marbled results:
- Candy Thermometer: This is arguably the most critical tool for candy making. It allows you to precisely monitor the sugar mixture’s temperature, which is vital for reaching the “hard crack” stage (300°F/150°C). Without accurate temperature control, your candy coating could end up too soft, sticky, or even burn, preventing that desired crispness.
- Parchment Paper or Wax Paper: An absolute necessity for a non-stick cooling surface. Once your apples are dipped in the hot candy, they will begin to harden rapidly. Placing them on parchment or wax paper ensures they don’t stick to your work surface, making for effortless removal and preserving their pristine finish.
- Baking Sheet: A sturdy baking sheet provides a stable platform when lined with parchment or wax paper. It serves as an organized, portable space for your dipped apples to cool and harden, streamlining cleanup after the sticky process.
- Heavy Saucepan: A medium-sized, heavy-bottomed saucepan is ideal. Its thick base ensures even heat distribution, which is crucial for preventing localized scorching of the sugar mixture. This consistent heating allows the candy to cook uniformly and reach the correct temperature without burning.
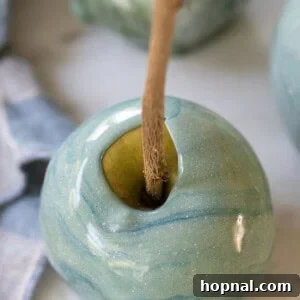
- Wooden Sticks: These serve as handles for dipping and enjoying your candy apples. You can opt for classic craft sticks, lollipop sticks, or even gather and clean rustic twigs for a charming, natural, and particularly festive Halloween aesthetic. Ensure they are sturdy enough to support the apple.
- Rubber Spatula (Heat-Proof): While stirring the sugar mixture during cooking is generally advised against, a heat-proof rubber spatula is invaluable for a few reasons. It’s perfect for gently swirling the food colors to create the marbled effect and for safely scraping down the sides of the pan or stirring once the candy is off the heat.
- Clean Scrub Brush: Essential for thoroughly cleaning apples and removing all traces of wax, which is a critical step for candy adhesion.
How to Master Marbled Candy Apples: A Comprehensive Step-by-Step Guide
Creating these visually stunning marbled candy apples is a rewarding process that, with careful attention to these detailed steps, will yield beautiful, glossy, and perfectly crunchy results:
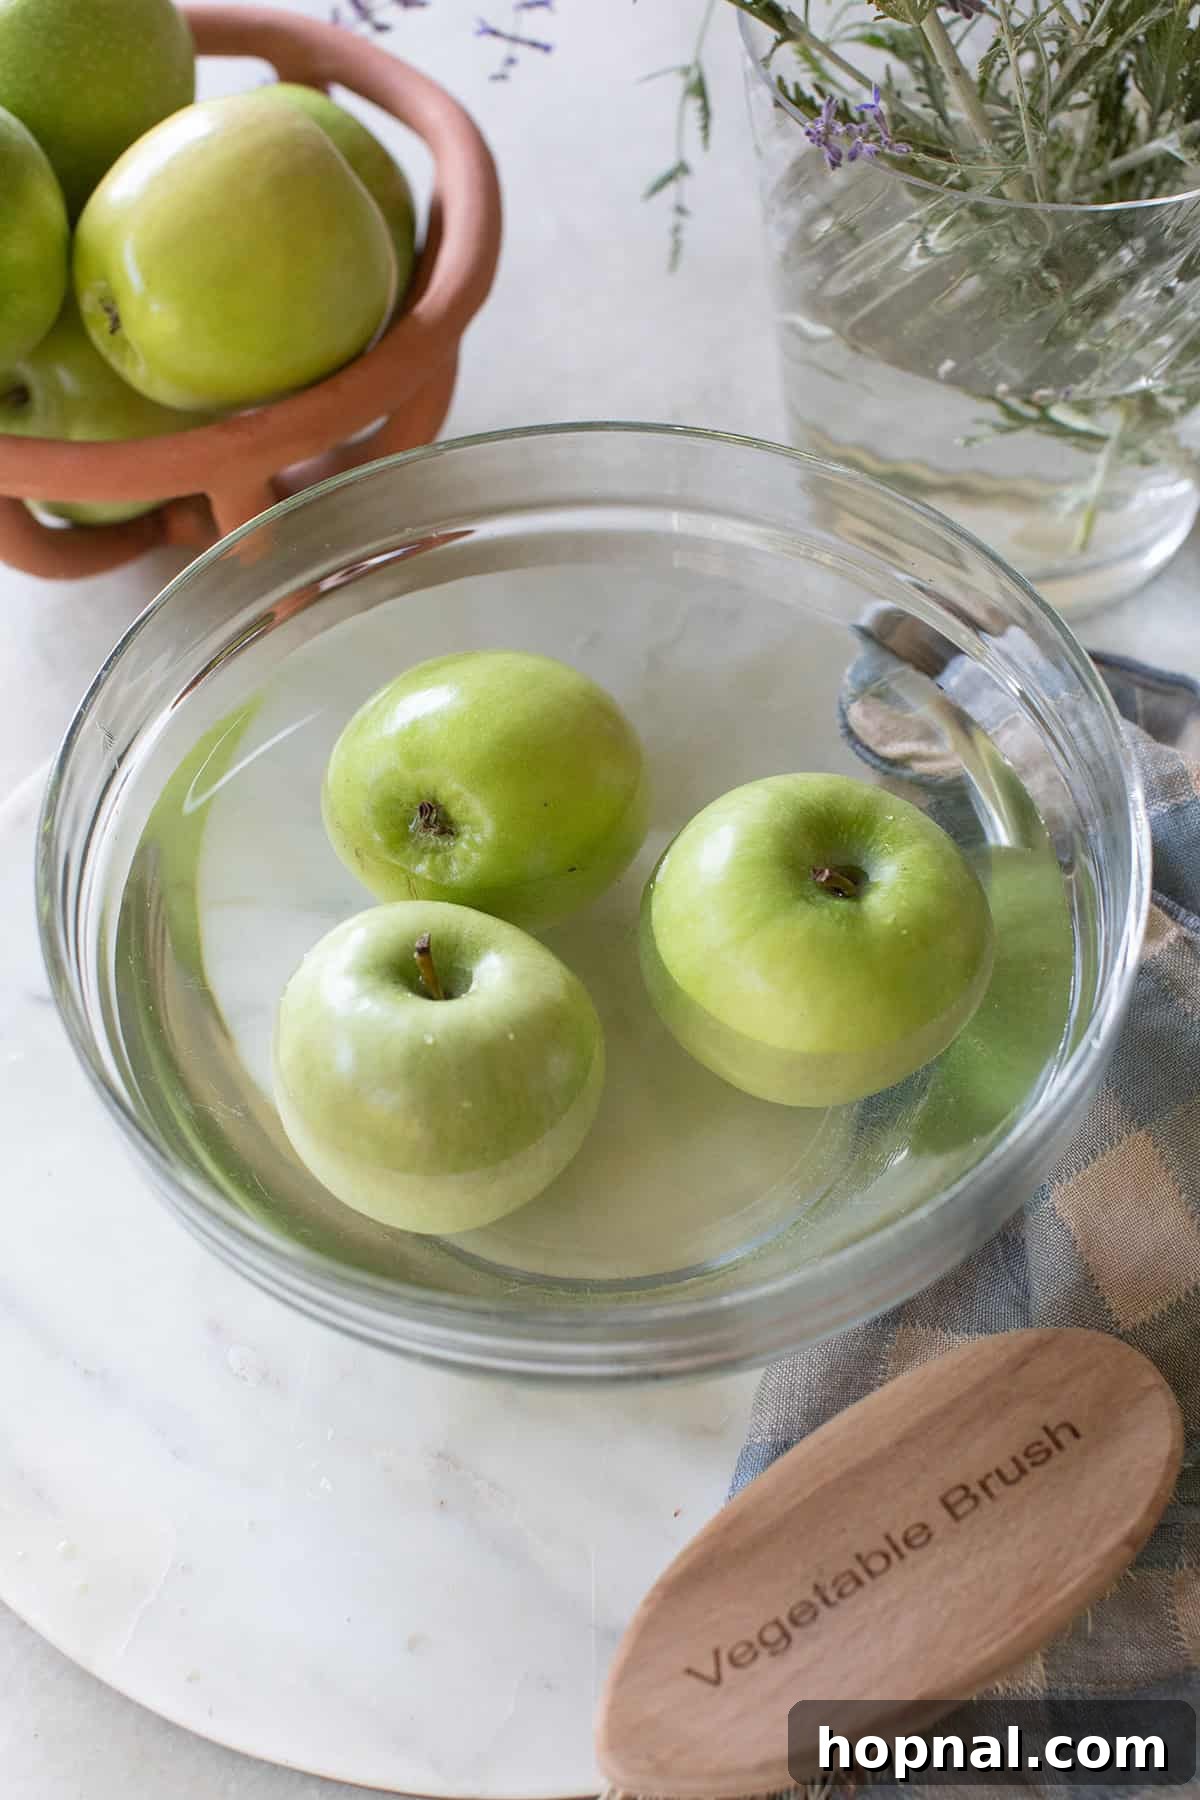
- Thoroughly Prepare the Apples: This is arguably the most critical preparatory step. Start by soaking your Granny Smith apples in a large bowl filled with hot tap water and a few tablespoons of white vinegar for 10-15 minutes. This helps to soften and loosen the natural and commercial wax coatings. Next, use a clean, stiff-bristled scrub brush (a dedicated produce brush works best) to vigorously scrub each apple, ensuring all wax and residue are removed. Rinse each apple thoroughly under cold running water, then dry them completely with a clean, lint-free towel. For an extra layer of assurance and optimal candy adhesion, wipe each apple with a cloth lightly dampened with unflavored vodka; the alcohol helps strip away any remaining oils and evaporates quickly.
- Set Up Your Organized Workstation: Preparation is key for efficiency, especially when working with hot candy. Firmly insert wooden sticks into the core of each thoroughly cleaned and dried apple. Arrange your prepared apples within easy reach of your stovetop. Crucially, line a sturdy baking sheet generously with parchment paper or wax paper. This non-stick surface is essential for placing your dipped apples to cool and harden without adhering, ensuring a clean and perfect finish.
- Craft the Candy Mixture to Perfection: In a medium-sized, heavy-bottomed saucepan, combine the granulated sugar, water, and light corn syrup. Attach a candy thermometer to the side of the pot, ensuring its tip does not touch the bottom of the pan, as this can lead to inaccurate temperature readings. Heat the mixture over medium-high heat. Allow it to come to a rolling boil and continue cooking without stirring. Stirring is highly discouraged during this stage as it can introduce sugar crystals, resulting in a grainy rather than smooth candy coating. Watch the thermometer diligently; your goal is to reach precisely 300°F (150°C), which signifies the “hard crack” stage.
- Swiftly Add Flavor and Base Color: The instant your candy mixture hits 300°F, immediately remove the saucepan from the heat. Carefully stir in the vanilla extract until fully incorporated. Next, thoroughly mix in the white food coloring until the entire candy base is opaque and uniformly white. This white foundation is absolutely essential for making your subsequent marbled colors pop vividly.
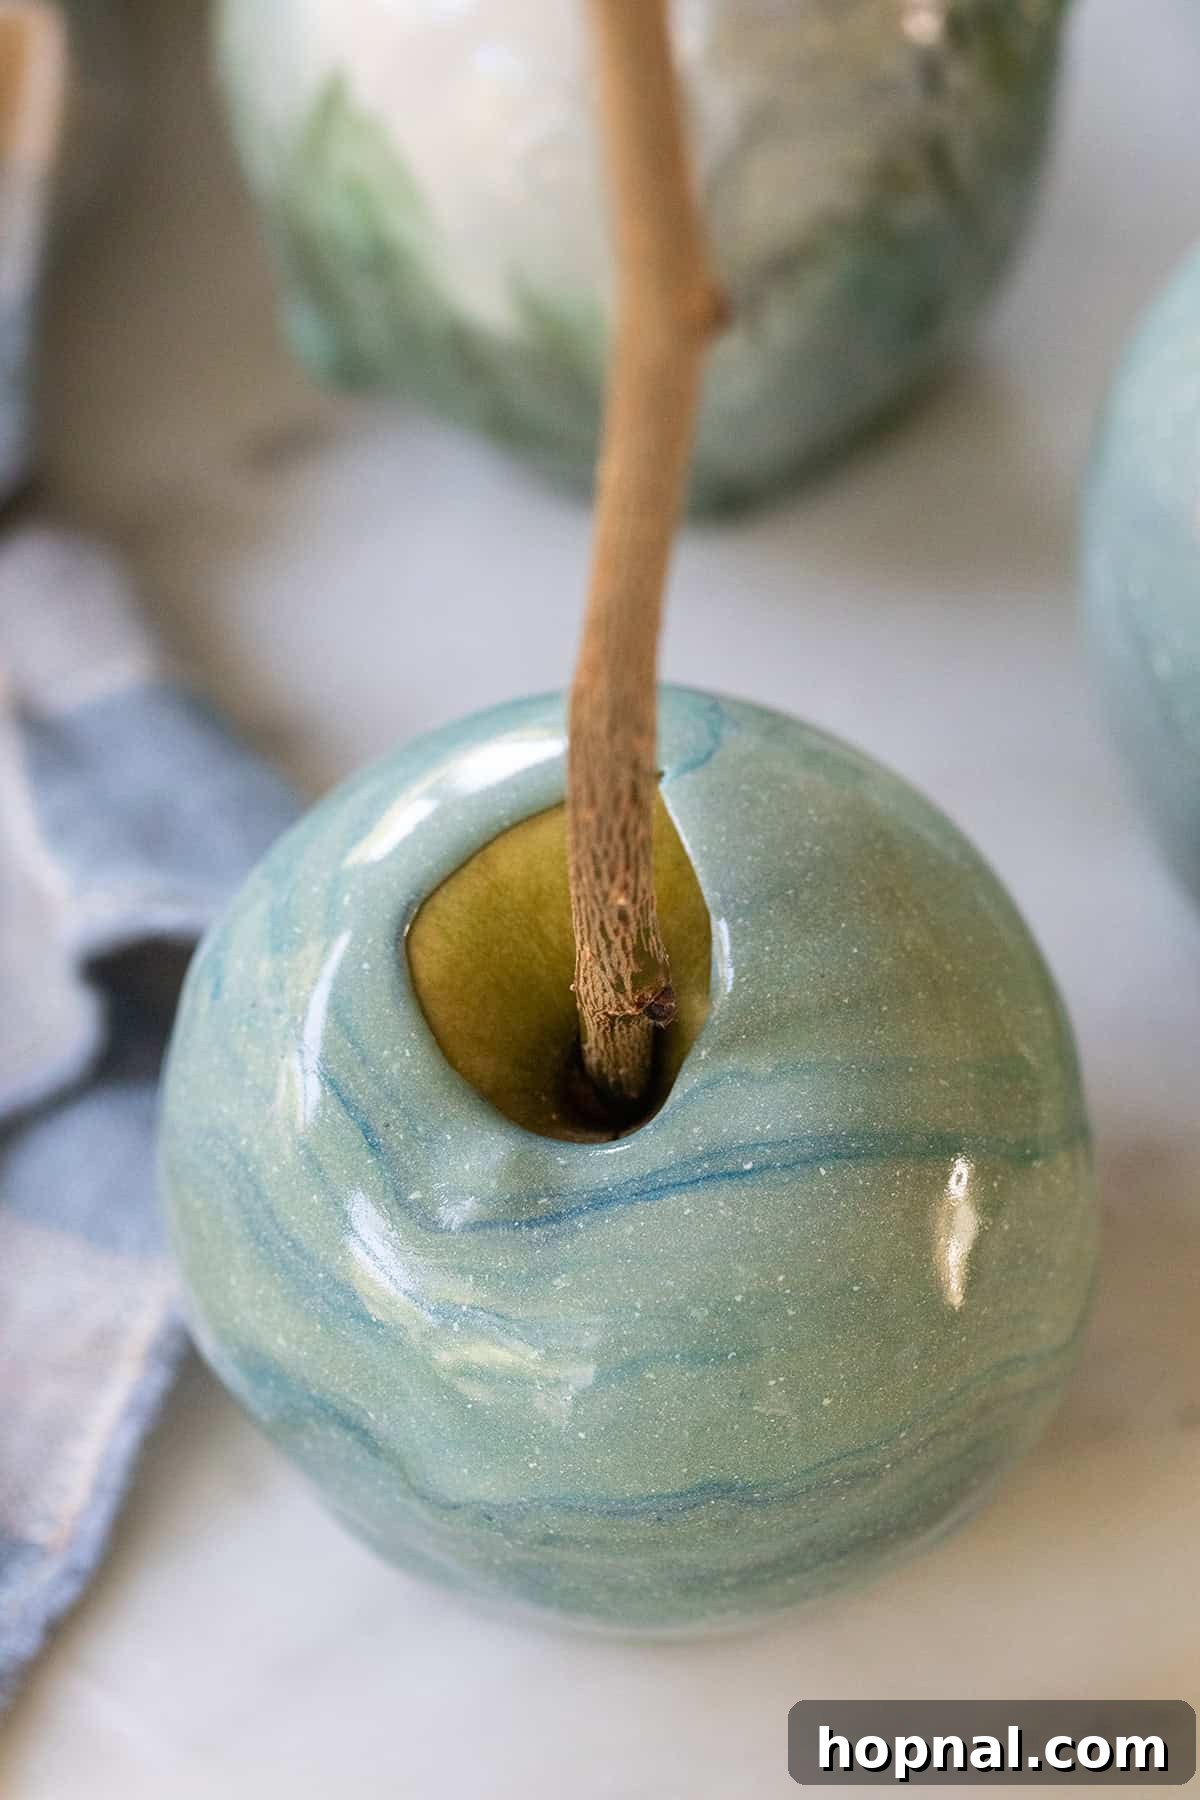
- Introduce and Swirl the Marbling Colors: Quickly add a few drops of your chosen gel food colors (2-3 contrasting colors work best for a dynamic effect) to different spots on the surface of the hot, white candy mixture. Using a clean wooden skewer, gently swirl these added colors into the white base. The key here is gentle motion; avoid over-mixing, as this will cause the colors to blend into a muddy single hue, rather than forming distinct, elegant ribbons of marble. You want captivating, flowing patterns.
- Dip Each Apple with Precision: To facilitate dipping, slightly tip the saucepan to one side, creating a deeper pool of the marbled candy mixture. Working quickly and decisively, take one prepared apple by its stick and immerse it into the candy, rotating it smoothly to ensure all sides are evenly coated with the beautiful marbled design. Lift the apple slowly, allowing any excess candy to drip back into the pot.
- Cool and Harden for a Perfect Finish: Once the excess candy has ceased dripping, immediately place the dipped marbled candy apple onto your prepared parchment-lined baking sheet. Repeat the dipping process with the remaining apples, remembering to occasionally swirl the candy mixture with your skewer if the marbled pattern starts to diminish. Allow the candy apples to cool completely at room temperature, which is crucial for the candy coating to harden into that desired crisp, glossy shell. This typically takes approximately 20-30 minutes, after which they will be ready to enjoy.
Elevate Your Creation: Adding Unique Flavors to Your Candy Apples
While the classic taste of vanilla extract offers a universally cherished profile for candy apples, venturing beyond tradition opens up a world of exciting flavor possibilities. Customizing the taste of your candy coating can transform a simple delightful treat into a sophisticated dessert, perfectly tailored to specific seasons, events, or individual preferences. Don’t hesitate to experiment and unleash your culinary creativity! Here are some compelling alternatives and ideas to consider:
- Cinnamon Extract: Infuse your candy apples with a warm, inviting spice. This is an especially comforting and popular choice during the crisp days of autumn and the festive winter months, pairing wonderfully with the apple’s natural sweetness.
- Orange Extract: For a bright, zesty, and refreshing twist. The citrus notes provide a beautiful contrast to the candy’s sweetness, offering a lighter, more vibrant flavor profile ideal for spring and summer gatherings.
- Almond Extract: Imparts a rich, slightly nutty, and aromatic depth that complements the crispness of the apple beautifully, adding a touch of elegance.
- Butter Pecan Extract: A decadent and luxurious choice that evokes the comforting flavors of classic Southern desserts and holiday indulgence. This flavor adds a warm, buttery richness to your candy apples.
- Lavender Extract: For a truly unique, subtle floral, and unexpectedly sophisticated flavor. Lavender candy apples are distinctive and perfect for high tea, bridal showers, or any elegant party where you wish to impress with an unusual gourmet touch.
- Pumpkin Spice Extract: The quintessential flavor of fall. This blend of cinnamon, nutmeg, ginger, and cloves makes your candy apples instantly festive and perfect for Halloween, Thanksgiving, or any cozy autumn celebration.
- Peppermint Extract: Ideal for winter holidays, adding a cool, refreshing burst that beautifully complements chocolate drizzles.
- Maple Extract: Another fantastic fall option, offering a deep, sweet, and earthy flavor reminiscent of autumnal forests and pancake breakfasts.
These various extracts provide an incredibly easy yet impactful way to customize the flavor profile of your candy apples, allowing you to create truly bespoke treats that will delight the palate as much as their stunning visuals please the eye.
Expert Tips for Crafting Perfectly Marbled Candy Apples
Achieving consistently perfect, glossy, and crunchy candy apples with a beautiful marbled finish requires attention to detail and adherence to a few key techniques. Keep these expert tips in mind to ensure your candy apple endeavors are met with dazzling success:
- Meticulous Surface Preparation is Non-Negotiable: Before you even think about heating your candy mixture, ensure your workstation is completely prepped. Have your baking sheet generously lined with parchment or wax paper and positioned conveniently near your stovetop. This foresight is crucial because once the candy reaches its optimal temperature, you’ll need to work with swift precision. A perfectly prepped, non-stick surface means you can immediately transfer your freshly dipped apples, preventing them from sticking, pooling, or becoming misshapen as they cool and harden.
- Mastering the Art of the Marbling Technique: The beauty of marbling lies in its elegant, flowing patterns, not in uniform mixing. After you’ve incorporated your white base color, add your chosen gel food colors to the surface of the candy mixture. Then, use a clean wooden skewer to gently swirl the colors together. Aim for smooth, deliberate strokes to create distinct ribbons and veins of color. Avoid over-stirring at all costs; excessive mixing will cause the colors to blend into a muddy, indistinct single hue, completely defeating the purpose of the beautiful marble effect you’re striving for.
- Precise Sugar Temperature Control is Paramount: This is perhaps the single most critical factor for achieving a flawless, hard, and crunchy candy shell. Your candy thermometer must accurately register the “hard crack” stage, which occurs at precisely 300°F (150°C). Heating the mixture to a temperature below this will result in a soft, sticky coating that lacks the desired crispness and may slide off the apple. Conversely, heating it too much, even by a few degrees, can cause the sugar to burn, imparting an unpleasant bitter taste, or lead to excessive bubbling that creates an uneven, unsightly surface on your apple. As soon as the thermometer hits 300°F, remove the saucepan from the heat immediately.
- Optimal Make-Ahead and Storage Solutions: One of the advantages of candy apples is that they can be prepared in advance, making them an excellent choice for party planning. For the best flavor, texture, and visual appeal, store your completed candy apples carefully in the refrigerator. Place them in a single layer on parchment paper or in an airtight container, ensuring they do not touch each other to prevent sticking and damage to the delicate coating. They are best enjoyed within 1-2 days of preparation to maintain their exquisite crispness and glossy finish. Beyond this timeframe, moisture from the apple can begin to soften the candy coating, diminishing its ideal texture.
The Crucial Step: Effectively Removing the Wax Coating from Apples
A common frustration for many attempting candy apples is the candy coating failing to adhere properly or, worse, sliding right off the apple once cooled. This almost always stems from insufficient wax removal. Apples naturally produce a protective waxy layer, and commercial apples are often coated with additional food-grade wax for shine and preservation. Properly stripping this coating is absolutely essential for your candy to form a beautiful, uniform, and long-lasting shell. Here’s a detailed, effective method:
- Initial Soak for Softening: Begin by filling a large bowl or your kitchen sink with hot tap water – as hot as your hands can comfortably tolerate. Add a generous few tablespoons of white vinegar to the water. Submerge all your apples in this mixture for a solid 10-15 minutes. The warmth of the water helps to soften both natural and commercial waxes, while the acidity of the vinegar assists in breaking down these protective layers.
- Vigorous Brushing Action: After the soaking period, remove one apple at a time from the hot water-vinegar solution. Using a clean, stiff-bristled scrub brush (a dedicated produce brush is perfect for this task), thoroughly brush the entire surface of the apple. Apply firm pressure to ensure you’re actively dislodging and removing the waxy film. You might even visibly see the wax coming off or feel a cleaner surface under your fingers.
- Thorough Rinsing and Drying: Once scrubbed, rinse each apple meticulously under cold running water. This step is crucial to wash away any loosened wax particles and residual vinegar. Immediately after rinsing, use a clean, lint-free cloth or paper towels to wipe the apples completely dry. Every last speck of moisture must be removed; even microscopic water droplets will act as a barrier, preventing the candy from adhering correctly.
- Final Cleansing with Vodka (Highly Recommended): For an unparalleled level of cleanliness and to ensure optimal candy adhesion, perform a final wipe-down. Lightly dampen a fresh, clean cloth or paper towel with a small amount of unflavored vodka. Wipe down each apple one last time. Alcohol is an exceptional degreaser and will effectively remove any remaining trace of oils, waxes, or residues. Crucially, it evaporates very quickly, leaving behind a perfectly clean, dry, and receptive surface for your candy coating.
By diligently following these critical wax removal steps, you create the ideal “canvas” for your candy coating, guaranteeing a smooth, beautiful, and enduring finish that sticks perfectly every time.
Beyond the Classic: Fun Candy Apple Varieties to Explore
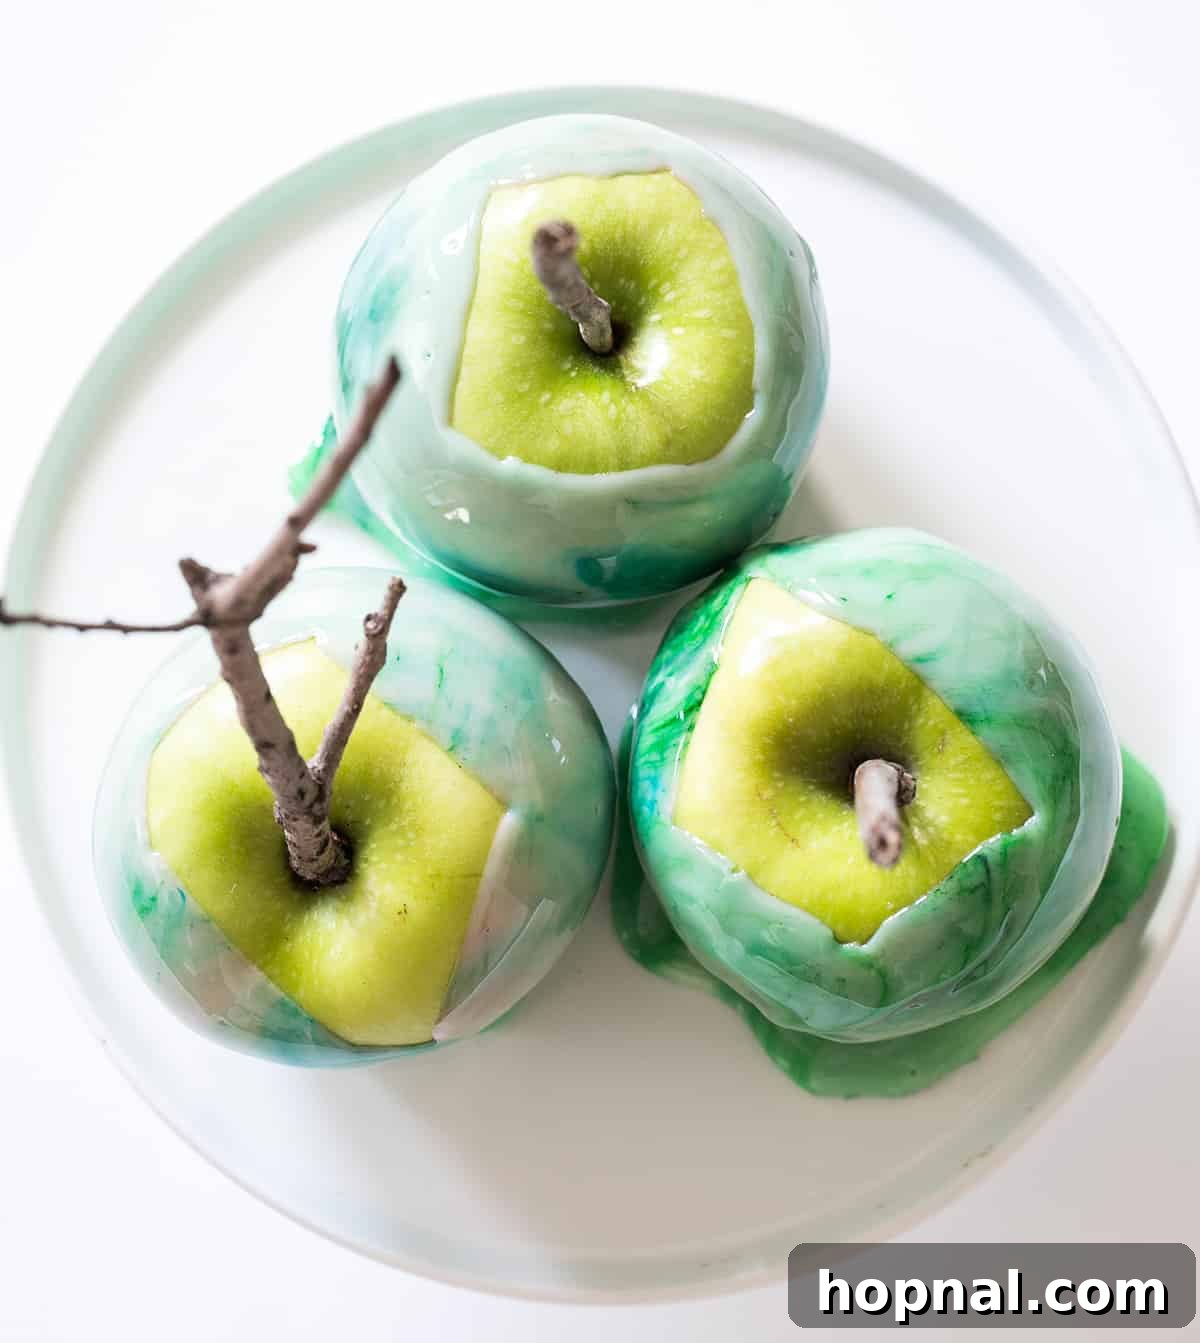
While the classic candy apple holds a special place in our hearts, and the marbled candy apple adds an undeniable touch of elegance, the world of candy-coated apples is truly boundless. There are endless opportunities for creativity, thematic adaptation, and flavor experimentation. Here are some inspiring and fun varieties to spark your imagination and help you create truly unique treats for any occasion:
- Galaxy Candy Apples: Take your marbling to an extraterrestrial level! Swirl deep blues, purples, and subtle touches of black gel food coloring into your white candy base. Before the candy fully sets, sprinkle generously with edible glitter or silver/gold dust to mimic distant stars and galaxies. These celestial treats are absolutely perfect for space-themed parties, futuristic celebrations, or anyone who loves a touch of cosmic magic.
- Blackout Candy Apples: For a dramatically chic, mysteriously elegant, or wonderfully spooky aesthetic, incorporate black food coloring into your candy mixture. The result is a uniformly dark, intensely glossy apple that makes a bold statement. These are particularly striking for sophisticated Halloween gatherings, gothic-themed events, or whenever you want a dessert with an edgy flair.
- Caramel Candy Apples: A timeless autumn favorite that offers a delightful chewy contrast to the hard candy shell. Instead of a hard sugar syrup, coat your apples in a rich, buttery, homemade or store-bought caramel. Once dipped, these can be rolled in a variety of delicious toppings like chopped nuts (peanuts, pecans), mini chocolate chips, sprinkles, or even a drizzle of dark chocolate for an extra layer of indulgence.
- Chocolate Candy Apples: Satisfy your deepest chocolate cravings by using melted chocolate (dark, milk, or white) as your coating. Once dipped and the chocolate begins to set, the creative possibilities are endless! Drizzle with contrasting white chocolate, sprinkle with crushed cookies (like Oreos for a “dirt” effect), mini marshmallows, or colorful candies. For Halloween, use white chocolate to pipe on adorable ghost faces or mummy wraps.
- Glitter Candy Apples: For an extra touch of sparkle and undeniable glamour, transform your candy apples with edible glitter. While the candy coating is still slightly tacky after dipping, gently sprinkle edible glitter (available in various colors) over the entire surface. This instantly elevates them into magical, eye-catching delights, perfect for birthdays, princess parties, New Year’s Eve celebrations, or any event where you want to add a bit of shimmer.
- Ombré Candy Apples: Achieve a stunning gradient effect by preparing several small batches of candy mixture, each a slightly different shade of the same color (e.g., light pink, medium pink, dark pink). Dip the bottom portion of the apple into the darkest shade, then slightly higher into the next lighter shade, and so on, for a beautiful, gradual color transition that is truly impressive.
- Holiday Themed Candy Apples: Think beyond Halloween! For Christmas, use red and green candy coating, perhaps with a peppermint flavor. For Valentine’s Day, vibrant pinks and reds. For patriotic holidays, red, white, and blue swirls. The colors and flavors can be adapted for any celebration.
Each of these delightful variations offers a unique experience, allowing you to tailor your candy apples to any taste, theme, or celebration, making them truly special, memorable, and a joy to behold and devour.
Frequently Asked Questions About Marbled Candy Apples
New to making candy apples or encountering some common challenges? We’ve compiled answers to the most frequently asked questions to help you troubleshoot and achieve candy apple perfection every time:
How do I ensure the candy coating sticks firmly to the apples and doesn’t slide off?
The secret to a beautifully adherent candy coating lies entirely in meticulous apple preparation. It is absolutely crucial that your apples are thoroughly cleaned to remove all natural waxes, commercial wax coatings, and any residual oils or moisture. Follow our detailed wax removal steps: soaking in hot water and vinegar, vigorous scrubbing, thorough rinsing, and then meticulously drying them completely. For extra assurance, a quick wipe with vodka helps strip any final residues. Any lingering wax, oil, or moisture will act as a barrier, preventing the candy from sticking properly.
What type of food coloring works best for creating vibrant marbled effects?
For truly vibrant, distinct, and easily swirlable colors that won’t thin out your candy mixture, gel or liquid food coloring is highly recommended. These types of food colorings are highly concentrated, meaning you’ll achieve intense, brilliant hues with just a few drops. This is particularly important for marbling, as it allows colors to pop without diluting the candy. While classic red is an iconic candy apple color, feel free to mix and match any colors to perfectly align with your event’s theme or your creative vision!
How can I avoid burning the candy mixture or having it turn out grainy?
To prevent burning and ensure a smooth, clear candy coating, always use a reliable candy thermometer and heat the mixture over medium-high heat. Critically, avoid stirring the mixture once the sugar has dissolved and it starts boiling. Stirring can introduce sugar crystals, which will lead to a grainy texture. Carefully monitor the thermometer until it reaches precisely 300°F (150°C) – the hard crack stage. Remove the pan from the heat immediately the moment it hits this temperature; even a few seconds longer can cause the sugar to burn and impart an unpleasant bitter flavor.
Can I make candy apples successfully without a candy thermometer?
While it is technically possible to attempt candy apples without a candy thermometer, it is extremely challenging to consistently achieve the perfect “hard crack” stage required for the coating to set properly. Without precise temperature measurement, the candy may turn out too sticky, too soft, or burn easily. If you absolutely must proceed without one, you can try the “cold water test”: drop a very small amount of the hot syrup into a cup of ice-cold water. If it immediately forms brittle threads that snap easily when bent, it has reached the hard crack stage. However, for consistent, reliable, and stress-free results, investing in a candy thermometer is strongly recommended.
Why did my candy coating turn out sticky or soft instead of hard and crunchy?
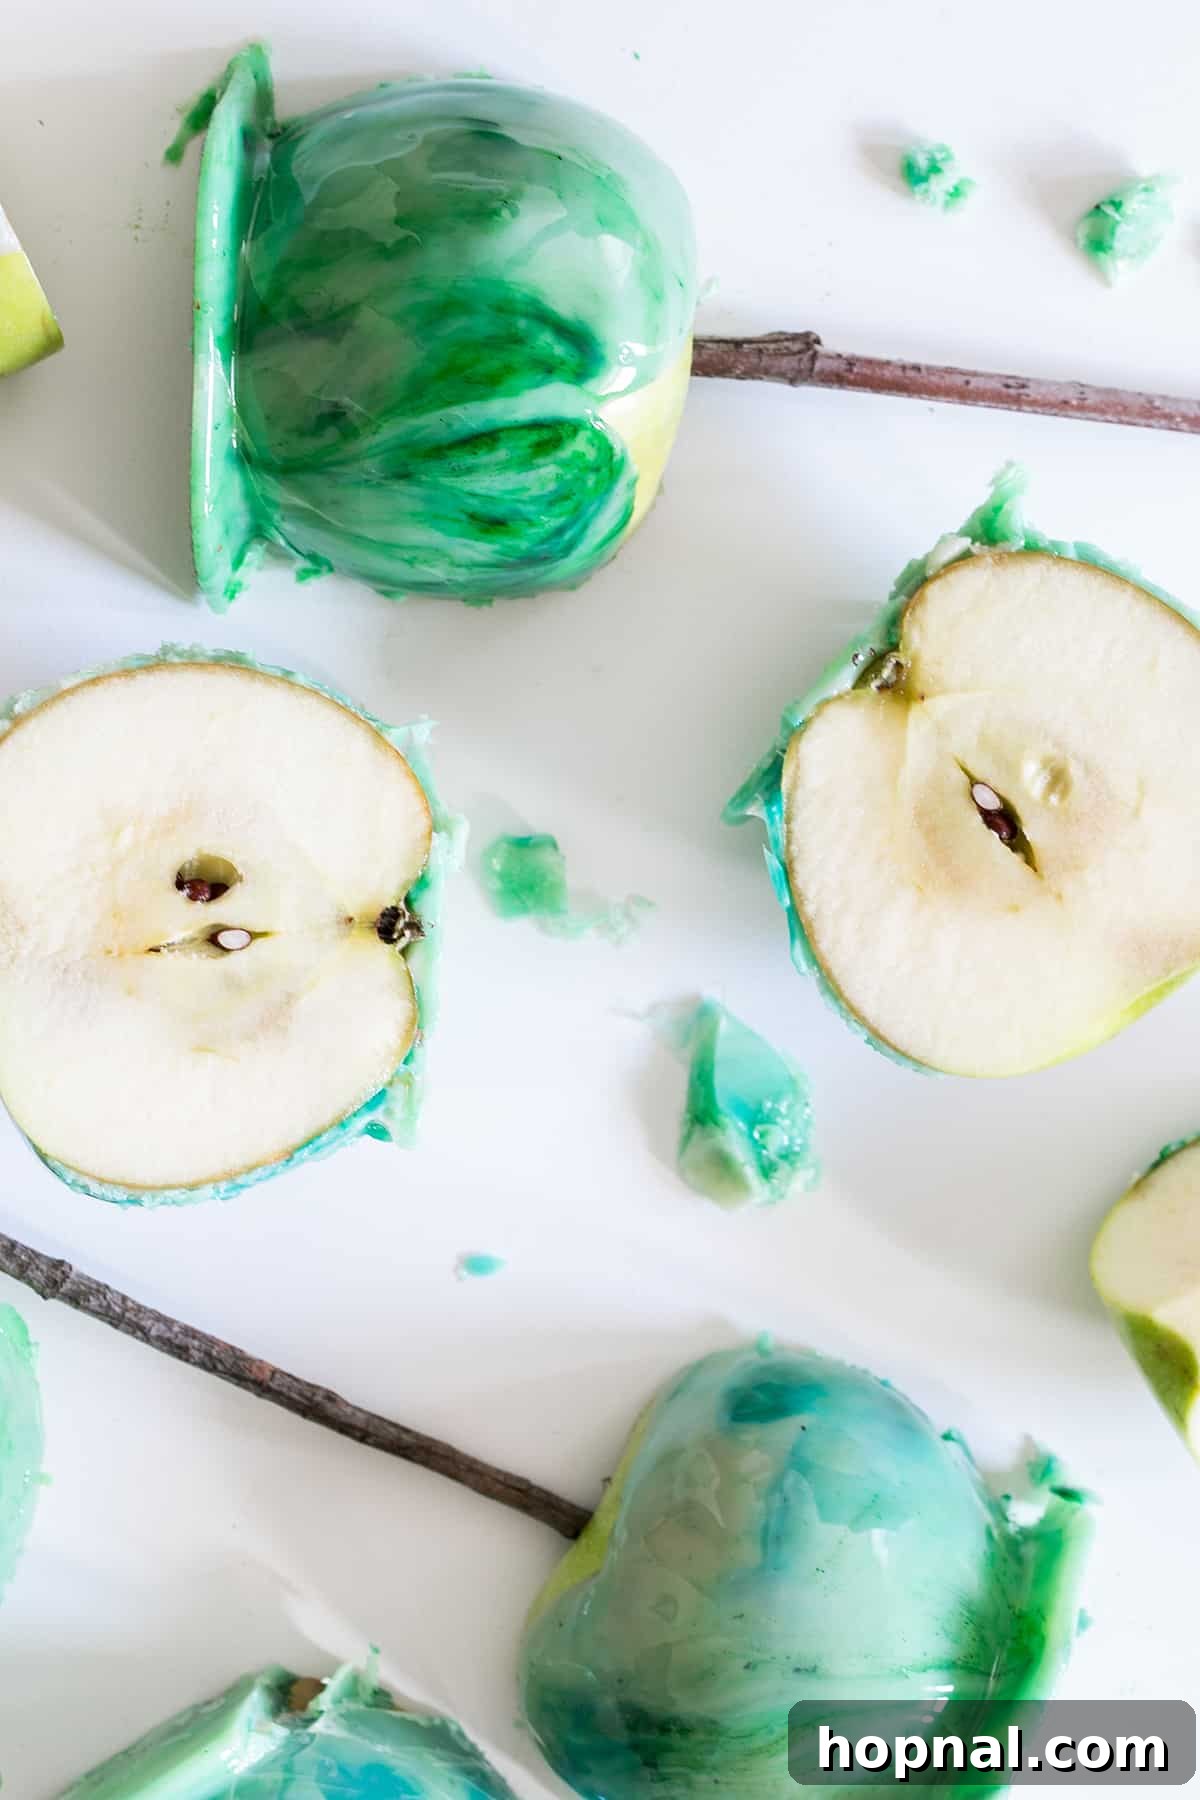
A sticky or soft candy coating is almost always an indication that the sugar mixture did not reach the correct temperature during cooking. The candy needs to hit precisely 300°F (150°C) to enter the “hard crack” stage. At this temperature, the sugar molecules bond in a way that allows the coating to become completely solid, brittle, and crunchy when cooled. If the temperature is too low, even by a few degrees, the sugar won’t bond sufficiently, resulting in a soft, tacky, or chewy finish. Double-check your candy thermometer’s accuracy and ensure you’re reading it correctly.
Explore More Delectable Dessert Recipes
If you’ve been charmed by the artistry and the delightful taste of these marbled candy apples, you’ll be thrilled to discover an array of other exquisite treats from our culinary collection. Each recipe is thoughtfully crafted to bring both elegance and deliciousness to your kitchen, making every gathering a little more special:
- Marble Drip Cake: Continue your journey with marbled magic by creating a truly stunning drip cake, an ideal centerpiece for birthdays, anniversaries, or any sophisticated celebration.
- Easy Ghost Trifles: These adorable and effortlessly spooky trifles are a breeze to assemble and are guaranteed to be a spirited hit at any Halloween party.
- Chocolate and Vanilla Mummy Cupcakes: Delightfully whimsical and eerie, these chocolate and vanilla cupcakes are dressed up as cute mummies, perfect for a fun and festive Halloween treat.
- Frankenstein Macarons: Unleash your monstrously sweet side with these charmingly spooky macarons, an impressive and delicious addition to your Halloween dessert spread.
- Black Velvet Cupcakes: Indulge in the rich, dark, and utterly delicious decadence of these black velvet cupcakes, offering a sophisticated and elegant treat for any special occasion.
- Halloween Dessert Platter: A fantastic and visually appealing collection of spooky and sweet bites, ideal for easily feeding a crowd during your Halloween festivities.
We absolutely love hearing about your culinary adventures! Please share your thoughts, experiences, and any creative twists on our recipes by leaving a comment and review below. Your feedback inspires us!
You can also FOLLOW ME on FACEBOOK, INSTAGRAM, and PINTEREST to see more delicious recipes, cocktails, desserts, and party inspiration!
Marbled Candy Apples Recipe
Equipment
- Candy Thermometer
- Medium Heavy-Bottomed Saucepan
- Parchment Paper or Wax Paper
- Baking Sheet
- Wooden Sticks (craft sticks, lollipop sticks, or rustic twigs)
- Heat-Proof Rubber Spatula
- Clean Scrub Brush
Ingredients
- 6 Granny Smith apples
- 3 cups granulated sugar
- 1 cup water
- 1/2 cup light corn syrup
- 1 teaspoon vanilla extract
- 3 tbsp White food coloring (or more, as needed)
- 2 tsp additional colors of gel food coloring (e.g., teal and green, adjust as desired for marbling)
Instructions
- Prepare Apples: Soak apples in hot water with a few tablespoons of vinegar for 10-15 minutes. Scrub them thoroughly with a clean brush to remove any wax coating. Rinse well and dry completely. For an extra clean surface, wipe with a cloth dipped in vodka.
- Setup Workstation: Insert wooden sticks firmly into the core of each apple. Position your prepared apples near the stove. Line a baking sheet with parchment paper or wax paper and keep it close by.
- Make the Candy Base: In a medium, heavy-bottomed saucepan, combine the granulated sugar, water, and light corn syrup. Attach a candy thermometer to the side of the pot, ensuring it doesn’t touch the bottom. Heat over medium-high heat, allowing the mixture to boil without stirring, until the thermometer reads precisely 300°F (150°C) – the hard crack stage.
- Remove from Heat: Immediately remove the saucepan from the heat once it reaches 300°F.
- Add Vanilla & White Color: Carefully stir in the vanilla extract and the white food coloring until the mixture is uniformly opaque white.
- Introduce Marble Colors: Quickly add a few drops of your chosen additional gel food colors to different spots on the surface of the hot, white candy mixture.
- Swirl for Marbling: Use a wooden skewer to gently swirl the added colors into the white candy. Be careful not to over-mix, aiming for distinct marbled patterns.
- Dip Apples: Tilt the pot to one side to create a deeper candy pool. Holding an apple by its stick, quickly dip it into the marbled candy, rotating to coat it completely. Lift the apple and allow any excess candy to drip back into the pot.
- Cool & Harden: Place the dipped marbled candy apple onto the prepared parchment-lined baking sheet. Repeat for all apples. Allow them to cool completely at room temperature until the coating is hard and glossy (approximately 20-30 minutes).
Video Tutorial
Recipe Notes
- Easy Cleanup Tip: To clean your saucepan easily after making candy, pour out any remaining candy, then add about 2/3 cups of water and bring it to a boil. The boiling water will dissolve any hardened sugar, making the pan simple to wash afterward.
- Adjusting Marbling: Feel free to add more drops of gel dye as needed to achieve your desired intensity and complexity of the marble effect. Remember, gentle swirling is key for distinct patterns.
- Why Gel Food Coloring? Gel food coloring is superior for candy apples because its concentrated nature produces brighter, more vivid colors with less product, preventing the candy mixture from becoming too liquidy or affecting its crucial temperature.
- Removing Wax: For detailed instructions on how to effectively remove wax from apples, please refer to the comprehensive “The Crucial Step: Effectively Removing the Wax Coating from Apples” section found earlier in this article.
Nutrition Information
Carbohydrates: 147g,
Protein: 0g,
Fat: 0g,
Saturated Fat: 0g,
Cholesterol: 0mg,
Sodium: 22mg,
Potassium: 194mg,
Fiber: 4g,
Sugar: 140g,
Vitamin A: 100IU,
Vitamin C: 8.3mg,
Calcium: 15mg,
Iron: 0.3mg
Nutrition information is automatically calculated and should only be used as an approximation.
Loved this recipe? Share your experience and leave a comment and rating below!