
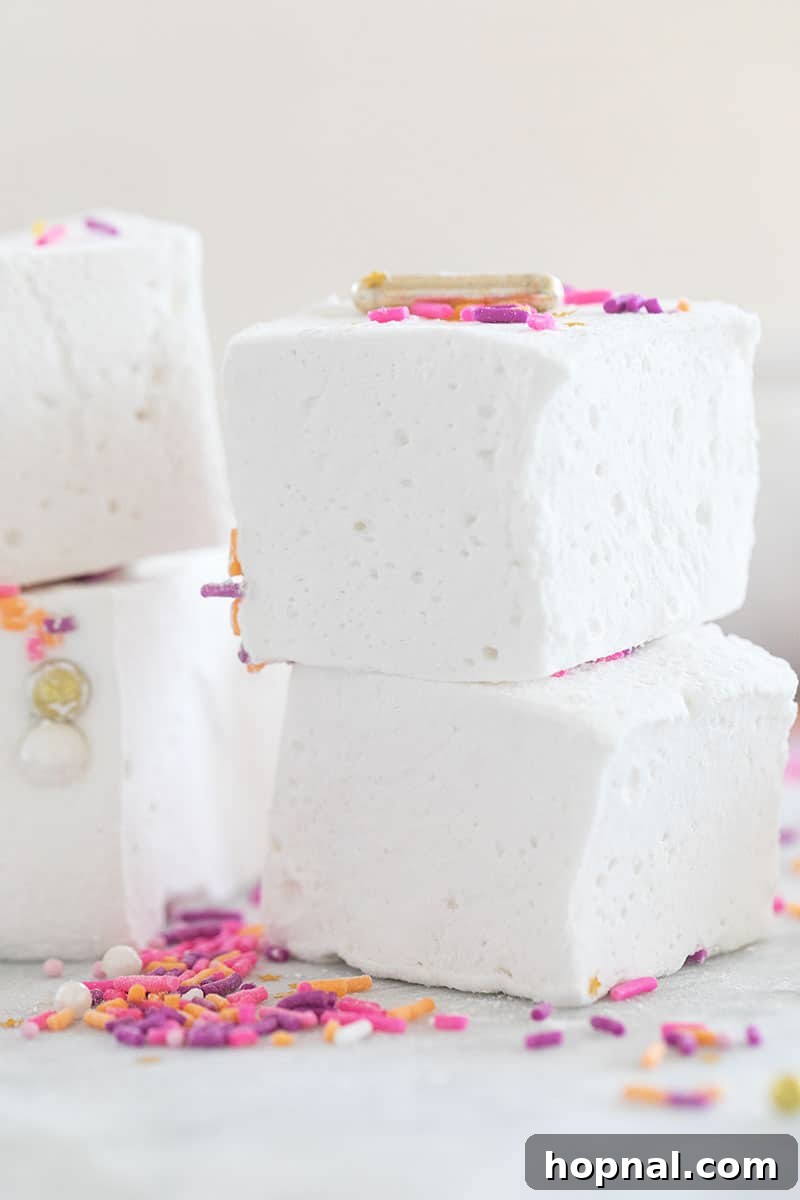
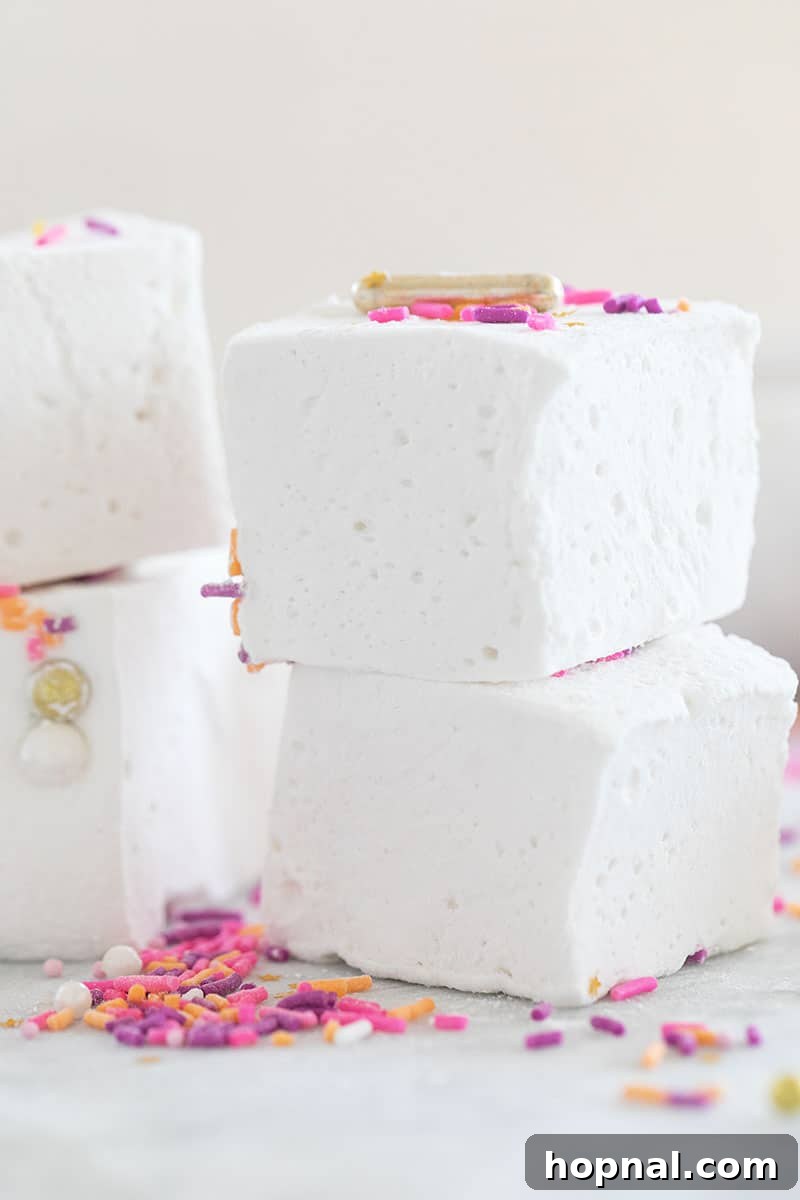
Prepare to elevate your dessert game with these incredible homemade marshmallows. For years, this recipe has been my go-to, consistently delivering marshmallows that are impossibly fluffy, delightfully pillow-soft, and unequivocally superior to anything you’ll find in a store. Crafted with just six essential ingredients, this recipe offers endless possibilities for customization, allowing you to infuse them with your favorite flavors, vibrant colors, or delectable toppings. Once you experience the unparalleled taste and texture of these artisanal treats, you’ll understand why there’s simply no going back to mass-produced varieties. Making marshmallows from scratch is not only a rewarding culinary adventure but also ensures you have control over the quality and purity of your ingredients, resulting in a wholesome and delicious indulgence.
⭐️⭐️⭐️⭐️⭐️
“These were so fun to make! My children loved the whole process, from watching the mixture whip up to cutting the squares. I even tried substituting half the corn syrup for local honey, and the flavor was absolutely stunning. Thank you for sharing such a wonderful recipe!”— Debbie, a delighted home baker
Why Homemade Marshmallows Are a Game-Changer: Beyond Store-Bought
Making marshmallows from scratch might seem daunting at first, but I promise you, the results are worth every minute. This recipe is designed to be accessible for home bakers of all skill levels, ensuring a delightful and rewarding experience. Here’s why you’ll fall in love with homemade marshmallows:
- A Foolproof Journey to Perfection: Forget the intimidation! I’ve meticulously crafted this guide to walk you through each step with clarity and confidence. We’ll cover everything from precise temperatures to ideal whipping times, ensuring your marshmallows turn out flawlessly fluffy and soft every single time. This makes our recipe a true triumph for home cooks seeking reliable results.
- Unleash Your Inner Marshmallow Artist: The beauty of homemade marshmallows lies in their incredible versatility. You’re the master of your creation! Imagine cutting them into charming miniature cubes for an elegant hot chocolate, crafting oversized squares that perfectly fit your graham crackers for the ultimate s’mores experience, or even custom shapes for festive occasions. Beyond shape, the possibilities for flavor and color are endless, allowing you to truly personalize your sweet treats to match any theme or craving.
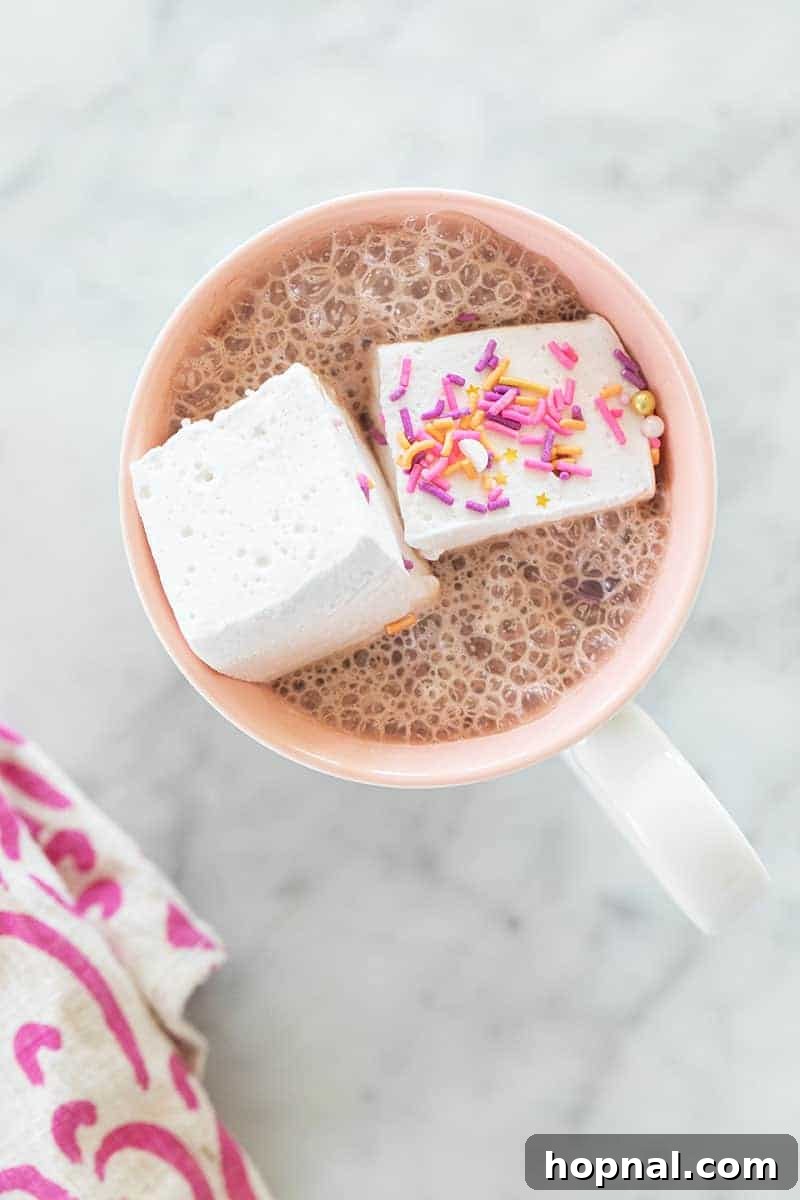
- Melt-in-Your-Mouth Magic: These aren’t just any marshmallows; they are engineered for a divine melting experience. Their delicate, airy structure makes them absolutely perfect for a luxurious cup of naturally dyed pink hot chocolate, where they transform into a creamy, dreamy swirl. They’re also an essential component for elevated desserts like gourmet biscuit s’mores, or even lightly toasted for an impressive hot chocolate charcuterie platter. The way they toast to a golden, gooey perfection, developing a crispy exterior and molten interior, is truly unmatched by store-bought options.
- Pure Ingredients, Superior Taste: Unlike commercially produced marshmallows that often contain artificial flavors, colors, and preservatives, our homemade version uses simple, recognizable ingredients. This commitment to purity results in a cleaner, more natural flavor that truly shines, allowing the rich vanilla (or any other flavor you choose) to take center stage.
- The Gift of Deliciousness: Homemade marshmallows make fantastic gifts! Package them in decorative bags or boxes for holidays, birthdays, or as a thoughtful hostess present. They’re a unique and personal touch that shows you care.
If you’re eager to explore more marshmallow adventures and discover innovative ways to enjoy this delightful confection, don’t miss my other exciting recipes: indulge in the rich, earthy sweetness of my maple syrup marshmallows, experience the delicate floral notes of rose-flavored marshmallows, or opt for a guilt-free treat with my healthy marshmallow recipe, which offers a wholesome twist on the classic.
Homemade Marshmallow Ingredients Unveiled: The Building Blocks of Fluff
Creating perfect homemade marshmallows relies on a handful of simple, readily available ingredients. Each plays a crucial role in achieving that signature fluffy texture, delightful sweetness, and stable structure. Understanding their function will help you master the art of marshmallow making.
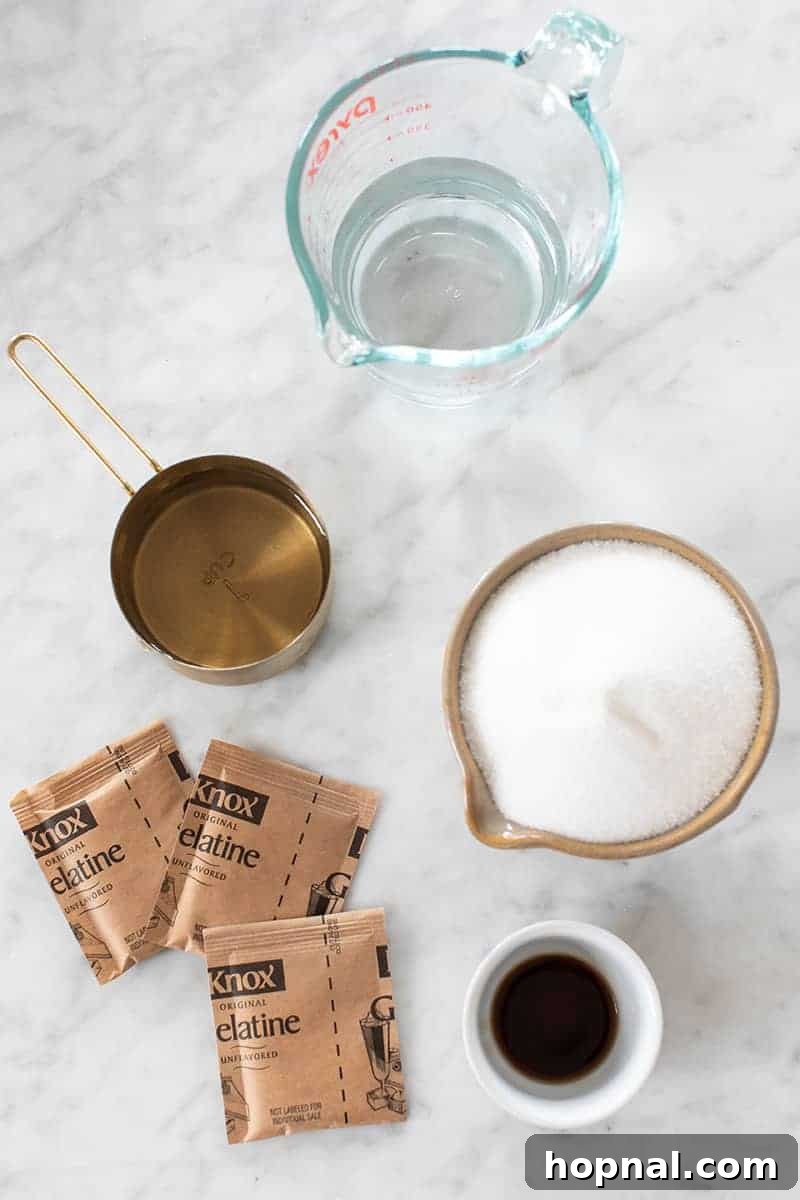
Granulated Sugar: This is the primary sweetener and provides much of the structural integrity for your marshmallows. Using standard white granulated sugar ensures a neutral flavor profile, allowing other additions to shine without interference. It forms the backbone of the sugar syrup, contributing to the firm yet tender set of the finished product. Consistency in sugar quality is key for reliable results.
Light Corn Syrup: A true hero ingredient in confectionery, light corn syrup is essential for two main reasons: it acts as an invert sugar, preventing sugar crystallization, which can lead to a grainy or brittle marshmallow. Secondly, it stabilizes the sugar mixture, contributing significantly to the overall soft, chewy, and pliable texture that defines a perfect marshmallow. While some recipes suggest substitutions, using light corn syrup is highly recommended for consistent, professional-grade results. Alternatives like golden syrup can be used, but be aware they will impart a distinct, slightly caramel-like flavor and a darker hue.
Unflavored Gelatin: This is the magical ingredient that gives marshmallows their characteristic bouncy, chewy, and ethereal structure. It’s the gelling agent that transforms a liquid sugar syrup into a solid, yet incredibly soft and springy confection when whipped. For those exploring vegan options, alternatives like agar-agar or carrageenan can be used, but note that the final texture will differ significantly from traditional gelatin-based marshmallows, often being firmer or more brittle. Ensure you use unflavored gelatin to avoid unwanted tastes.
Salt: Often overlooked in sweet recipes, a small pinch of fine sea salt plays a vital role. It doesn’t make the marshmallows salty but rather acts as a flavor enhancer. It balances the intense sweetness of the sugar, preventing the marshmallows from tasting cloyingly sweet, and enhances all the other flavors, making them more vibrant, well-rounded, and complex.
Vanilla Extract: The classic flavor enhancer for marshmallows, pure vanilla extract adds a warm, inviting depth and delightful aroma that is universally loved. However, this is where your creativity can truly shine! Feel free to experiment with a myriad of other extracts such as pure peppermint extract for a festive, cooling touch; almond extract for a nutty depth; or even a delicate dash of rose water for an elegant, floral note. High-quality extracts will make a noticeable difference in the final taste.
Powdered Sugar or Cornstarch (or a 50/50 mix): These fine powders are crucial for coating your freshly made marshmallows. Their primary function is to prevent the sticky, freshly cut marshmallow surfaces from adhering to each other and to anything they touch, making them easy to handle, cut, and store. A combination of both often yields the best non-stick results while maintaining a silky-smooth, appealing exterior. You can even experiment with flavored powdered sugars for extra flair.
How to Make Homemade Marshmallows: A Detailed Guide to Fluffy Perfection
Follow these step-by-step instructions carefully to ensure your homemade marshmallows are perfectly fluffy, soft, and utterly delicious. Precision in temperature and timing is absolutely key to achieving that signature ethereal texture. Read through all steps before you begin.
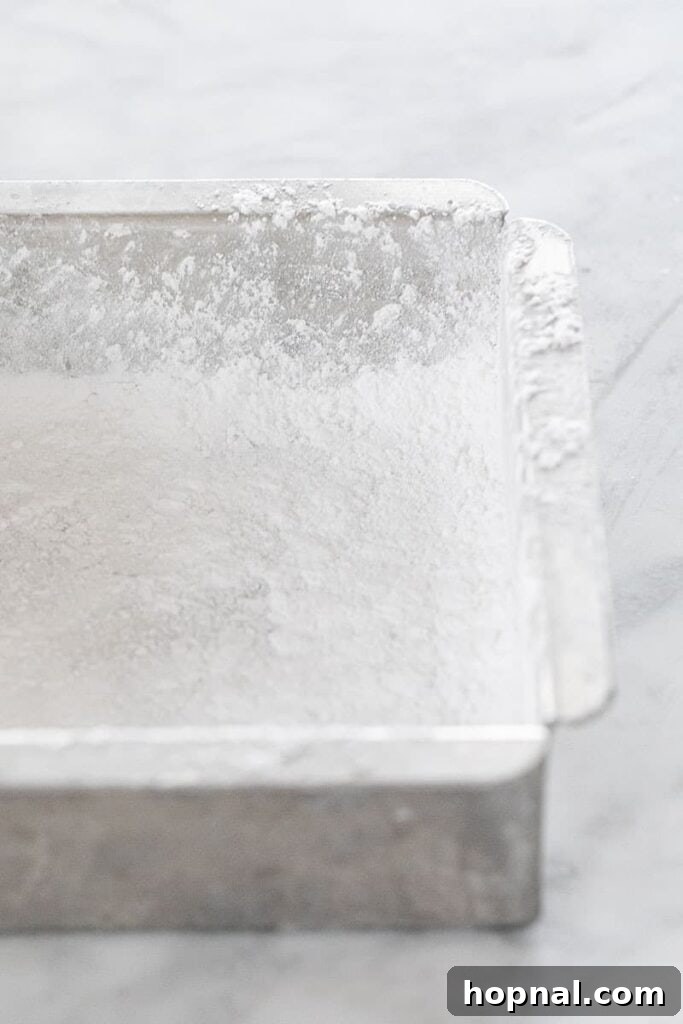
1. Prepare Your Pan for Success
Generously grease a 9×9-inch (or similar size like 8×8 for thicker marshmallows or 9×13 for thinner ones) baking pan with a light, neutral-flavored vegetable oil or nonstick cooking spray. This initial greasing is crucial to create a non-stick base. After greasing, liberally dust the entire surface of the pan – bottom and all sides – with powdered sugar or a 50/50 blend of powdered sugar and cornstarch. Ensure a thick, even coating (at least 1/8 inch) to create a robust barrier. Tap out any excess powder. This step is foundational for easy removal later, so don’t skimp!
2. Master the Sugar Syrup
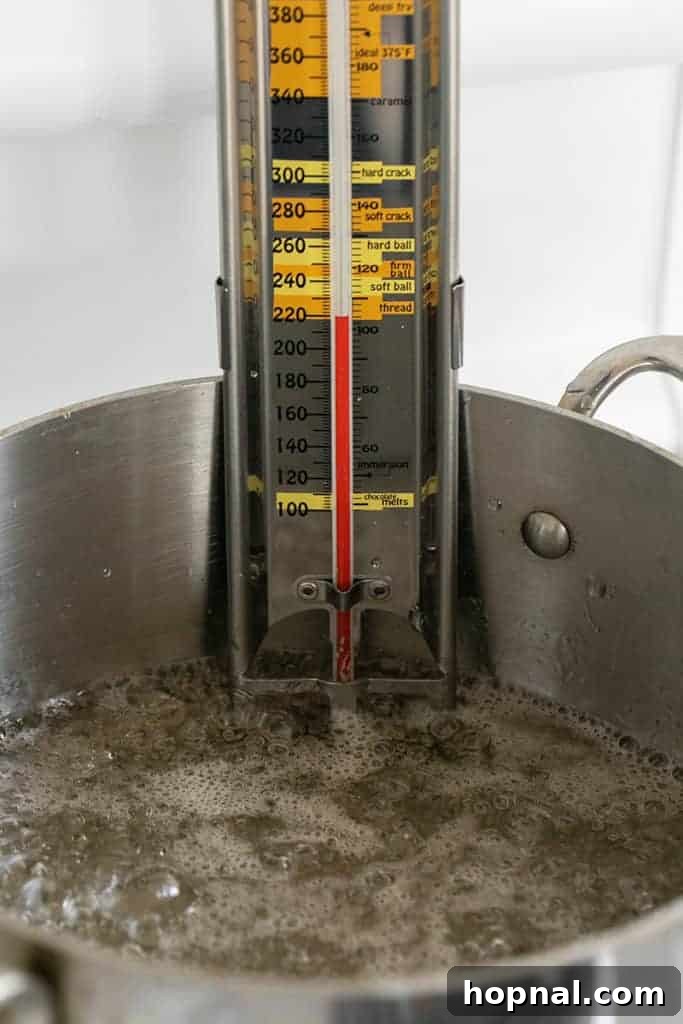
In a heavy-bottomed medium saucepan, combine 1/2 cup of your measured cold water, the granulated sugar, and the light corn syrup. Stir these ingredients together gently over medium heat just until the sugar is completely dissolved. Avoid aggressive stirring once it starts to boil to prevent crystallization along the sides of the pan. Attach a reliable candy thermometer to the side of the pan, making sure the tip doesn’t touch the bottom. Increase the heat to medium-high and bring the mixture to a rolling boil. Continue to cook, without stirring, until the thermometer precisely reads 240°F (115°C). This temperature signifies the “soft-ball” stage, which is absolutely critical for the perfect marshmallow texture. Immediately remove the saucepan from the heat once it reaches this exact temperature.
3. Bloom the Gelatin – The Foundation of Fluff
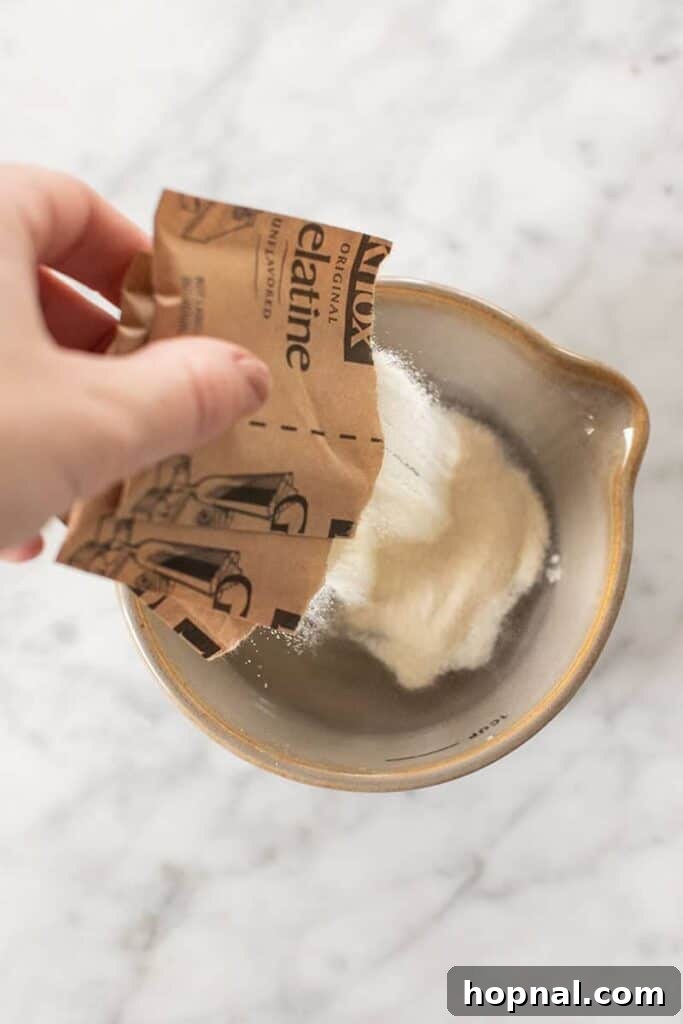
While your sugar syrup is heating, prepare your gelatin. In the clean bowl of a stand mixer (fitted with the whisk attachment, if possible, but don’t turn it on yet), combine the unflavored gelatin powder with the remaining ½ cup of cold water. Gently whisk with a fork to ensure no clumps remain and all gelatin granules are moistened. Allow this mixture to sit undisturbed for about 5 to 10 minutes. This essential process, known as “blooming,” allows the gelatin granules to absorb the water, softening and preparing them to dissolve smoothly and efficiently into the hot syrup. This step is what creates the essential structure and bounce for your marshmallows.
4. The Whipping Transformation Begins
With your bloomed gelatin ready and your hot sugar syrup just removed from the heat, it’s time for the magic to happen. Place the bowl onto your stand mixer and fit it with the whisk attachment. Turn your stand mixer on its lowest speed. Carefully and slowly pour the very hot sugar syrup in a steady, thin stream down the side of the mixer bowl, allowing it to combine with the bloomed gelatin. Avoid pouring directly onto the whisk, as it can splatter hot syrup. Once all the syrup has been added, increase the mixer speed to high.
5. Achieve Peak Fluffiness and Flavor
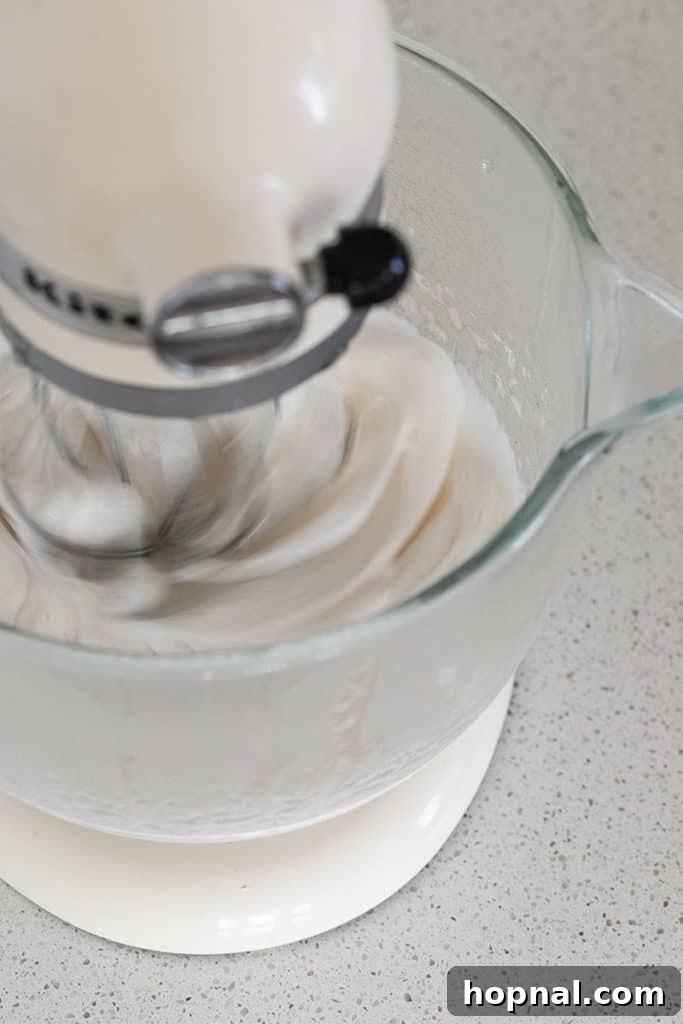
Whip the mixture continuously on high for a sustained period of 10 to 12 minutes. During this remarkable transformation, the mixture will become incredibly thick, glossy, opaque white, and will significantly increase in volume, resembling a cloud-like meringue. It should be stiff enough to hold soft peaks. In the final minute of whipping, add your pure vanilla extract and the fine sea salt. This ensures these delicate flavorings are evenly incorporated without losing their aromatic qualities to prolonged heat. Continue whipping for the last minute to fully integrate them and achieve maximum fluffiness.
6. Pour, Spread, and Set
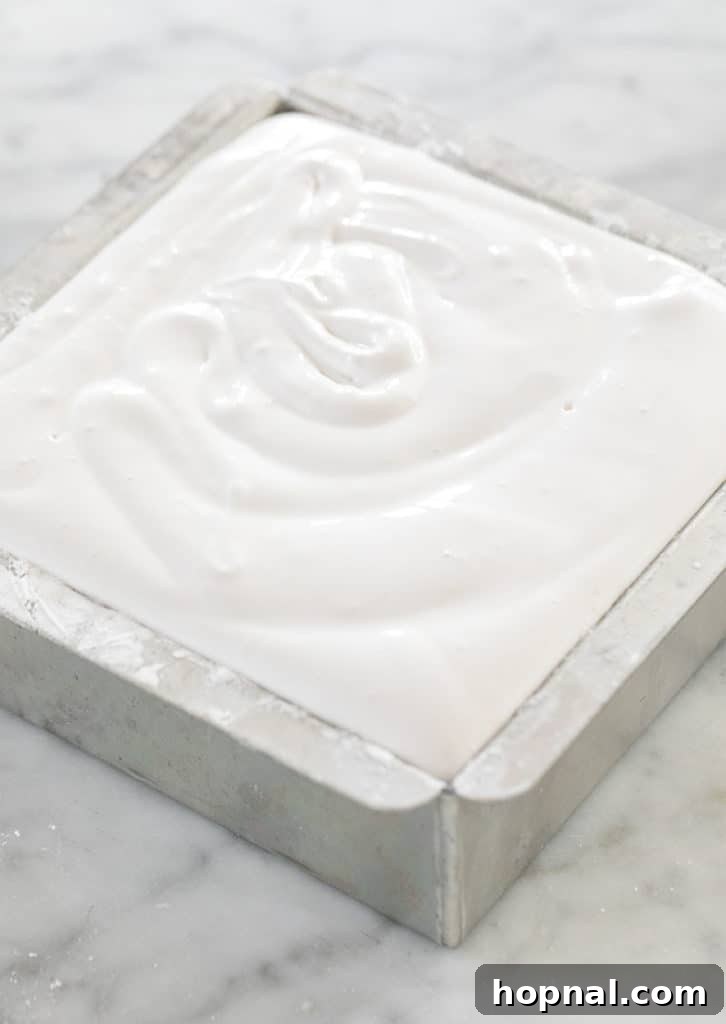
Working quickly is paramount at this stage, as the marshmallow mixture sets surprisingly fast once whipping stops. Remove the bowl from your mixer. Lightly grease a rubber spatula with a little vegetable oil or nonstick spray to prevent sticking. Pour the thick, fluffy, cloud-like marshmallow mixture into your meticulously prepared baking pan. Use the greased spatula to gently and evenly spread the mixture into all corners of the pan, striving for a smooth, level surface. If you wish to add sprinkles or other toppings, scatter them evenly over the top now before it sets. Leave the pan uncovered at room temperature for a minimum of 6 to 8 hours, or ideally, overnight (up to 12 hours) to allow the marshmallows to fully set and firm up. Resist the urge to refrigerate, as the condensation can make them overly sticky.
7. Cut and Coat Your Cloud-Like Treats
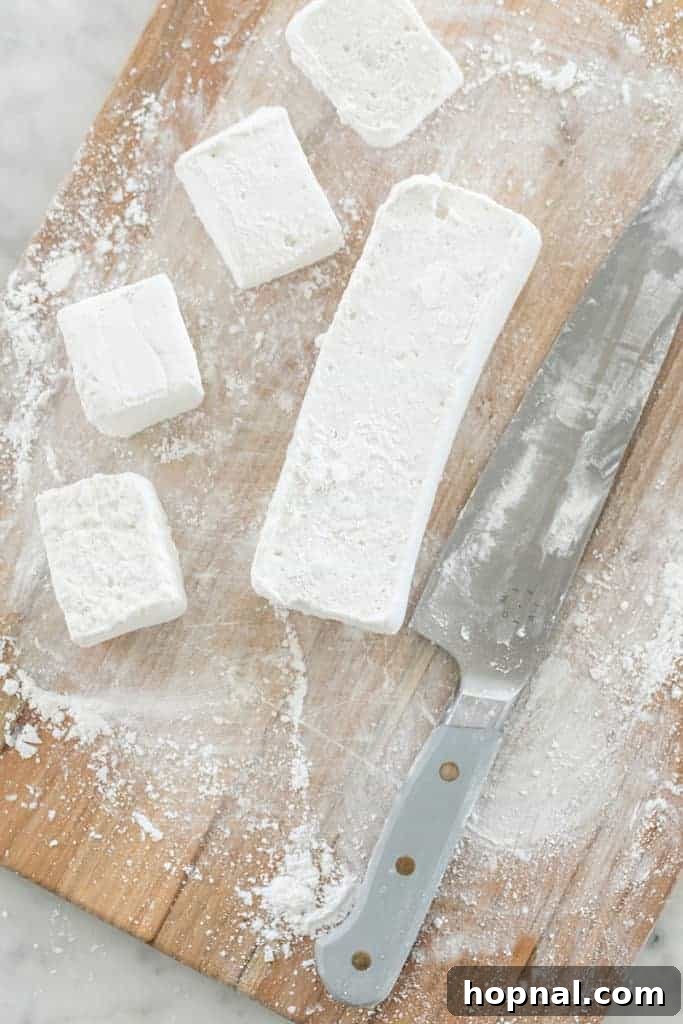
Once fully set and completely firm to the touch, it’s time to release and cut your beautiful homemade marshmallows. Dust a large cutting board and a very sharp knife generously with more powdered sugar or the powdered sugar/cornstarch mix. First, run the dusted knife carefully around all edges of the marshmallow slab in the pan to help release it. Gently invert the pan onto the prepared cutting board. If needed, dust your hands with additional powder to prevent sticking. Carefully cut the large marshmallow sheet into your desired squares, rectangles, or even use cookie cutters for fun shapes. As you cut each piece, immediately roll it in the powdered sugar/cornstarch mixture to fully coat all sides. This coating is crucial to prevent the sticky cut surfaces from adhering to each other and maintain their fluffy, individual form. For particularly sticky marshmallows, you might need to re-dust your knife periodically during the cutting process.
8. Serve and Store for Lasting Enjoyment
Your magnificent homemade marshmallows are now ready to be enjoyed! Serve them immediately in a steaming cup of hot chocolate, roast them for gourmet s’mores, or simply savor them as a delightful treat. For storing, place any leftovers in an airtight container at cool room temperature, away from direct sunlight. Layer them with parchment paper if you have many, to further prevent sticking. They will stay wonderfully fresh and delicious for up to 3 weeks. As mentioned, avoid refrigeration, as the moisture and condensation can make them damp and excessively sticky, compromising their perfect texture.
Expert Tips & Creative Variations for Perfect Homemade Marshmallows
Achieving marshmallow perfection is all about precision and a little creativity. Here are some essential tips and exciting ways to customize your homemade treats, ensuring every batch is a masterpiece:
- Invest in a Quality Candy Thermometer: This is arguably the most crucial tool for consistent marshmallow success. Heating the sugar syrup to precisely 240°F (115°C) is non-negotiable for the ideal texture. If the temperature is too low, your marshmallows won’t set properly and will remain gooey. If it’s too high, they’ll become dense, rubbery, or even brittle. A reliable digital candy thermometer offers the most accuracy and peace of mind.
- Embrace Flavor Experimentation: Beyond classic vanilla, the world of flavors awaits! Incorporate a few drops of gel food coloring for visually stunning marshmallows that match any party theme. Explore different extracts like pure peppermint (perfect for winter holidays), almond (adds a subtle nutty note), lemon, orange blossom water, coffee, or even a splash of high-quality rum or bourbon for adult-friendly treats. For a richer, deeper flavor, consider adding a tablespoon of sifted cocoa powder or a teaspoon of instant espresso powder to the mixture with the vanilla.
- Fruity Freshness with Freeze-Dried Powders: For a natural burst of fruity flavor and a beautiful pastel hue, mix in 1-2 tablespoons of finely ground freeze-dried fruit powder (such as raspberry, strawberry, blueberry, or mango) during the last minute of whipping. This adds natural sweetness and a lovely tangy note without introducing excess moisture, which can be detrimental to marshmallow texture.
- Speed is Your Friend After Whipping: Once the marshmallow mixture reaches its peak fluffiness in the mixer, it begins to set relatively quickly. Have your prepared pan ready and work swiftly to pour and spread the mixture evenly. Don’t dawdle, or it might become too stiff to work with smoothly, resulting in a less uniform appearance.
- The Art of Clean Cutting: To achieve perfectly neat squares or shapes, always dust your sharp knife generously with powdered sugar or a powdered sugar/cornstarch blend before each cut. You can also lightly oil the knife blade. For easier removal from the pan, gently run an oiled knife around the edges before attempting to lift the entire slab. If the marshmallows are sticking to the knife, re-dust or re-oil.
- Crafting Vegan Marshmallows: For a plant-based alternative, you can replace animal-derived gelatin with agar-agar powder. Be aware that the texture will be slightly different, often a bit firmer and less stretchy or bouncy than traditional gelatin marshmallows. You’ll need to adjust the water ratio and follow specific instructions for agar-agar-based recipes, as it sets and behaves differently.
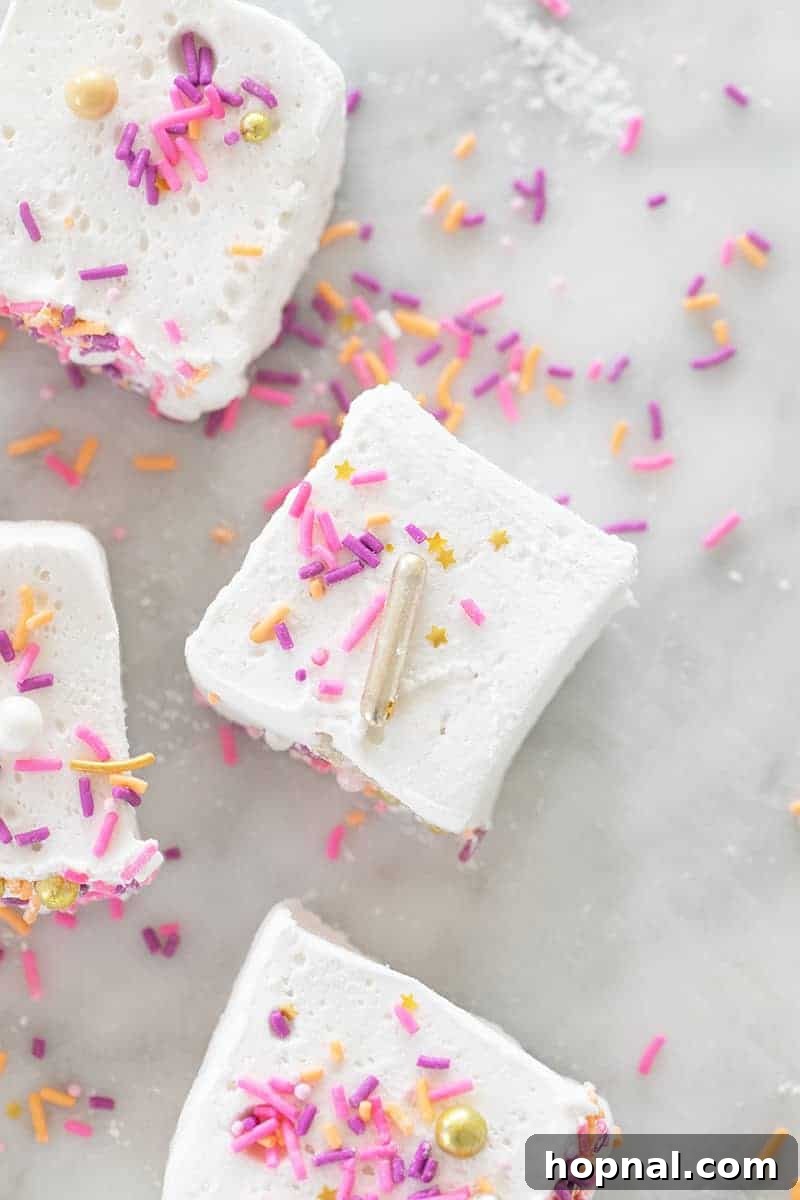
- Add a Touch of Crunch and Texture: Mix in finely crushed nuts (pecans, walnuts), toasted coconut flakes, mini chocolate chips, or finely chopped candies (like peppermint candies) during the last minute of whipping for delightful textural variations. For festive sprinkles, scatter them generously over the freshly poured marshmallow mixture before it sets – the stickiness will help them adhere.
- Toasting for Elevated Flavor: These homemade marshmallows toast beautifully! Use a kitchen torch for a perfectly browned, caramelized exterior and a gooey, molten interior, ideal for topping desserts or making indoor s’mores.
How to Make Marshmallows Without a Candy Thermometer: The Cold Water Test
While a candy thermometer is highly recommended for precise and consistent results, it is possible to make marshmallows using a traditional “cold water test.” This method relies on visual cues and experience, so pay close attention and be prepared to act quickly:
- Prepare Your Cold Water Bowl: Have a small bowl filled with very cold water (ice water is even better for precise cooling) ready and placed right next to your stovetop before you start cooking the sugar syrup.
- Boil and Test the Syrup: As your sugar syrup boils on the stove, keep a close watch. Once it reaches what appears to be a vigorous, rolling boil for a few minutes, carefully use a clean spoon to drop a very small amount of the hot syrup (about ½ teaspoon) into the bowl of cold water.
- The Soft-Ball Stage is Key: Immediately reach into the cold water and try to gather the cooled syrup with your fingers. If it forms a soft, pliable ball that can be easily flattened or squished between your fingers – almost like soft putty or wet sand – then your syrup has reached the coveted “soft-ball stage,” which is approximately 240°F (115°C). This is the absolute perfect consistency for fluffy marshmallows!
- Adjust and Re-test as Needed: If the syrup dissolves, feels gritty, or is too runny in the cold water, it hasn’t cooked long enough. Continue boiling for another minute or so, then repeat the cold water test with a fresh drop of syrup in a different spot in the cold water.
- Avoid Overcooking at All Costs: Be extremely careful not to let it cook too long. If the syrup forms a “firm ball” (harder, more resistant to flattening) or a “hard ball” (brittle, cracks easily), it means it’s gone too far (usually 245-250°F or higher). Overcooked syrup will result in dense, rubbery, or hard marshmallows that lack the desired airy texture. Watch closely and act fast once you achieve that perfect soft ball – timing is everything with this method!
This traditional method requires practice and a keen eye, but it’s a valuable skill for any home confectioner to develop, especially when a thermometer isn’t available.
Homemade Marshmallow FAQs: Your Questions Answered for Success
Stickiness is a common issue with homemade marshmallows and usually indicates one of two things: either your sugar syrup didn’t reach the correct temperature (precisely 240°F), or your marshmallows weren’t coated generously enough with powdered sugar or cornstarch after cutting. Ensure your candy thermometer is accurate, and don’t be shy with the coating – every side needs to be thoroughly dusted. High humidity in your environment can also contribute to stickiness, so always store them in an airtight container in a cool, dry place.
While technically possible, achieving the necessary volume, aeration, and texture for truly light and fluffy marshmallows without a stand mixer is exceptionally challenging. The mixture needs continuous, high-speed whipping for a sustained period (10-12 minutes). A powerful hand mixer might work if you have a very strong arm and can maintain consistent speed for the entire duration, but it will require significant effort and might not yield the same ethereal fluffiness as a stand mixer.
Adding food coloring is a fantastic way to customize your marshmallows and make them pop! For evenly tinted marshmallows, add gel food coloring (a few drops at a time) during the last minute of whipping in the stand mixer. Start with a small amount and add more until you reach your desired shade. For a beautiful marbled effect, drizzle a few drops of food coloring onto the whipped mixture just before pouring it into the pan, then gently swirl it with a toothpick or skewer – don’t overmix, or the colors will blend too much.
Yes, classic homemade marshmallows, made with sugar, corn syrup, gelatin, water, salt, and vanilla extract, are naturally gluten-free. These core ingredients do not contain gluten. However, always double-check the labels of your specific ingredients (especially extracts or any unique additions like sprinkles) to ensure they are certified gluten-free, particularly if you are catering to someone with Celiac disease or severe gluten sensitivity to avoid any cross-contamination.
Dense or hard marshmallows are typically a result of overcooking the sugar syrup. If the syrup goes beyond the soft-ball stage (240°F / 115°C) and reaches a higher temperature, the sugar concentration becomes too high, leading to a much firmer and less airy final product. Ensure your candy thermometer is accurate and remove the syrup from heat immediately once it hits 240°F. Another factor can be under-whipping, where the mixture doesn’t incorporate enough air.
Once properly coated with powdered sugar, store your homemade marshmallows in an airtight container at cool room temperature, away from direct sunlight or any sources of heat or humidity. Layer them with parchment paper between layers to prevent any potential sticking. They will stay wonderfully fresh, fluffy, and delicious for up to 3 weeks. It’s best to avoid refrigerating them, as the condensation created by the cold can make them damp and excessively sticky, compromising their perfect texture.
More Marshmallow Inspirations You’ll Love
If you’ve fallen in love with homemade marshmallows, you’ll be thrilled to explore these other delightful recipes, ranging from fluffy spreads and versatile baking ingredients to festive treats and health-conscious twists. Expand your marshmallow repertoire!
Spreads & Toppings
Homemade Marshmallow Fluff
Whip up this incredibly light and airy marshmallow fluff, a versatile spread that’s perfect for desserts, fruit dips, or as a delightful sandwich filling.
Baking & Decorating
Marshmallow Fondant
Elevate your cake decorating with this easy-to-make, deliciously pliable marshmallow fondant, a fantastic alternative to traditional fondant for smoother finishes.
Seasonal Treats
Homemade Holiday Marshmallows
Add a special touch to your festive gatherings with these charming homemade holiday marshmallows, ideal for gifting or adding to seasonal drinks.
Health-Conscious Desserts
Healthy Homemade Marshmallows with Honey
Indulge guilt-free with these healthy homemade marshmallows, sweetened with natural honey and often incorporating fruit for a delightful and mindful treat.
I genuinely hope this comprehensive guide inspires you to create the fluffiest, most delicious homemade marshmallows you’ve ever tasted! Remember, practice makes perfect, and every batch is a step closer to marshmallow mastery. Don’t hesitate to share your experiences, creative variations, and what you thought in the comments section below – your feedback helps other aspiring bakers!
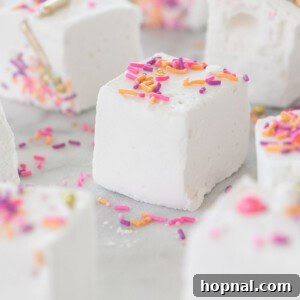
The Best Fluffy Homemade Marshmallows
Eden
30 minutes
10 minutes
6-8 hours
40 minutes active time
9 large marshmallows
Pin Recipe
Rate Recipe
Print Recipe
Equipment
-
Candy Thermometer (essential for accurate temperature control!)
-
Medium-Heavy Bottomed Saucepan
-
Stand Mixer with Whisk Attachment (a powerful hand mixer may suffice with extra effort)
-
9×9 inch (or similar) Baking Pan
-
Rubber Spatula (for spreading)
-
Sharp Knife (for cutting marshmallows)
-
Measuring Cups and Spoons
Ingredients
- 1 1/2 cups granulated sugar
- 1 cup cold water, divided into two 1/2-cup portions
- 1 cup light corn syrup
- 3/4 ounce unflavored gelatin, approximately 3 packets (like Knox brand)
- 1/4 tsp fine sea salt
- 1 tbsp pure vanilla extract
- Extra powdered sugar or a 50/50 mix of powdered sugar and cornstarch for dusting
Instructions
-
1. Prepare Your Baking Pan: Lightly grease the bottom and sides of a 9×9-inch baking pan with vegetable oil or nonstick spray. Then, generously sift a thick layer (at least 1/8 inch) of powdered sugar or a 50/50 mix of powdered sugar and cornstarch over the entire greased surface, ensuring it’s fully coated. Tap out any excess powder.
-
2. Make the Sugar Syrup: In a medium-heavy bottomed saucepan, combine 1/2 cup of the cold water, the granulated sugar, and the light corn syrup. Stir gently over medium heat until the sugar completely dissolves. Attach a candy thermometer to the side of the pan. Increase heat to medium-high and bring to a boil. Cook without stirring until the thermometer accurately reads 240°F (115°C). Immediately remove from heat.
-
3. Bloom the Gelatin: Pour the remaining 1/2 cup of cold water into the bowl of a stand mixer. Sprinkle the unflavored gelatin powder evenly over the water. Stir briefly with a fork, then let it sit undisturbed for 5-10 minutes to “bloom” and soften into a thick paste.
-
4. Whip the Marshmallow Base: Fit your stand mixer with the whisk attachment. With the mixer running on low speed, carefully and slowly pour the very hot sugar syrup in a steady stream down the side of the bowl into the bloomed gelatin mixture. Once all the syrup is added, increase the mixer speed to high.
-
5. Add Flavor & Finish Whipping: Whip continuously on high for 10-12 minutes, or until the mixture is incredibly thick, glossy, opaque white, and has more than tripled in volume. During the last minute of whipping, add the vanilla extract and the fine sea salt.
-
6. Pour and Set: Working quickly, remove the bowl from the mixer. Lightly grease a rubber spatula with a little vegetable oil. Pour the marshmallow mixture into your prepared baking pan. Use the greased spatula to gently spread it evenly. If adding sprinkles, do so now. Leave uncovered at room temperature for 6-8 hours or, ideally, overnight to fully set. Do not refrigerate.
-
7. Cut and Coat: Once firm, dust a clean, sharp knife and a large cutting board generously with more powdered sugar or the powdered sugar/cornstarch mix. Run the dusted knife around the edges of the pan to loosen the slab. Gently invert onto the cutting board. Cut into desired squares. As you cut each piece, immediately roll it in the powdered sugar mixture to fully coat all sides, preventing sticking.
-
8. Serve and Store: Enjoy your homemade marshmallows immediately. Store any leftovers in an airtight container at cool room temperature for up to 3 weeks, layered with parchment paper if desired.
Notes & Pro Tips for Perfect Marshmallows
Gelatin Specifics: This recipe calls for 3/4 ounce of unflavored gelatin, which typically equates to three standard 0.25-ounce packets of brands like Knox. Always check your package for exact measurements to ensure accuracy. Using too much or too little gelatin will impact the final texture significantly.
Optimal Storage: Once fully coated, homemade marshmallows are best stored in an airtight container at cool room temperature, away from direct sunlight or humidity. They will maintain their perfect texture and freshness for up to 3 weeks. Avoid refrigeration, as the moisture can make them damp and excessively sticky.
Freezing for Longevity: For extended storage, homemade marshmallows freeze beautifully! Arrange the coated marshmallows in a single layer on a baking sheet and freeze until solid (about 2-3 hours). Then, transfer them to a freezer-safe airtight bag or container. They can be frozen for up to 3 months. Thaw at room temperature for a few hours before enjoying, ensuring they are fully thawed before use.
Tackling Stickiness: If your marshmallows still feel a bit sticky after cutting and coating, simply give them another gentle roll in more powdered sugar or cornstarch. Ensure your storage container is truly airtight and that they are kept in a dry environment to prevent moisture absorption.
Nutrition Facts (Per Large Marshmallow)
Carbohydrates: 53g,
Protein: 2g,
Fat: 3g,
Saturated Fat: 1g,
Cholesterol: 1mg,
Sodium: 217mg,
Potassium: 50mg,
Fiber: 1g,
Sugar: 42g,
Calcium: 10mg,
Iron: 1mg
Nutrition information is automatically calculated and is provided as an estimate only. It should not be considered a substitute for professional nutritional advice or a guarantee of precise values.
Loved this recipe? Leave a comment and rating below!
Your feedback and experiences are incredibly valuable to our baking community. Share your thoughts!