
Master the Art of Gold Leaf Easter Eggs: A Shimmering DIY Guide
Elevate your Easter celebrations with a touch of unparalleled elegance by learning how to craft exquisite gold leaf Easter eggs. This detailed guide will walk you through a simple yet sophisticated technique, using just a few essential supplies to transform ordinary eggs into dazzling works of art. Whether you’re planning an enchanting Easter egg hunt, hosting a sophisticated Easter brunch, or simply seeking unique decorations to adorn your home, these shimmering gold eggs are guaranteed to captivate and charm. Prepare to unlock your creativity and infuse your Easter festivities with a luxurious, handmade glow.
The Irresistible Charm of Golden Eggs
Just like the whimsical desire for golden eggs found in classic tales, there’s an undeniable allure to incorporating gold into our Easter traditions. While traditional dyes offer a spectrum of colors, gold leaf brings a sophisticated, almost magical quality that elevates Easter eggs from simple craft projects to treasured decorative pieces. This ancient art form, dating back centuries, when applied to a humble egg, creates a stunning fusion of history and modern festivity. Imagine these shimmering beauties nestled in a basket, catching the light, or gracing your dining table—they’re more than just decorations; they’re conversation starters and a testament to personalized craftsmanship.
Unleashing Your Creativity: Design Ideas for Gold Leaf Eggs
The beauty of gold leafing lies in its versatility, allowing for a spectrum of designs from the elegantly simple to the intricately detailed. Don’t be intimidated by the delicate nature of gold leaf; with a little patience, you can bring any vision to life. Here are a few inspirational ideas to get you started on your golden egg journey:
Simple Elegance: The Heart Sticker Method
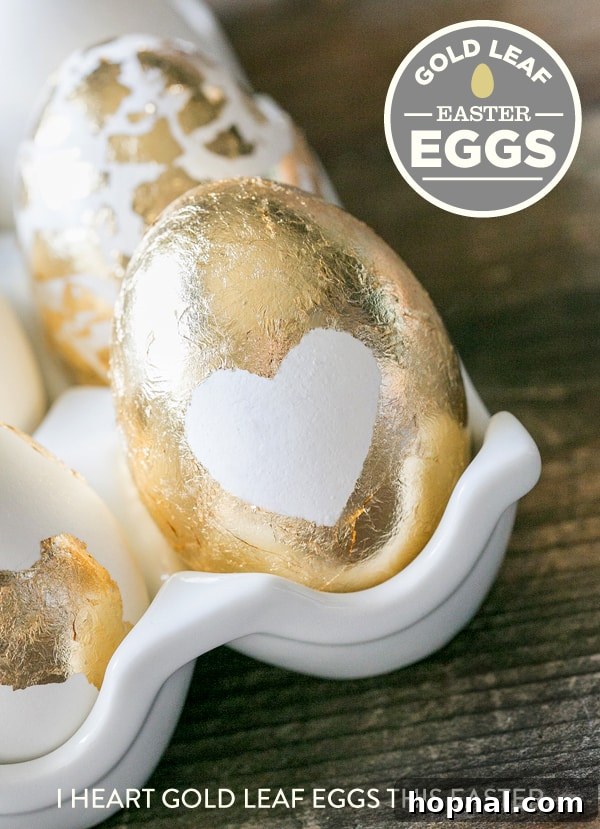
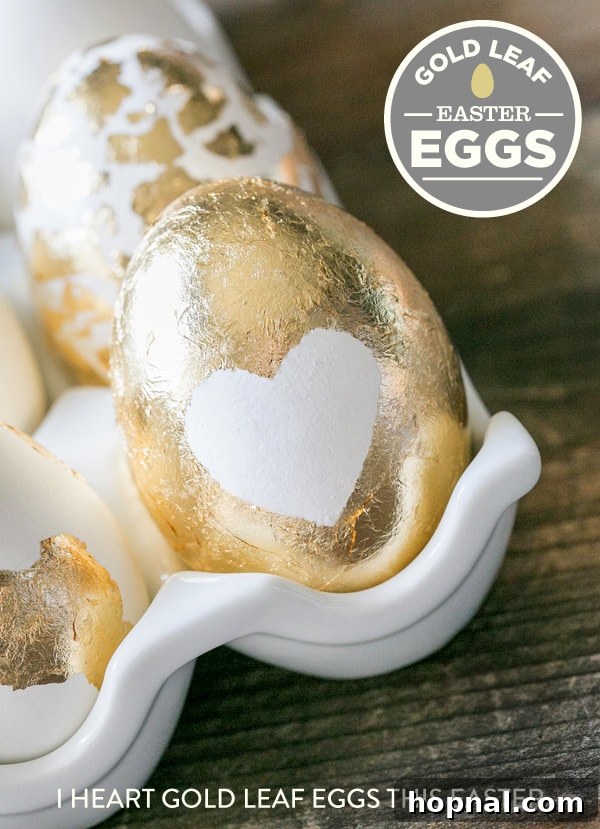
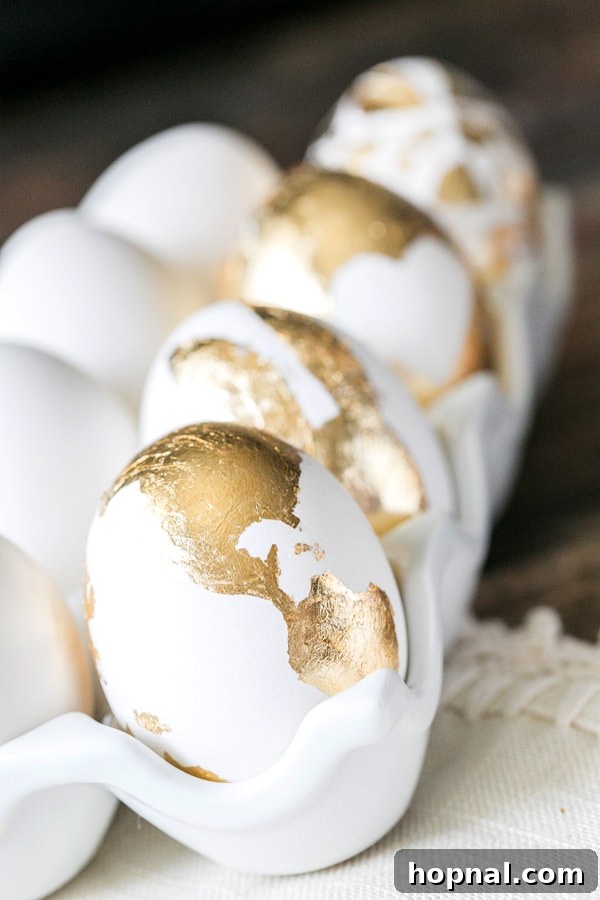
For beginners or those seeking a minimalist yet striking design, the heart sticker method is incredibly effective. Begin by applying a small heart-shaped sticker (or any other simple shape) onto your egg. Once your entire egg is covered with gold leaf, carefully peel away the sticker to reveal a perfect, un-gold-leafed heart. This technique creates a beautiful contrast and is wonderfully forgiving, making it an ideal starting point for your first gold leaf project.
Artistic Flourish: The Hand-Painted World Design
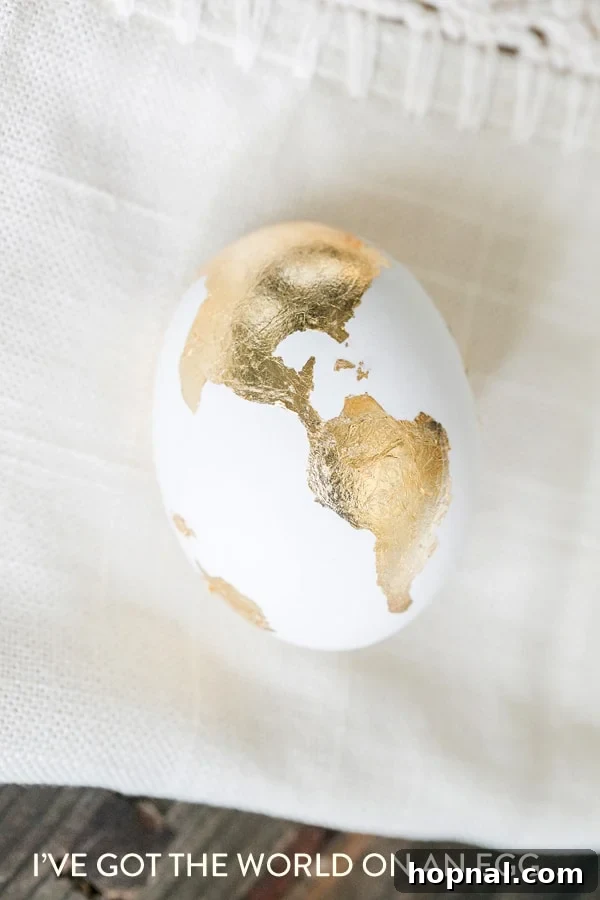
Feeling more adventurous? Take inspiration from our “world on an egg” design. This freehand approach allows for immense personalization. Using a small paintbrush and gold leaf adhesive, you can meticulously draw continents, swirling patterns, or abstract designs. The slight imperfections that come with hand-painting only add to the charm and uniqueness of each egg, transforming them into miniature globes of gold. This process is surprisingly meditative, letting your imagination guide the brush.
Whimsical Wonders: The Golden Bunny and Beyond
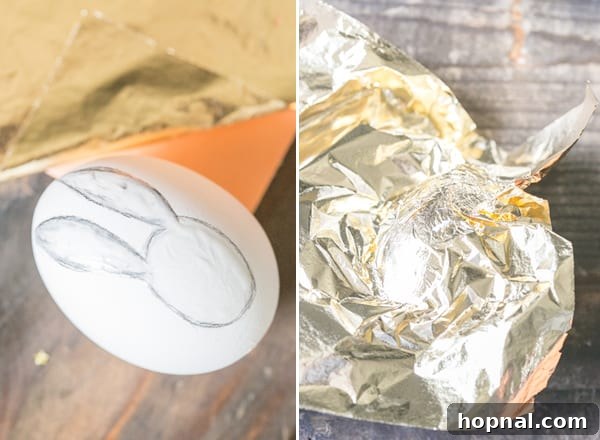
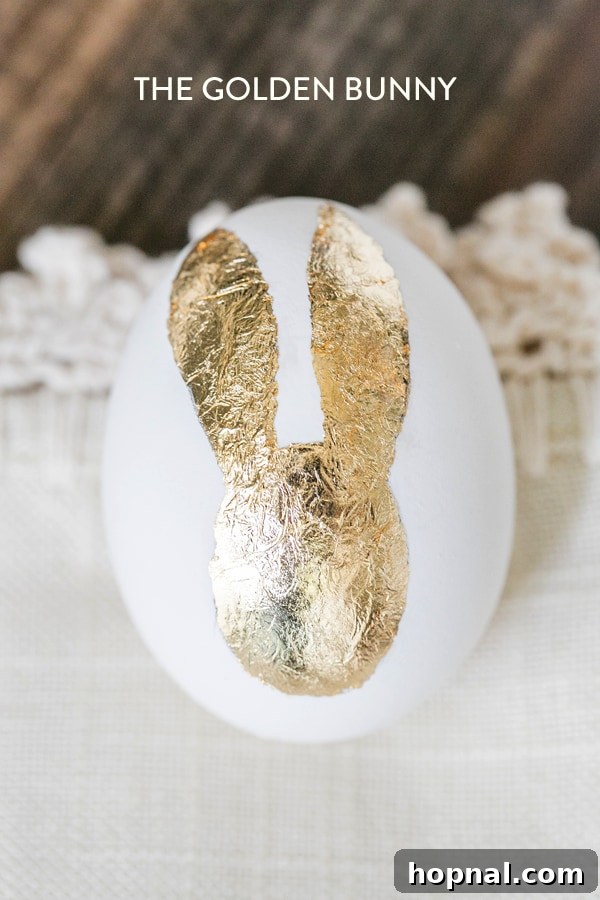
For a truly whimsical touch, a golden bunny silhouette brings a playful spirit to your eggs. Start with a light pencil sketch of your bunny outline, then apply the adhesive precisely within the lines before laying the gold leaf. The pencil acts as a guide, ensuring your design is exactly as envisioned. This method isn’t limited to bunnies; consider other Easter motifs like chicks, flowers, or intricate geometric patterns. Small stencils or even cookie cutters can serve as excellent templates for more complex or repetitive designs, allowing you to create a cohesive collection of uniquely decorated eggs.
Experiment with Negative Space and Patterns
Don’t just think about what you’re covering with gold; consider what you’re leaving exposed. Using lace or doilies as stencils can create delicate, intricate patterns where the gold leaf adheres around the fabric, leaving behind a stunning, detailed design on the egg’s surface. Alternatively, create abstract splatters or drips of adhesive for a modern, artistic look. The possibilities are truly endless, limited only by your imagination.
The Joy of the Craft: A Meditative Experience
There’s something profoundly satisfying about engaging in creative projects that demand concentration and focus. The act of carefully applying gold leaf to an Easter egg transcends a mere craft; it becomes a form of “yoga for the brain,” allowing your thoughts to settle and your right brain to fully engage. While gold leaf is notoriously delicate—tearing easily and eager to stick to your fingers—this inherent fragility is part of its charm. Embracing the slightly messy nature of Easter egg decorating adds to the authentic, handmade feel of your creations. The tiny imperfections, the unexpected tears, and the areas where the gold leaf adheres imperfectly tell a story and make each egg uniquely yours. The sheer delight of peeling back the excess gold leaf to reveal your sparkling design is incredibly rewarding. I truly fell in love with how these eggs turned out, and I’m confident they will be a beautiful, eye-catching addition to my Easter decor this year, bringing a touch of personalized shimmer and joy.
So, why not treat yourself to a moment of creative indulgence? Grab a refreshing carrot cocktail and a delightful bunny cookie, set the mood, and embark on this wonderfully satisfying crafting adventure. The result will be a collection of Easter eggs that are not only beautiful but also imbued with your personal touch and creative energy.
Your Comprehensive Guide to Gold Leaf Easter Eggs: Step-by-Step
Essential Supplies for Golden Creations
Before you begin, gather all your materials. Having everything at hand will make the process smoother and more enjoyable.
- Gold Leaf Sheets: These come in various alloys (imitation gold, genuine gold) and sizes. Imitation gold leaf is more affordable and easier to handle for beginners.
- Gold Leaf Adhesive (Gilding Size): This special glue is designed to remain tacky once dry, providing the perfect surface for gold leaf to adhere. Ensure you choose one suitable for delicate applications.
- Fine Paint Brushes: A variety of sizes will be helpful. A very fine detail brush is crucial for intricate designs, while a slightly larger one can cover broader areas.
- Hard-Boiled Eggs (or Blown-Out/Wooden Eggs): Hard-boiled eggs are great for immediate use, but for keepsakes, consider using blown-out eggshells (emptied and cleaned) or wooden craft eggs for lasting decor.
- Pencil: A light pencil is essential for sketching your designs onto the egg before applying adhesive, acting as a guide.
- Soft, Dry Brush or Cotton Swab (Optional): Useful for gently burnishing the gold leaf and brushing away excess flakes.
- Protective Surface/Newspaper: To keep your workspace clean, as gold leaf can be a bit messy.
Detailed Directions: Crafting Your Golden Masterpiece
Follow these steps carefully to achieve beautifully gilded Easter eggs:
- Step 1: Prepare Your Eggs and Workspace. Ensure your hard-boiled eggs are completely cool and dry. If using blown-out or wooden eggs, make sure they are clean. Cover your work surface with newspaper or a craft mat to catch any stray gold leaf flakes.
- Step 2: Sketch Your Design. Using a light pencil, gently draw your desired pattern onto the egg’s surface. Whether it’s a simple heart, an intricate bunny, or an abstract swirl, sketching it first will give you a clear guide for applying the adhesive. For designs like the sticker resist, apply the sticker now.
- Step 3: Apply the Gold Leaf Adhesive. Dip your chosen paintbrush into the gold leaf adhesive. Carefully paint over your pencil design with a thin, even layer of glue. Avoid applying too much, as this can make the design appear clumpy. Allow the adhesive to dry to a “tacky” state, which typically takes 10-15 minutes, depending on the brand. It should feel sticky to the touch but not wet.
- Step 4: The Delicate Art of Applying Gold Leaf. Once the adhesive is tacky, gently pick up a sheet of gold leaf. Gold leaf is incredibly thin and delicate, so handle it with care—it’s best to use static from your fingers or tweezers, or even a soft, wide dry brush to lift it. Carefully lay the gold leaf sheet directly over your glued design, pressing it down lightly with your fingers or a soft brush. Don’t worry if it wrinkles or tears; you can always patch it up.
- Step 5: Burnishing and Revealing Your Design. Lightly tap and press the gold leaf onto the glued areas. After a few seconds, gently begin to lift and brush away the excess gold leaf using a soft, dry paintbrush or a cotton swab. The gold leaf will adhere only to the areas where you applied the adhesive, revealing your design underneath. This part is incredibly satisfying!
- Step 6: Finishing Touches and Sealing (Optional). Inspect your design for any gaps or areas where the gold leaf didn’t fully adhere. You can touch up these spots by applying a tiny bit more adhesive with a fine brush and then adding small pieces of gold leaf. Once your design is complete and excess gold leaf is brushed away, you can apply a thin coat of clear sealant (like a clear craft spray or varnish) if you want to protect the gold leaf and ensure greater durability, especially for display eggs.
Expert Tips for Flawless Gold Leaf Easter Eggs
Achieving stunning gold leaf eggs is easier with a few insider tricks:
- For Lasting Decor, Choose Wisely: While hard-boiled eggs are convenient, opt for wooden craft eggs or carefully blown-out and cleaned eggshells if you wish to preserve your creations for years to come. These alternatives provide a durable base for your golden designs.
- Precision is Key: A tiny, fine-tipped paint brush is your best friend for intricate designs. For very small details, a toothpick can be dipped in adhesive for ultimate precision.
- Don’t Be Afraid to Sketch: Always sketch your designs lightly with a pencil first. This provides a clear roadmap for your adhesive application and helps avoid mistakes.
- Experiment with Templates: If freehand isn’t your forte, use stencils, stickers (as a resist, or to apply glue around), or even cookie cutters to create precise shapes and patterns.
- Color Contrast Matters: Gold leaf looks magnificent on natural eggshells, but don’t hesitate to experiment with colored eggs as your base! Gold can pop beautifully against a dark navy, jewel-toned green, or even a soft pastel, creating entirely different aesthetic effects.
- Handle with Care: Gold leaf is extremely delicate. Work in an area free of drafts. Use tweezers or a very dry, soft brush to pick up sheets to minimize sticking to your fingers.
- Don’t Stress Imperfections: Gold leaf often tears or creases. Embrace these as part of the unique, handmade charm. Small tears can often be patched up with tiny bits of gold leaf and adhesive, or left as is for a rustic, antique look.
- Less is More with Adhesive: A thin, even layer of adhesive works best. Too much glue can lead to a raised, uneven surface.
Beyond Gold: Explore More Easter Egg Decorating Adventures
Once you’ve mastered the art of gold leafing, you might find yourself eager to explore other creative ways to decorate your Easter eggs. Handmade eggs add such a special touch to any Easter celebration. Dive into these other exciting projects to expand your decorating repertoire:
- Decoupage Easter Eggs: Create intricate designs using delicate paper cutouts or napkins.
- Calligraphy Easter Eggs: Personalize your eggs with elegant hand-lettered names or festive phrases.
- Mosaic Easter Eggs: Break eggshells into small pieces and reassemble them into beautiful mosaic patterns.
- Watercolor Eggs: Achieve soft, artistic washes of color for a gentle and ethereal look.
- Wood Burning Easter Eggs: For a unique and rustic touch, try etching designs onto wooden eggs.
The Perfect Occasion: Showcasing Your Golden Eggs
While beautifully decorated eggs are intrinsically linked with Easter, their versatility allows them to enhance various aspects of your spring celebrations. These golden beauties are not just for admiring; they can play an active role in your festivities!
- Easter Egg Hunts: Designate a few gold leaf eggs as special “golden prizes” for your hunt, adding an extra layer of excitement for participants.
- Easter Brunch Centerpieces: Arrange a collection of your gold leaf eggs in a decorative bowl or nest for a stunning, elegant centerpiece that immediately elevates your table setting.
- Place Settings: Tuck a personalized gold leaf egg at each guest’s place setting as a thoughtful and beautiful party favor.
- Home Decor: Display your gilded creations on a mantle, bookshelf, or windowsill, catching the sunlight and adding a festive glow to your home throughout the spring season.
- Easter Egg Decorating Parties: Host an Easter egg decorating party and make gold leafing a central activity. It’s a fantastic way to share the joy of crafting and create lasting memories with friends and family.
- Thoughtful Gifts: A beautifully gold-leafed egg makes a unique and heartfelt handmade gift for loved ones, showcasing your effort and creativity.
Elevate Your Easter Celebration: More Entertaining Ideas
Looking for even more delightful Easter ideas to make your holiday truly special? We’ve got you covered with a range of charming and delicious suggestions that pair perfectly with your newly crafted gold leaf eggs:
- Easter Candy Platter: Indulge in the festive spirit by creating an eye-catching platter overflowing with colorful and delicious Easter candies.
- Easter Desserts: Explore a collection of the best dessert recipes, from classic treats to innovative sweets, perfect for your Easter feast.
- Coconut Loaf Cake: This moist and flavorful coconut loaf cake is an absolute must-have for any Easter brunch spread.
- Carrot Margarita Recipe: Mix up a batch of this fun and refreshing spring cocktail, made with fresh carrot juice for a unique twist on a classic.
- Italian Sodas: Offer a delightful non-alcoholic option with these vibrant and refreshing Italian sodas, customizable with any flavor and boasting beautiful pastel hues.
We absolutely adore seeing your creative endeavors! If you embark on making these gorgeous Gold Leaf Easter eggs, please let us know how they turned out by leaving a comment below. We’d be thrilled to see your stunning creations, so be sure to tag @sugarandcharm on social media! Your projects inspire us and our community.
For more delicious recipes, inspiring cocktails, irresistible desserts, and charming party ideas, you can also FOLLOW US on FACEBOOK, INSTAGRAM, and PINTEREST. Join our community and never miss out on new ways to celebrate and create!