
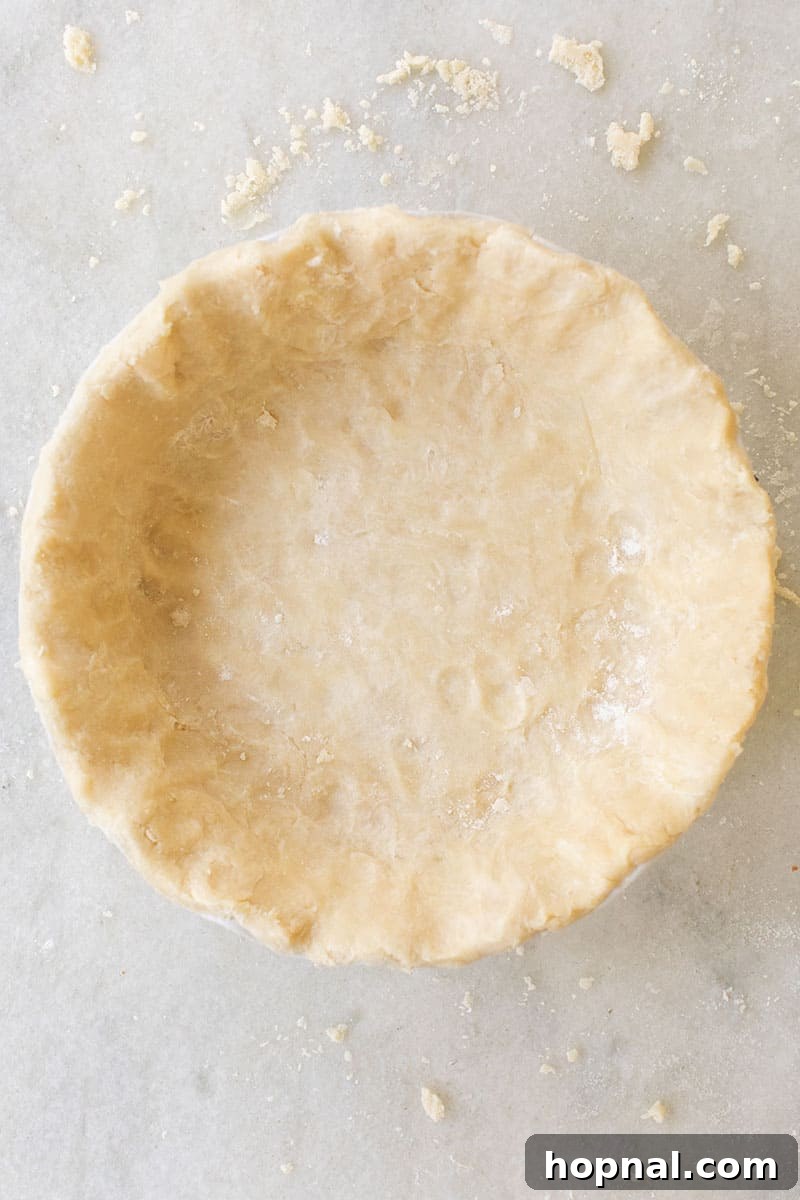
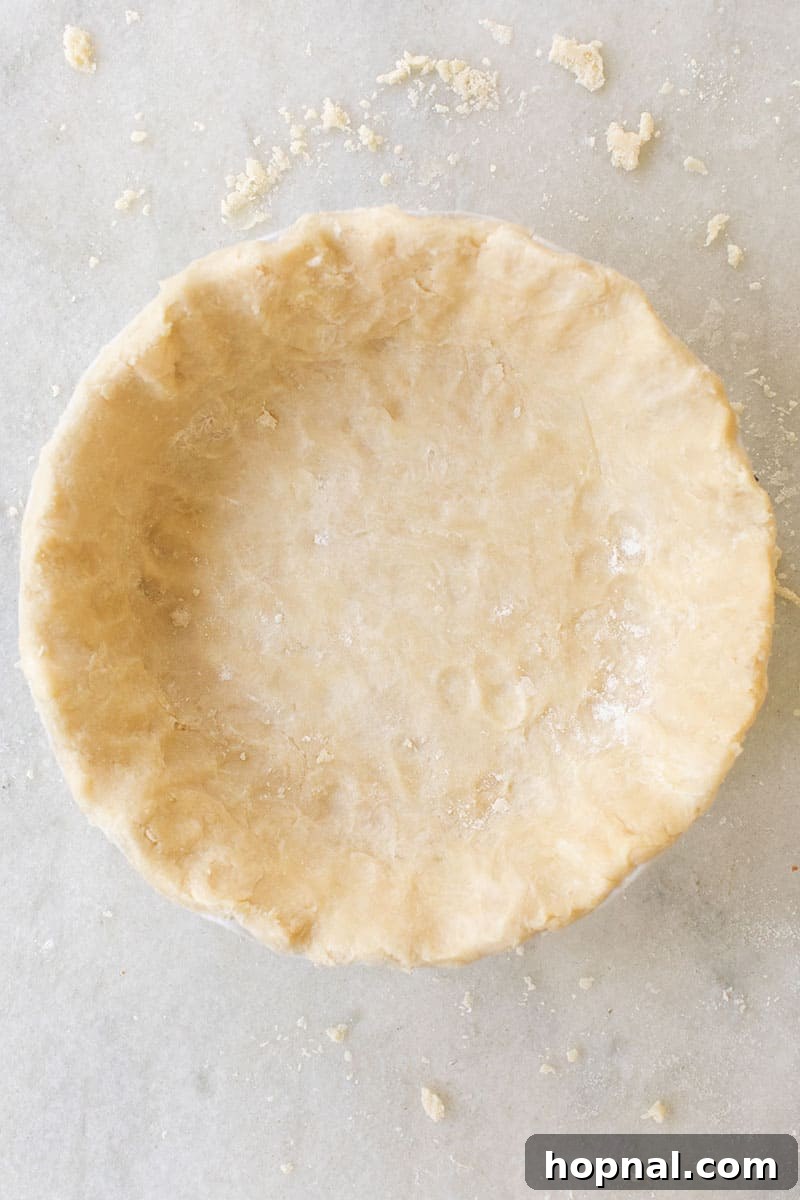
Embark on a delightful baking journey with our **ultimate foolproof buttery pie crust** recipe. This isn’t just *a* recipe; it’s *the* recipe for a perfectly flaky, wonderfully tender, and incredibly delicious pie crust that performs flawlessly every time. Forget the stress and embrace the joy of creating a homemade foundation that will elevate any pie filling you choose. Whether you’re a seasoned baker or taking your first foray into pie making, this forgiving crust promises consistent success, leaving you with more time to savor the sweet (or savory!) results.
My deep passion for pie making began years ago when I had the privilege of attending a masterclass led by the renowned pie expert, Kate McDermott. Her teachings were transformative, guiding me from a casual baker to a confident pie maker. Kate meticulously detailed the subtle nuances required to create the flakiest dough imaginable, emphasizing how every minute factor, even external weather conditions, could influence the delicate pie-making process. It was a true revelation, underscoring that pie baking is as much an art form as it is a precise science.
During her class, we mastered the technique of skillfully rolling pie dough on a traditional pastry cloth, then expertly flipping it over into the pie dish with a swift, confident motion. While I now primarily use parchment paper for its convenience and consistent non-stick properties, the fundamental principles and deep understanding of dough mechanics I gained from Kate remain invaluable. Over the years, I’ve refined her core teachings, blending them with my own experiences to perfect a foolproof method that consistently yields spectacular, tender, and flaky results in my kitchen.
This unwavering reliability has cemented this **foolproof easy, buttery pie crust** as my absolute go-to for every single pie I bake. It’s a recipe I trust implicitly, one that never fails to deliver a tender, flaky, and golden crust, regardless of the filling. Below, I’ll share all my essential tips, the science behind its perfection, and a comprehensive, step-by-step guide to help you create your own delicious pie crust with absolute confidence. Prepare to impress your taste buds and your guests alike; with this recipe, you simply can’t go wrong!
The Science Behind a Perfect Flaky Pie Crust
Understanding the fundamental principles behind a great pie crust can revolutionize your baking. The secret to an irresistibly flaky texture lies in the careful manipulation of fats and temperature. When cold fats (like butter and lard) are incorporated into flour and then baked, the water within the fats turns to steam. This steam creates tiny pockets of air that expand and separate the layers of dough, a process known as “lamination.” This expansion is precisely what gives pie crust its characteristic light, airy, and distinctively flaky layers. The colder your ingredients and tools, the better these fat pockets are preserved, leading to a superior texture. Additionally, minimizing gluten development by gentle mixing and sufficient chilling ensures a tender crust, rather than a tough, chewy one. This recipe perfectly balances these critical elements to guarantee a consistently excellent result every single time.
Essential Pie Crust Ingredients for Success
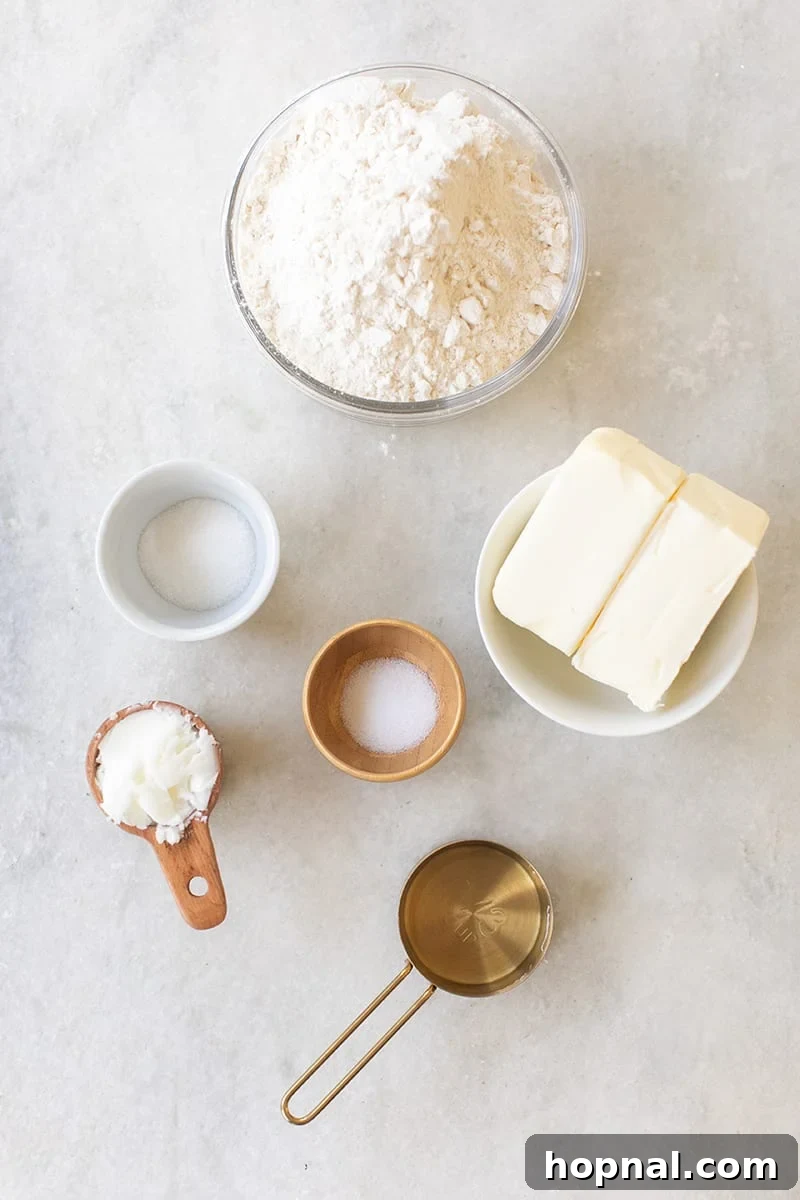
Each ingredient plays a crucial role in achieving the perfect balance of flavor, structure, and texture in your pie crust. Opting for high-quality ingredients can make a noticeable difference in the final product.
- Butter: The cornerstone for rich flavor. Whether you choose salted or unsalted, butter contributes a luxurious, creamy taste that is essential for a truly delicious crust. Keeping it very cold is paramount to creating flaky layers.
- Lard or Shortening: This is the secret weapon for achieving ultimate flakiness and tenderness. Lard, particularly leaf lard, contributes an unparalleled delicate texture. Vegetable shortening is a fantastic and accessible alternative that also delivers excellent flakiness due to its high melting point.
- All-Purpose Flour: The structural backbone of your crust. Using a good quality, unbleached all-purpose flour is recommended. Some bakers even chill their flour for an extra boost of coldness.
- Granulated Sugar: While optional for savory pies, a touch of sugar in the crust enhances browning during baking and adds a subtle sweetness that beautifully complements most fruit and dessert pies.
- Fine Sea Salt: Crucial for balancing flavors and bringing out the richness of the butter. Don’t skip this ingredient, as it elevates the overall taste profile.
- Ice Water: The binding agent that brings the dough together. Using ice-cold water is vital to keep the fats solid and prevent premature gluten development, both of which are key to achieving a tender, flaky crust.
Making the Perfect Pie Dough: A Detailed Step-by-Step Guide
Follow these detailed instructions carefully to ensure a perfectly pliable, tender, and flaky dough every single time. Remember, the key to success lies in working quickly and keeping all ingredients and tools as cold as possible!
- Prepare Your Workspace and Ingredients: Begin by gathering all your ingredients. Ensure both butter and lard/shortening are thoroughly chilled. Cube your cold butter into precise 1/2-inch pieces. For an optimal start, place your mixing bowl (preferably metal or glass) and your pastry cutter (if using) in the freezer for 5-10 minutes to chill them completely before you begin.
- Combine Dry Ingredients: In your well-chilled mixing bowl, whisk together the measured flour, granulated sugar (if incorporating), and fine sea salt until they are evenly combined. This ensures even flavor distribution throughout the crust.
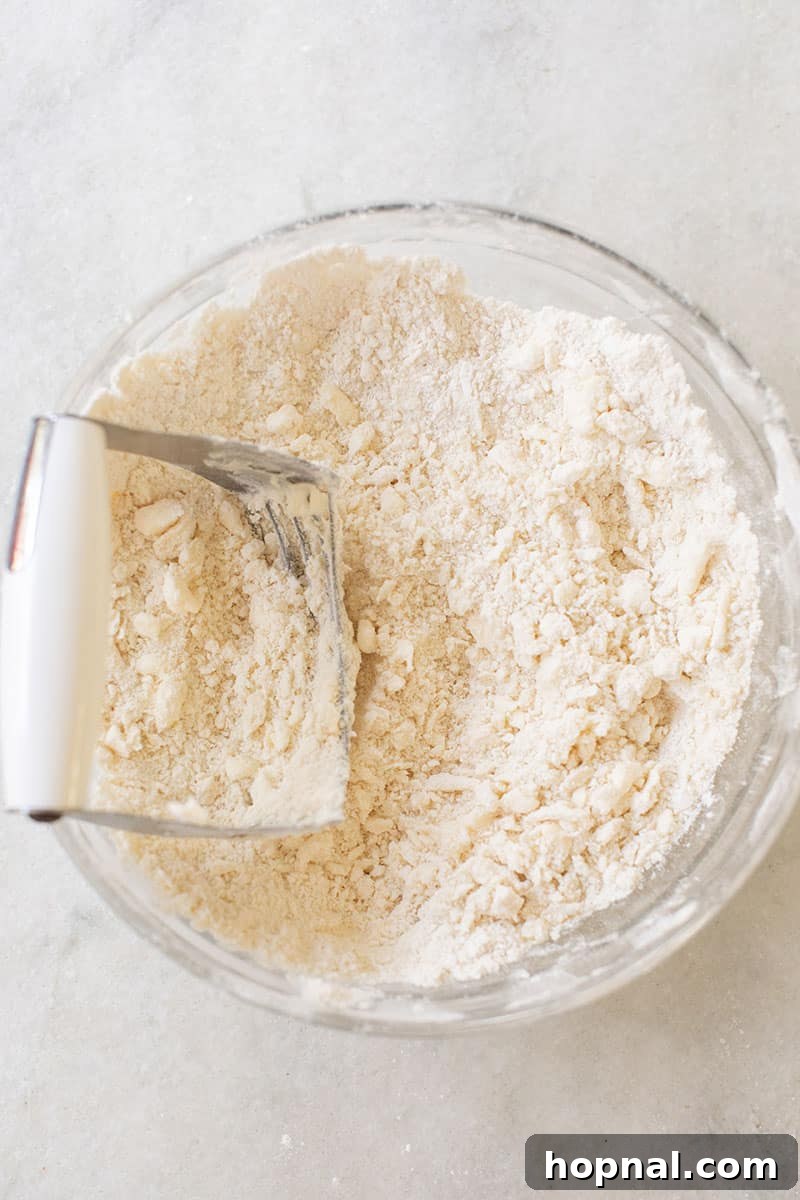
- Incorporate the Butter: Add the cold butter cubes directly into the dry flour mixture. Using your hands (working very quickly to minimize warmth transfer) or a pastry cutter, begin to work the butter into the flour. The goal is to flatten some butter pieces and break them down. Aim for a mixture where some butter pieces are still visible, roughly the size of small almonds or walnuts, while others are incorporated into smaller crumbs. This variation in fat size is crucial for flakiness.
- Add the Lard/Shortening: Next, introduce the very cold lard or shortening to the mixture. Continue working the fat into the flour with your fingertips or pastry cutter until the mixture resembles coarse meal with distinct pea-sized crumbs. It’s absolutely crucial not to overwork the dough at this stage, as warmth from your hands can melt the fat prematurely, hindering flakiness.
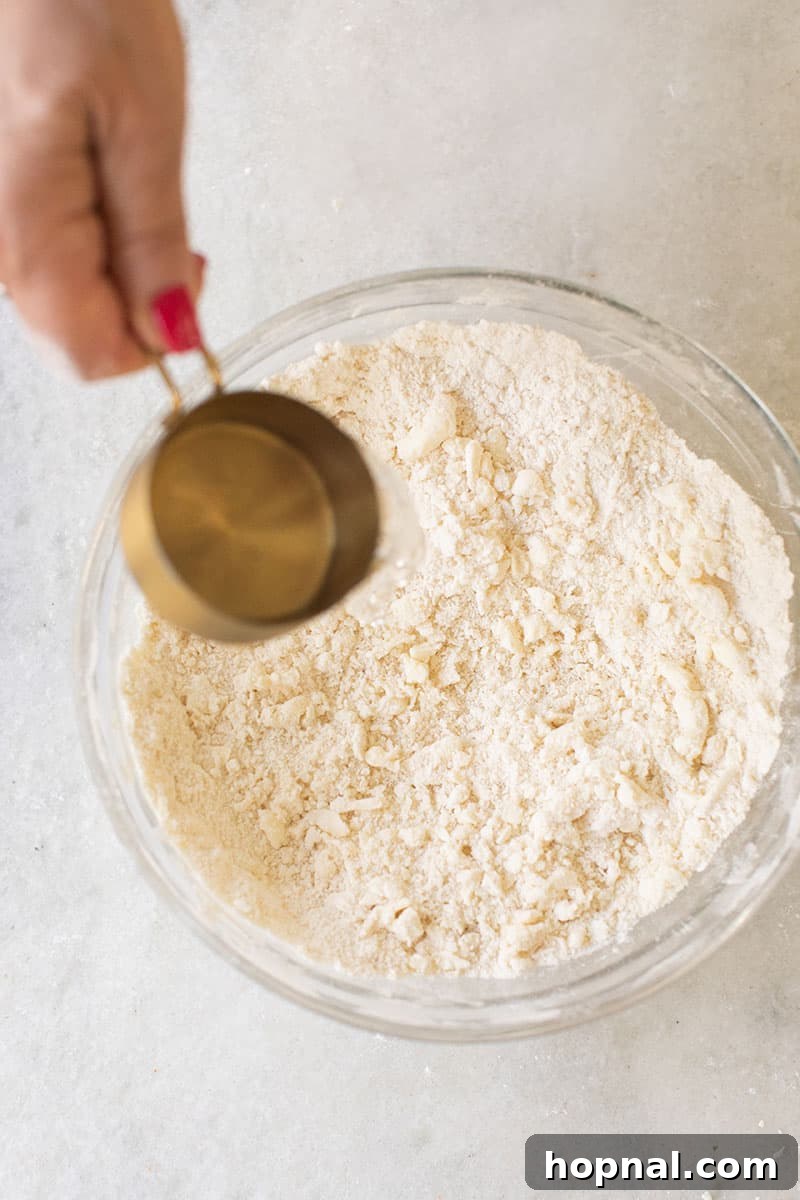
- Introduce Ice Water Gradually: Begin adding the ice water, one tablespoon at a time. After each addition, gently toss the dough with your hands or a fork. You want to add just enough water for the dough to barely come together without becoming sticky or wet. The exact amount can vary slightly based on the type of flour used and the humidity in your environment.
- Test for Proper Consistency: The dough is ready when it just barely comes together. To test, pinch a small amount between your fingers; if it holds together without crumbling apart, it’s done. It will still look quite shaggy, crumbly, and perhaps a bit dry – this is precisely the desired texture for a truly flaky crust. Avoid overmixing at all costs, as excessive handling develops gluten, which can lead to a tough, rather than tender, crust.
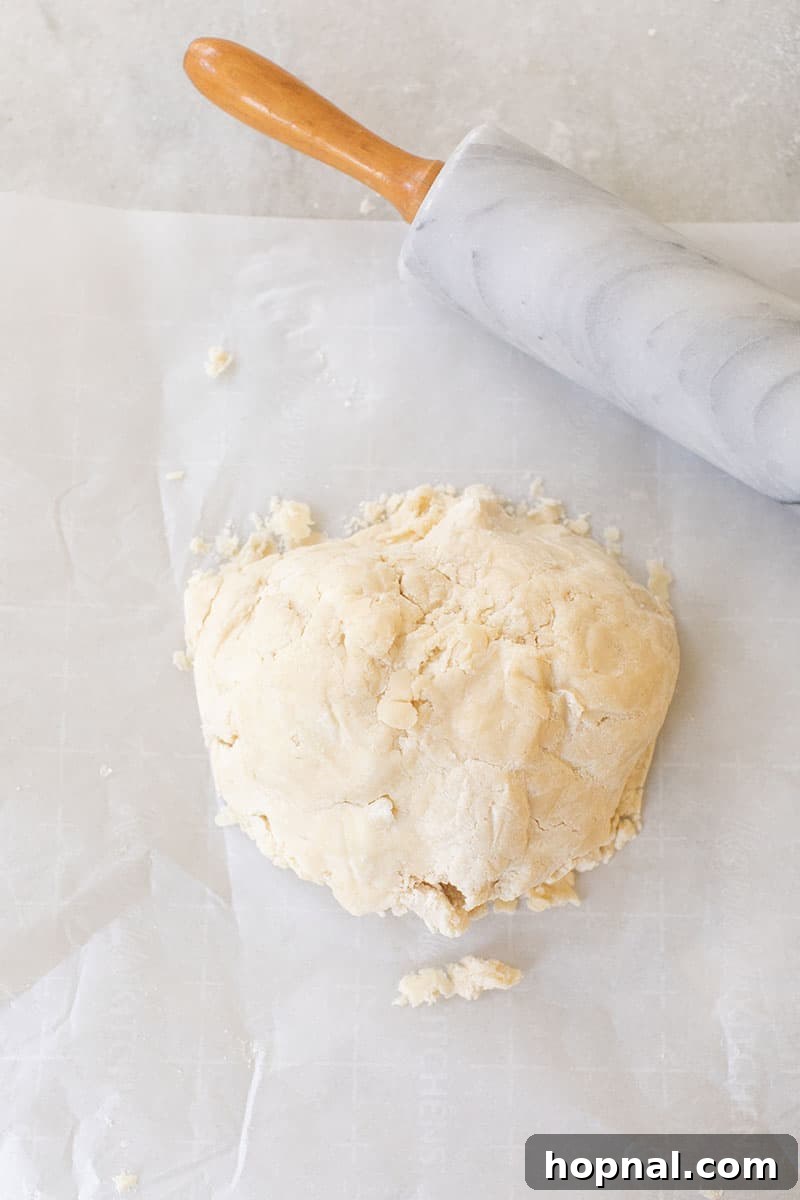
- Form and Chill the Dough Discs: Carefully divide the dough into two equal portions. Gently shape each half into a flat, round disc. It’s important to avoid kneading or overly compacting the dough. Wrap each disc tightly in plastic wrap to prevent it from drying out.
- Refrigerate for Optimal Results: Place the wrapped dough discs in the refrigerator for a minimum of 30 minutes, or ideally for at least an hour. You can even prepare the dough up to 2-3 days in advance and keep it refrigerated. This chilling period is vital as it allows the gluten to relax, makes the fats firm up again, and significantly improves the dough’s workability, ensuring the crust holds its shape beautifully during baking and achieves maximum flakiness.
Expert Tips to Master the Perfect Pie Crust
Achieving a truly outstanding pie crust is within your reach when you adhere to these golden rules. These insider tips are honed from years of baking experience and will guide you to consistent, mouthwatering success.
- Embrace the Cold Imperative: This is arguably the most critical tip in pie making. Every ingredient, from butter to water, and even your mixing bowl, should be as cold as possible. A brilliant pro tip is to chill your flour in the freezer for 15-20 minutes before you even begin mixing. The colder your fats remain during incorporation, the less they melt into the flour, which preserves those crucial fat pockets that will steam and create flakiness in the oven.
- Chill Your Tools Too: Don’t overlook your equipment. Pop your mixing bowl and even your pastry cutter (if you’re using one) into the freezer for 5-10 minutes before you start. This simple extra step significantly helps prevent the dough from warming up too quickly during the mixing process.
- Invest in Quality Ingredients: While you can certainly make a good pie crust with standard ingredients, using high-quality components can elevate your pie from good to truly extraordinary. Brands like King Arthur Flour or Bob’s Red Mill for flour, and Kerrygold Butter or other European-style butters for their higher fat content, are known for their consistency and superior flavor.
- Roll with Precision and Protection: Always use parchment paper or a pastry cloth when rolling out your dough. This prevents sticking to your countertop, allows for easier transfer of the delicate dough, and helps achieve a more uniform thickness. A very light dusting of flour on your rolling surface can also aid, but be mindful not to use excessive amounts, which can dry out the dough and make it tough.
- Don’t Fear Imperfections: Pie crust making should be an enjoyable, stress-free process. If your dough cracks, tears, or breaks while rolling or transferring, do not panic! This crust is incredibly forgiving. Simply use a little ice water to moisten the torn edges and gently press the pieces back together once it’s in the pie dish. Patching is perfectly acceptable and will not negatively affect the final taste or texture.
- The Golden, Inviting Finish: For that irresistible, rich golden-brown hue and a subtle sheen that signals deliciousness, always apply an egg wash to the top crust before baking. A simple egg wash consists of one beaten egg mixed with a tablespoon of water or milk. For an added touch of sweetness and sparkle, you can also sprinkle a little granulated or coarse sugar over the egg wash.
Essential Materials for Mastering Pie Crust
Having the right tools can make the pie-making process significantly smoother, more efficient, and ultimately, more enjoyable. Here’s a list of materials you might find incredibly helpful:
- Rolling Pin: A sturdy, comfortable rolling pin is absolutely essential for evenly rolling out your dough to a consistent thickness. Many bakers prefer a French-style pin (without handles) for its excellent control and feel.
- Pastry Cloth or Parchment Paper: Crucial for preventing your delicate dough from sticking to the countertop and for aiding in the seamless transfer of the rolled-out dough to your pie dish. Parchment paper is widely accessible, easy to use, and disposable.
- Pie Dish: A good quality pie dish is an investment that ensures even baking and a beautiful presentation. Ceramic, glass, or cast iron dishes are often favored for their excellent heat distribution and retention properties.
- Pastry Cutter: While not strictly required (your hands work perfectly well for incorporating fats!), a pastry cutter can make the process quicker and more efficient, helping to keep the ingredients colder, especially if you have warm hands.
- Mixing Bowls: Large, chilled mixing bowls are a must for effectively combining your ingredients without spillage and helping to maintain the cold temperature of your dough.
- Leaf Lard: If you’re keen on experimenting with this traditional and highly-praised fat, ensure you have it on hand.
The Great Fat Debate: Leaf Lard or Crisco?
Choosing the right fat for your pie crust can significantly impact its texture and flavor profile. It’s a debate as old as pie itself, and each option has its distinct merits.
Leaf Lard: The Traditional Choice for Superior Texture
Leaf lard, rendered from the soft, clean fat found around a pig’s kidneys, is widely regarded as the gold standard by many pie purists. It boasts a remarkably neutral flavor profile, an incredibly delicate texture, and contributes to an exceptionally flaky and tender crust. This is precisely the fat we utilized during Kate McDermott’s masterclass, and the resulting crusts were truly phenomenal. However, its primary drawback can be its limited availability, as it’s often harder to source in conventional grocery stores and may require purchasing from specialty butchers or online suppliers.
Crisco (Vegetable Shortening): The Accessible and Reliable Alternative
Crisco, a popular vegetable-based shortening, is readily available in almost any grocery store, making it a highly convenient option. Its notably high melting point is a significant advantage, as it contributes to a very flaky crust by staying solid longer during the mixing process and creating distinct, separate layers in the oven. While some traditionalists might hesitate to use it, I can personally attest to using Crisco several times when leaf lard wasn’t accessible, and the resulting pie crusts consistently turned out wonderfully flaky and delicious. It’s a reliable, no-fuss option that ensures excellent results without special sourcing.
The Verdict: If you have access to high-quality leaf lard, I wholeheartedly recommend trying it for an authentic and superior texture experience; consider it an exciting experiment in culinary tradition! However, if convenience, consistent results, and ease of access are your priorities, Crisco is a perfectly acceptable and highly effective substitute that will still yield a fantastic pie crust. Many quality brands of leaf lard can also be found online from artisanal farmers or specialty food retailers.
Why We Use Two Fats in Our Pie Crust: The Best of Both Worlds
Our recipe ingeniously combines both butter and lard (or shortening) to achieve the ultimate pie crust. This dual-fat approach is a deliberate strategy that allows us to harness the unique and complementary benefits of each type of fat:
- Butter for Unbeatable Flavor: Butter is absolutely indispensable for its rich, distinctively dairy-forward flavor that permeates every bite of the crust, giving it that luxurious, melt-in-your-mouth quality. It adds a depth and complexity of taste that simply cannot be replicated by other fats alone.
- Lard/Shortening for Superior Texture: The lard or shortening, with its higher melting point and unique fat composition, is the secret to achieving that coveted, incredibly flaky and tender texture. It creates distinct layers within the dough by staying solid longer during baking, resulting in a light, airy, and wonderfully delicate bite.
By using a generous amount of butter primarily for its exquisite flavor, and a smaller, strategic quantity of lard or shortening for its unparalleled textural contributions, we create a perfectly balanced pie crust. This ensures you get the best of both culinary worlds: unbeatable taste and an unparalleled flaky, tender structure.
Mastering the Mixing: The Key to Tender Dough
The mixing stage is absolutely crucial for developing a tender, flaky pie crust. It demands both speed and an unwavering commitment to keeping everything cold. From your mixing bowl to your hands, aim for the lowest possible temperature. The colder your ingredients and tools remain throughout the process, the less the butter and lard will melt prematurely, which is vital for preserving those essential pockets of fat that create flakiness.
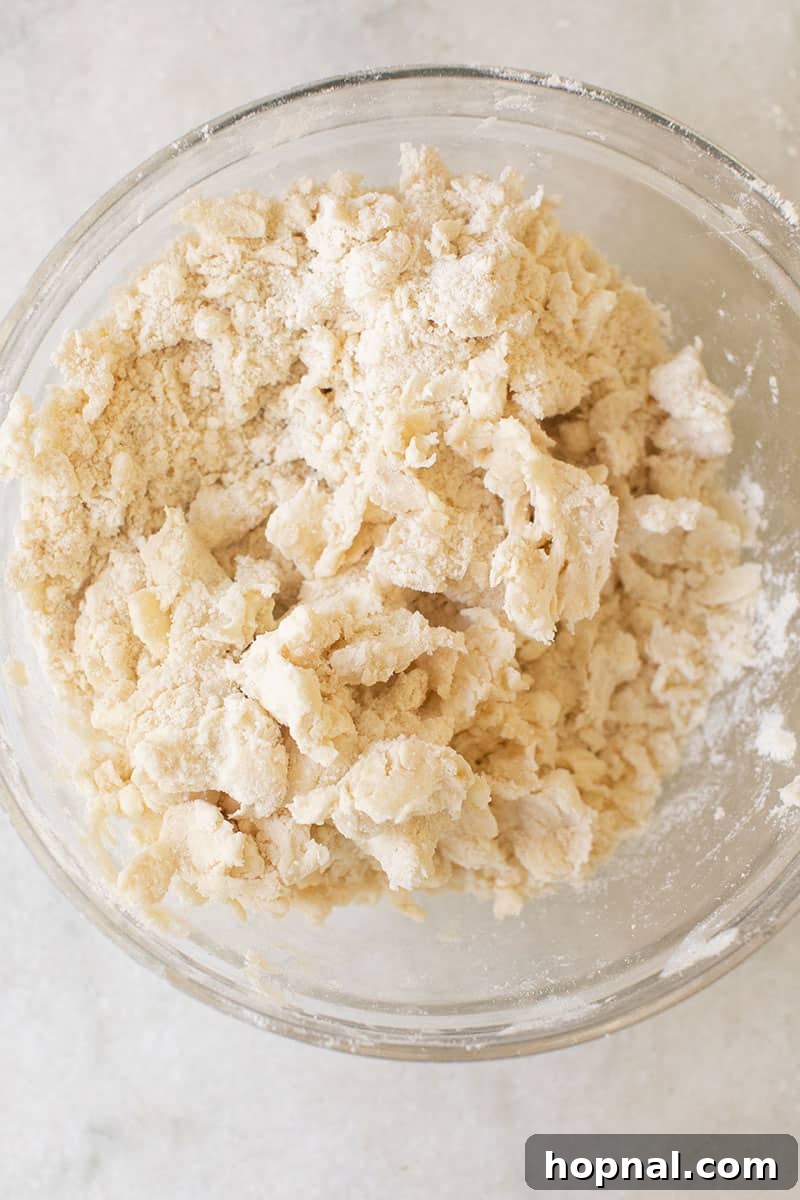
Once your cold fats and dry ingredients are in the chilled bowl, work quickly using either your hands or a pastry cutter. Your primary goal is to break down the fats until the mixture generally resembles small, pea-sized crumbs, with some larger, flattened pieces of butter still distinctly visible. This is the ideal consistency for developing maximum flakiness. The dough should never appear fully homogenous or smooth like traditional cookie dough; instead, it will have a distinctly crumbly, shaggy, and somewhat dry texture. If the dough feels too dry and isn’t coming together when gently squeezed, add a tiny bit more ice water, one teaspoon at a time, until it just barely holds when pinched. Remember, minimal handling is always best to prevent warming the dough and developing too much gluten, which can lead to a tough crust.
How to Roll Out Pie Dough Like a Pro
Once your perfectly mixed dough has completed its essential chilling period, it’s time for the next exciting step: rolling it out. This process requires a gentle touch, a bit of finesse, and some key techniques to ensure an even, beautifully shaped crust.
- Initial Chill and Gentle Softening: After dividing the dough into two round discs and chilling, remove one disc from the refrigerator. If it feels extremely firm and resistant, let it rest at room temperature for just a few minutes (3-5 minutes, no more). This will allow it to soften ever so slightly, making it more pliable and less prone to cracking as you roll.
- Prepare Your Rolling Surface: Lightly dust your chosen rolling surface – a pastry cloth or a large sheet of parchment paper works best – with a handful of all-purpose flour. Place one unwrapped disc of chilled dough directly onto this floured surface.
- Roll with Even Pressure: Using a rolling pin, begin rolling the dough from the center outwards, applying even, gentle pressure. Periodically rotate the dough (and the parchment paper beneath it) a quarter turn to ensure you are rolling an even circle and prevent sticking. Aim for a consistent thickness of about 1/8 to 1/4 inch. Your rolled-out circle should be roughly 1 1/2 to 2 inches larger in diameter than the pie dish you intend to use; this allows for sufficient overhang needed for crimping and creating a decorative edge.
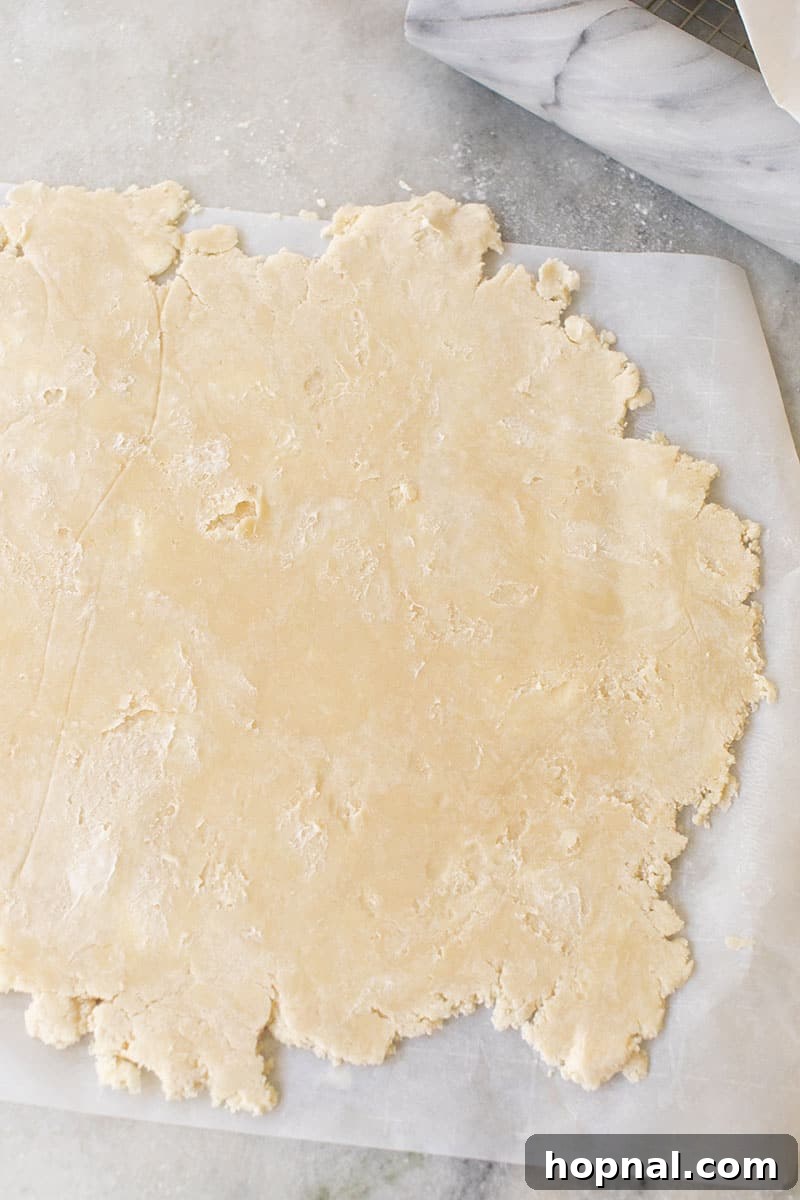
Once your dough is rolled to the desired size and thickness, it’s time for the crucial step of transferring it to the pie dish. This can often seem daunting, but with a simple, confident technique, it’s a breeze:
- Effortless Transfer to Dish: Gently lift the parchment paper or pastry cloth (with the dough still on it) and, in one swift, fluid motion, invert it over the center of your pie pan. Alternatively, a common and effective method is to loosely roll the dough around your rolling pin, then carefully unroll it directly over the pie dish, allowing it to gracefully drape into place.
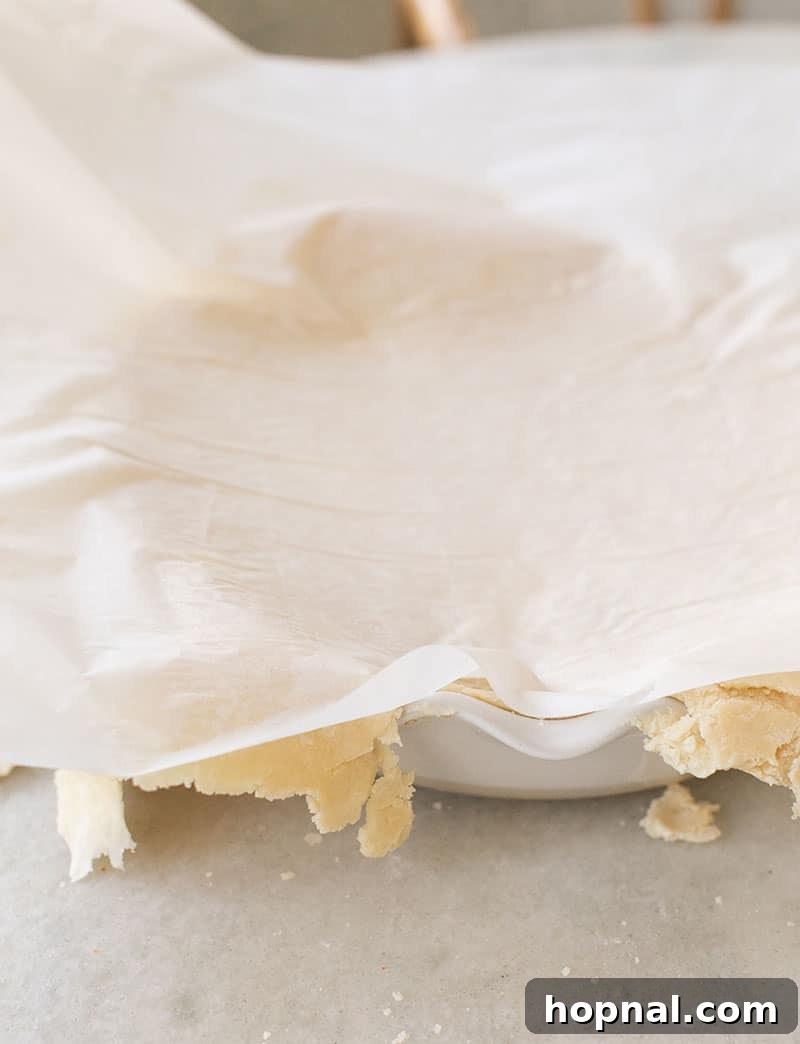
The second dough disc can be rolled out using the exact same method to create a top crust, if your specific pie recipe calls for one. Depending on the type of pie, you might choose to craft an intricate lattice design, employ charming decorative cutouts, or simply create a classic, fully covered top for a traditional apple pie.
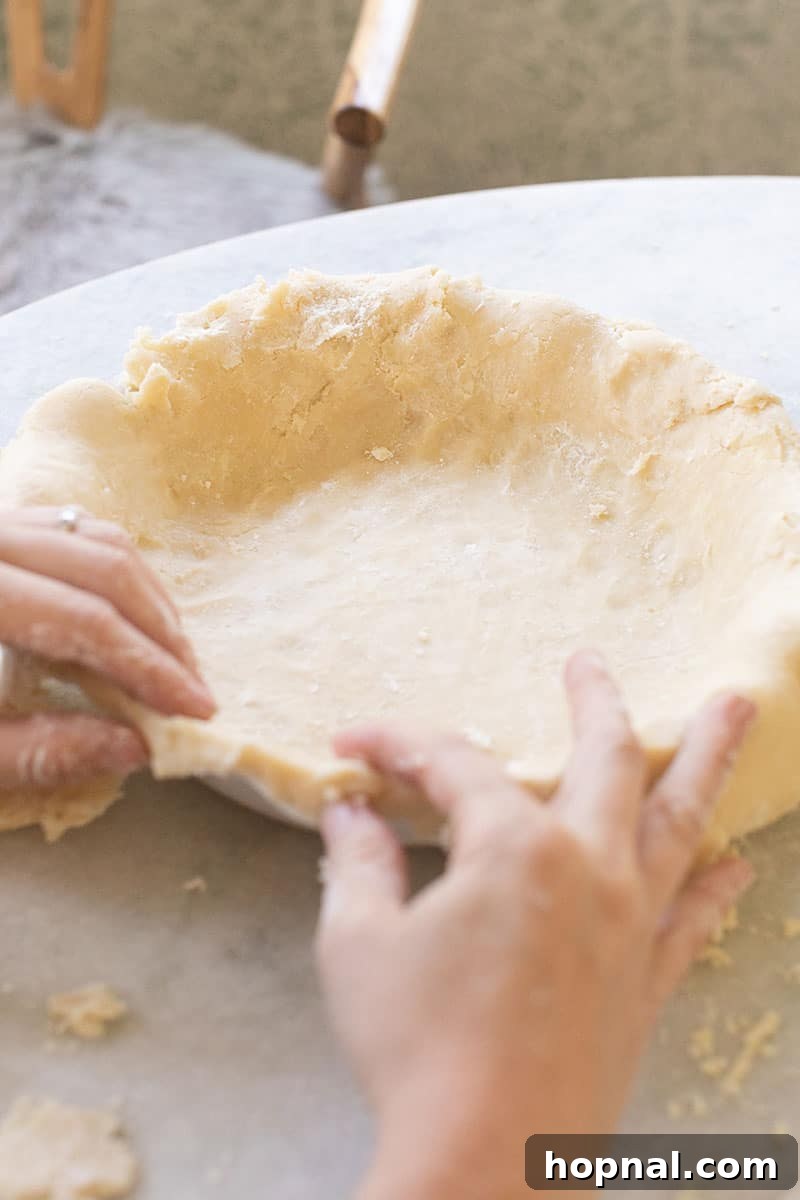
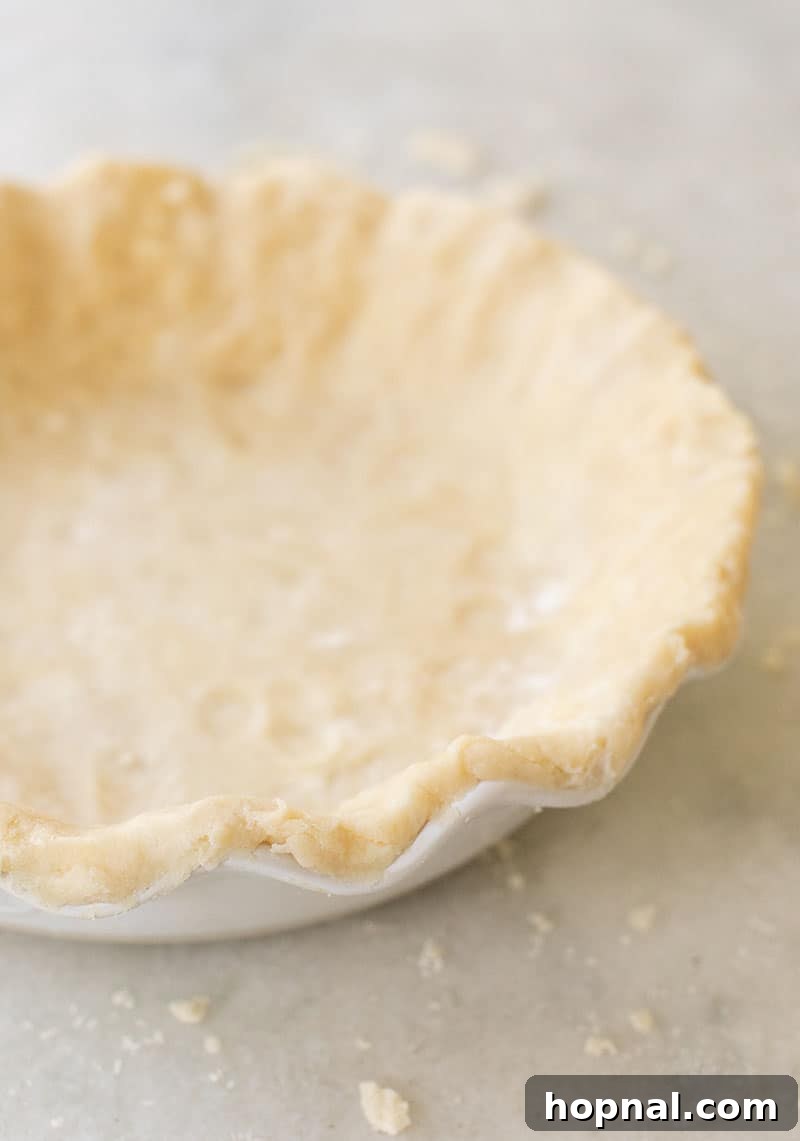
After successfully transferring the dough, carefully peel away the parchment paper. Begin gently pressing the dough down into the contours of the pie dish, ensuring there are no hidden air bubbles trapped underneath. Next, start pinching and shaping the edges. Trim away any significant excess dough that hangs too far over the rim of the dish to create a clean base for your crimp.
Don’t worry even for a second if the dough breaks or tears at this stage! This truly is an incredibly forgiving dough. Simply moisten your fingertips with a tiny bit of ice water and gently press the torn pieces back together. The dough will seamlessly patch up without compromising the final taste or texture of your baked pie. I personally love using my fingers to create a beautiful, classic decorative crimped edge, but you can also use the tines of a fork or other specialized tools for different designs.
Finally, for a stunning golden-brown finish and a touch of professional flair, always apply an egg wash (typically a single whisked egg with a splash of milk or water) over the entire crust, or just the top crust, before baking. This simple yet effective step makes all the difference in the visual appeal and can contribute to a slightly crispier texture.
Can I Make the Pie Crust in Advance? Absolutely!
One of the many wonderful benefits and time-saving features of this particular pie crust recipe is its incredible versatility for make-ahead preparation. You can effortlessly complete all the messy work well in advance, leaving you with a perfectly ready-to-bake pie shell precisely when you need it most, whether for a spontaneous dessert or a holiday feast.
- Refrigeration: Once you’ve formed the dough into tidy discs and wrapped them tightly in plastic wrap (or beeswax wrap), they can be conveniently stored in the refrigerator for up to 3 days. This is an ideal solution for preparing ahead for busy holidays, dinner parties, or special occasions, allowing you to spread out your baking tasks.
- Freezing for Longer Storage: For extended storage, you can easily freeze your tightly wrapped and airtight-sealed dough discs for up to 3 months. When you’re ready to use them, simply transfer the frozen discs to the refrigerator to thaw slowly overnight. Once thawed, let them sit at room temperature for just a few minutes (5-10) before attempting to roll them out to restore their pliability.
Having pre-made pie crusts on hand in your fridge or freezer is an absolute game-changer, empowering you to whip up a delicious homemade pie with minimal effort and stress on actual baking day!
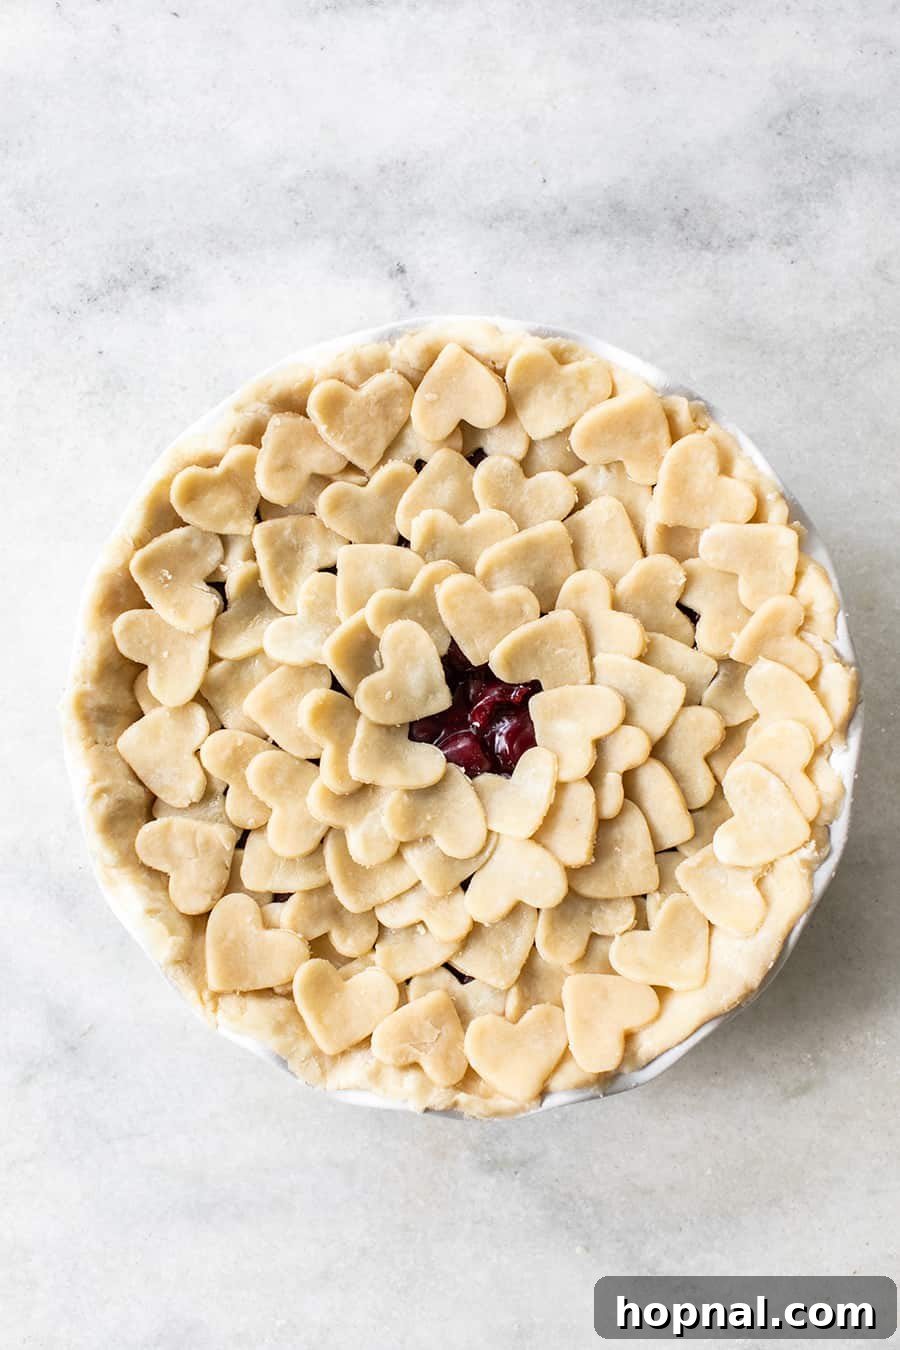
Investing in the Best Pie Dishes
A quality pie dish can significantly impact how your pie bakes, browns, and ultimately presents. While not overly expensive, a good pie dish is often a lifelong investment that will serve you well for countless baking adventures. Here are a few favorites that consistently deliver even baking and beautiful results:
- Staub Ceramic Pie Dish with Handles: Renowned for its exceptional heat distribution and superior heat retention, ensuring a perfectly cooked and evenly browned crust every time. The integrated handles also make it incredibly easy to transport from oven to table.
- Emile Henry Made in France Pie Dish: A classic and highly-regarded choice, celebrated for its superior ceramic craftsmanship. These dishes promote consistent baking, produce a wonderfully crisp crust, and offer an elegant presentation for any occasion.
- Williams Sonoma Gold Touch Pie Dish: An excellent option for those who prefer metal bakeware. Its commercial-grade nonstick coating ensures effortless pie release, and the distinctive gold touch finish is designed to promote even heat distribution and beautiful golden-brown results.
- Williams Sonoma Stoneware Pie Dishes (set of 3): A fantastic value set, offering versatile options for baking different pie sizes or for preparing multiple pies simultaneously. Stoneware provides excellent heat retention, which is key for a well-baked bottom crust.
The Perfect Gift: Thoughtful Pie Boxes!
If you’re planning to share your magnificent homemade pies as gifts or take them to gatherings, presentation truly matters! We absolutely adore these elegant pie boxes! They’re not only incredibly practical for safe and secure transport but also add a charming, professional touch to your thoughtful culinary creation, making your gift even more special.
Delightful Pie Recipes You’ll Love to Try with Your New Crust!
Now that you’ve mastered the art of creating the perfect foolproof buttery pie crust, it’s time to put your magnificent creation to use! This versatile crust serves as an ideal foundation for an extensive array of fillings, from lusciously sweet desserts to hearty savory options. Here are some of our absolute favorite pie recipes that will truly shine when encased in your homemade, flaky crust:
- The Best Classic Cherry Pie Recipe: Experience a burst of vibrant, sweet-tart cherry filling that truly sings in harmony with a flaky, buttery crust. A timeless favorite!
- Silky Smooth Egg Custard Pie: A comforting, creamy, and subtly sweet pie where the delicate tenderness of the crust is just as vital as the rich, comforting filling.
- Decadent Pumpkin Pecan Pie: A quintessential holiday favorite that ingeniously combines the earthy sweetness of pumpkin with the rich, buttery crunch of pecans, all deliciously encased in your magnificent homemade crust.
We’d absolutely love to hear about your experience making this incredible foolproof buttery pie crust! Please feel free to leave a comment and review below to let us know how it turned out for you. Your valuable feedback inspires us and helps other aspiring bakers in our community. Happy baking, and may all your pies be perfectly golden, flaky, and utterly delicious!
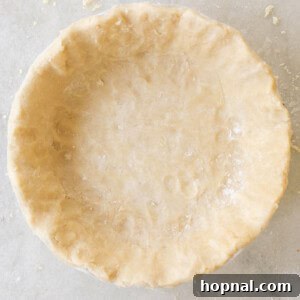
Perfect and Easy Buttery Pie Crust
Print Recipe
Equipment
-
9-inch Pie Dish
-
Rolling Pin
-
Large Mixing Bowls (preferably chilled)
-
Pastry Cutter (optional, hands work effectively)
-
Parchment Paper or Pastry Cloth
-
Plastic Wrap
Ingredients
- 2 1/2 cups all-purpose flour , very cold (can chill in freezer for 15 minutes)
- 1 tsp fine sea salt
- 1 tbsp granulated sugar , optional, but enhances flavor and browning
- 1/2 pound unsalted butter, (2 sticks); cut into 1/2-inch cubes and kept very cold
- 1/4 cup leaf lard or vegetable shortening , extremely cold
- 1/3 cup ice water, plus extra, by the teaspoon, if needed
- 1 large egg , whisked with 1 tbsp milk or water for egg wash (optional)
Instructions
-
Chill your large mixing bowl for 5-10 minutes in the freezer. In the chilled bowl, combine the very cold flour, sugar (if using), and salt. Whisk briefly to ensure all dry ingredients are well combined.
-
Add the cubed cold butter to the dry flour mixture. Using your hands (work quickly and efficiently!) or a chilled pastry cutter, blend the butter into the flour until some pieces are flattened and resemble small almonds, while others are pea-sized crumbs.
-
Next, add the cold lard or shortening. Continue to work it into the mixture with your fingertips or pastry cutter until most of the fat pieces are uniformly pea-sized. The mixture should appear coarse and crumbly, not like a smooth dough.
-
Gradually add the ice water, starting with 1/3 cup, one tablespoon at a time. After each addition, gently toss the dough with your hands or a fork. Add just enough water for the dough to barely come together; it should feel shaggy and slightly dry but hold together when pinched. Avoid overmixing.
-
Divide the shaggy dough into two equal portions. Gently form each portion into a flat, round disc (do not knead or overwork). Wrap each disc tightly in plastic wrap to prevent drying.
-
Refrigerate the dough discs for at least 30 minutes, or ideally for 1 hour, up to 3 days. This chilling period is crucial for relaxing the gluten and firming the fats. For longer storage, freeze for up to 3 months.
-
When ready to use, remove one dough disc from the refrigerator. Let it sit at room temperature for 5-10 minutes until it becomes slightly more pliable and easier to roll without cracking.
-
Lightly flour a pastry cloth or a large sheet of parchment paper. Roll the dough out evenly with a rolling pin until it is about 1/8 to 1/4 inch thick and 1.5 to 2 inches larger in diameter than your pie dish.
-
Carefully transfer the rolled dough into the pie dish. You can do this by gently draping it over your rolling pin or by lifting the parchment paper and inverting it over the dish. Press the dough gently into the bottom and sides of the dish, ensuring no air pockets.
-
Trim any excess dough, leaving about a 1/2-inch overhang. Fold the overhang under, then crimp or decoratively shape the edges of the crust. If the dough cracks or tears, moisten your fingertips with a tiny bit of ice water and gently press to patch.
-
If the dough feels warm or becomes difficult to handle after shaping, place the entire pie dish with the crust back into the refrigerator for another 10-15 minutes to re-chill before adding filling or blind baking. This crucial step helps prevent the crust from shrinking during baking.
-
To cook the pie crust, follow the specific instructions of your chosen pie filling recipe. Some recipes require pre-baking (also known as blind baking) the crust first, while others do not.
-
For a beautiful golden-brown finish and a slight sheen, brush the crust with an egg wash (one beaten egg mixed with 1 tablespoon of water or milk) before placing it in the oven to bake.
Notes
Remember the “cold rule”: keep ALL ingredients, especially the flour, butter, and water, as cold as possible throughout the entire pie-making process for best results.
Don’t stress if the crust cracks, tears, or seems crumbly while you’re working with it; this is a very forgiving dough! Simply use a little ice water to moisten and gently patch it back together.
This stress-free pie crust is not only incredibly tasty but also delivers perfect, flaky results every single time – making it your ideal choice for all your pie-baking adventures!
Nutrition Information (per serving, approximate)
Carbohydrates: 119g
Protein: 17g
Fat: 94g
Saturated Fat: 58g
Cholesterol: 244mg
Sodium: 18mg
Potassium: 194mg
Fiber: 4g
Sugar: 1g
Vitamin A: 2834IU
Calcium: 51mg
Iron: 7mg
Nutrition information is automatically calculated and should only be used as an approximation. Values can vary significantly based on specific ingredients, portion sizes, and preparation methods.
Enjoyed this recipe? Please leave a comment and review below!Your feedback helps other bakers and aspiring pie makers in our community.