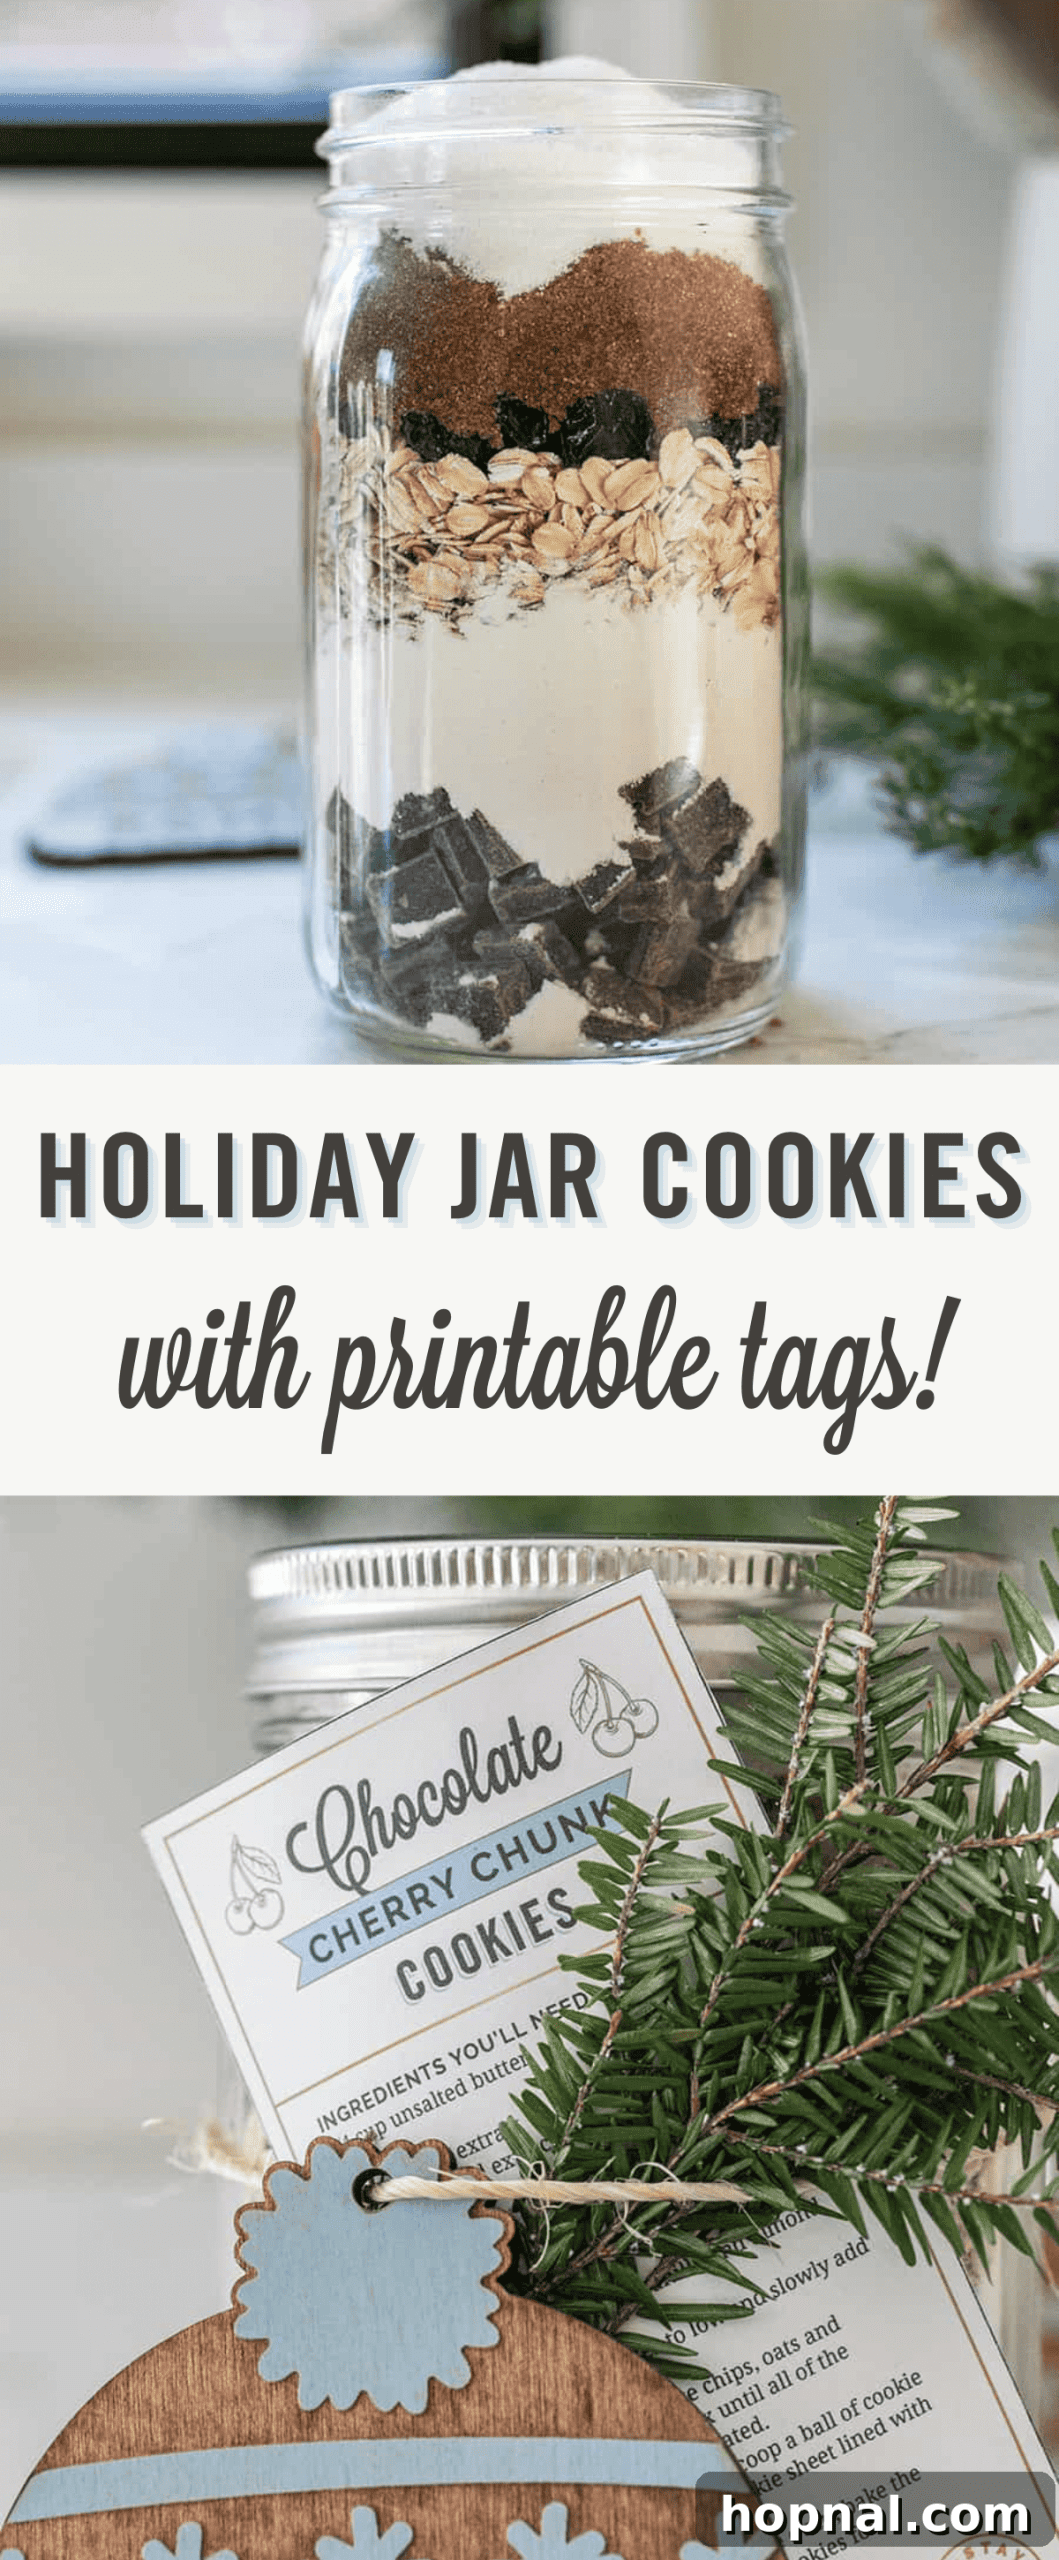
The holiday season, with its crisp air and festive lights, wouldn’t be complete without the heartwarming aroma of freshly baked cookies. While store-bought treats have their place, there’s an undeniable magic in a homemade gift, especially when it comes with love and thoughtfulness. This year, elevate your gifting game with delightful **Holiday Jar Cookies** – a charming, easy, and incredibly personal present that keeps on giving. This comprehensive guide provides everything you need to assemble the best cookie mix jars, featuring two beloved recipes and even complimentary printable labels to perfect your presentation.
We’ve meticulously adapted two of our most celebrated cookie recipes, transforming them into convenient and visually appealing holiday cookie mixes in a jar. These aren’t just ingredients; they’re an experience, ready for your friends and family to bake and enjoy warm from their ovens, bringing a touch of your kitchen’s magic directly to theirs this festive season.
Why Homemade Cookie Mix Jars Make the Perfect Holiday Gift
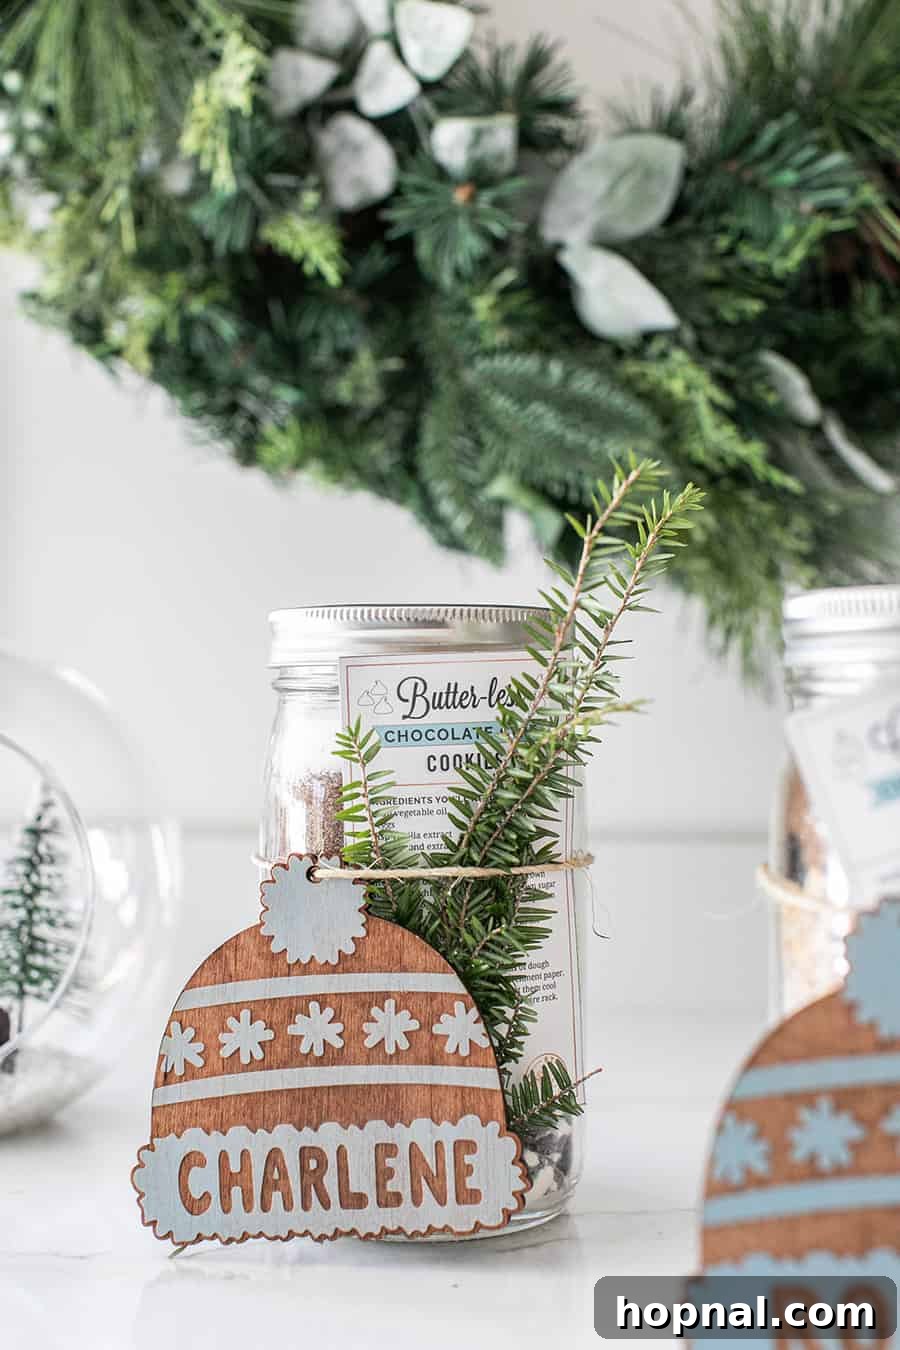
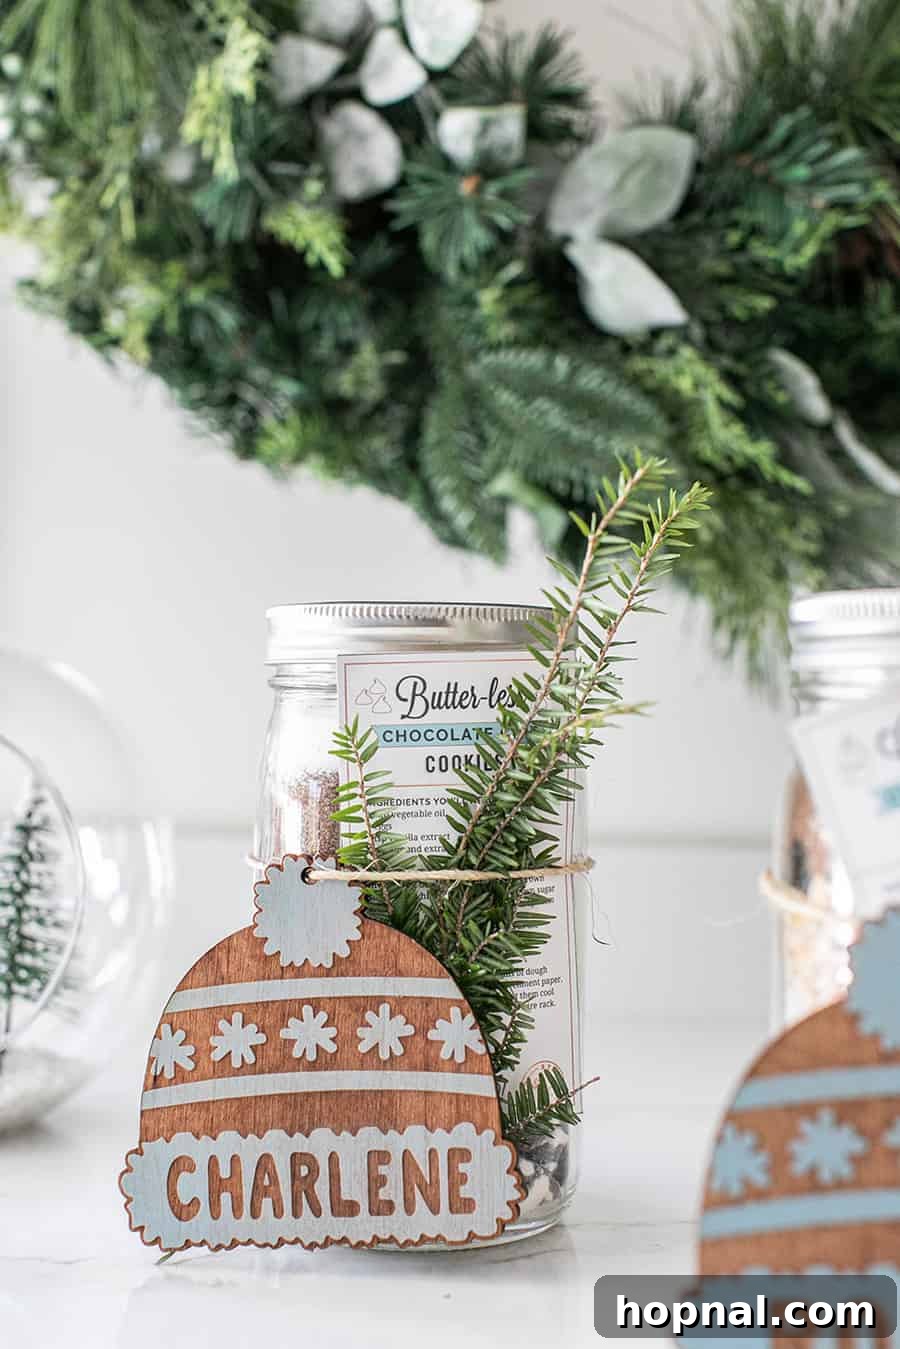
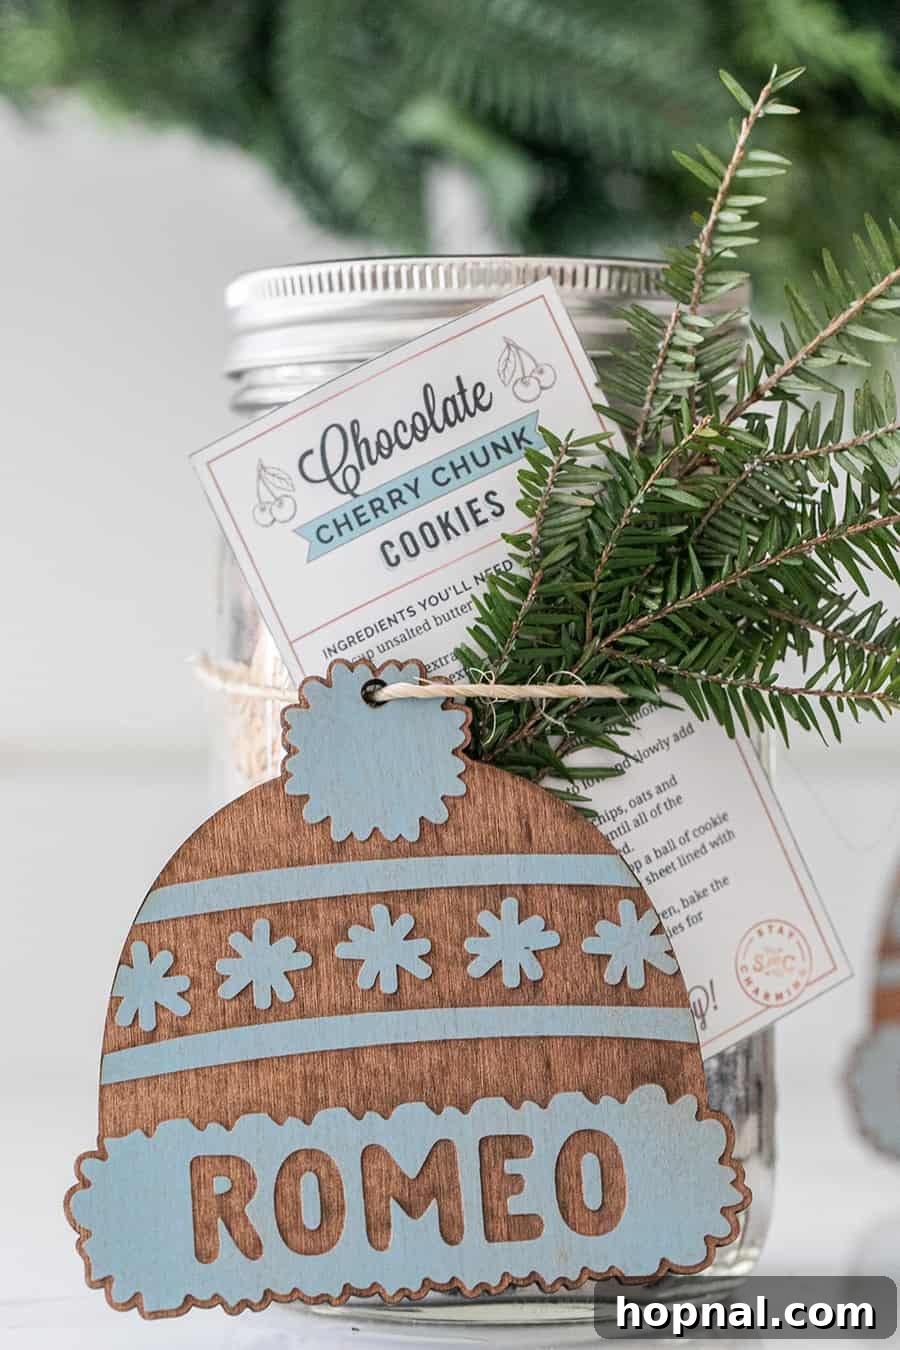
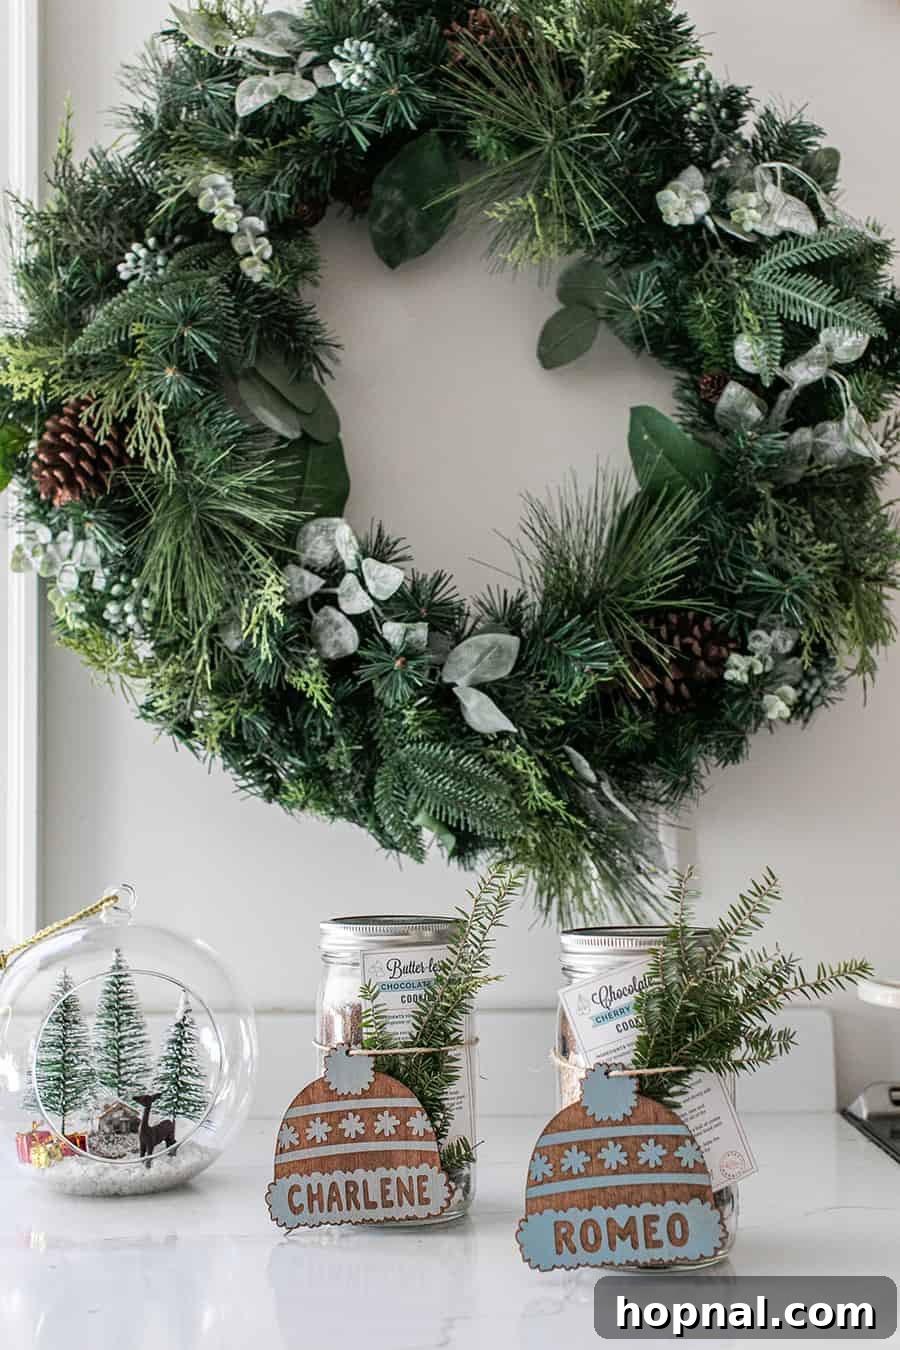
Searching for a unique and memorable holiday gift for friends, family, or even coworkers? Our carefully crafted cookie jars are a fantastic solution. Each 32oz wide-mouth Ball jar is not merely filled; it’s a testament to sweetness, with ingredients precisely measured and lovingly layered to the brim. Beyond the delicious promise inside, each jar becomes a work of art, adorned with a charming, personalized wooden Christmas tree ornament, tied elegantly with natural twine, and completed with a practical printable tag containing clear baking instructions.
Creating these cookie mix jars is an absolute joy. It’s a whimsical experience, reminiscent of childhood days spent layering vibrant colors and textures. But the fun doesn’t stop with making them; the true beauty of cookie jars lies in their customizable nature. Imagine tailoring each jar to the specific tastes of your loved ones: does Grandma adore raisins? Include a generous sprinkle! Does a friend have a penchant for crunchy walnuts? Layer those in too! This personal touch transforms a simple gift into a deeply cherished gesture.
Furthermore, these gifts truly keep on giving. Every time a recipient opens one of your beautifully prepared jars and bakes a fresh batch of cookies, they’ll be reminded of your thoughtful generosity and the warmth of the holiday spirit you shared. It’s more than just a mix; it’s an invitation to create, share, and enjoy precious moments.
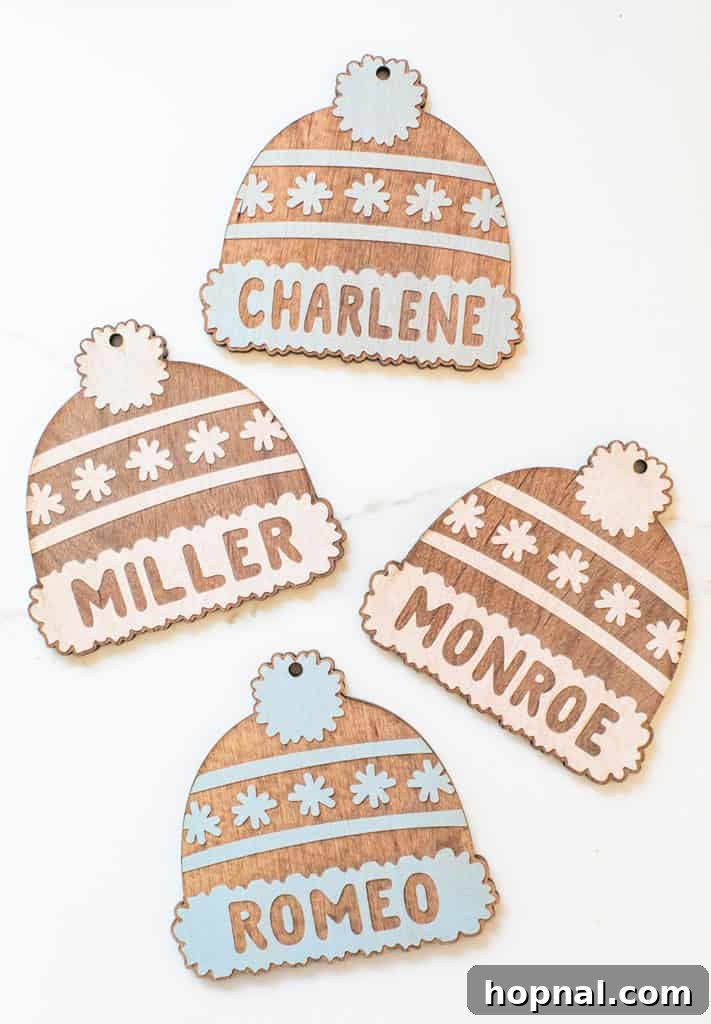
For an extra special touch, we wholeheartedly recommend including the personalized wooden ornaments. These small additions infuse each jar with an irreplaceable touch of character and charm, making your gift stand out and become a treasured keepsake long after the cookies are gone.
Crafting Your Cookie Mix Jars: A Simple Guide
Cookies in a jar are an exceptionally easy and gratifying gift idea, especially perfect for the busy holiday season. The process is straightforward: using our carefully developed recipes below, you will layer all the dry ingredients, including delightful chocolate chips or other mix-ins, into spacious glass jars. This preparation means the lucky recipient only needs to gather a few wet ingredients, mix everything together, and bake! It’s baking made incredibly simple, allowing them to enjoy warm, homemade cookies with minimal effort.
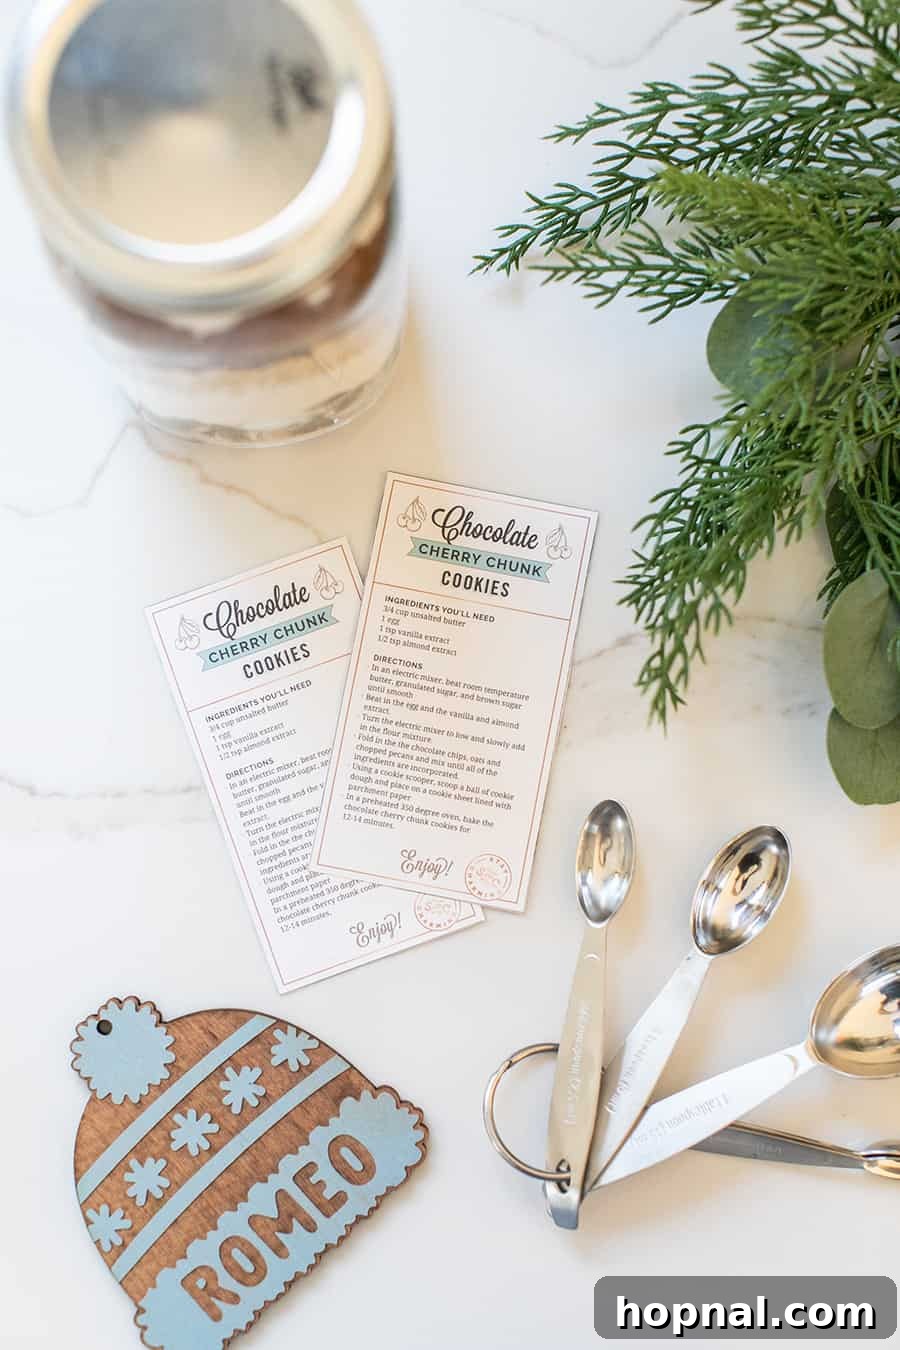
A crucial element of this gift is our set of printable recipe tags, which you’ll find available for download further down this page. These tags are essential as they provide the recipient with a clear list of the wet ingredients needed and step-by-step instructions on how to prepare and bake the cookies. Do not forget to print these tags and securely tape or tie them to each jar; they are the key to ensuring a successful and enjoyable baking experience for your friends and family.
Expert Tips for Layering Dry Ingredients
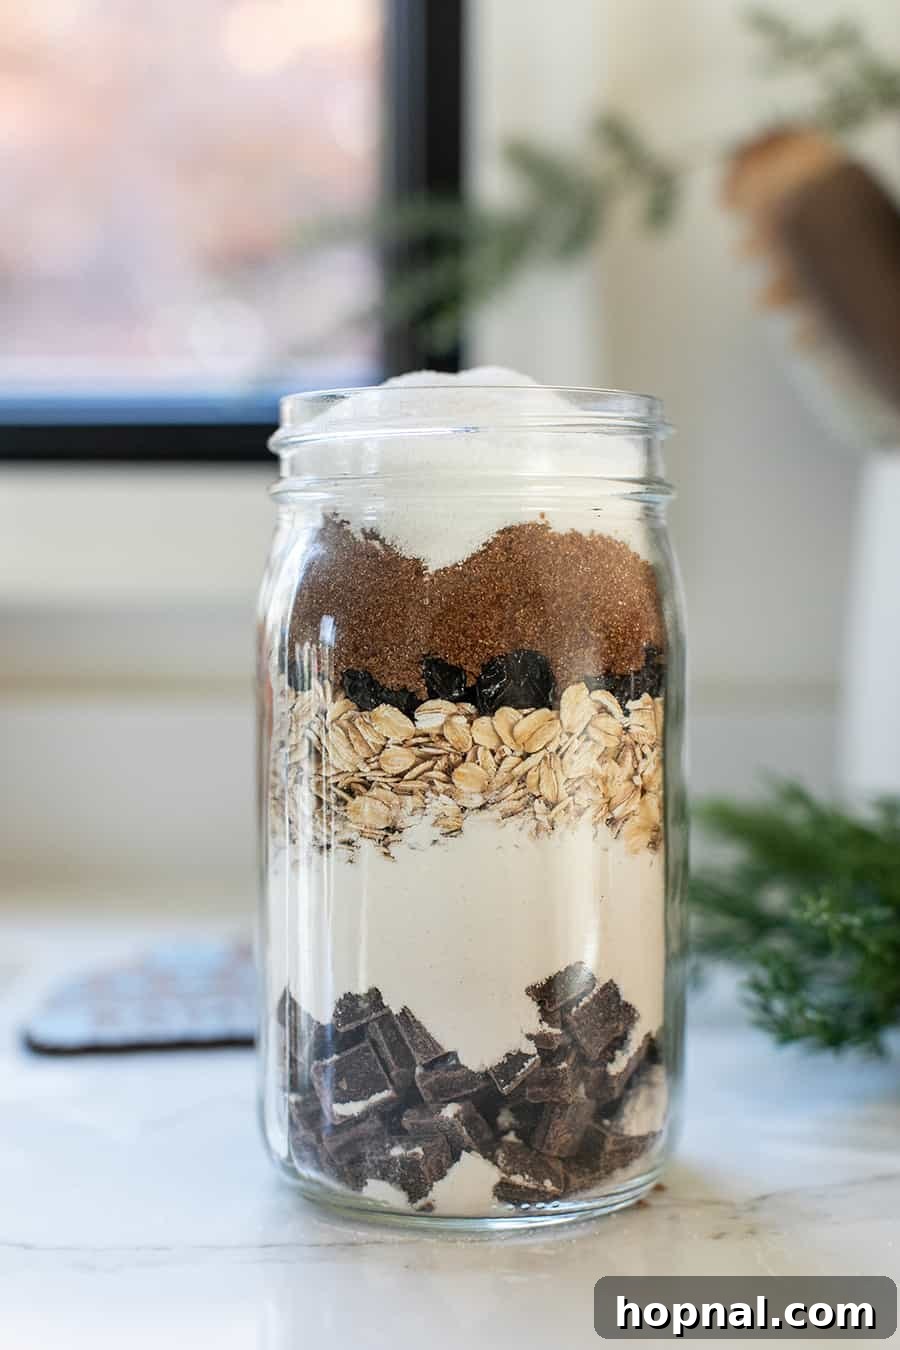
The art of creating an attractive and functional cookie mix jar lies in the layering technique. To ensure the recipient can easily follow the recipe, you’ll work backward when filling your jar. The ingredients that are typically used last in a cookie recipe should be placed at the very bottom of the jar, meaning they are the first to be added during assembly. Here’s a detailed breakdown:
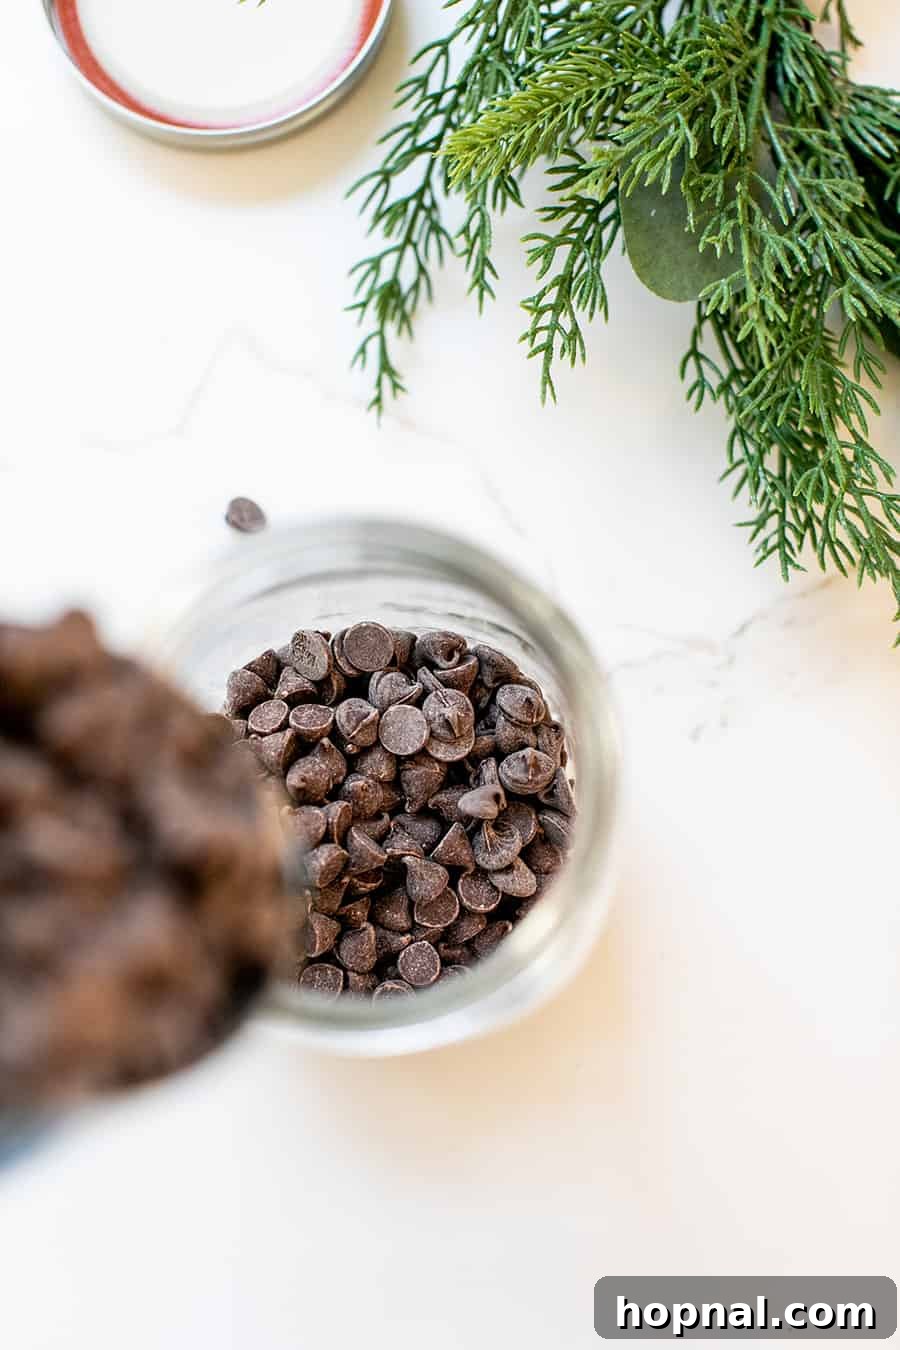
Chocolate chips, along with any other nuts or dried berries, are almost always folded into cookie dough last. Therefore, these delightful additions should form the first layer at the bottom of your jar. This strategic placement allows the recipient to scoop out each dry ingredient layer by layer into their mixing bowl, concluding perfectly with the chocolate chips and other chunky mix-ins.
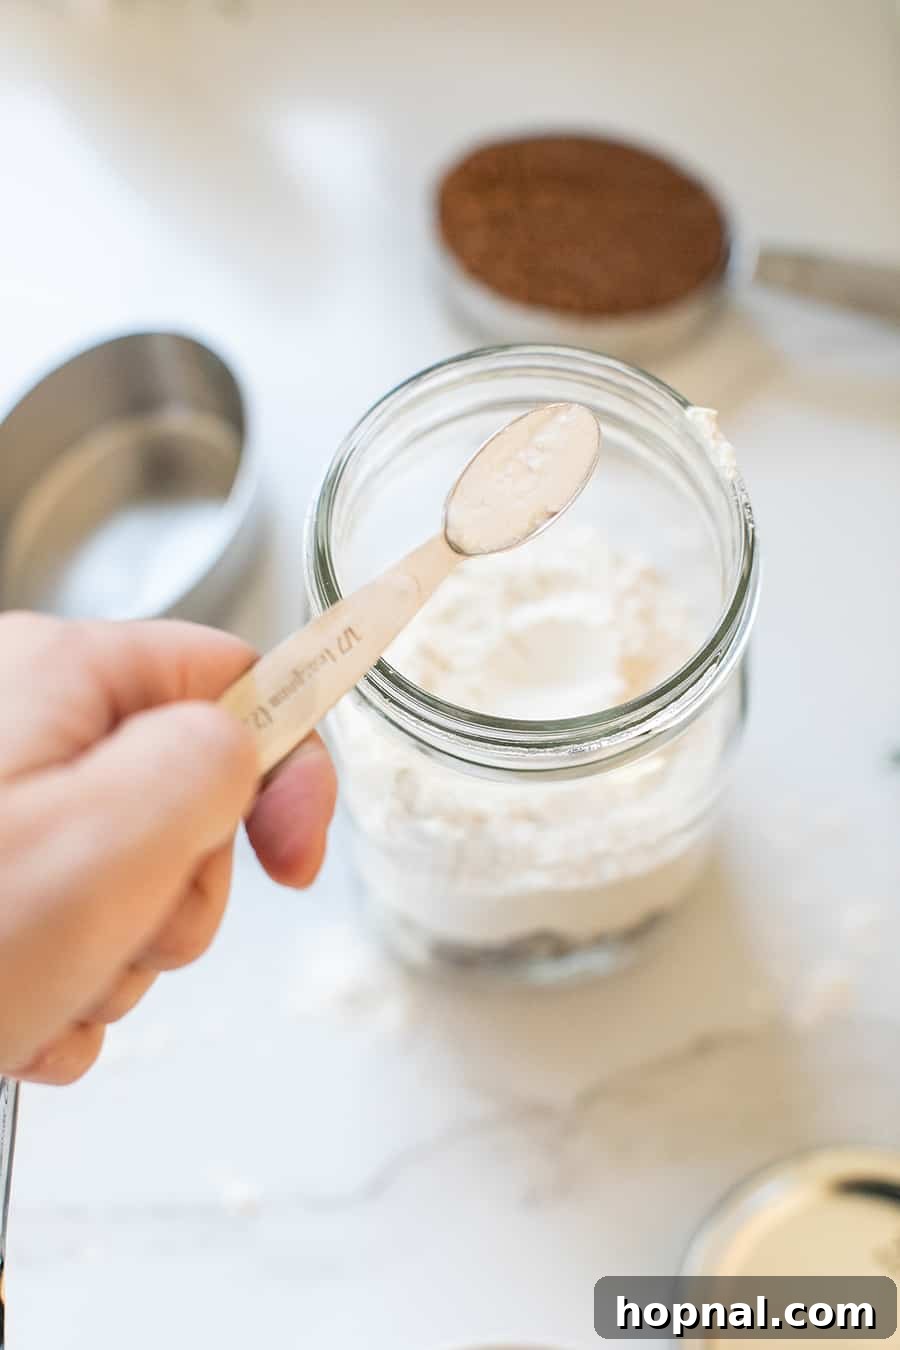
The next dry ingredients typically called for are flour and, in some recipes, oats (as is the case with our delicious Chocolate Cherry Chunk cookies). So, a carefully measured combination of flour, baking soda, baking powder (if used), and salt should be gently layered directly over the chocolate chips. Ensure this layer is compact to maintain separation.
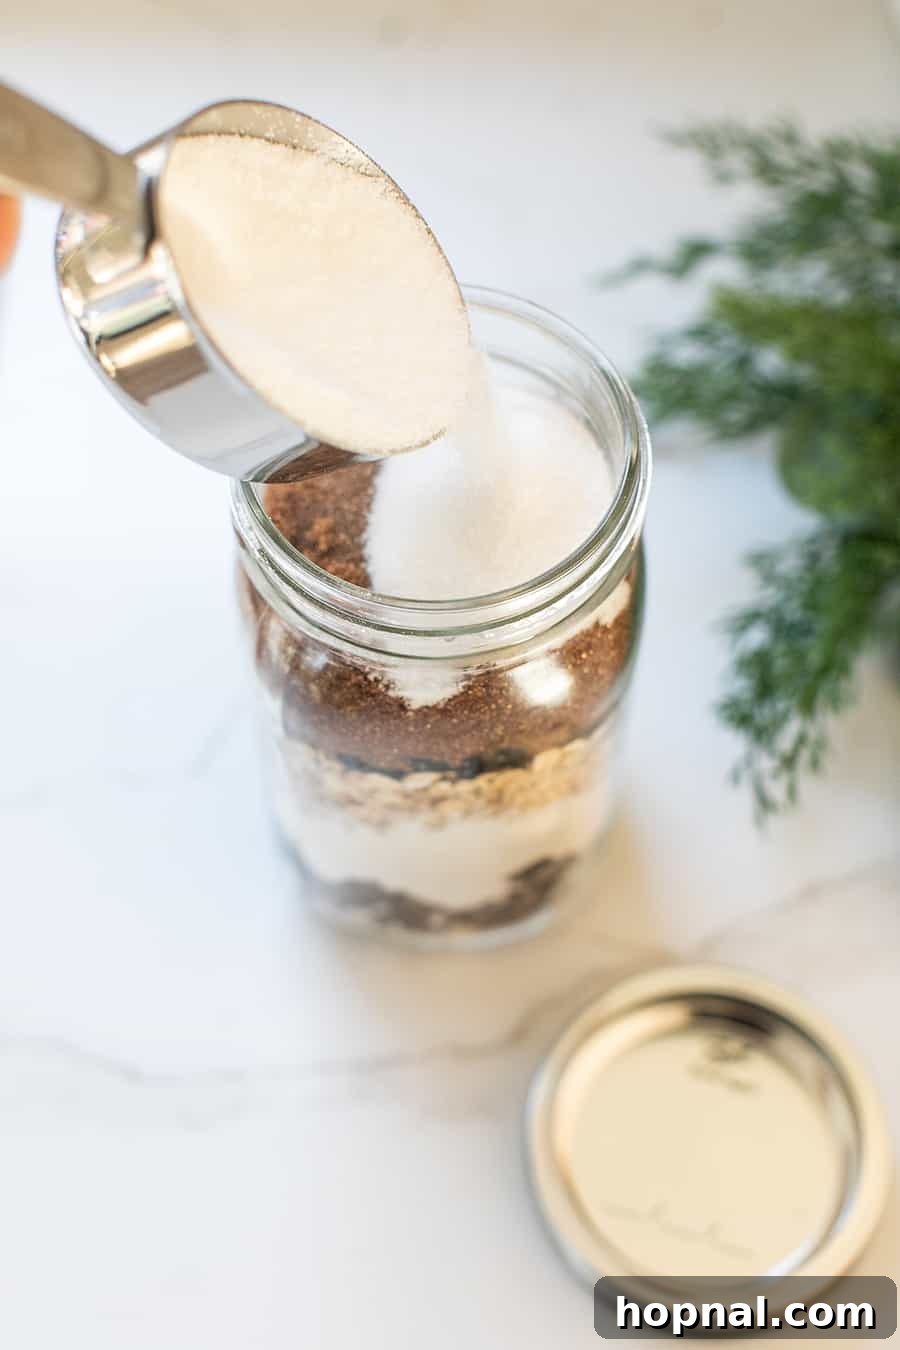
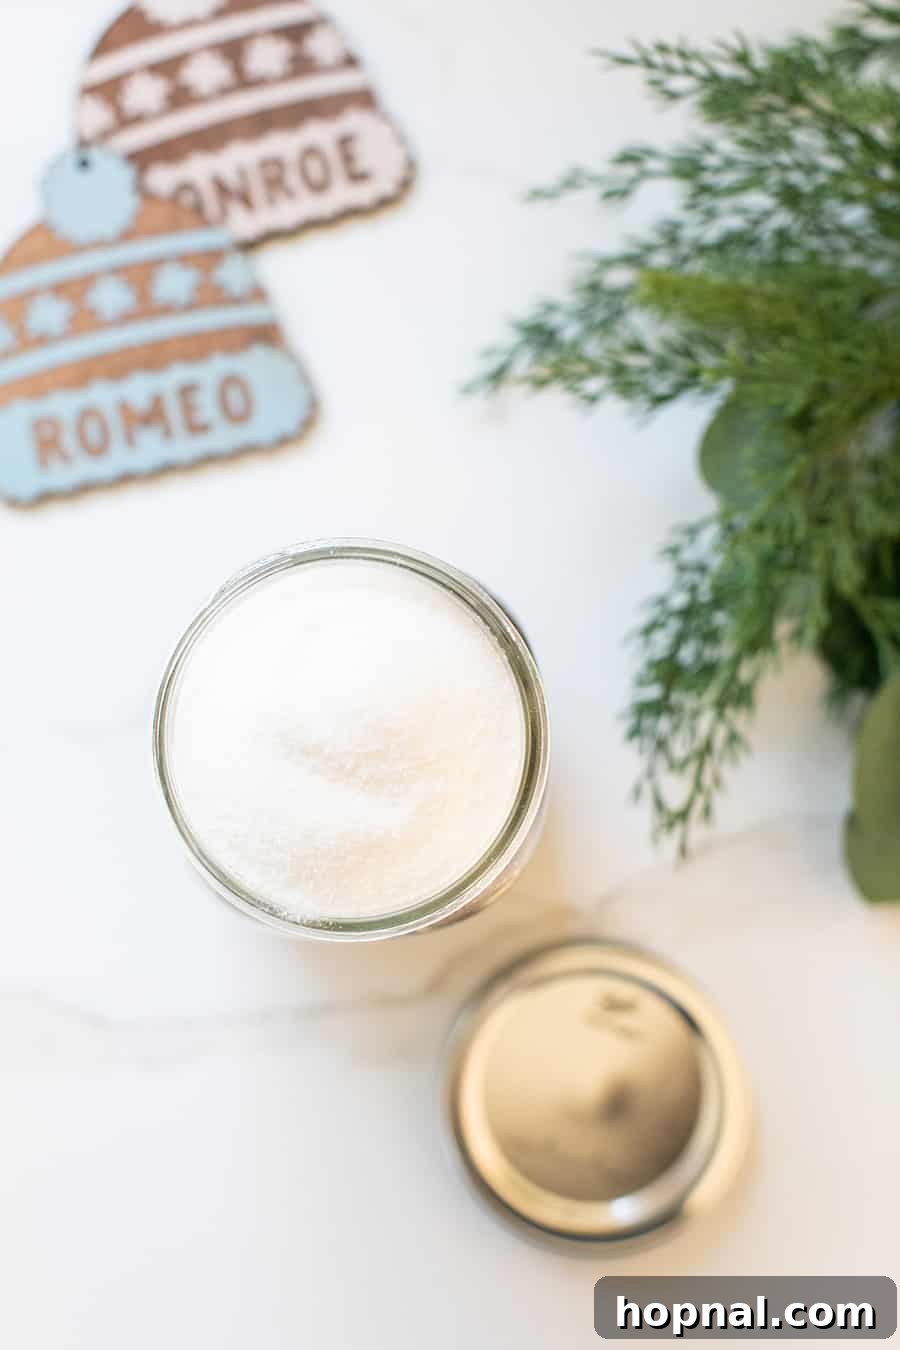
Finally, the very first dry ingredient to go into a mixing bowl when preparing cookies is usually the sugar, whether it’s brown or granulated. This means your sugar layers should be positioned at the very top of the jar. This allows the recipient to easily spoon the sugar into their mixing bowl first, typically to be creamed with butter or oil, setting them up for a smooth baking process.
Once all the ingredients are neatly layered, securely screw on the lid of the jar. The final, essential step is to attach one of our printable recipe tags to the jar, ensuring your thoughtful gift is ready for its grand reveal.
Essential Products for Your Holiday Cookie Mix Jars
Gathering the right tools and supplies will make your cookie jar creation process smooth and enjoyable. Here’s a list of recommended products:
- 32 oz Wide Mouth Ball Jars – These jars are the ideal size for our cookie mixes and offer ample space for layering. Their wide mouth makes filling easy, and they are wonderfully reusable for countless purposes after the cookies are enjoyed.
- Stainless Steel Measuring Cups and Spoons – Precision is key in baking. These durable stainless steel sets often feature sleek designs and long handles, making them perfect for accurately scooping ingredients, even from tall containers.
- Cooking Twine – Essential for adding that rustic, charming touch. It’s perfect for securely tying around the jar neck, ready to hold both your personalized ornament and the all-important instruction tags.
- Personalized Wooden Christmas Tree Ornaments – These adorable ornaments are not just decorative; they offer a wonderful opportunity to personalize each cookie jar, making every gift truly unique and cherished.
- Everyday White Bowls – Having a set of various-sized bowls is incredibly handy for pre-measuring and holding your dry ingredients before you begin layering them into the jars.
- Printable Tags (available for download below) – These are non-negotiable! Our specially designed cookie tags provide all the necessary instructions for baking and list the additional wet ingredients required, ensuring a perfect batch of cookies every time.
Decadent Chocolate Cherry Chunk Jar Cookies
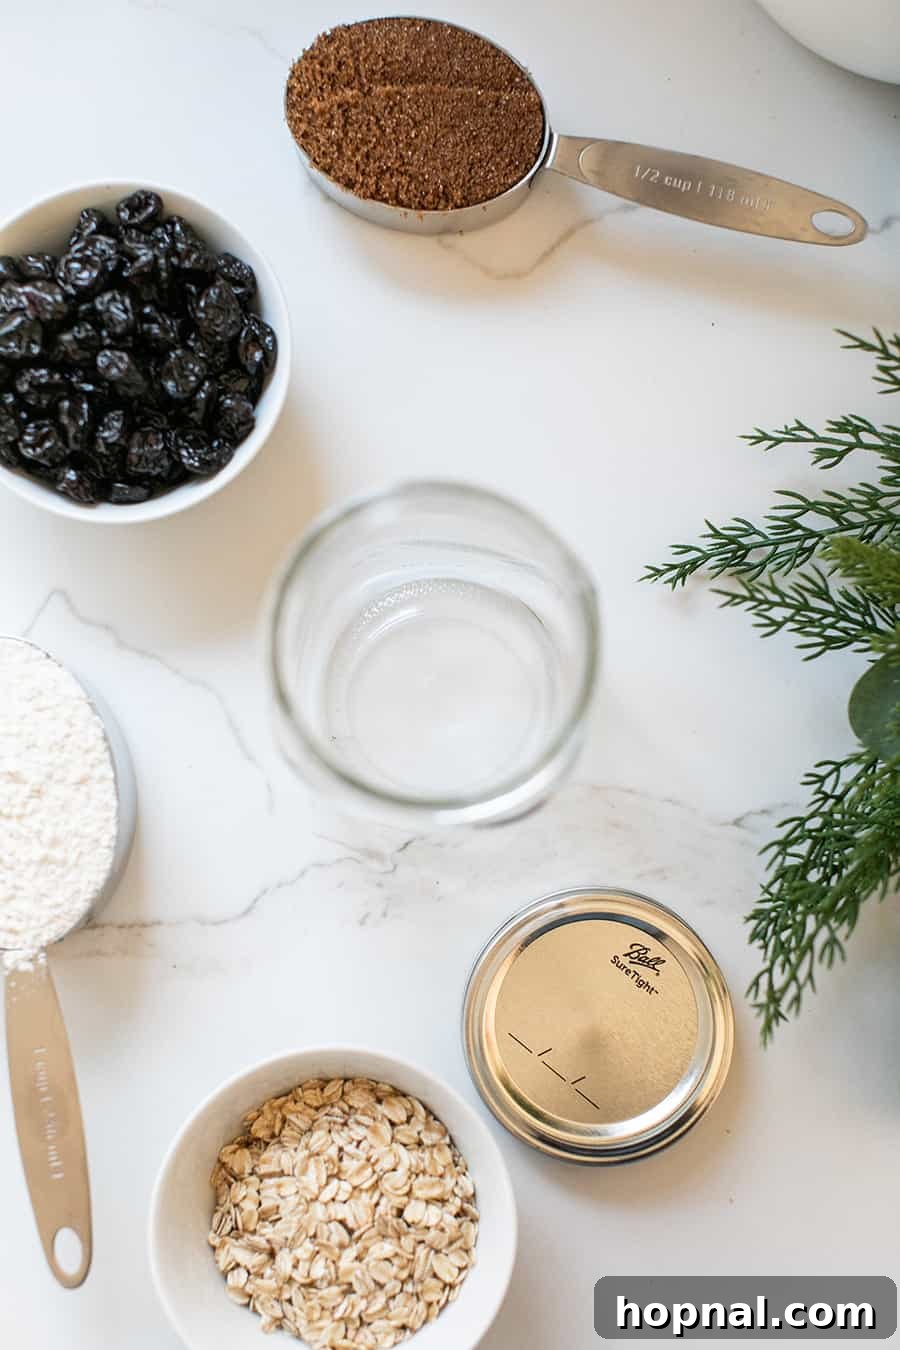
Indulge in the rich flavors of our Chocolate Cherry Chunk Cookies, reimagined for gifting! These cookies are renowned for their buttery texture, generous filling of rich chocolate chips, delightfully chewy dried cherries, and crunchy pecans. We’ve taken our original, full-sized recipe and thoughtfully adjusted the dry ingredients to fit perfectly into a standard 32 oz wide-mouth jar, making it an ideal candidate for your homemade gift collection. Here’s what you’ll need to assemble this gourmet cookie mix jar:
Ingredients for Chocolate Cherry Chunk Jar Cookies:
- 3/4 cups chocolate chunks
- 1 cup dried cherries
- 1/2 cup pecans
- 1 cup old-fashioned oats
- 1 cup all-purpose flour (mixed with 1 tsp baking soda and 1/2 tsp salt)
- 1/2 cup brown sugar (firmly packed)
- 1/2 cup granulated sugar
Pro Tip: To ensure all these wonderful ingredients fit snugly, gently press down each layer with a spoon after filling. This helps to compact the mix and create distinct, beautiful layers.
Assembly Directions for Chocolate Cherry Chunk Jar Cookies:
- Begin by pouring the chocolate chunks into the very bottom of your clean 32oz wide-mouth Ball jar. This will be the first ingredient scooped out by the baker.
- Next, gently add the dried cranberries (or cherries, as per the recipe) over the chocolate chunks, spreading them evenly.
- Follow with the pecans, creating another distinct layer on top of the cherries.
- In a separate bowl, measure your all-purpose flour and thoroughly mix it with the baking soda and salt. This ensures even distribution in the final cookie.
- Carefully scoop the prepared flour mixture over the pecans in the jar, creating a solid, uniform layer.
- Add the old-fashioned oats next, followed by the firmly packed brown sugar, and finally, top it all off with the granulated sugar, ensuring it forms the uppermost layer.
- Once all layers are in place, securely close the jar with its lid. Enhance your gift by tying cooking twine around the neck, attaching a personalized ornament, and don’t forget the essential printable tag with detailed baking instructions for the recipient.
Simply Delicious Butter-less Chocolate Chip Jar Cookies
Our Butter-less Chocolate Chip Cookies hold a special place as Sugar and Charm’s most popular cookie recipe – and for good reason! They deliver all the classic chocolate chip cookie comfort without the butter, making them a fantastic option for those seeking an alternative or simply a wonderfully chewy cookie. To ensure these fit perfectly into an adorable 32oz wide-mouth Ball jar for gifting, we’ve thoughtfully halved the original recipe. This adjusted amount still yields a generous 18 cookies, providing plenty of deliciousness for the recipient to enjoy! The printable tag provided below has been updated to reflect these changes, making these jars incredibly simple and foolproof to assemble.
Ingredients for Butter-less Chocolate Chip Jar Cookies:
- 1 1/4 cups semisweet chocolate chips
- 1 1/4 cups all-purpose flour (mixed with 1/2 tsp baking soda, 1/4 tsp baking powder, and 1/4 tsp salt)
- 3/4 cup brown sugar (firmly packed)
- 1/4 cup granulated sugar
Assembly Directions for Butter-less Chocolate Chip Jar Cookies:
- Start by adding the full amount of semisweet chocolate chips to the very bottom of your jar, creating a rich, dark base layer.
- In a separate bowl, thoroughly combine the all-purpose flour with the baking soda, baking powder, and salt. This ensures these leavening agents and seasonings are evenly distributed.
- Carefully layer the prepared flour mixture over the chocolate chips in the jar.
- Next, add the firmly packed brown sugar, creating a distinct and slightly darker layer.
- Finally, top all the layers with the granulated sugar, ensuring it is the topmost ingredient for easy access when baking.
- Once all ingredients are layered, securely close the jar with its lid. Complete the gift by tying cooking twine around the jar, attaching a charming personalized ornament, and the essential printable tag with baking instructions.
Expert Tips for Perfect Cookie Mix Jars
To ensure your homemade cookie mix jars are both beautiful and practical, follow these expert tips:
- Layer with Precision: The key to an appealing cookie jar is distinct layers. Use a spoon, or even a small funnel, to carefully add each ingredient. Gently pat down each layer before adding the next to create clear separation and prevent premature mixing. This also helps ensure all ingredients fit snugly.
- Seal for Freshness: Before gifting, double-check that the jar lid is tightly sealed. A secure seal prevents any ingredients from mixing during transport and, more importantly, keeps the dry mix fresh until the recipient is ready to bake. Consider adding an extra piece of decorative fabric under the lid for an airtight seal and a charming touch.
- Crystal Clear Instructions are Key: The printable tags are vital! Ensure the instructions for baking and the list of wet ingredients needed are clear, concise, and easy for anyone to follow, regardless of their baking experience. This thoughtful detail prevents any confusion and guarantees a successful baking adventure for your loved ones. It also adds a wonderful personal touch, showing you’ve thought of every step.
- Quality Ingredients, Delicious Results: The success of any cookie starts with the ingredients. Use fresh, high-quality dry ingredients for your mix. This ensures the best flavor and texture in the final baked cookies, making your thoughtful gift even more delightful.
- Consider Allergies: If you know the recipient has allergies or dietary restrictions, tailor the ingredients accordingly. You might create a gluten-free mix, use dairy-free chocolate chips, or omit nuts. Always label clearly if your mix caters to specific dietary needs.
- Decorate with Flair: Beyond the personalized ornament and twine, consider adding a fabric circle over the lid, a sprig of rosemary or a small pinecone for a natural touch, or a festive ribbon. Presentation significantly enhances the gifting experience!
Your Essential Cookie Jar Printable Tags
These specially designed printable tags are a cornerstone of your cookie jar gifts. Each tag is precisely crafted for its corresponding recipe, providing the recipient with the necessary additional wet ingredients and comprehensive baking directions. Downloading and printing these tags to attach to your jars ensures your gift is not only beautiful but also entirely functional, guiding your friends and family to bake perfect, warm cookies with ease.
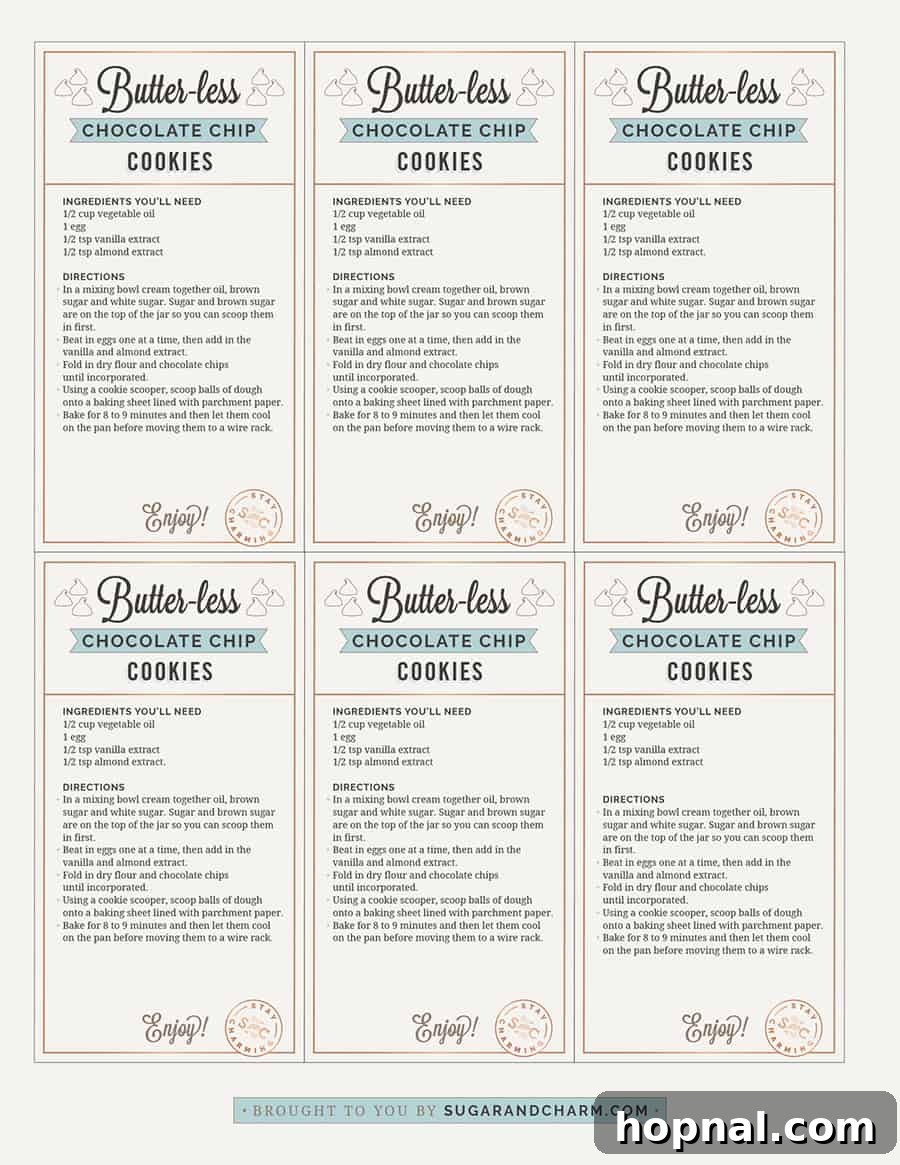
Click here to download our Butter-less Chocolate Chip Cookie Tags
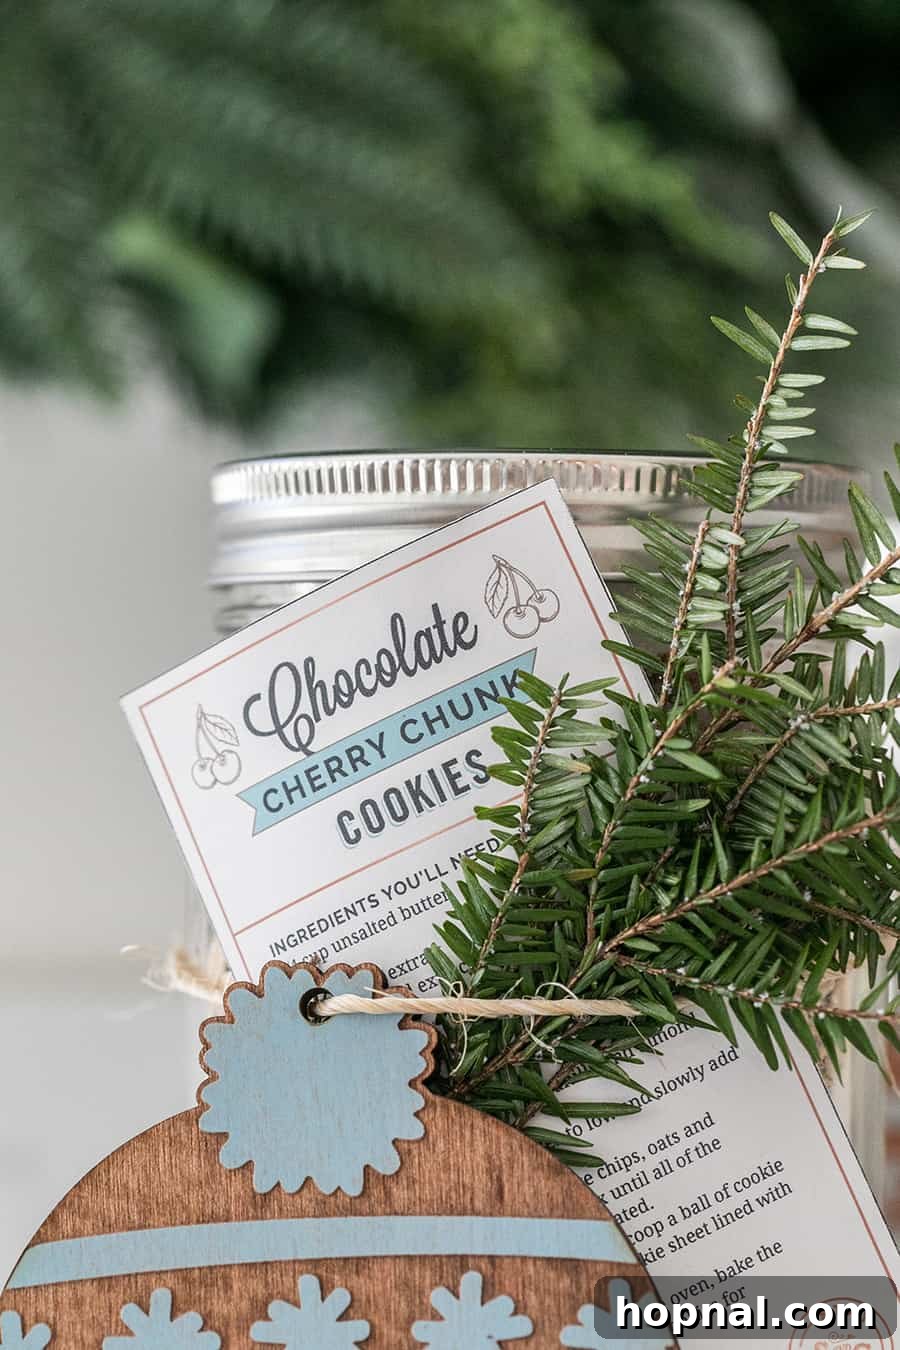
Click here to download our Chocolate Cherry Chunk Cookie Tags
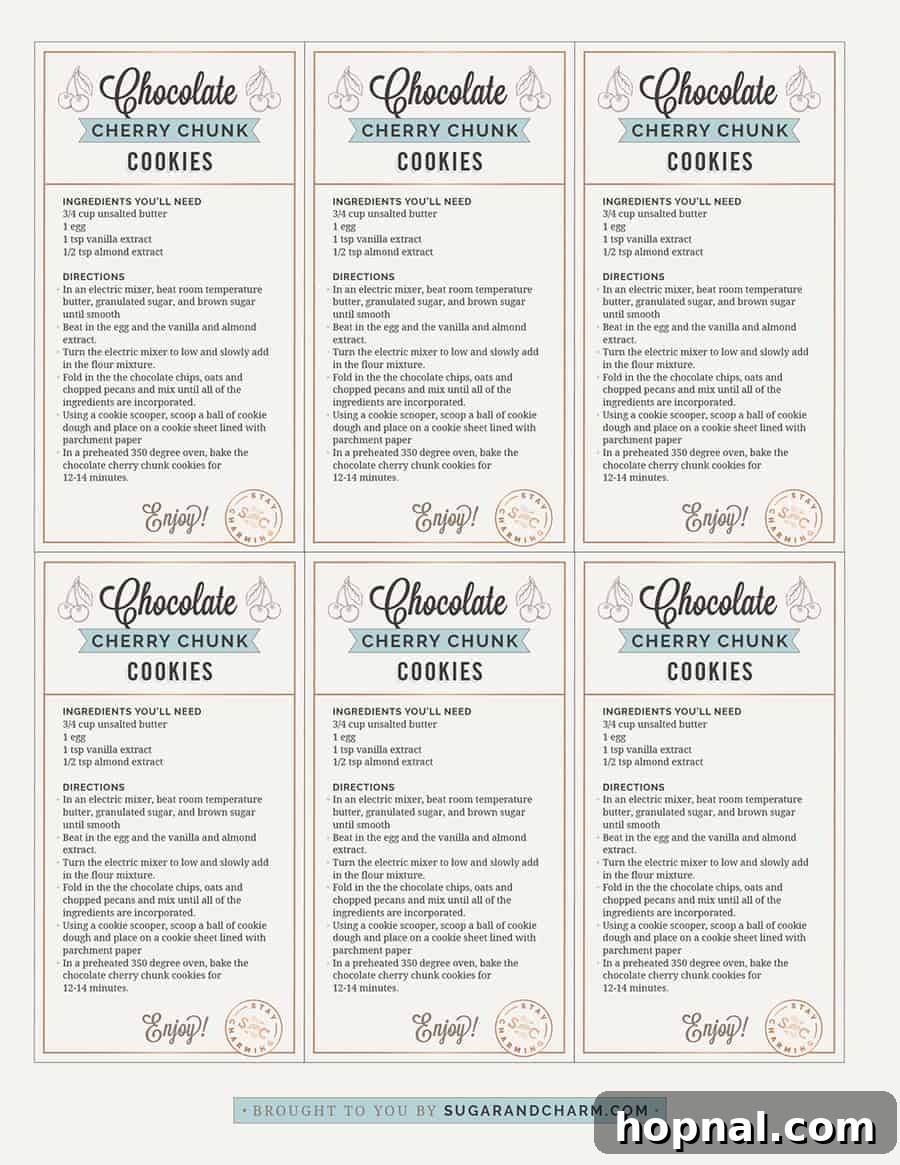
Remember, these printable tags are absolutely essential when gifting cookies in a jar. They transform a simple collection of ingredients into a complete, ready-to-bake experience. So, don’t forget to download, print, and securely attach them to each of your beautifully prepared jars!
More Festive Recipes and DIY Projects You’ll Love!
If you’re brimming with holiday spirit and eager for more festive creations, explore these wonderful recipes and DIY ideas from our collection:
- The Best Chocolate Crinkle Cookies – A holiday classic that’s as fun to make as it is to eat.
- Lavender Chocolate Chunk Cookies in a Jar – An elegant and unique twist on the classic cookie jar gift.
- DIY Pine Scented Soy Candles – Bring the cozy scent of a winter forest into your home with this simple craft.
- Best Homemade Hot Chocolate Recipe – The ultimate comforting beverage for chilly evenings.
- The Perfect Snickerdoodle Recipe – A timeless favorite, soft, chewy, and coated in cinnamon sugar.
We hope this guide inspires you to create some truly special gifts this holiday season. If you make these delightful cookies in a jar, we’d love to hear about it! Please share your experiences and creations by leaving a comment and review below.
Holiday Jar Cookies with Printable Tags!
Eden
20 minutes
0 minutes
20 minutes
24
cookies
Pin Recipe
Print Recipe
Ingredients
Chocolate Cherry Chunk Cookies in a Jar
- 3/4 cup chocolate chunks
- 1 cup dried cherries
- 1/2 cup pecans
- 1 cup old-fashioned oats
- 1 cup all-purpose flour
- 1 tsp baking soda
- 1/2 tsp salt
- 1/2 cup brown sugar
- 1/2 cup granulated sugar
Butter-less Chocolate Chip Cookies
- 1 1/4 cups semisweet chocolate chips
- 1 1/4 cup all-purpose flour
- 1/2 tsp baking soda
- 1/4 tsp baking powder
- 1/4 tsp salt
- 3/4 cup brown sugar
- 1/4 cup granulated sugar
Instructions
Chocolate Cherry Chunk Cookies
-
Pour the chocolate chunks into the bottom of the 32oz wide mouth ball jar.
-
Next add in the cranberries, then pecans.
-
Measure the flour and add the salt and baking soda in with it.
-
Then scoop the flour over the pecans.
-
Add the oats and brown sugar and top it all with the granulated sugar.
-
Close the lid and attach twine, a personalized ornament, and a printable tag on how to make the cookies.
Butter-less Chocolate Chip Cookies
-
First, add the chocolate chips to the bottom of the jar.
-
Next, add the flour, baking soda, baking powder and salt.
-
Add in the brown sugar and then layer the granulated sugar over the top.
-
Close the lid and using twine, attach a personalized ornament and a printable tag on how to make the cookies.
Notes
Nutrition
Calories:
239kcal
,
Carbohydrates:
40g
,
Protein:
3g
,
Fat:
7g
,
Saturated Fat:
3g
,
Polyunsaturated Fat:
1g
,
Monounsaturated Fat:
3g
,
Trans Fat:
1g
,
Cholesterol:
1mg
,
Sodium:
101mg
,
Potassium:
136mg
,
Fiber:
3g
,
Sugar:
26g
,
Vitamin A:
188IU
,
Vitamin C:
1mg
,
Calcium:
30mg
,
Iron:
2mg
Nutrition information is automatically calculated and should only be used as an approximation. Actual values may vary.
Enjoyed this recipe? Leave a comment below!
Your feedback helps us create more delicious content.