
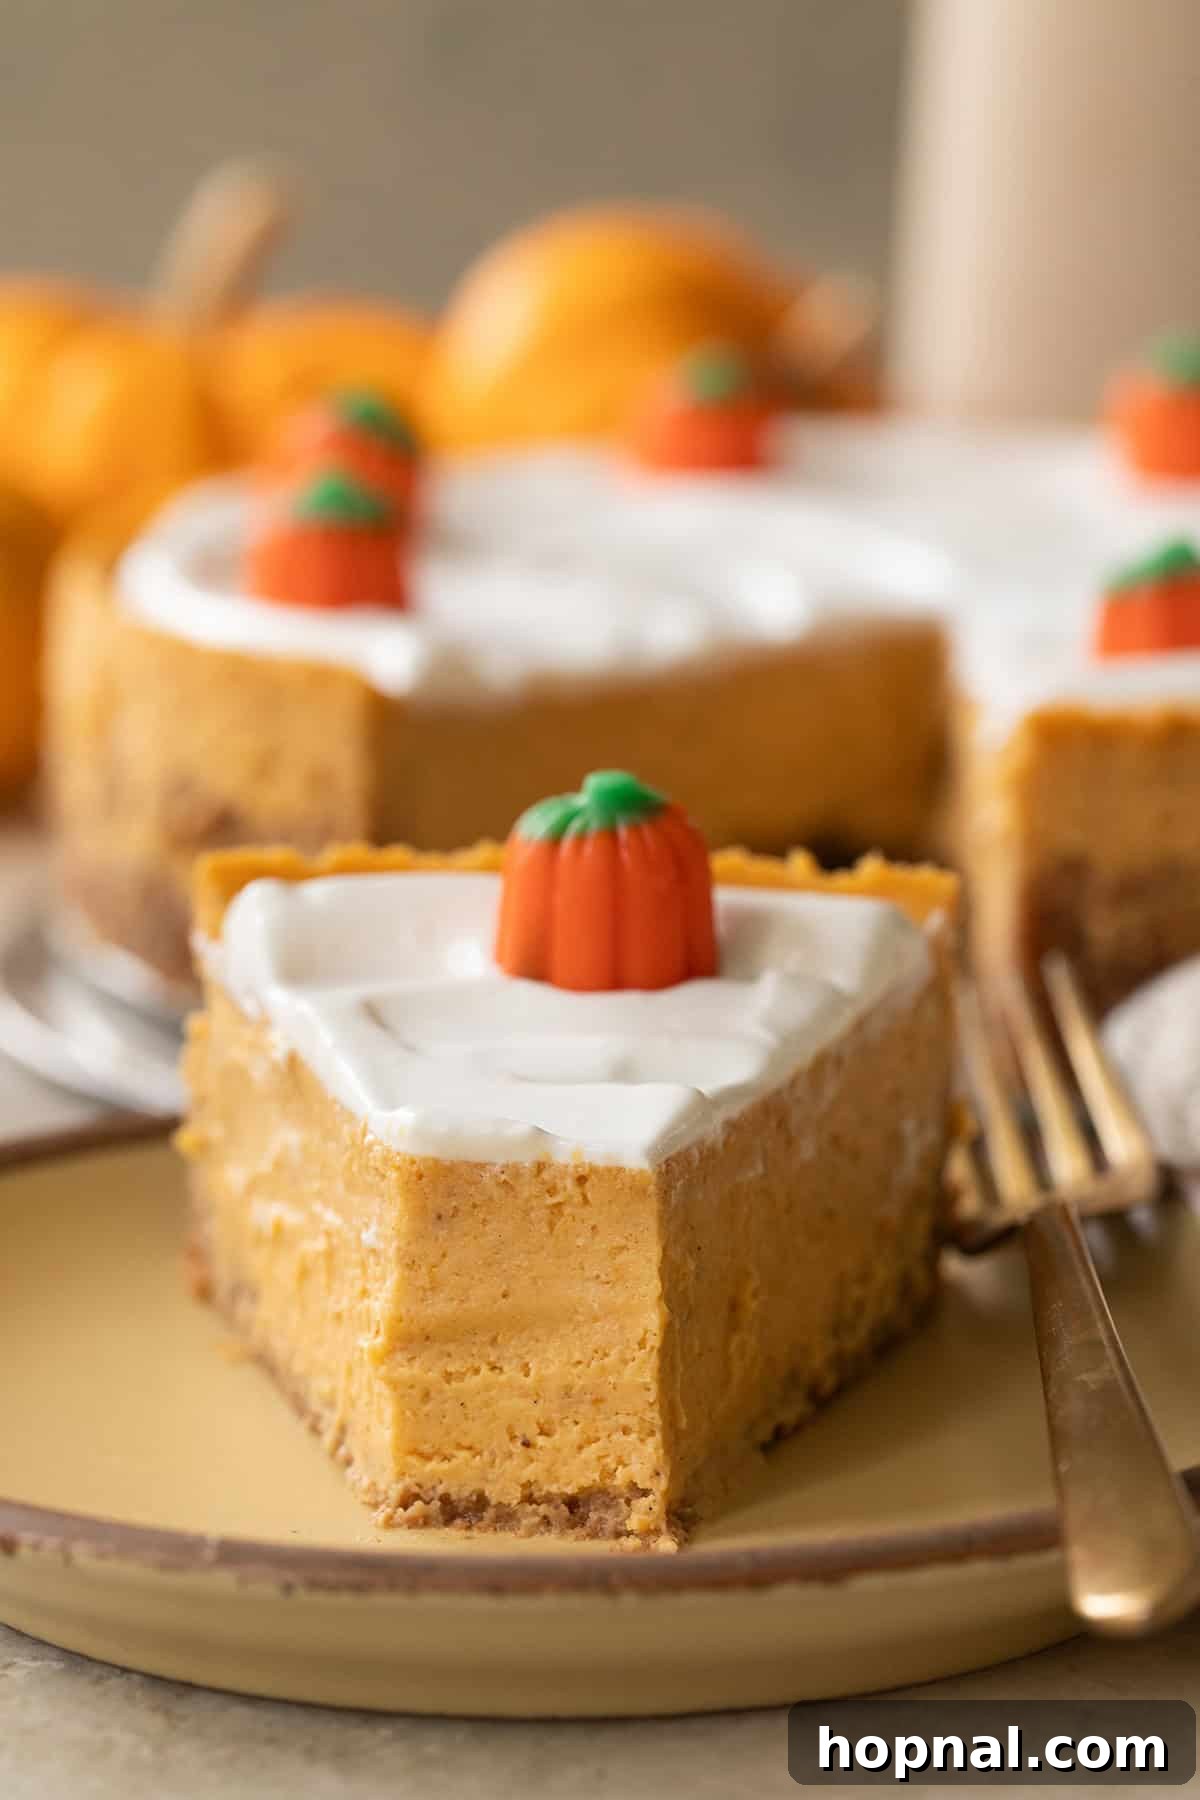
The Ultimate Creamy Pumpkin Cheesecake Recipe: Your Guide to a Perfect Fall Dessert
Welcome to your new favorite fall dessert! This incredibly rich and smooth creamy pumpkin cheesecake recipe masterfully blends the luxurious texture of classic cheesecake with the warm, inviting flavors of a homemade pumpkin pie. Crafted with real pumpkin puree, a harmonious blend of aromatic spices, and a delightfully buttery graham cracker crust, it’s more than just a dessert—it’s the quintessential centerpiece for your Thanksgiving feast or any cherished autumn gathering. Prepare to impress your guests and delight your family with every decadent bite of this irresistible creation.
If you have a passion for creamy, dreamy cheesecakes, be sure to explore my other beloved recipes such as the vibrant Strawberry Cheesecake, delightful Pumpkin Cheesecake Truffles, rustic Ricotta Cheesecake, and the effortless No-Bake Cheesecake! Each offers a unique twist on this timeless dessert, but for fall, this pumpkin cheesecake truly shines, promising to be the star of your dessert table.
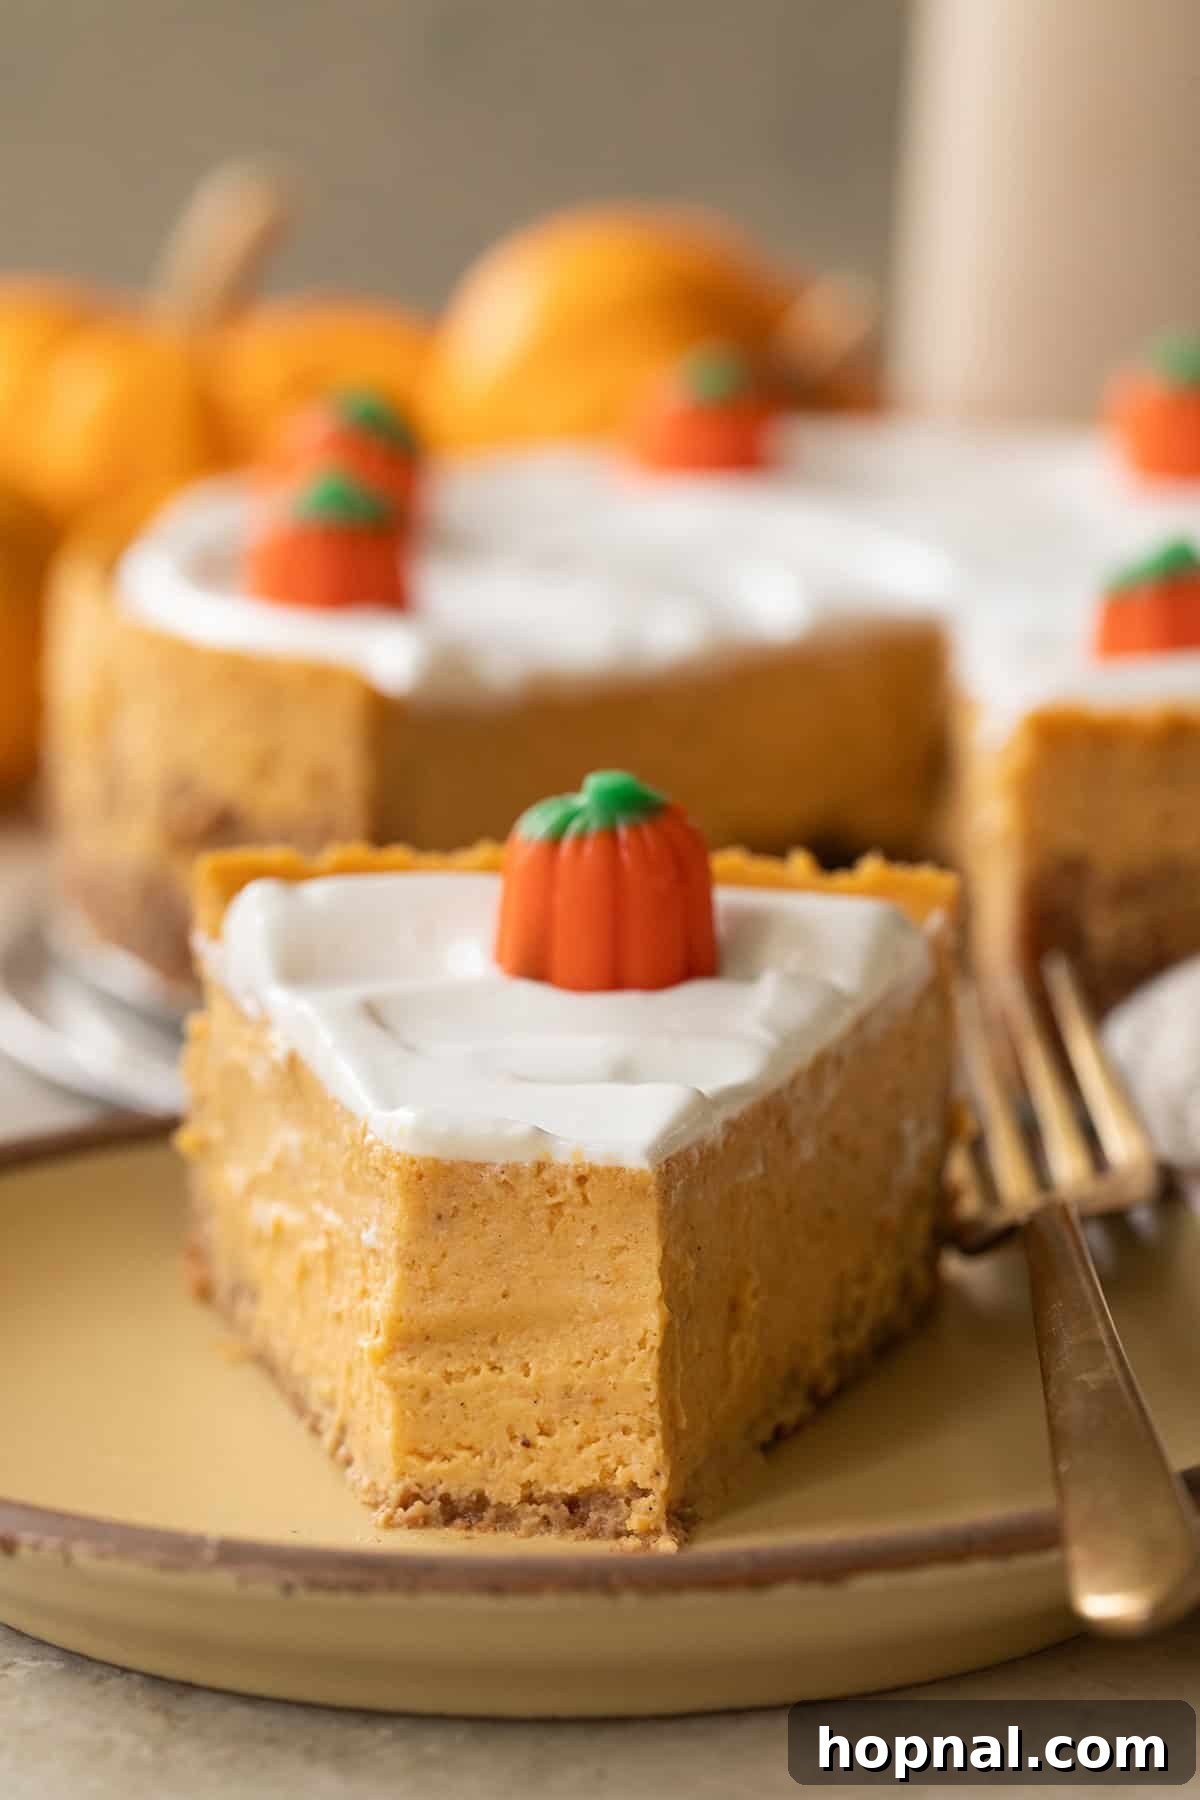
Why This Creamy Pumpkin Cheesecake Will Become Your Fall Favorite
There are countless reasons to fall head over heels for this pumpkin cheesecake, and I’m thrilled to share why it consistently earns rave reviews from everyone who tries it. It’s more than just a seasonal dessert; it’s an experience that truly captures the heartwarming essence of autumn in every spoonful:
- A Sophisticated Twist on a Beloved Classic: I’ve taken my all-time favorite classic cheesecake recipe and masterfully infused it with the quintessential flavors of the fall season. This isn’t merely a pumpkin-flavored dessert; it’s a sophisticated marriage of rich, tangy cream cheese and the comforting warmth of traditional pumpkin pie spices. It stands out as one of my absolute favorite fall desserts, perfect for elevating any special occasion or simply treating yourself.
- The Unforgettable Tangy Sour Cream Topping: What truly sets this pumpkin cheesecake apart is my signature sour cream topping. Much like the decadent layer on my goat cheese cheesecake, this creamy, light addition provides a brilliant contrast of tangy sweetness that cuts through the richness of the pumpkin filling. It’s the secret touch that elevates the entire dessert, giving it a professional, bakery-quality finish that will undoubtedly leave your guests impressed and asking for the recipe.
- Guaranteed Rave Reviews Every Single Time: Don’t just take my word for it! This recipe has been meticulously tried, tested, and absolutely adored by everyone who tastes it. My family consistently asks for it, going back for seconds and even thirds! My neighbors have even sent me enthusiastic texts, proclaiming, “It’s so darn deliciously decadent!” When a dessert evokes such widespread and enthusiastic responses, you know you’ve got a true winner on your hands. It’s a guaranteed crowd-pleaser that will make you the culinary star of any fall gathering.
Essential Ingredients for Your Perfect Pumpkin Cheesecake
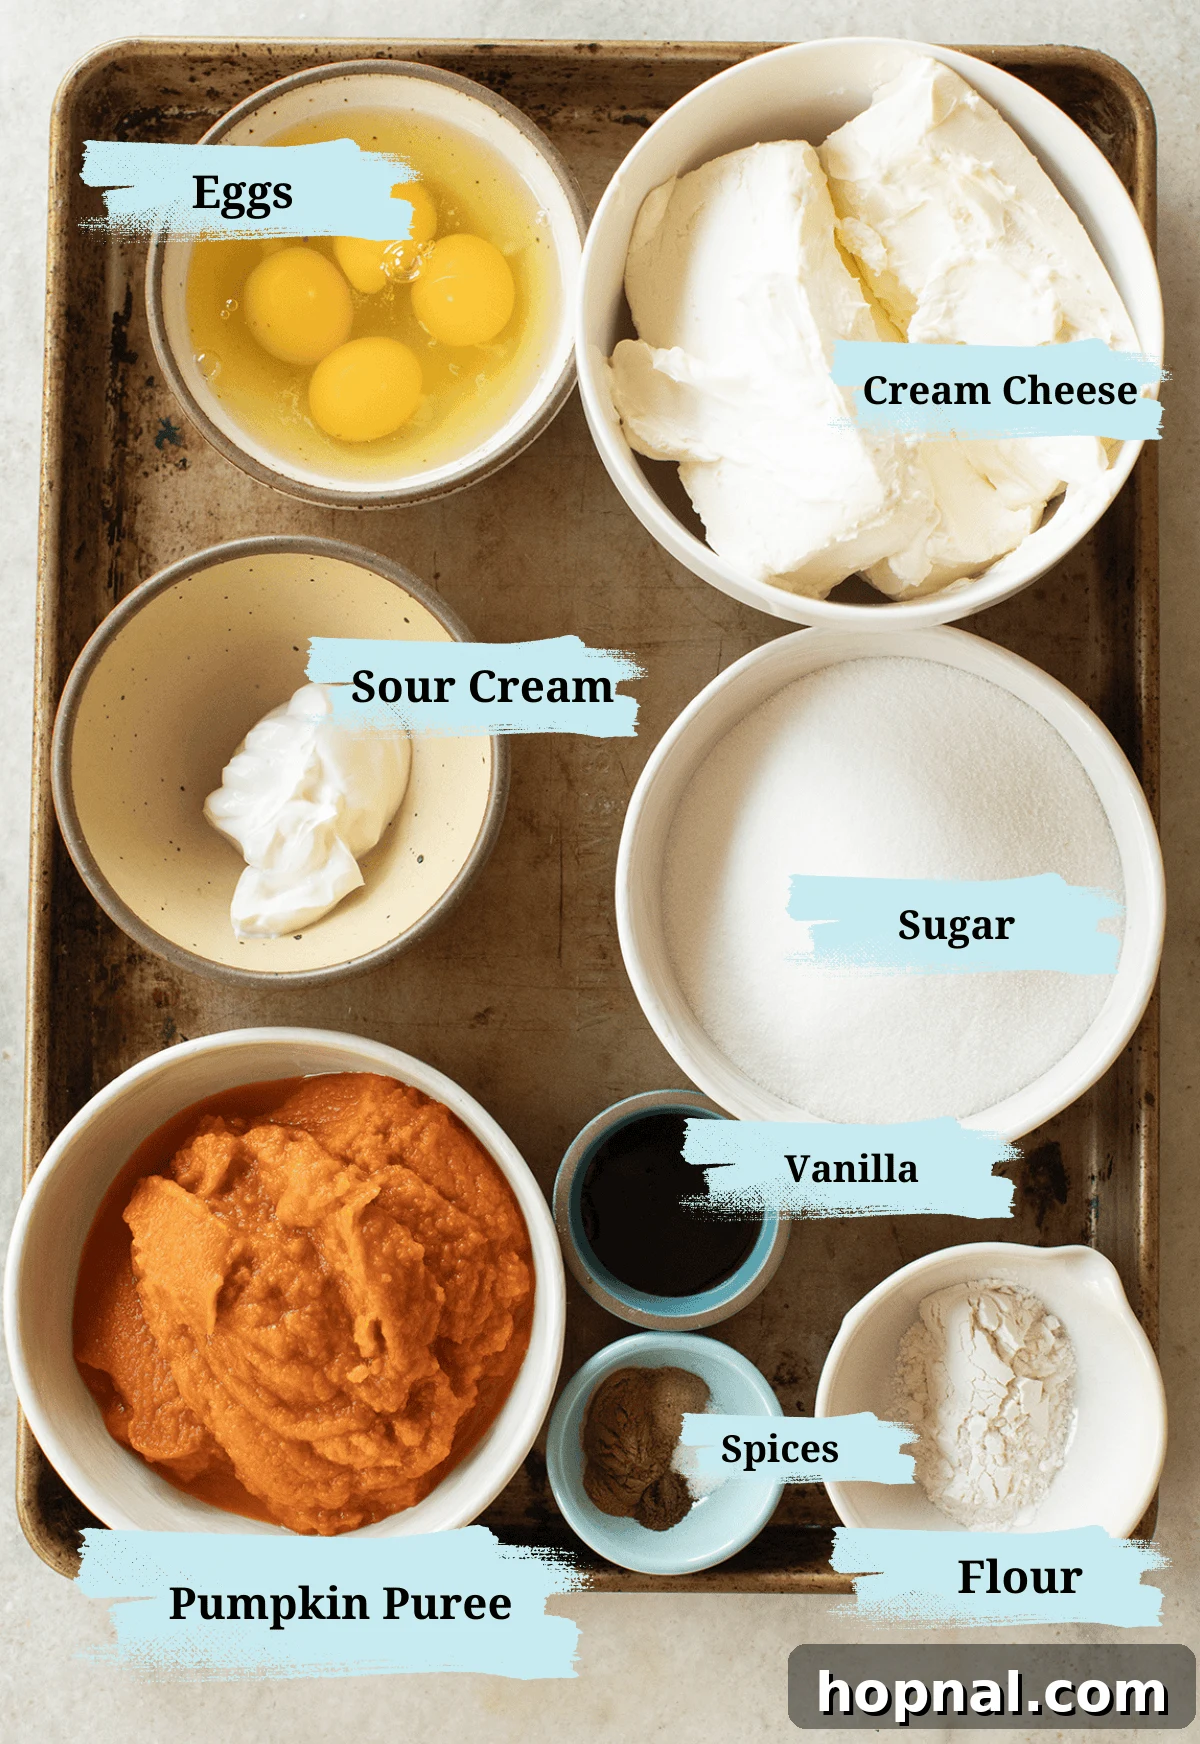
Crafting the perfect pumpkin cheesecake begins with selecting high-quality ingredients. Each component plays a vital role in achieving that coveted creamy texture, rich flavor, and sturdy crust. Here’s a detailed look at everything you’ll need to create this autumn masterpiece, ensuring every bite is a harmonious blend of taste and texture:
Graham Cracker Crust
The foundation of any truly great cheesecake is its crust. This simple yet effective graham cracker base offers a perfect balance of buttery richness and subtle sweetness, providing a delightful textural contrast to the smooth, luscious filling.
- Graham Cracker Crumbs: These finely crushed crumbs are the cornerstone of a classic, irresistible buttery base. For the best consistency and ease, use pre-crushed graham cracker crumbs. If using whole crackers, process them in a food processor until they resemble fine sand.
- Light Brown Sugar: Incorporating a touch of light brown sugar adds a deep, slightly caramelized sweetness to the crust. This subtle flavor enhances the overall profile and complements the warm spices beautifully.
- Ground Cinnamon: Just a hint of ground cinnamon in the crust adds a warm, inviting spice note. This touch helps to bridge the flavors between the crust and the pumpkin-spiced filling, creating a cohesive taste experience.
- Butter (Salted or Unsalted): Melted butter is absolutely essential for binding the graham cracker crumbs together, creating a firm yet tender crust that won’t crumble apart when sliced. Whether you choose salted or unsalted butter, it contributes a rich, savory depth that perfectly contrasts the crust’s sweetness.
Pumpkin Cheesecake Filling
The heart of this dessert is its incredibly smooth, rich, and flavorful filling. Each ingredient is carefully selected to contribute to the creamy texture and authentic, comforting taste of fall.
- Cream Cheese: This is undoubtedly the star of the show! For an ultra-smooth, velvety cheesecake filling, your cream cheese must be SUPER-soft and at room temperature. Cold cream cheese will inevitably lead to a lumpy batter. If you’re short on time, a quick 10-15 second burst in the microwave can help achieve the perfect softness, but ideally, let it sit out for at least an hour or two. I highly recommend using full-fat cream cheese for the richest flavor and most luxurious texture.
- Pureed Pumpkin: It’s crucial to use 100% pure pumpkin puree, not pumpkin pie filling. Pumpkin pie filling contains added sugars and spices that will alter the carefully balanced flavor profile of this recipe. This natural pumpkin goodness adds essential moisture, a beautiful vibrant orange color, and that unmistakable seasonal flavor we all crave.
- Large Eggs: Eggs are fundamental for binding all the ingredients together, providing the necessary structure, and helping the cheesecake set beautifully during baking. Ensure they are at room temperature so they incorporate smoothly into the batter without curdling or seizing.
- Sour Cream: A quarter cup of sour cream integrated into the filling introduces a delicate tanginess. This acidity skillfully balances the sweetness of the cheesecake and significantly contributes to its luxurious creaminess. It’s also a key component of our irresistible secret topping!
- Granulated Sugar: This sweetens the cheesecake to perfection, allowing the natural pumpkin and aromatic spice flavors to truly shine without the dessert becoming overly cloying.
- Salt: A small amount of salt is a flavor enhancer, bringing out the best in all the other ingredients and balancing the sweetness.
- Ground Spices (Cinnamon, Nutmeg, Cloves): This aromatic trio forms the signature warm and cozy fall flavor profile. Cinnamon provides a sweet warmth, nutmeg adds a subtle, earthy complexity, and cloves offer a pungent yet sweet note that pairs exquisitely with pumpkin. This blend creates a deeply satisfying autumn taste.
- All-Purpose Flour: A small amount of all-purpose flour acts as a gentle thickener and stabilizer for the filling. It helps prevent cracking on the surface of the cheesecake and ensures a smooth, consistent texture throughout.
- Vanilla Bean Paste or Extract: A high-quality vanilla bean paste or pure vanilla extract is indispensable for rounding out all the flavors. It adds a hint of comforting sweetness and a deep aromatic depth that elevates the entire cheesecake, tying all the autumn flavors together beautifully.
How to Create Your Perfect Pumpkin Cheesecake: A Detailed Step-by-Step Guide
Making a homemade cheesecake might seem like a daunting task, but with these comprehensive, detailed instructions and helpful tips, you’ll be able to achieve a flawless, crack-free, and utterly delicious pumpkin cheesecake every single time. Follow along carefully for a smooth and rewarding baking experience!
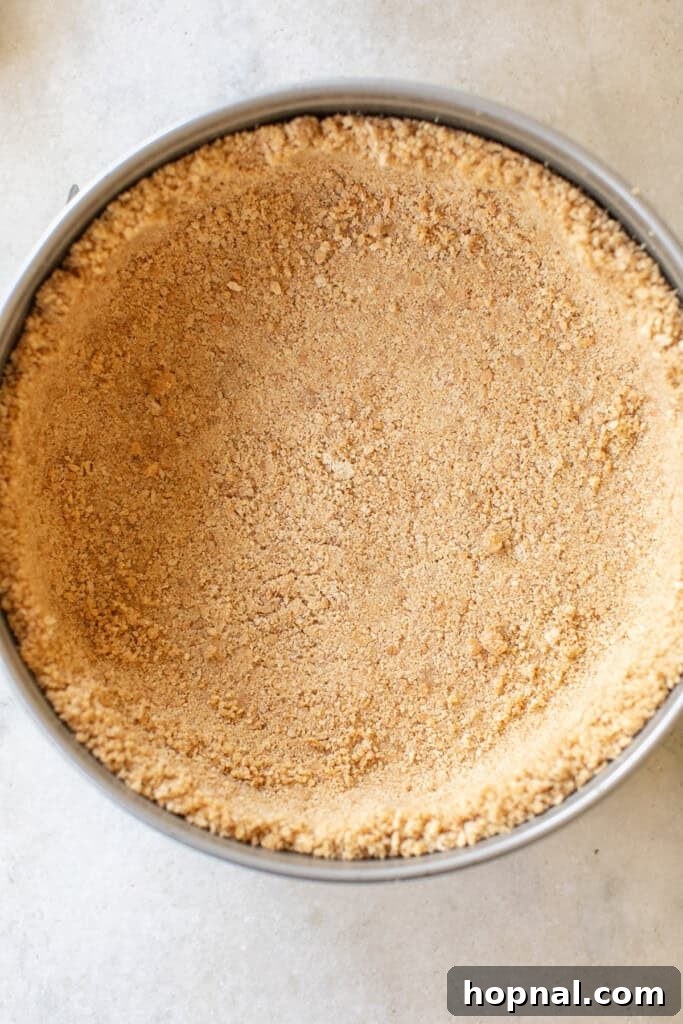
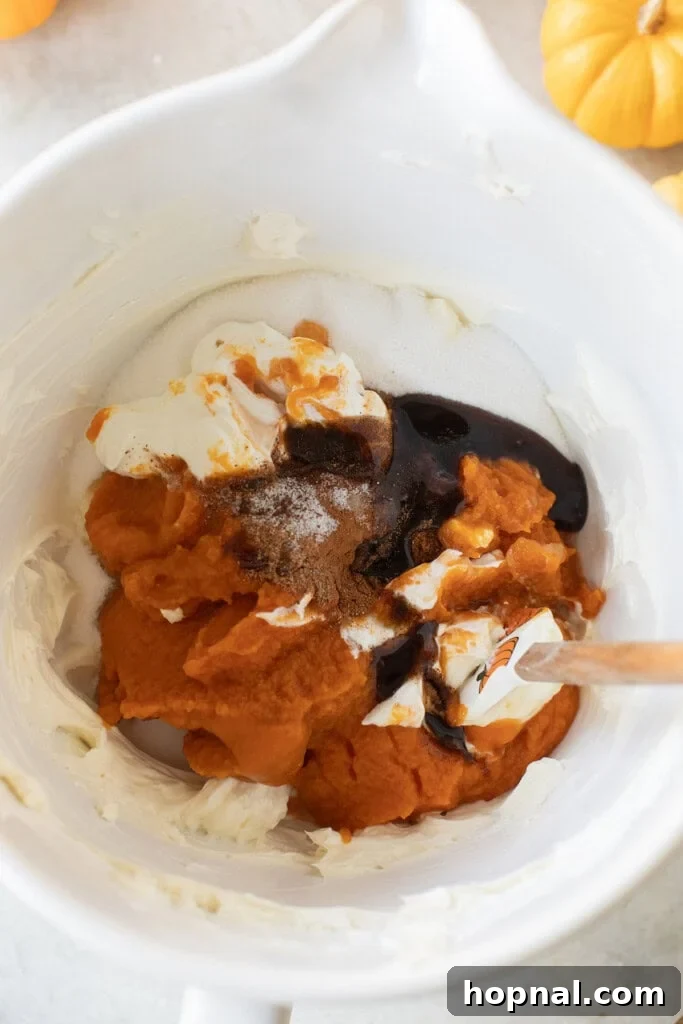
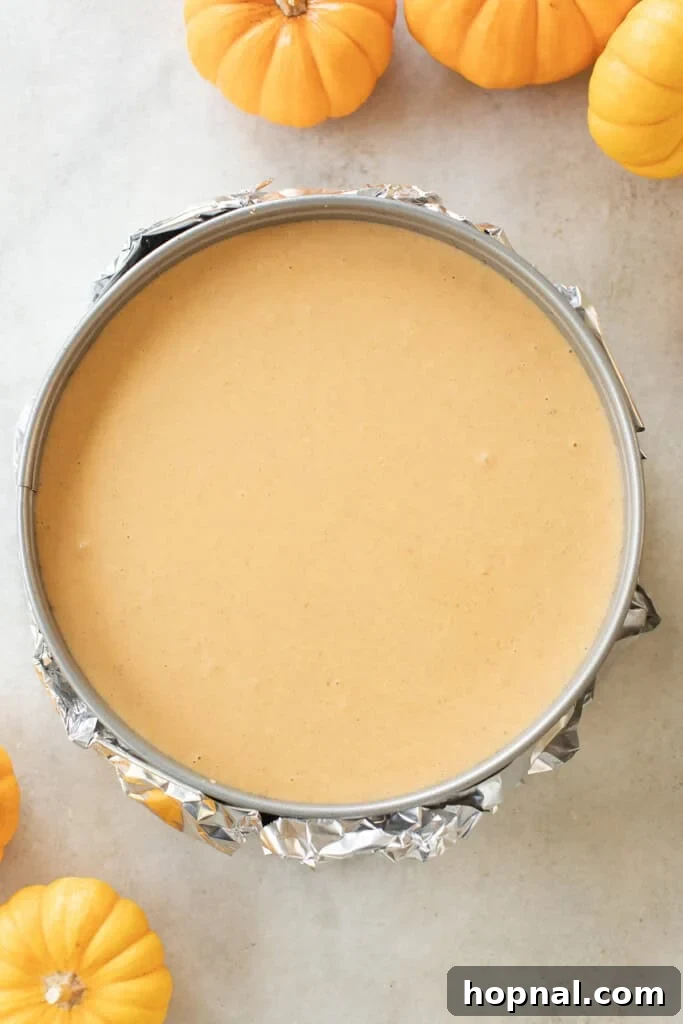
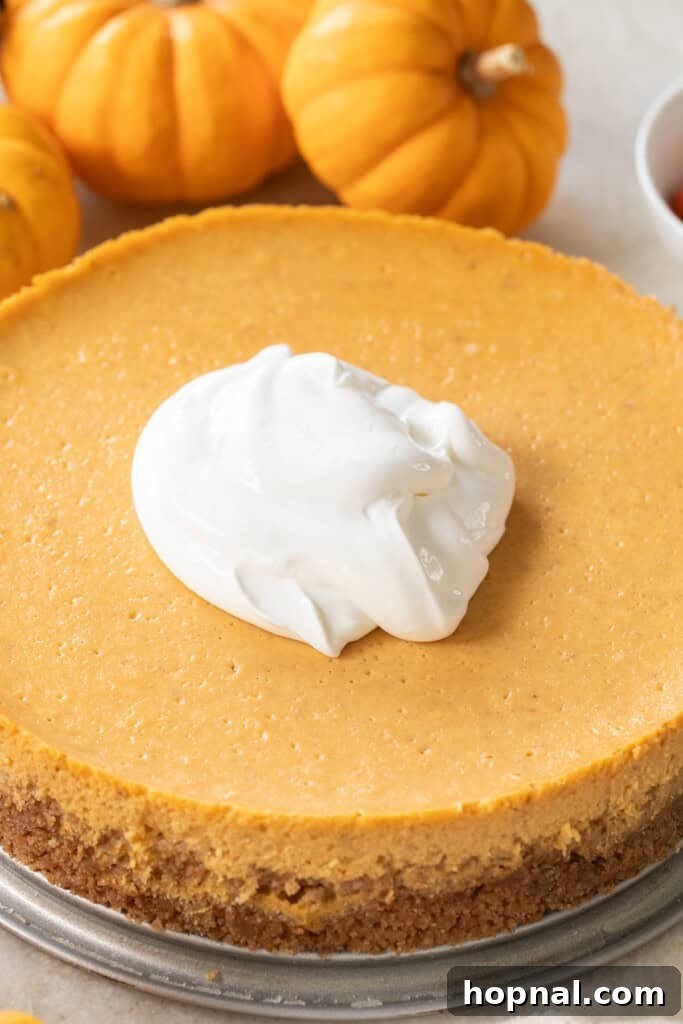
- Preheat Oven and Prepare Pan: Start by preheating your oven to the precise temperature of 325°F (160°C). This lower, consistent heat is absolutely crucial for the slow, even baking of a cheesecake, which prevents cracking. Next, prepare your 9-inch springform pan. For the crust, follow my easy graham cracker crust recipe instructions, pressing the mixture firmly and evenly into the bottom of the pan. An essential step for cheesecake success is to wrap the entire outside of your springform pan with two layers of heavy-duty aluminum foil. This creates a robust protective barrier for the water bath, preventing any water from seeping into the crust and ruining its texture.
- Cream the Cream Cheese Thoroughly: In a large mixing bowl, beat the very soft, room-temperature cream cheese with an electric mixer on medium speed until it is completely smooth, light, and fluffy, with no visible lumps. This step is foundational for achieving that coveted silky, creamy cheesecake texture, so do not rush it. If your cream cheese isn’t soft enough, microwave it for 10-15 seconds to achieve the perfect consistency, but avoid melting it.
- Gently Combine Filling Ingredients: To the creamed cream cheese, gently add the pure pumpkin puree, room-temperature large eggs, sour cream, granulated sugar, salt, ground cinnamon, ground nutmeg, ground cloves, all-purpose flour, and vanilla bean paste or extract. Mix on the absolute lowest speed of your electric mixer, just until all the ingredients are thoroughly combined and the mixture appears smooth and silky. Be extremely careful not to overmix the batter, as incorporating too much air can cause the cheesecake to puff up too much and then crack during the baking and cooling process.
- Pour and Smooth the Filling: Carefully pour the prepared pumpkin cheesecake filling evenly over the pressed graham cracker crust in your foil-wrapped springform pan. Use a rubber spatula to gently smooth out the top surface of the filling, ensuring an even layer for consistent baking and a beautifully polished presentation.
- Set Up the Water Bath (Bain-Marie): This step is the key secret to a crack-free cheesecake! Place the foil-wrapped springform pan onto a larger, oven-safe baking sheet with high sides. Carefully transfer this entire setup into your preheated oven. Once the pan is securely in the oven, carefully pour boiling hot water into the larger baking sheet, surrounding the springform pan. Fill the baking sheet until the water reaches about halfway up the sides of the springform pan, being very cautious not to let any water splash directly into the cheesecake itself.
- Bake to Perfect Tenderness: Bake the cheesecake in the water bath for approximately 1 hour. The cheesecake should appear mostly set around the edges, but the very center (a circle about 2-3 inches in diameter) should still have a slight, gentle jiggle when the pan is lightly nudged. This slight movement indicates it’s perfectly cooked and will firm up beautifully as it cools. Overbaking is a common cause of cracks.
- Crucial Slow Cooling Process: Once the baking time is complete, turn off your oven. Critically, do not remove the cheesecake immediately. Instead, crack the oven door open slightly (you can use a wooden spoon or oven mitt to prop it open a few inches) and allow the cheesecake to rest inside the cooling oven for an additional 1 hour. This gradual, controlled decrease in temperature prevents a sudden thermal shock that can cause the cheesecake surface to crack. Patience here pays off immensely for the final aesthetic.
- Chill Thoroughly for Optimal Results: After the hour of cooling in the oven, carefully remove the cheesecake from the water bath and the larger baking sheet. Gently remove the aluminum foil from the springform pan. Let the cheesecake cool completely on a wire rack at room temperature for another 1-2 hours. Once it has cooled down, cover it loosely with plastic wrap and transfer it to the refrigerator. Chill for at least 4 hours, or ideally, overnight. This prolonged chilling period is absolutely vital for the cheesecake to fully set, allowing its rich flavors to meld and deepen, and making it perfectly firm and easy to slice cleanly.
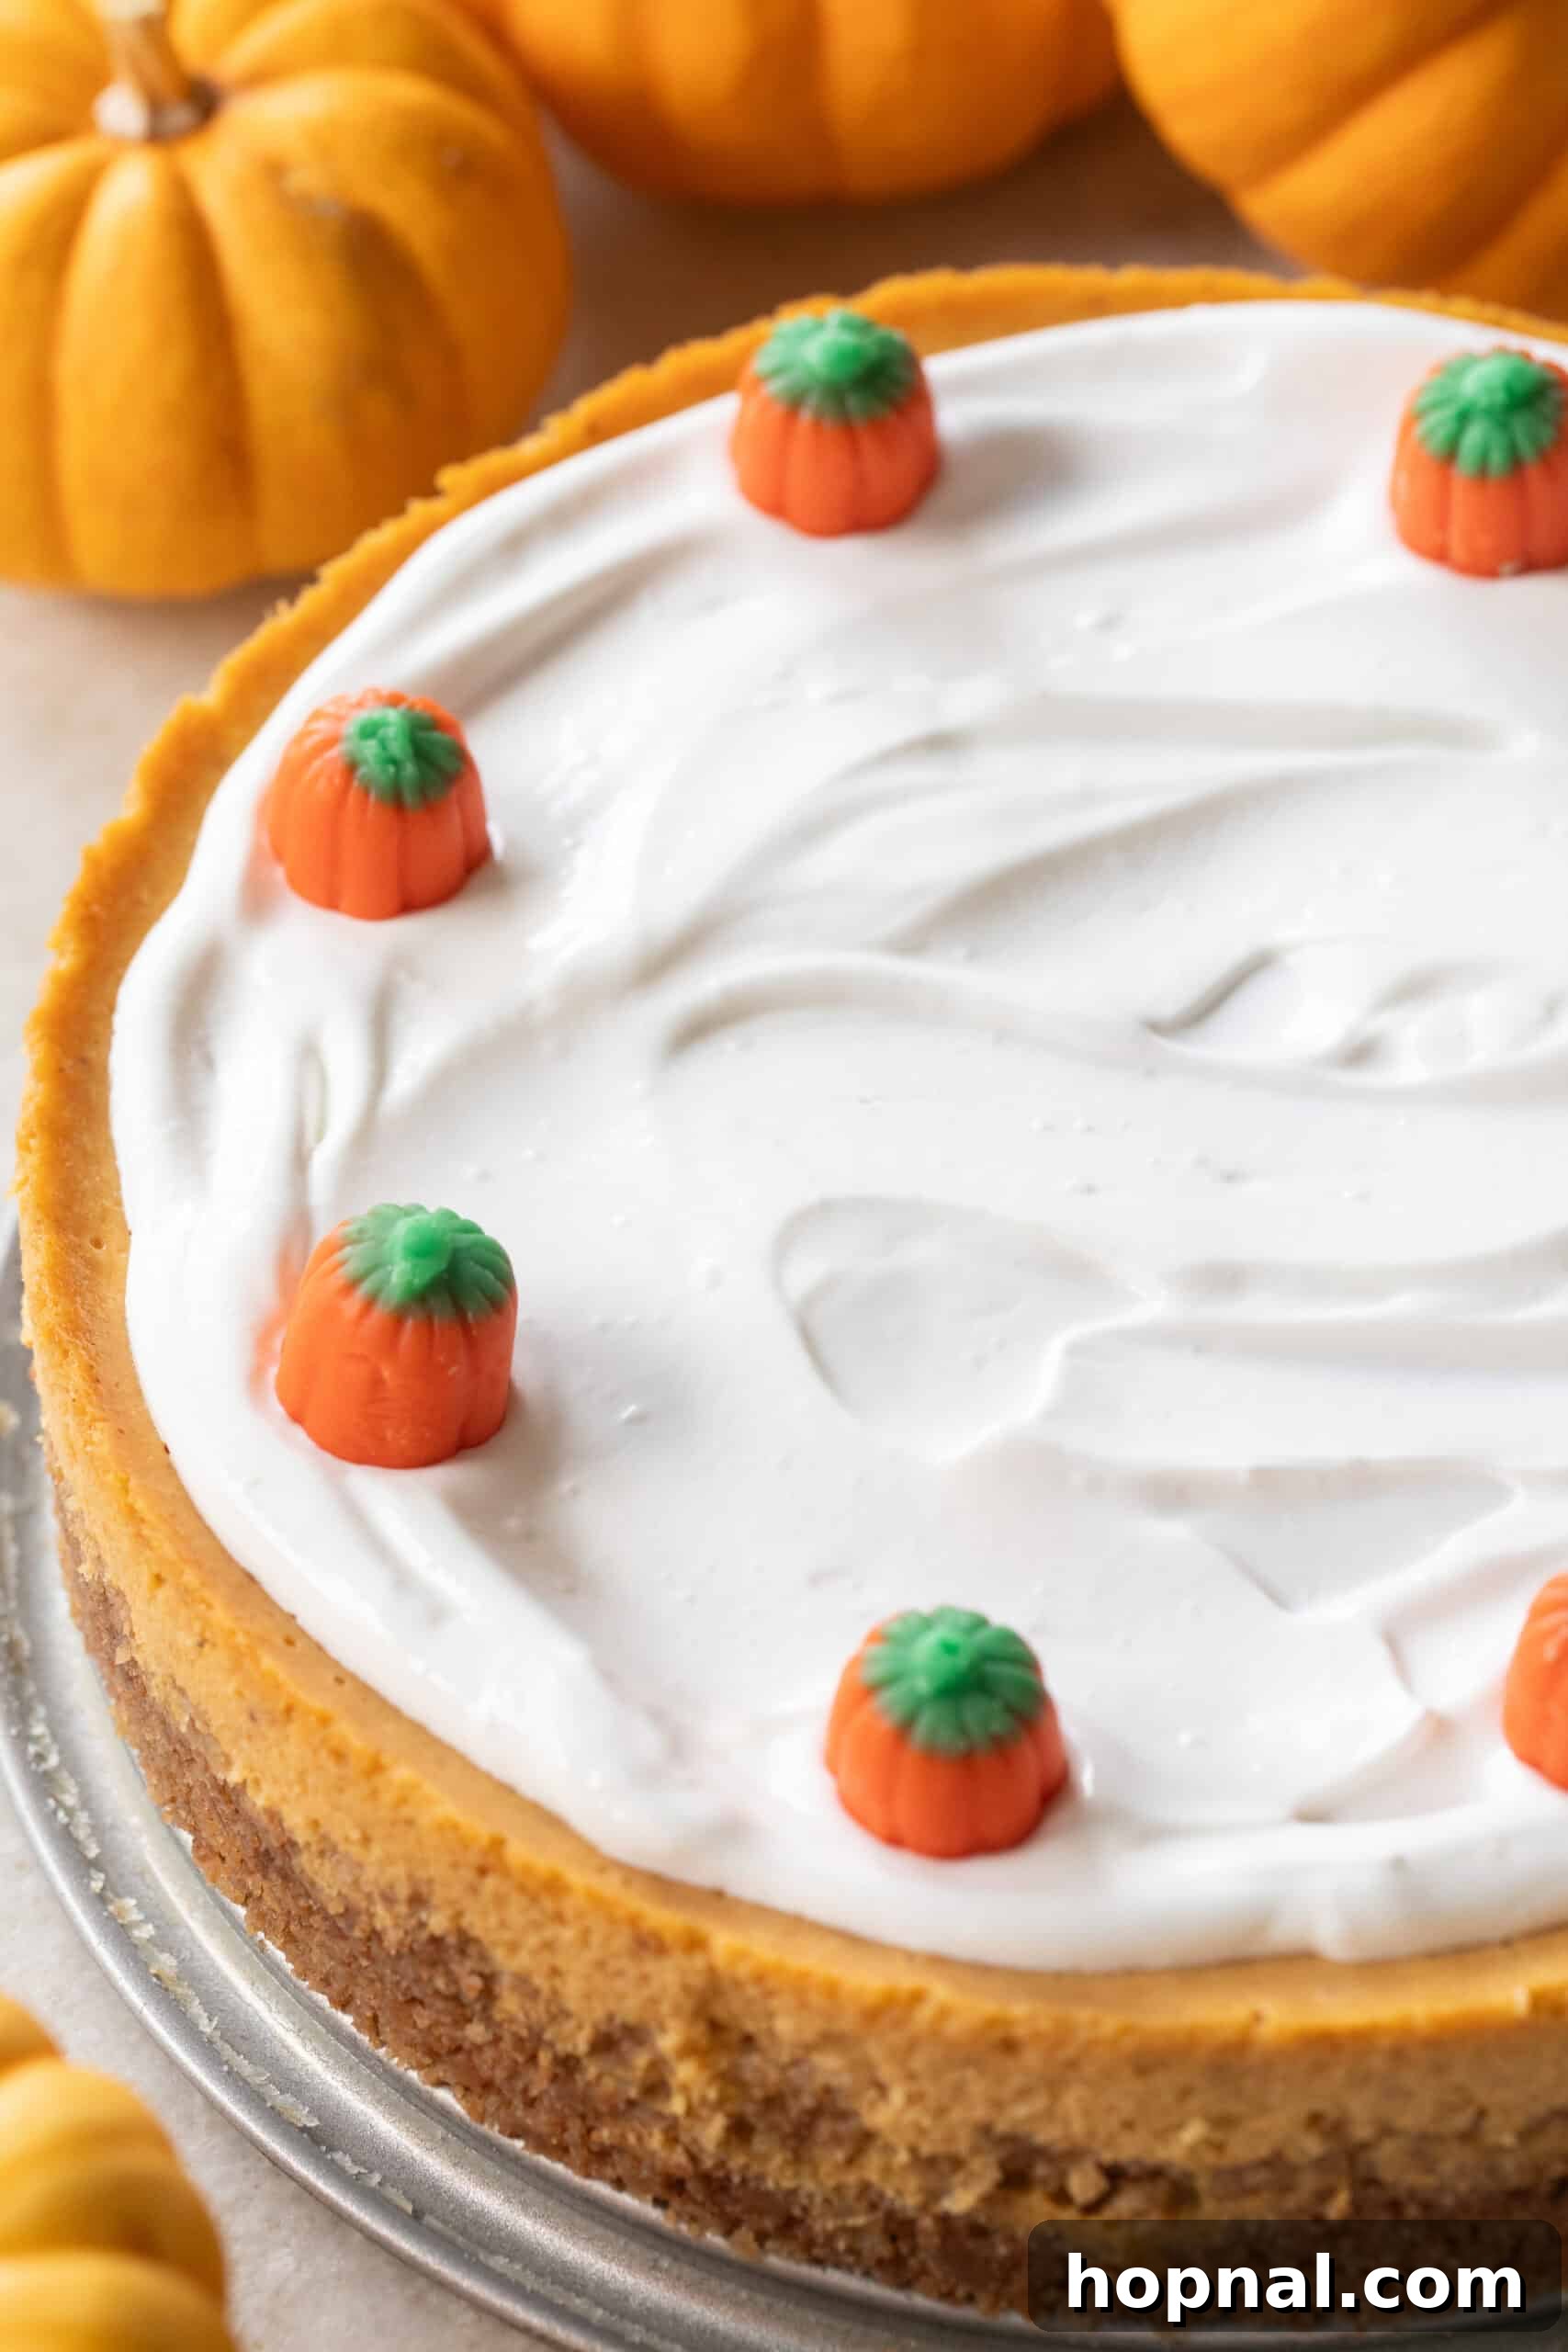
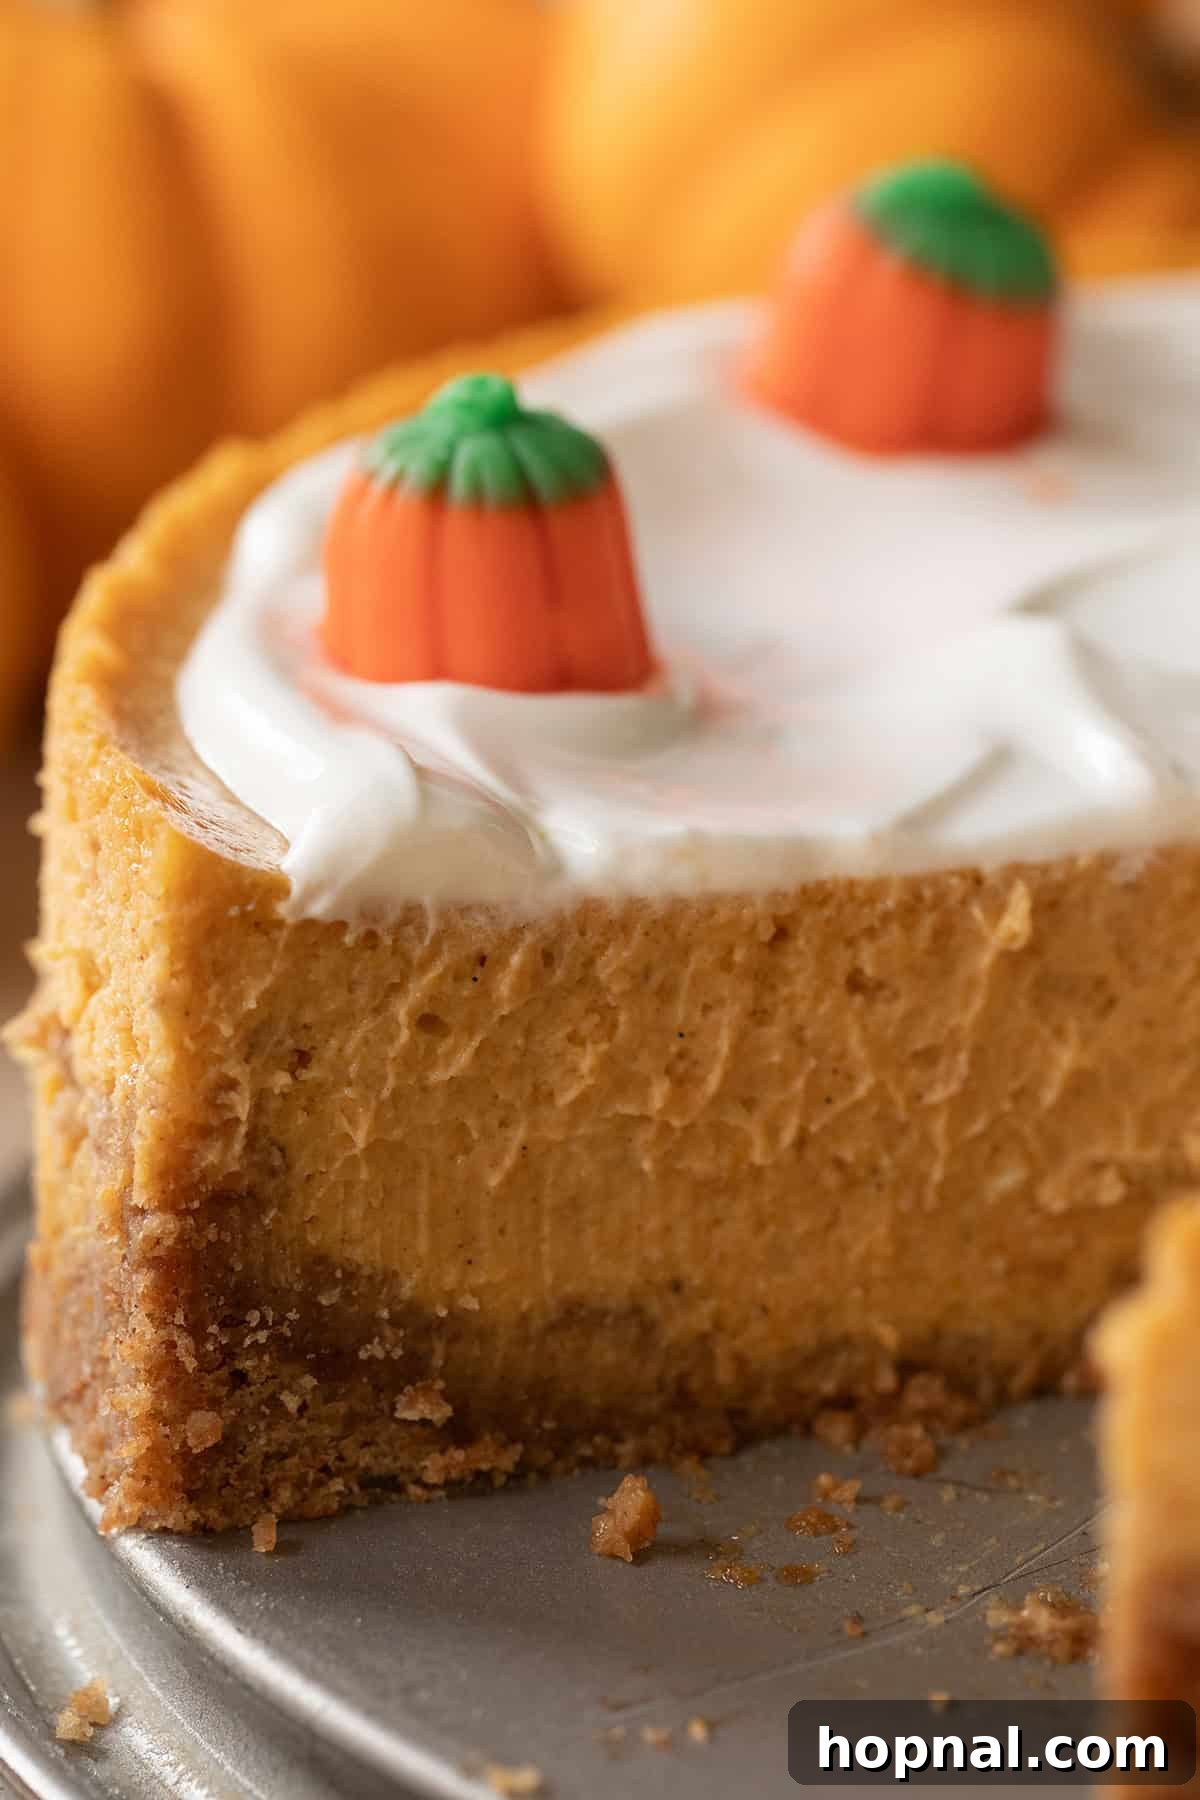
- Apply the Sour Cream Topping (Optional, but Highly Recommended!): Just before you are ready to serve your masterpiece, prepare the luscious sour cream topping. Simply whisk together the sour cream and powdered sugar until smooth and creamy. For an even more luxurious texture, you can use an electric whisk to thicken the cream slightly. Gently spread this delectable topping evenly over your completely cooled and chilled pumpkin cheesecake. This final layer adds an exquisite tangy sweetness that perfectly complements the rich pumpkin flavor and truly completes this extraordinary dessert experience.
Eden’s Expert Recipe Tips for Cheesecake Perfection
Achieving a truly magnificent, crack-free pumpkin cheesecake is simpler than you might imagine, especially when you know a few key secrets. These tried-and-true tips, honed in my own kitchen, will guide you towards creating a show-stopping dessert that is both visually stunning and incredibly delicious, ensuring a flawlessly smooth and creamy outcome every single time.
Super Soft Cream Cheese is Non-Negotiable: This is, without a doubt, the most critical tip for cheesecake success. It is absolutely imperative that your cream cheese is at absolute room temperature and incredibly soft before you even begin mixing. Cold, firm cream cheese will stubbornly resist blending smoothly, inevitably resulting in a lumpy batter and a less-than-silky final texture. If you’re short on time and forget to take it out in advance, a quick 10-15 second zap in the microwave can help, but ideally, let it sit out on the counter for at least one to two hours to naturally soften.
Embrace the Water Bath for Flawless Baking: Seriously, do not skip the water bath – it’s your best friend for a perfectly baked cheesecake! This ingenious technique, also known as a bain-marie, creates a moist, consistent baking environment in your oven. This moist heat prevents the cheesecake from drying out around the edges and, most importantly, completely guards against those unsightly surface cracks that can mar an otherwise perfect dessert. It ensures the cheesecake bakes gently and evenly from the edges to the very center, resulting in an incredibly creamy, uniform texture. While it might sound like an extra step, it’s remarkably straightforward and guarantees a beautiful, professional-looking result.
Cool Slowly for Crack-Free Results: The cooling process is just as vital as the baking itself for preventing cracks. After your cheesecake has finished baking and the edges are set with a slight jiggle in the center, resist the strong urge to pull it out of the oven immediately. Instead, turn off the oven, prop the door open slightly (you can use a wooden spoon or a folded oven mitt to keep it ajar), and allow the cheesecake to gradually cool inside the oven for about one additional hour. This slow, controlled decrease in temperature prevents a sudden thermal shock that can cause the cheesecake’s delicate surface to contract rapidly and crack. Patience here pays off immensely in the final, pristine presentation.
Refrigerate Overnight for Optimal Flavor and Texture: For the absolute best flavor development and a perfectly firm, easy-to-slice texture, plan to refrigerate your cheesecake for at least 6 hours, or ideally, overnight. This extended chilling period allows all the delicious pumpkin and aromatic spice flavors to fully meld, deepen, and truly bloom. It also ensures the cheesecake is completely set and firm, making for exceptionally clean, perfect slices—which is a huge advantage when you’re entertaining guests and desire a make-ahead dessert that truly shines and impresses!
How to Properly Store Your Delicious Pumpkin Cheesecake
Once you’ve invested your time and effort into creating this magnificent pumpkin cheesecake, you’ll want to ensure it stays incredibly fresh and delicious for as long as possible. Proper storage is absolutely key to preserving its creamy texture, vibrant flavors, and overall quality.
- Refrigerator Storage: After your cheesecake has completely cooled to room temperature and undergone its initial essential chilling period, it needs to be stored correctly to maintain its freshness. Wrap the entire cheesecake (or individual slices if you’ve already cut into it) tightly with several layers of plastic wrap, ensuring no air can penetrate the surface. Alternatively, you can place it in an airtight container. Stored this way, your pumpkin cheesecake will remain fresh, moist, and delectable in the refrigerator for up to 5 days. This makes it an ideal dessert for making ahead of time, especially during busy holiday seasons.
- Freezer Storage for Extended Enjoyment: Planning to save some for a future craving or prepare it well in advance for a special event? Cheesecake freezes exceptionally well, preserving its quality for months! For whole cheesecakes, ensure it’s fully chilled, then carefully remove it from the springform pan base. Wrap it first in a tight layer of plastic wrap, followed by a second, equally tight layer of aluminum foil. For individual slices, wrap each piece separately in plastic wrap, then foil, and place them in a freezer-safe bag or container. This double-layer protection is crucial for preventing freezer burn. You can confidently freeze your pumpkin cheesecake for up to 3 months. To enjoy, simply transfer the cheesecake (whether whole or individual slices) to the refrigerator and allow it to thaw slowly overnight until it’s fully defrosted and returns to its creamy, original texture.
My Secret for an Irresistible Sour Cream Topping!
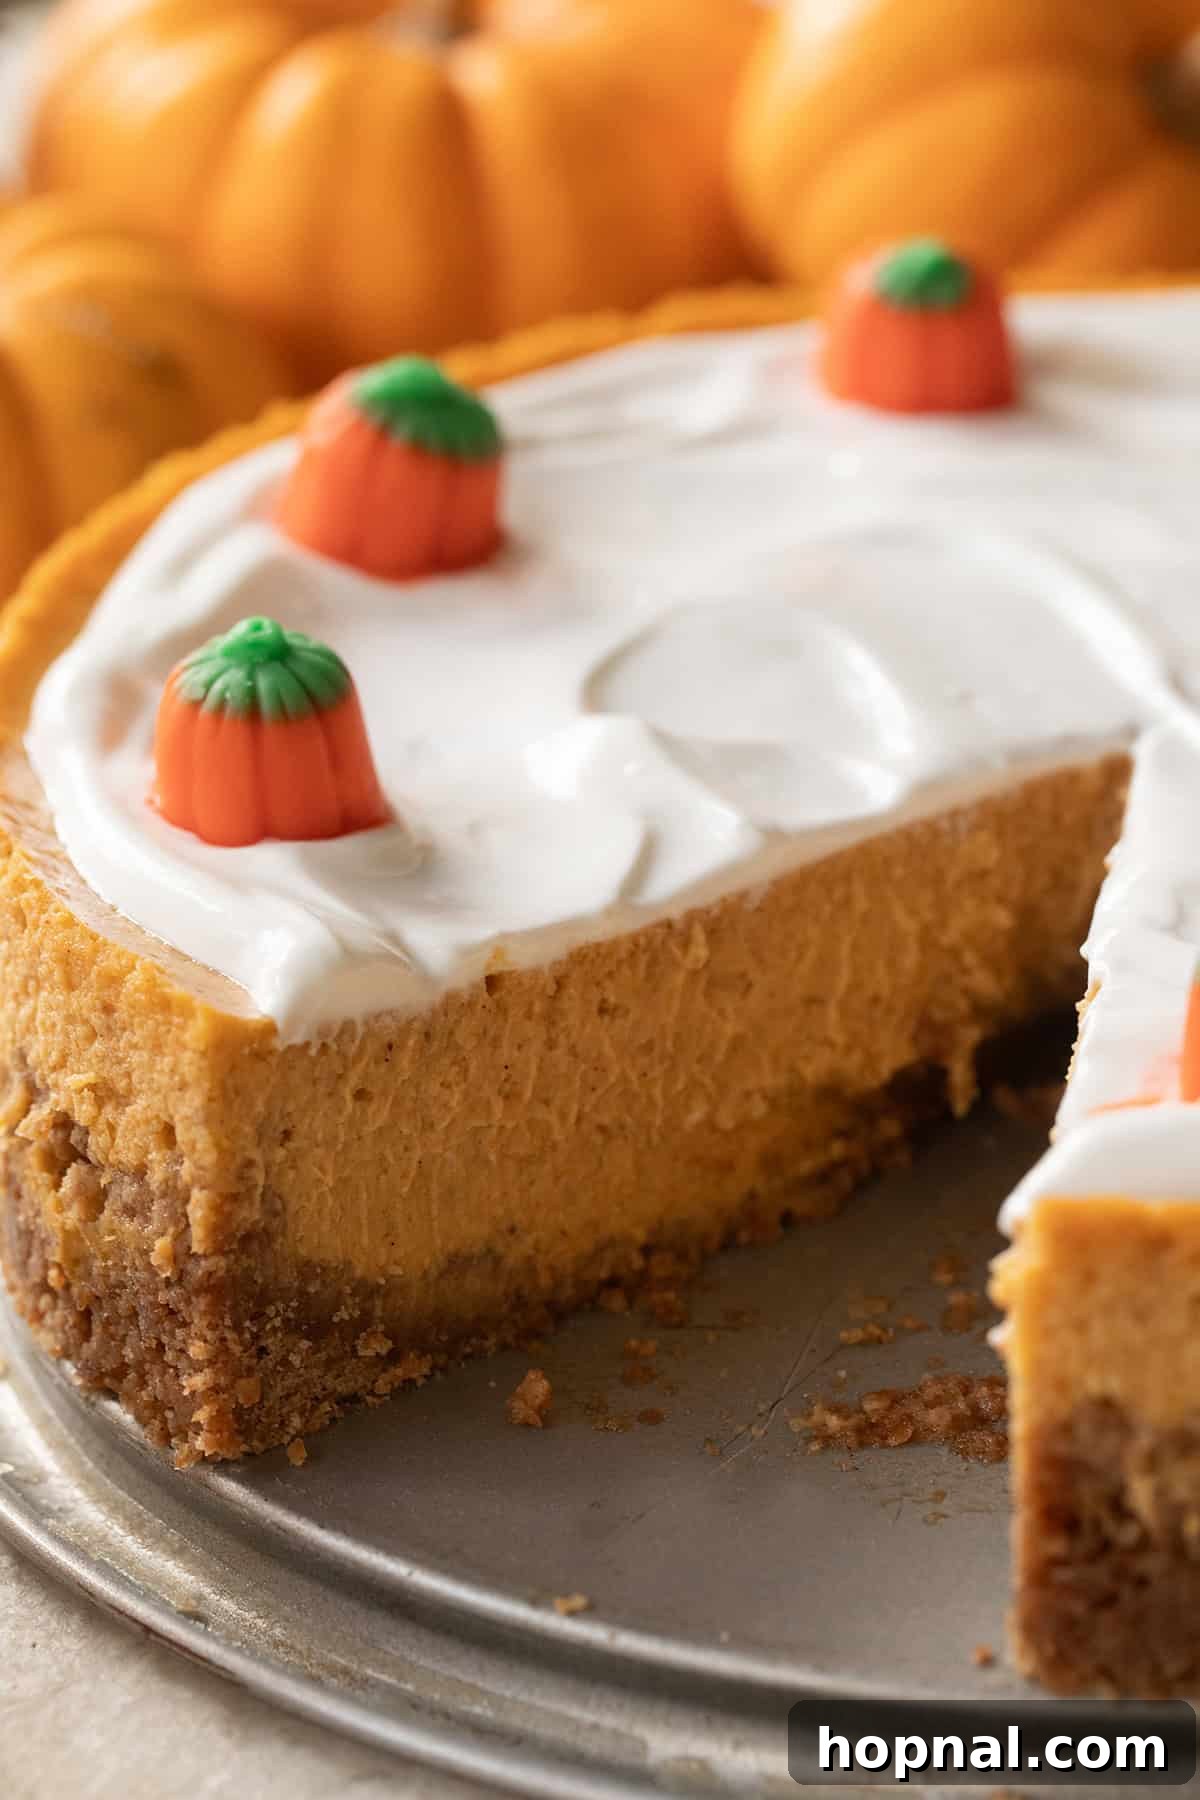
While this creamy pumpkin cheesecake is absolutely divine and incredibly flavorful on its own, I simply cannot resist adding a simple yet profoundly impactful sour cream topping. Consider this an optional, but highly recommended, enhancement that takes your cheesecake from delicious to utterly irresistible! It introduces an exquisite extra layer of creaminess and a delightful tangy counterpoint that perfectly complements the rich, spiced pumpkin filling.
This “secret” topping is incredibly easy to make, requiring just two simple ingredients: 1 cup of full-fat sour cream and 1/4 cup of powdered sugar (confectioners’ sugar). The sour cream provides a light, refreshing acidity that expertly cuts through the richness of the cheesecake, while the powdered sugar adds just enough sweetness without ever overpowering the natural, comforting flavors of the pumpkin and spices. To prepare, simply whisk these two ingredients together in a small bowl until they are completely smooth and well combined. For an even thicker, more luxurious topping, you can gently whisk it with an electric mixer for a minute or two until it slightly thickens and becomes more spreadable. Then, just before you’re ready to serve, gently spread this luscious mixture evenly over your completely cooled and thoroughly chilled pumpkin cheesecake. Trust me on this one – this simple addition truly enhances both the texture and the complex flavor profile, creating a truly memorable and utterly irresistible dessert experience that everyone will adore!
Frequently Asked Questions About Pumpkin Cheesecake
Absolutely! In fact, making this pumpkin cheesecake ahead of time is not only possible but highly recommended, especially for busy holidays like Thanksgiving or other festive autumn gatherings. Many cheesecake connoisseurs agree that the flavors actually develop and deepen even more beautifully after a full day of chilling in the refrigerator. Simply prepare the cheesecake according to all the instructions, allow it to cool completely and then refrigerate it for at least 4 hours, or ideally, overnight. This extensive chilling period allows it to fully set, ensuring it’s perfectly firm, easy to slice, and bursting with developed flavor when you’re ready to serve your guests.
Yes, the water bath is a critical and highly recommended step that I strongly advise against skipping for cheesecake perfection! While it might seem like an extra effort or a somewhat intimidating technique, it plays a vital role in preventing your cheesecake from developing unsightly cracks on its surface and ensures it bakes incredibly evenly and gently. The steam generated from the hot water bath creates a moist, consistent baking environment in your oven. This moisture helps the cheesecake cook slowly, prevents the top from drying out, and minimizes temperature fluctuations that lead to splitting. Don’t worry—it’s much easier to set up than it sounds, and the reward is a beautifully smooth, pristine, and crack-free cheesecake that looks and tastes like it came directly from a professional bakery!
Definitely! This homemade pumpkin cheesecake freezes wonderfully, making it an excellent option for meal prepping, saving leftovers, or simply having a delicious dessert on hand. You can freeze it whole (after it’s been fully chilled and removed from the springform pan base) or slice it into individual portions for convenience. To freeze, wrap each slice or the entire cake tightly in plastic wrap, followed by a sturdy layer of aluminum foil to prevent any freezer burn. It will stay fresh and delicious in the freezer for up to 3 months. When you’re ready to enjoy, simply transfer the frozen cheesecake (whole or slices) to the refrigerator and allow it to thaw slowly overnight. It will taste just as delicious and creamy as it did on the day you baked it!
Adapting this delicious pumpkin cheesecake recipe to be gluten-free is a simple and straightforward modification that won’t compromise on flavor or texture. The key is to swap out the regular graham cracker crumbs for readily available gluten-free graham crackers. Simply crush them in a food processor, just as you would with traditional graham crackers, and then proceed with the crust recipe as written. All the other ingredients in the pumpkin cheesecake filling are naturally gluten-free, so no further changes are needed for the filling itself. This easy tweak ensures that everyone, including those with gluten sensitivities, can enjoy a delightful slice of this quintessential fall dessert!
More Delicious Pumpkin Recipes You’ll Adore This Fall
Thanksgiving
Pumpkin Gooey Butter Cake Recipe
Thanksgiving
Classic Homemade Pumpkin Pie Recipe
Breads
Moist and Flavorful Pumpkin Bread Recipe
Thanksgiving
The Best Pumpkin Cheesecake Recipe
There you have it – your comprehensive and expert guide to baking the most exquisite, creamy pumpkin cheesecake. With its irresistible blend of warm fall spices, authentic pumpkin goodness, and that luscious, tangy sour cream topping, it’s truly the perfect dessert for your Thanksgiving feast, a cozy autumn evening with loved ones, or any special occasion that calls for something extraordinary and homemade. I sincerely hope you enjoy every moment of baking and savoring this delightful creation. If you try this recipe and fall in love with it, please do let me know your thoughts by leaving a comment below! I absolutely love hearing from you and seeing your delicious results.
Rated 5 out of 5 stars by 1 voter.
Pumpkin Cheesecake Recipe
Eden
This creamy pumpkin cheesecake recipe is full of warm spices and real pumpkin and topped with a tangy sour cream layer. It’s the perfect blend of rich cheesecake and fall flavors, making it an irresistible dessert for any occasion!
30 mins
1 hr
2 hrs 30 mins (plus chilling time)
10 slices
Print Recipe
Ingredients
Graham Cracker Crust
- 2 cups Graham Cracker Crumbs
- 3 tbsp Light Brown Sugar
- 1/2 tsp Ground Cinnamon
- 1/2 cup Salted Butter, melted (1 Stick)
Pumpkin Cheesecake Filling
- 24 oz Cream Cheese, softened (Three 8-Ounce Packages, full-fat recommended)
- 15 oz Pureed Pumpkin (100% pure pumpkin, not pie filling)
- 4 large Eggs, room temperature
- 1/4 cup Sour Cream, room temperature
- 1 1/3 cup Granulated Sugar
- 1/2 tsp Salt
- 1 tsp Ground Cinnamon
- 1/4 tsp Ground Nutmeg
- 1/8 tsp Ground Cloves
- 2 tbsp All-Purpose Flour
- 1 tbsp Vanilla Bean Paste or Extract (high-quality recommended)
Sour Cream Topping (Optional, but recommended)
- 1 cup Sour Cream (full-fat)
- 1/4 cup Powdered Sugar
Instructions
Crust Preparation
- Preheat your oven to 325°F (160°C).
- In a medium bowl, combine the graham cracker crumbs, light brown sugar, and ground cinnamon. Mix thoroughly until all ingredients are evenly distributed.
- Pour in the melted butter and stir vigorously until the crumb mixture is fully moistened and resembles wet sand.
- Press the mixture firmly and evenly into the bottom of a 9-inch springform pan. Use the back of a spoon or your knuckles to create a compact, uniform crust.
- Wrap the bottom and sides of the springform pan tightly with heavy-duty aluminum foil. This will create a protective barrier for the water bath. Set the prepared crust aside.
Cheesecake Filling & Baking
- Ensure your cream cheese is very soft and at room temperature. For optimal softness, microwave it for about 15 seconds if necessary.
- In a large mixing bowl, using an electric mixer, beat the softened cream cheese on medium speed until it is completely smooth and creamy, typically 2-3 minutes. Remember to scrape down the sides of the bowl as needed to ensure even mixing.
- Add the pumpkin puree, eggs, sour cream, granulated sugar, salt, ground cinnamon, ground nutmeg, ground cloves, all-purpose flour, and vanilla bean paste (or extract) to the bowl. Mix on low speed just until all ingredients are fully combined and the filling is silky smooth. Avoid overmixing to prevent excess air from incorporating.
- Carefully pour the pumpkin cheesecake filling over the prepared graham cracker crust in the springform pan. Gently spread the top with a spatula to create an even, level surface.
- Place the foil-wrapped springform pan onto a larger baking sheet. Carefully transfer this entire assembly into the preheated oven.
- Once the baking sheet with the cheesecake is in the oven, carefully pour boiling water into the baking sheet, surrounding the springform pan. Fill it until the water reaches about halfway up the sides of the springform pan, being very cautious not to splash any water into the cheesecake itself. This creates your crucial water bath.
- Bake the cheesecake for approximately 1 hour. The edges should appear set, but the center (a 2-3 inch circle) should still have a slight, gentle jiggle when the pan is lightly nudged.
- After baking, turn off the oven. Prop the oven door open slightly (using a wooden spoon or oven mitt) and allow the cheesecake to cool slowly inside the oven for an additional 1 hour. This gradual cooling process is key to preventing cracks.
- Remove the cheesecake from the oven and the water bath. Carefully remove the aluminum foil. Let it cool completely on a wire rack at room temperature for 1-2 hours. Once cooled, cover loosely with plastic wrap and transfer to the refrigerator. Chill for at least 4 hours, or ideally, overnight, for optimal setting and flavor development.
Sour Cream Topping (Optional)
- In a small bowl, whisk together the 1 cup of sour cream and 1/4 cup of powdered sugar until smooth and creamy. For a slightly thicker topping, use an electric whisk for a minute or two until it reaches desired consistency.
- Just before serving, gently spread this delicious sour cream topping evenly over your completely cooled and chilled pumpkin cheesecake.
Nutrition
Calories: 604kcal, Carbohydrates: 61g, Protein: 9g, Fat: 37g, Saturated Fat: 21g, Polyunsaturated Fat: 2g, Monounsaturated Fat: 10g, Trans Fat: 0.4g, Cholesterol: 171mg, Sodium: 634mg, Potassium: 224mg, Fiber: 4g, Sugar: 38g, Vitamin A: 4871IU, Vitamin C: 2mg, Calcium: 122mg, Iron: 2mg
Nutrition information is automatically calculated and should only be used as an approximation.
Like this recipe? Leave a comment below!
Your feedback makes my day! Share your thoughts and tell me how your pumpkin cheesecake turned out.