
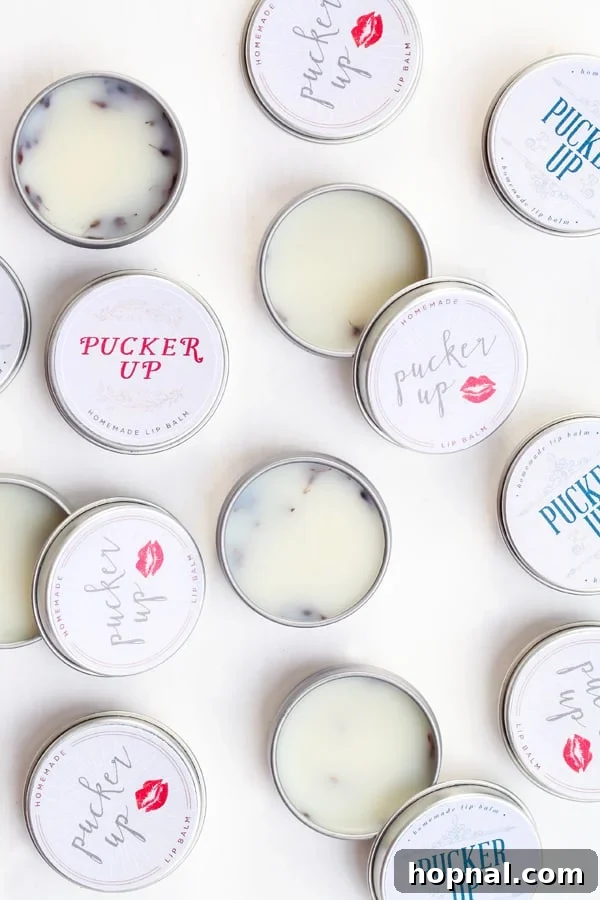
This Valentine’s Day, elevate your gifting game with a personal touch. Discover the joy of crafting your very own luxurious DIY lavender lip balm. This simple yet elegant recipe promises smooth, deeply moisturized, and truly kissable lips, making it an ideal present for friends, coworkers, or even a thoughtful self-care treat. We’ve also included complimentary printable labels, ensuring your homemade creations are as charming to look at as they are delightful to use.
Whether you’re planning an intimate girl’s night celebration for Valentine’s Day, hosting a festive gathering, or setting up a beautiful cocktail bar, these lavender lip balms serve as exquisite and memorable favors. They are also a fantastic Valentine’s Day craft project for teens, offering a fun and practical way to express creativity and share love during the holiday season.
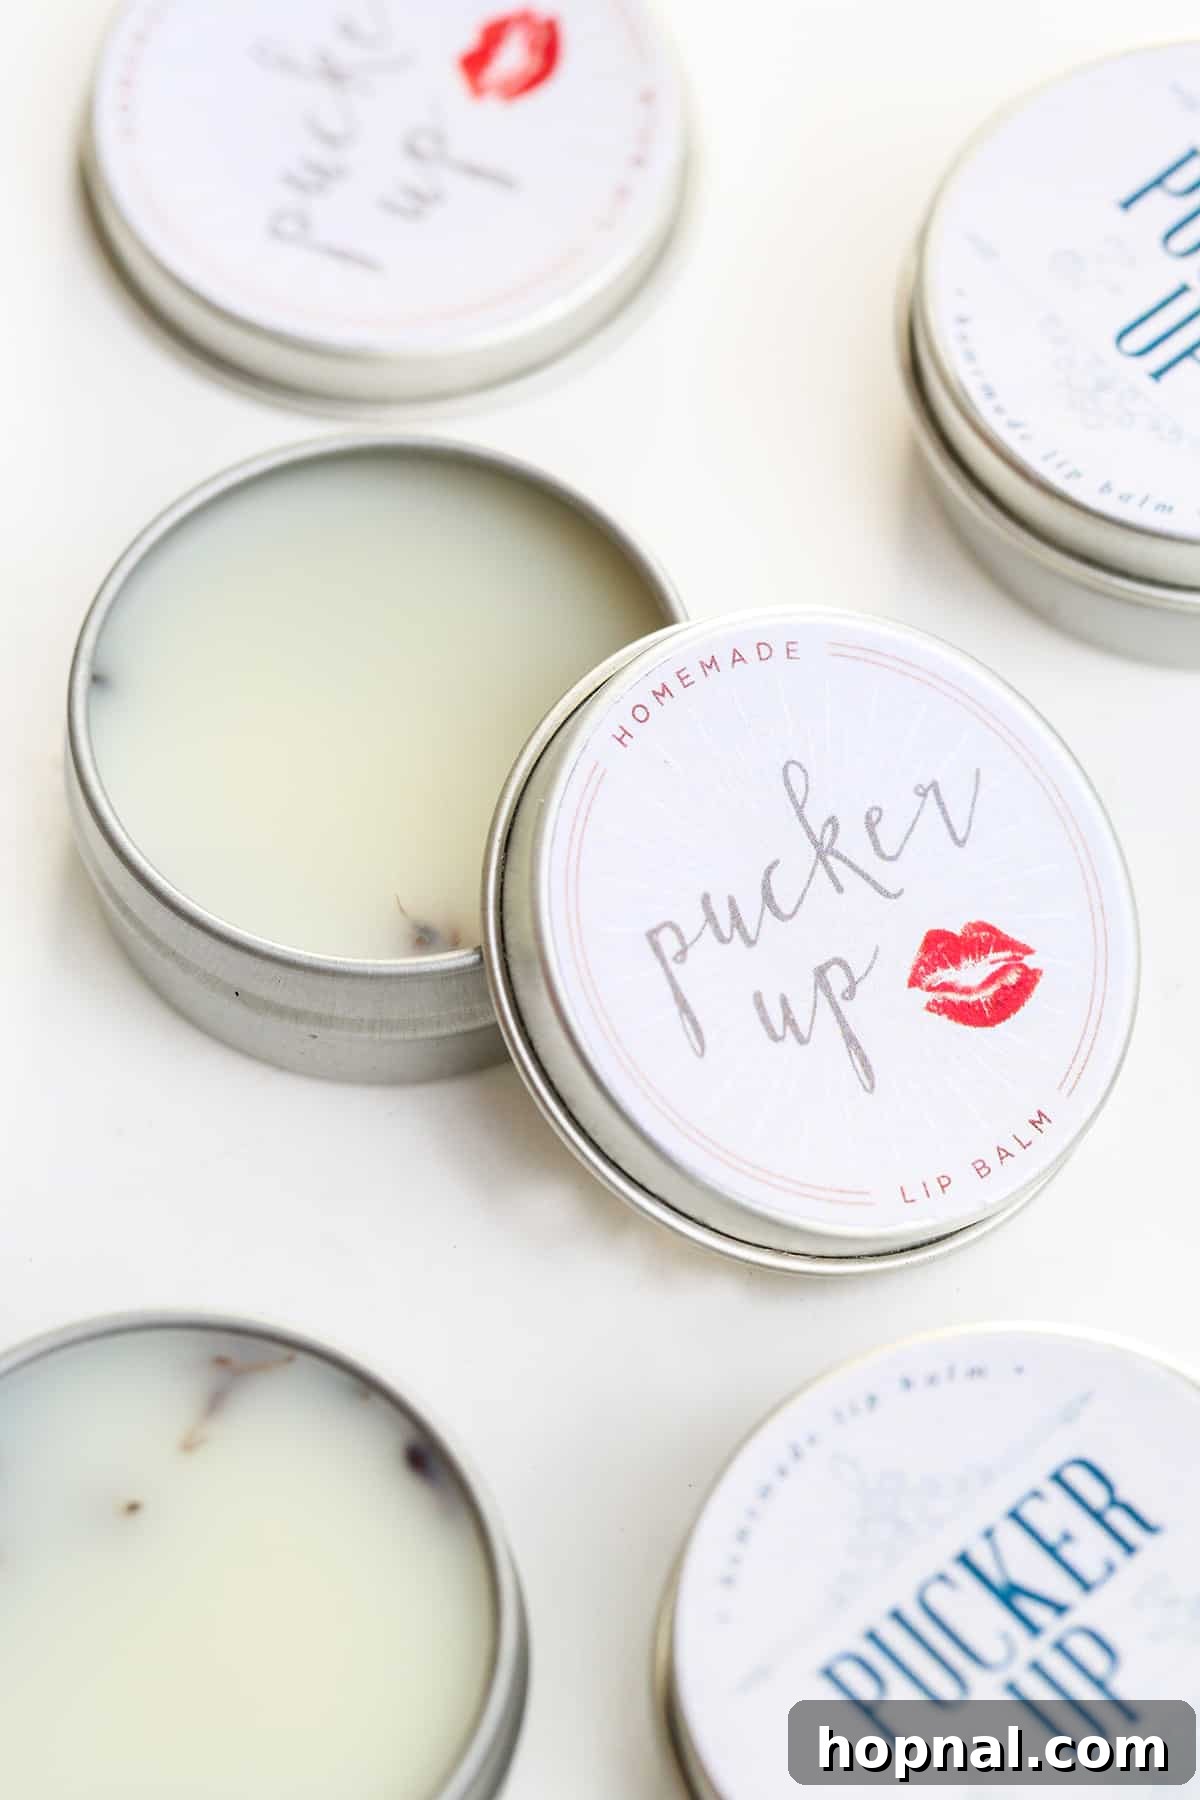
Why Choose Homemade Lavender Lip Balm?
In a world saturated with mass-produced items, a homemade gift truly stands out. Crafting your own lavender lip balm allows you to control every ingredient, ensuring a product that is free from harsh chemicals, synthetic fragrances, and unnecessary additives. This not only makes it safer and healthier for your lips but also more personal and thoughtful. Lavender, known for its calming and healing properties, adds a luxurious touch, making this lip balm a soothing balm for both the lips and the mind. It’s an act of self-love and a beautiful gesture of care for others, perfect for expressing affection on Valentine’s Day. Moreover, the process of creating something with your own hands is incredibly rewarding and allows for customization that store-bought products simply can’t offer. You can tailor the scent, texture, and even add subtle tints if you wish, though we’re focusing on a classic, natural balm here.
Essential Supplies for Your DIY Lip Balm Project
Before diving into the magic of creating your own lip balm, gather these simple tools and materials. Having everything ready will make the process smooth, enjoyable, and mess-free. Precision and cleanliness are key to a successful batch of homemade lip balm.
- 1.5″ Round Hole Puncher: This specialized puncher is essential for cleanly and precisely cutting out your circular labels. It ensures that each label is perfectly round and fits snugly on your lip balm tins, giving your finished product a professional and polished appearance that truly elevates a homemade gift.
- Sticker Paper: The ideal medium for printing your custom lip balm labels. Choose a good quality, self-adhesive paper that will hold ink well and adhere firmly to the tin. Matte or glossy options are available, allowing you to personalize the aesthetic of your labels even further.
- Round Lip Balm Tins: These small, portable containers are perfect for storing and distributing your homemade lip balm. Opt for tins with tight-fitting screw-top or push-on lids to ensure the balm remains fresh and prevents leakage, making them convenient for carrying in a purse or pocket.
- Medium Saucepan: You’ll need this to gently melt your ingredients together on low heat. For extra control and to prevent scorching the delicate ingredients, consider using a double boiler method. This involves placing your ingredients in a heatproof bowl set over a saucepan of simmering water, allowing for indirect, even heating.
- Heatproof Glass Measuring Cup or Bowl with a Spout: This crucial tool will make pouring the melted lip balm mixture into the small tins much easier and minimize spills. A spout ensures a controlled flow, allowing you to fill each tin accurately and cleanly, which is especially helpful when working with hot liquids and small openings.
The Heart of the Balm: Natural Ingredients
The beauty of this DIY lip balm lies in its pure, nourishing ingredients, each chosen for its unique benefits to create a truly effective and delightful product. These natural components work synergistically to hydrate, protect, and heal your delicate lip skin, leaving them soft, supple, and irresistibly smooth.
- Shea Butter: A remarkable emollient, shea butter is renowned for its intense moisturizing properties. Extracted from the nuts of the shea tree, it’s incredibly rich in vitamins A, E, and F, as well as essential fatty acids. These nutrients deeply nourish the skin, promoting elasticity and forming a protective barrier that locks in moisture, effectively healing chapped or dry lips. Its naturally creamy texture contributes to the lip balm’s luxurious, smooth feel on application.
- Coconut Oil: This versatile and widely available oil is a powerhouse of hydration and a staple in many natural beauty recipes. It melts easily on contact with skin, providing instant moisture and a smooth application without feeling greasy. Coconut oil also possesses natural antibacterial and antifungal properties, making it an excellent choice for maintaining healthy lips and preventing common irritations or infections. It’s a wonderful ingredient for its light texture and subtle, pleasant aroma.
- Beeswax: An essential ingredient for giving your lip balm its desired firm yet spreadable consistency. Beeswax is a natural wax produced by honey bees. When incorporated into lip balm, it creates a protective, breathable layer on the lips, effectively shielding them from harsh environmental elements like wind, cold, and sun, while also helping to retain moisture. It’s a natural emulsifier that binds all the oils and butters together beautifully, ensuring a stable and long-lasting product.
- Lavender Essential Oil: More than just a delightful fragrance, lavender essential oil is cherished for its wide range of therapeutic benefits. It’s well-known for its calming, anti-inflammatory, and antiseptic properties, which can help soothe irritated lips, reduce redness, and promote healing. Its gentle, floral, and herbaceous aroma also adds a wonderfully relaxing sensory experience to your lip balm, making each application a moment of tranquility. Ensure you use a high-quality, therapeutic-grade essential oil for best results.
- Dried Lavender (chopped): Incorporating finely chopped dried lavender adds a subtle visual appeal and enhances the natural lavender scent of your balm. While technically optional, it gives your homemade lip balm an extra touch of artisanal charm and reinforces the natural, botanical theme. Ensure the lavender is very finely chopped to avoid a gritty texture, or consider grinding it into a fine powder before adding. This adds a delightful speckle to the balm, signaling its natural origins.
Step-by-Step Guide: How to Make Your Lavender Lip Balm
Creating your own lavender lip balm is a wonderfully straightforward process that yields impressive results. Follow these detailed steps to ensure a perfect batch every time. The key is gentle heat, precise measurements, and a little patience.
- Prepare Your Workspace and Supplies: Before you begin melting, ensure you have all your measured ingredients and necessary supplies laid out on a clean, heat-resistant surface. Make sure your lip balm tins are clean, dry, and ready to be filled. This preparation will help the process flow smoothly once the mixture is melted.
- Gently Melt the Base Ingredients: In a medium saucepan, combine your measured coconut oil, shea butter, and beeswax. Place the saucepan over very low heat. Gently stir the mixture occasionally with a clean spoon or spatula until all ingredients are completely melted and blended into a clear, uniform liquid. It’s crucial not to use high heat, as overheating can diminish the beneficial properties of the oils and butters. A slow, steady melt is ideal.
- Incorporate Essential Oil and Dried Lavender: Once the base mixture is fully melted, immediately remove the saucepan from the heat. Allow the mixture to cool for just one or two minutes; it should still be liquid but not scalding hot. At this point, carefully add the recommended drops of lavender essential oil and the finely chopped dried lavender. Stir thoroughly to ensure the essential oil is evenly distributed throughout the mixture and the dried lavender is suspended.
- Transfer for Controlled Pouring: Carefully pour the warm, melted lip balm mixture from the saucepan into your heatproof glass measuring cup or bowl that features a convenient spout. This transfer is vital because the spout provides significantly better control and precision, making it much easier to accurately fill the small openings of the lip balm tins without making a mess or wasting precious balm.
- Fill the Lip Balm Tins: Working quickly but steadily, slowly and carefully pour the mixture into each round lip balm tin. Fill them almost to the very top, leaving just a tiny bit of space to prevent overflow once the balm hardens. The mixture will begin to harden as it cools, so efficiency here is beneficial.
- Cool and Harden Completely: Now comes the waiting game. Allow the filled tins to cool completely at room temperature. This process can take a couple of hours, depending on your room’s temperature. For a faster set, you can carefully transfer the tins to the refrigerator for approximately 30-60 minutes. However, avoid placing them in the freezer, as rapid temperature changes can sometimes lead to an uneven texture or cause the balm to separate. The lip balm is ready once it is fully solid and firm to the touch.
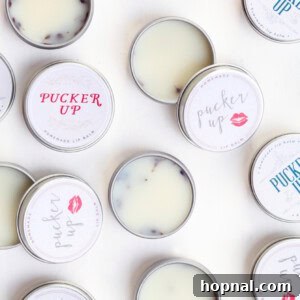
- Apply Your Custom Labels: While your lip balm is cooling and hardening, you can prepare your personalized labels. Once the balm is completely solid and cool, peel the backing from your pre-cut “Pucker Up” labels and firmly stick them onto the tops of your tins. Press down gently to ensure a smooth application without any trapped air bubbles, giving your homemade lip balm that perfect, professional, and charming finish.
Pro Tip: Achieving the perfect lip balm consistency might take a tiny bit of experimentation. If you find your first batch of lip balm is a little too soft after cooling, gently remelt it and add a small amount (e.g., half a teaspoon) of additional beeswax. If it turns out too hard, remelt it and stir in a touch more coconut oil or shea butter. Small adjustments can easily rectify the texture, ensuring your next batch is absolutely perfect!
Personalize Your Gift: Adorable Lip Balm Labels
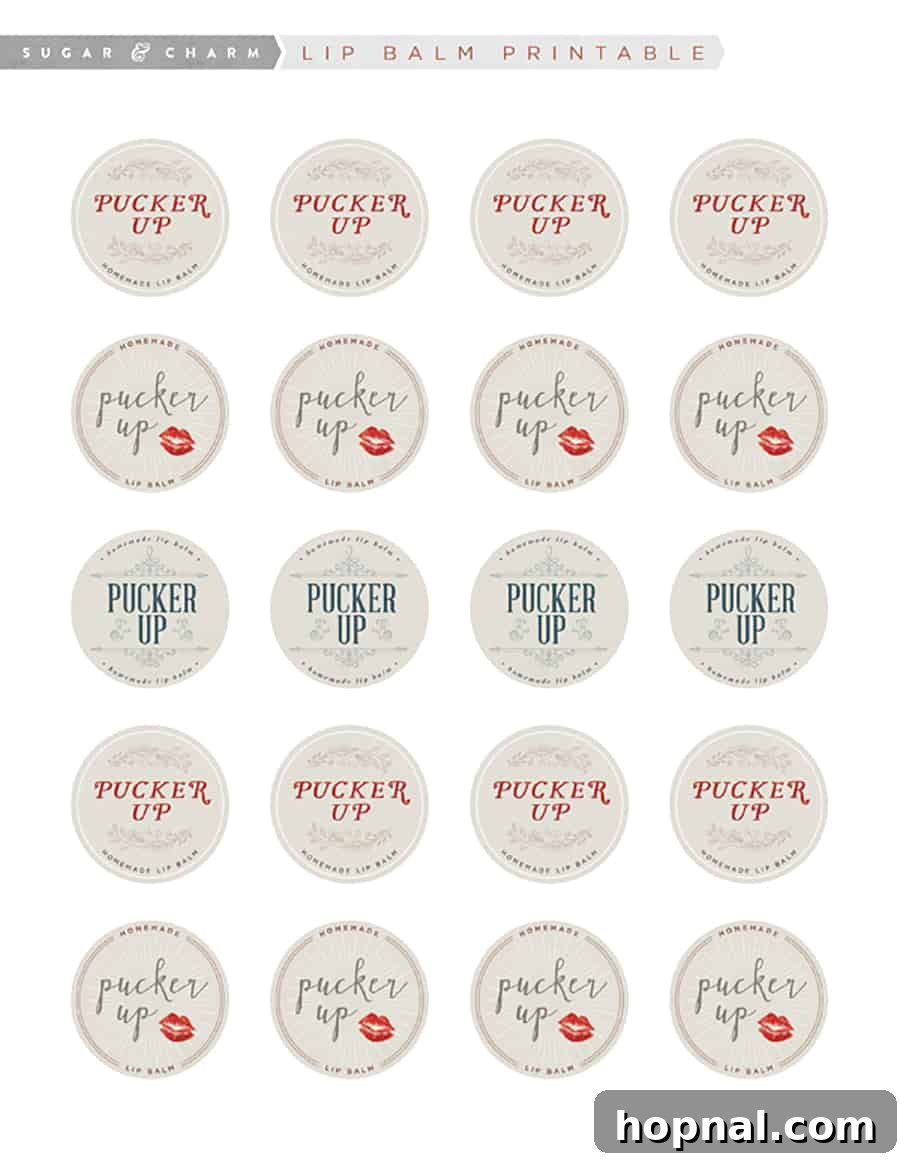
A beautifully crafted lip balm deserves an equally charming presentation. Our “Pucker Up” labels are designed to add that perfect finishing touch, transforming your homemade balm into an irresistible gift or party favor. Personalization makes all the difference, showing an extra layer of thought and effort that truly elevates your handmade creation. It’s these small details that make a gift memorable and cherished.
Download and print our “Pucker Up” labels directly onto sticker paper. For the best results and vibrant colors, ensure your printer settings are adjusted for high-quality output. Using waterproof sticker paper can also provide an added layer of durability, especially for a product that might be handled frequently.
Once your charming labels are printed, grab your trusty 1.5″ round hole puncher. Carefully align and punch out each label. This step ensures perfectly circular labels that fit snugly on your round lip balm tins, avoiding any uneven edges and contributing significantly to the professional, store-bought look of your homemade balms. This attention to detail will impress anyone who receives your thoughtful gift.
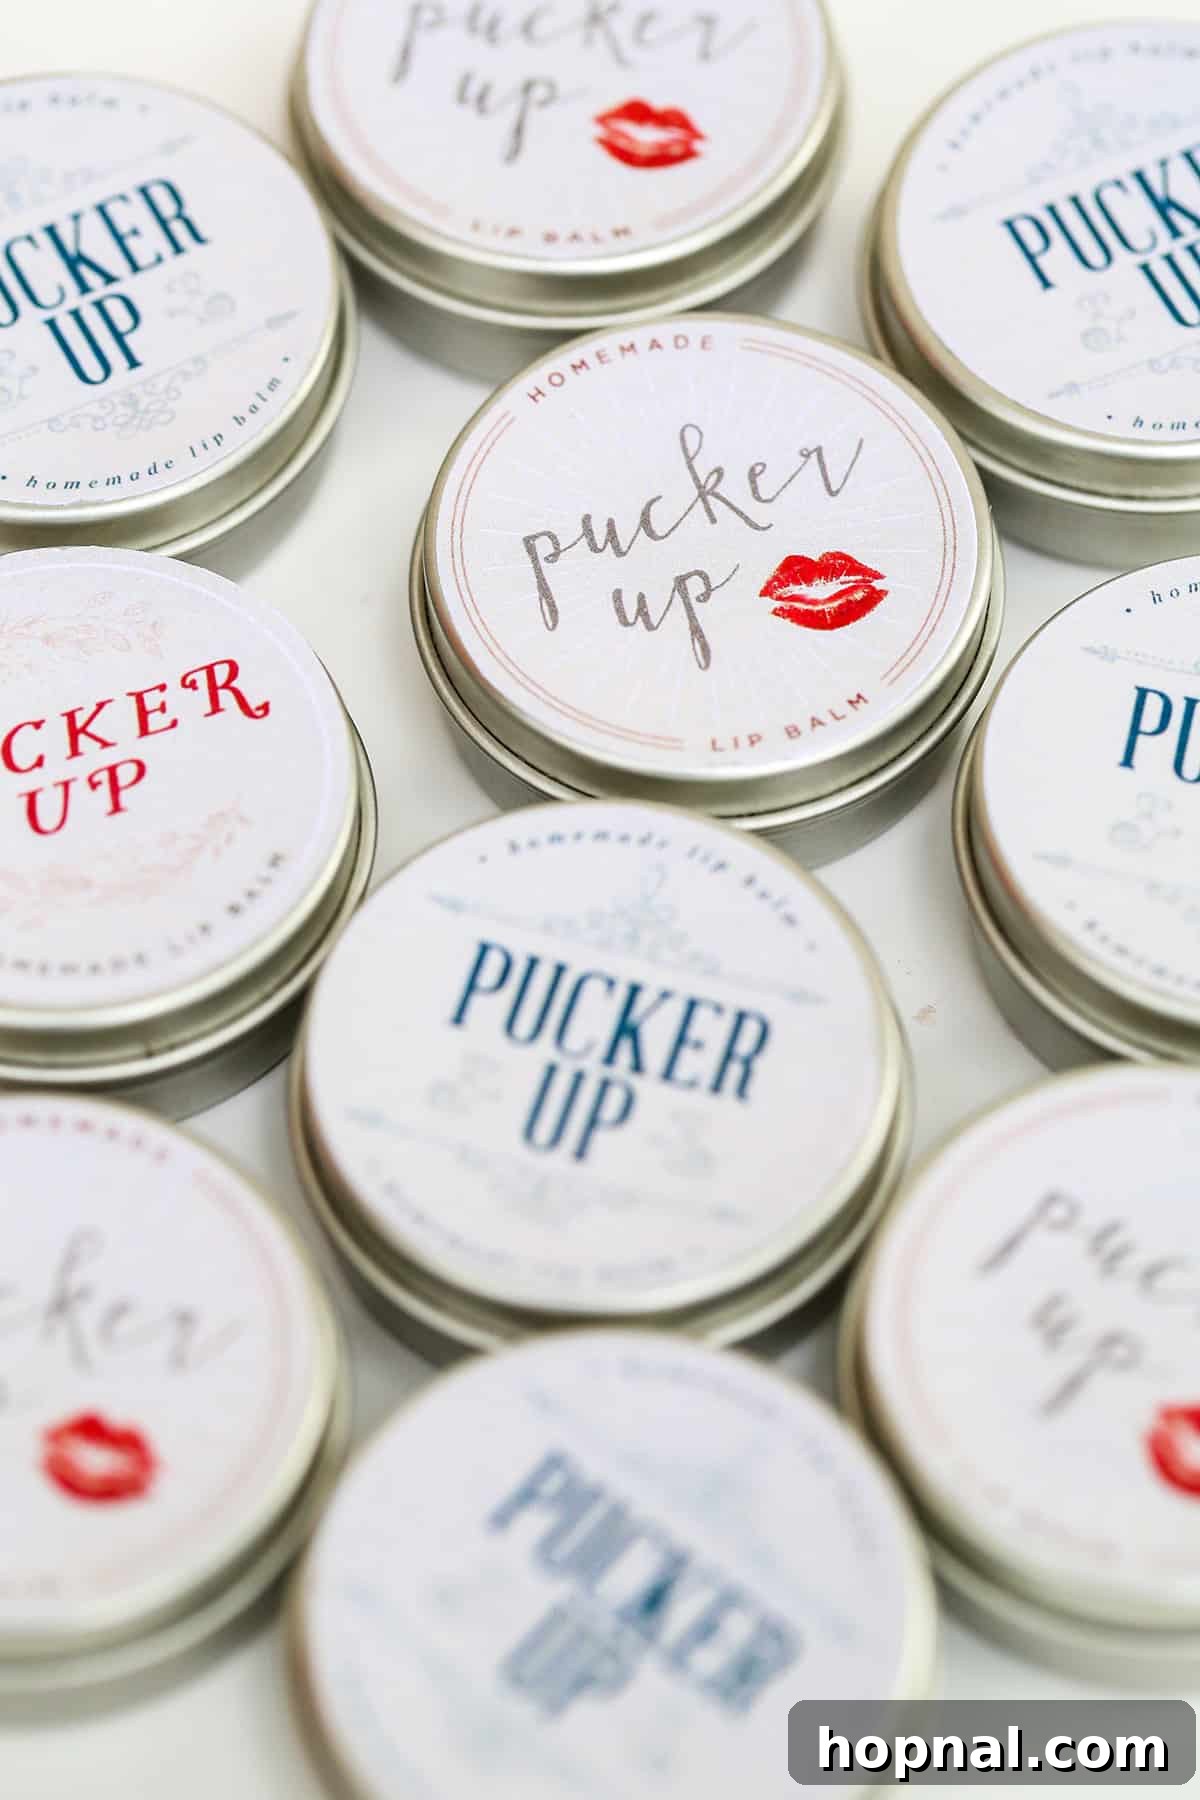
Finally, with your lip balm cooled and hardened, peel the backing from your custom labels and firmly stick them onto the center of each round tin lid. Press down gently but firmly across the entire label to ensure excellent adhesion and to prevent any air bubbles from getting trapped underneath. And just like that, your personalized, handcrafted lavender lip balms are ready to delight! Not only do they offer exceptional lip care, but they also look incredibly appealing. Pucker up and enjoy the smooth, soft results, or share these delightful creations with your loved ones this Valentine’s Day!
More Valentine’s Day Crafts You’ll Love!
If you’ve enjoyed making these delightful lip balms and are feeling inspired by the spirit of DIY gifting and crafting, you’re in for a treat! We love sharing creative projects that add charm and personal flair to all your celebrations. Handmade gifts carry a special meaning, showing care and effort that store-bought items simply can’t replicate. Here are a few more of our favorite Valentine’s Day crafts and DIY gift ideas that are sure to spread joy and affection, perfect for continuing your crafting journey:
- DIY Mini Cake Stands: These adorable and elegant cake stands are surprisingly simple to make and create a stunning display for cupcakes, cookies, or small gifts. They add a sophisticated touch to any dessert table or serve as a charming decorative piece. A truly charming Valentine’s Day craft and gift!
- DIY Essential Oil Candles: Crafting your own candles infused with essential oils is a wonderful way to create a cozy, romantic ambiance. You can customize the scents to match the mood or recipient, making them a unique and aromatic Valentine’s Day gift idea that promotes relaxation and warmth.
- Embroidery Heart Wine Bags: Elevate your wine gifts with a beautiful, personal touch by making these charming embroidered heart wine bags. They’re chic, eco-friendly, and show thoughtful effort. Perfect for presenting a bottle of wine to someone special.
- Infusing Sugars: Delight the culinary enthusiasts or tea lovers in your life with homemade infused sugars. These unique, flavored sweeteners make such a fun and flavorful gift for Valentine’s Day, perfect for enhancing teas, coffees, baked goods, or even cocktails.
- DIY Valentine’s Day Terrariums: Bring a touch of nature and whimsical charm indoors with these delightful terrariums. They are incredibly fun to make, allowing for endless creativity with plants and small decorations, and serve as a living, lasting Valentine’s Day craft and decor piece.
For even more delightful ideas and easy ways to add festive touches to your holiday, don’t forget to explore our comprehensive collection of Charming Valentine’s Day Printables. These resources are designed to help you celebrate love and creativity with ease and style!
DIY Lavender Lip Balm Recipe
Print
Pin
Rate
15 minutes
15 minutes
30 minutes
Servings:
10
lip balms
Eden
Ingredients
-
1/4
cup
coconut oil -
1/4
cup
shea butter -
1/8
cup
beeswax -
10
drops
lavender essential oil -
1
tbsp
dried lavender,
chopped
Instructions
-
Melt all of the ingredients (coconut oil, shea butter, beeswax) in a medium saucepan on low heat until fully liquid.
-
Remove from heat, then stir in the lavender essential oil and chopped dried lavender.
-
Carefully pour the melted mixture into a heatproof glass measuring cup or bowl with a spout for easier pouring.
-
Pour into round tin pots, filling almost to the brim. Allow to cool completely and harden at room temperature or in the refrigerator.
-
Once hardened, print your “Pucker Up” labels on sticker paper, cut them out with a 1.5″ round hole puncher, and stick them onto the tops of the tins.
Tried this Recipe? Tag me Today!
Mention @sugarandcharm or tag us #sugarandcharm!