
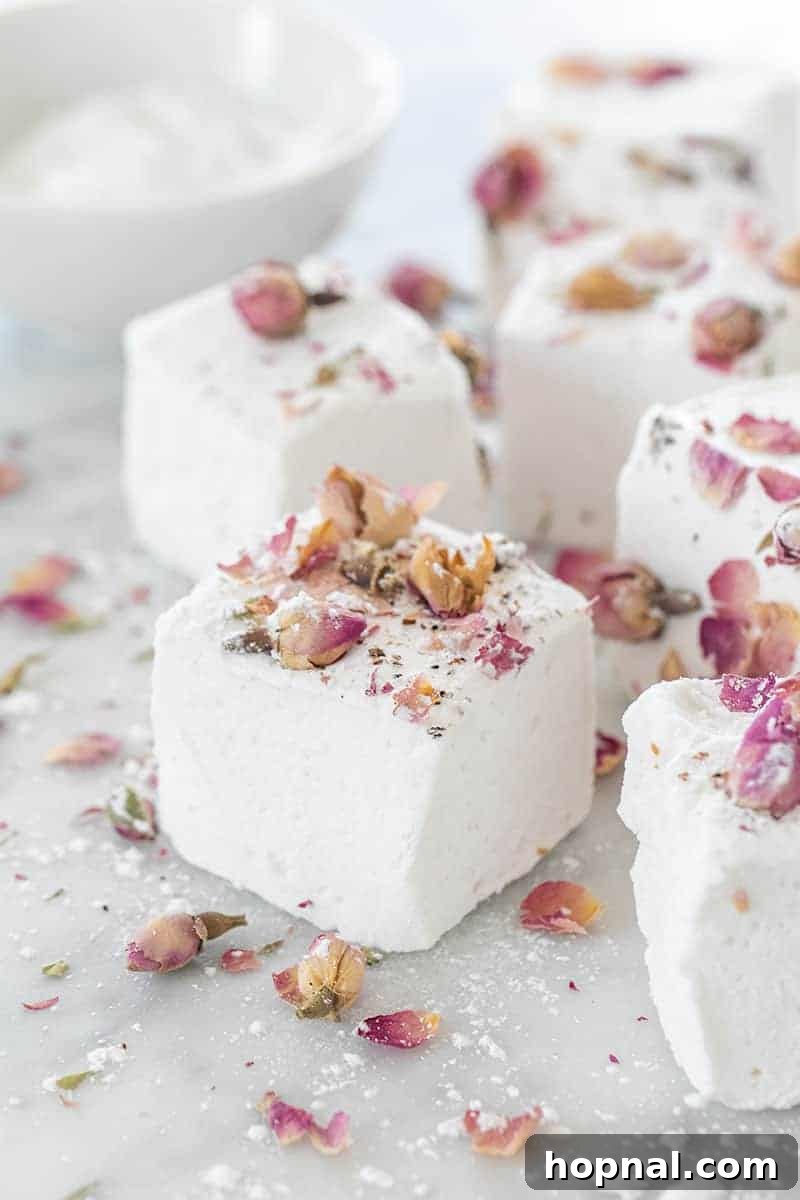
Homemade Rose Marshmallows: Fluffy, Fragrant, and Fun to Make
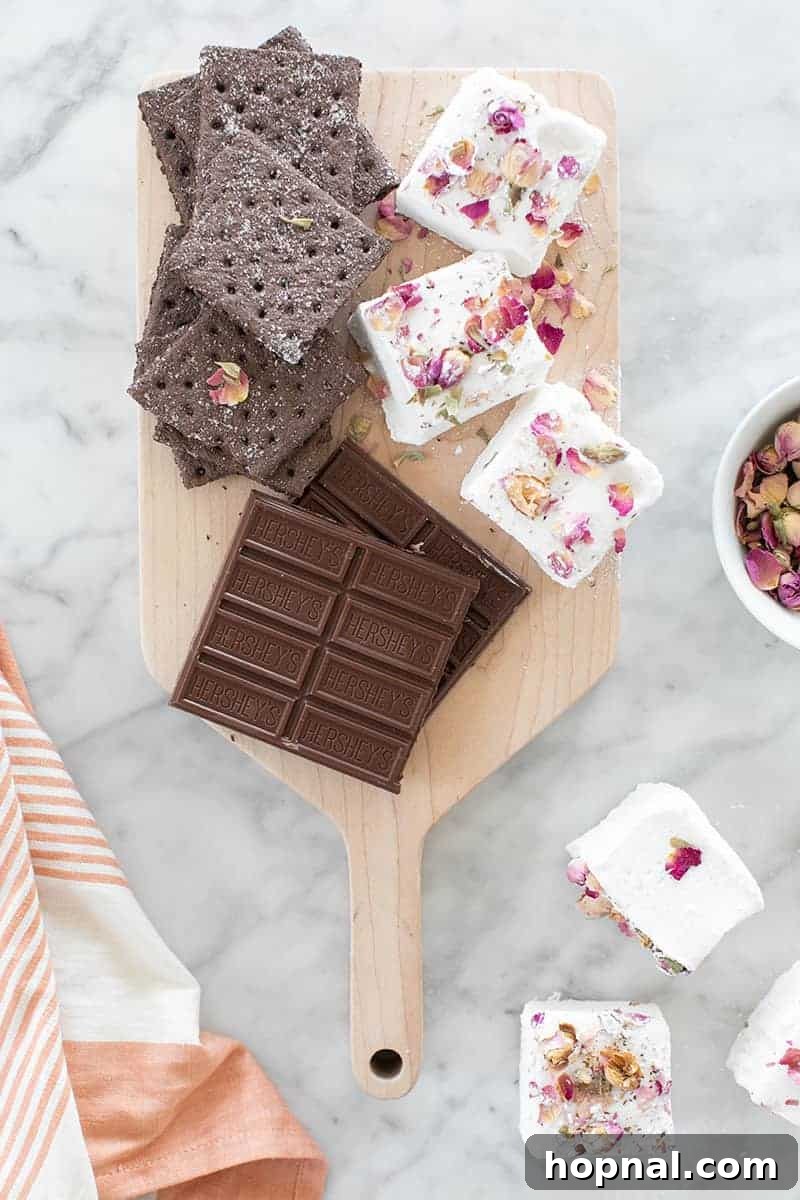
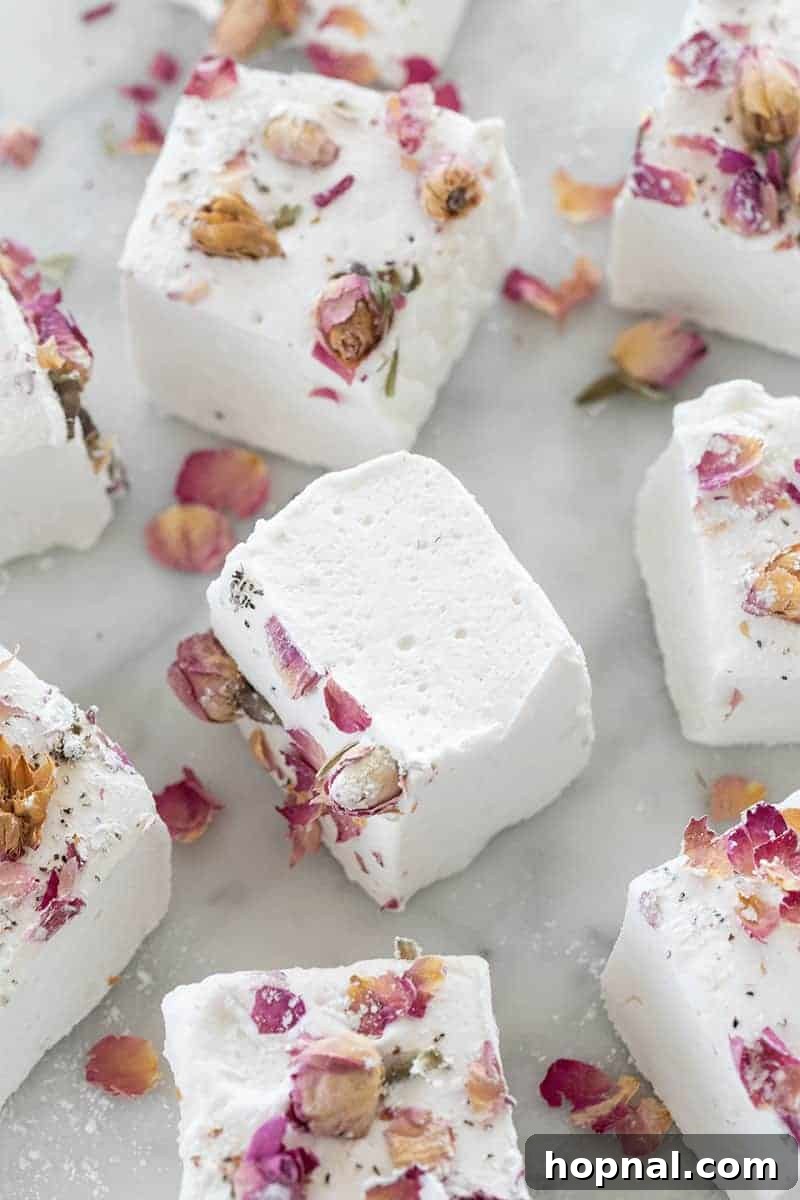
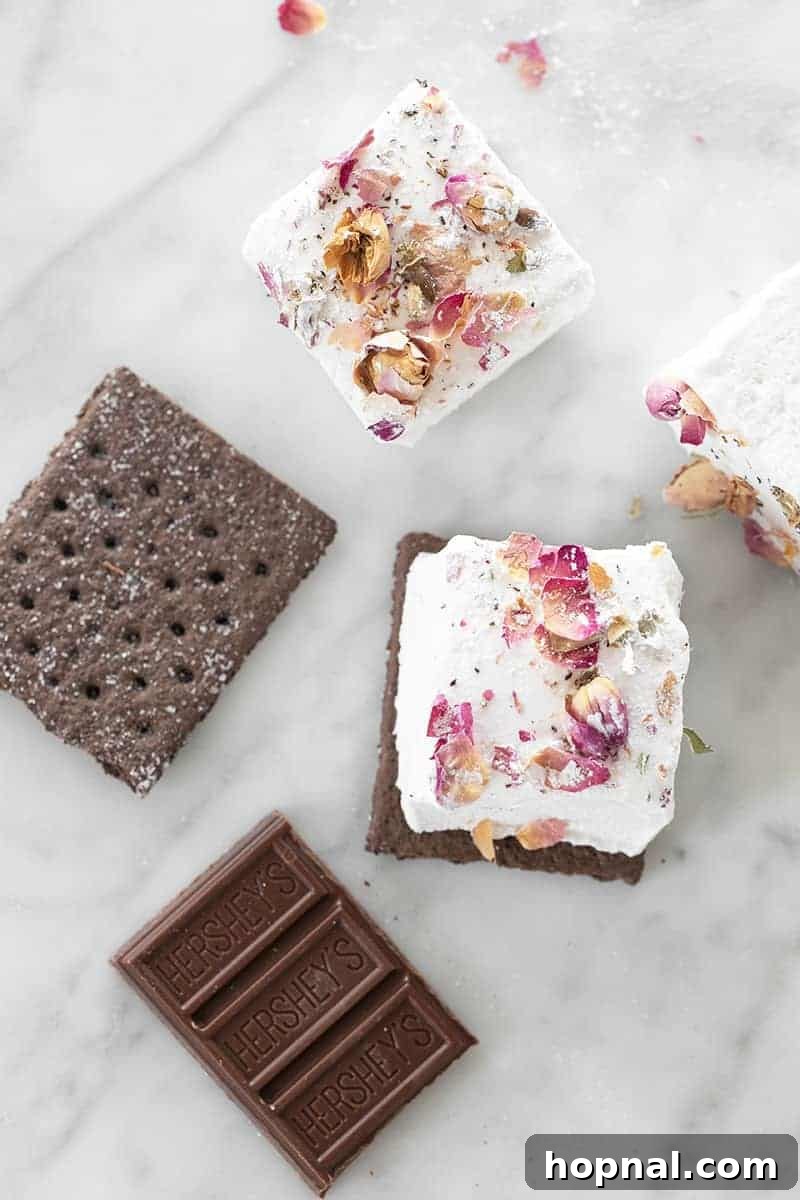
Prepare to be enchanted by the delicate flavor and unbelievably soft texture of our homemade rose marshmallows! These delightful confections are a world apart from store-bought varieties, offering a gourmet experience that’s surprisingly achievable in your own kitchen. Imagine biting into a cloud-like sweet, gently infused with the aromatic essence of rose and adorned with beautiful edible rosebuds. Perfect for elevating your hot chocolate, transforming s’mores, or gracing a special occasion dessert platter, these rose-flavored treats are truly a labor of love that pays off in every exquisite bite.
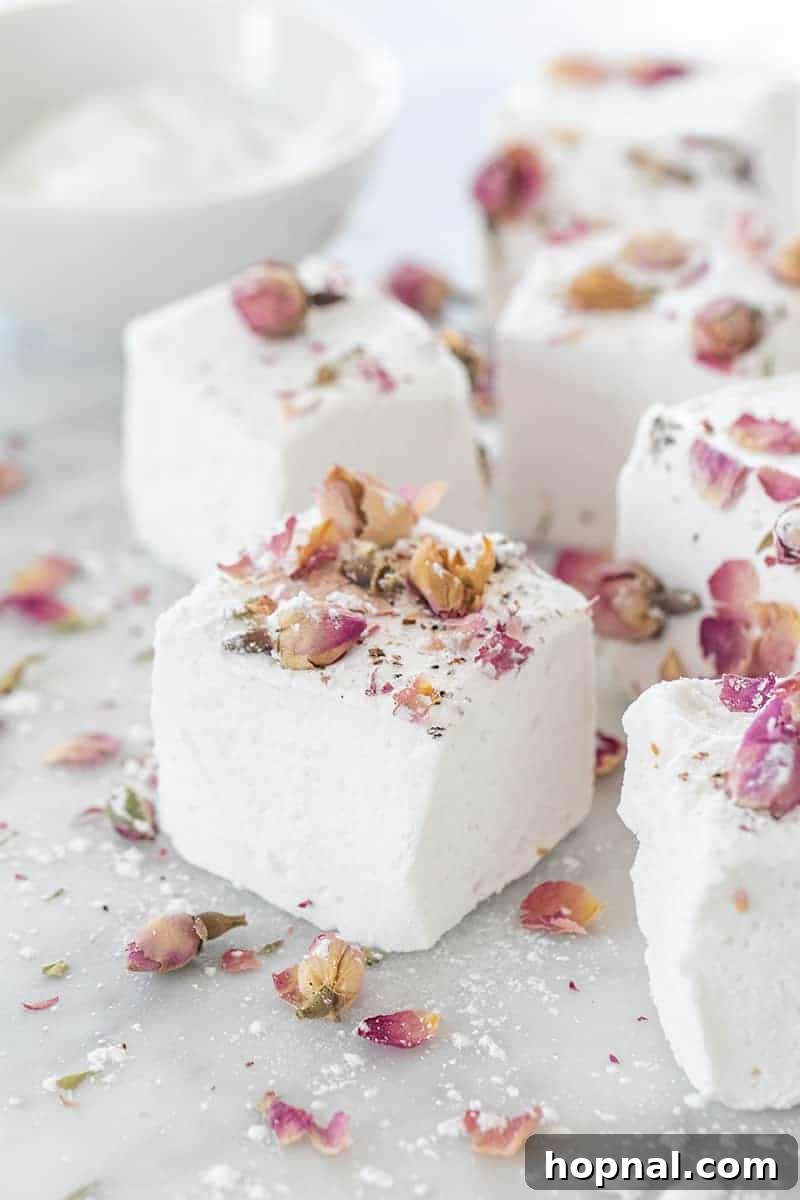
Homemade marshmallows are a game-changer, offering a superior taste and texture that simply can’t be matched by their mass-produced counterparts. They are incredibly versatile, serving as a standalone indulgent treat, an essential component for elevated s’mores, or a luxurious addition to a warm mug of hot chocolate. This particular rose-flavored marshmallow recipe introduces an element of sophisticated elegance, making them an ideal choice for memorable events such as a bridal shower tea party, a chic baby shower, or any gathering where you wish to impress with a unique, handcrafted dessert.
If you’re delving into the delightful world of homemade confections, you might also enjoy exploring How to Make Marshmallow Fluff for versatile dessert toppings, How to Make Marshmallow Fondant for cake decorating, and our comforting Maple Syrup Marshmallows for a taste of autumn.
Why Choose Homemade Rose Marshmallows?
Beyond the undeniable fresh taste, crafting your own marshmallows gives you complete control over ingredients and flavors. You avoid artificial additives, high-fructose corn syrup, and preservatives often found in commercial brands. The ability to infuse unique flavors like rose water elevates a simple sweet into a sophisticated gourmet delight. Furthermore, the light, airy, and truly melt-in-your-mouth texture of homemade marshmallows is unparalleled. They toast beautifully, dissolve wonderfully in hot beverages, and make for stunning edible gifts or party favors that reflect genuine care and craftsmanship.
Essential Ingredients for Rose Marshmallows
Creating these aromatic treats requires a few key components, each playing a vital role in achieving the perfect texture and flavor profile. Sourcing quality ingredients is paramount for the best results.
The Magic of Rose Water Extract
The star of our rose marshmallows is, undoubtedly, high-quality rose water extract. This potent flavoring agent imparts the delicate floral notes that make these marshmallows so special. We recommend using a good culinary-grade rose water extract. Its strength varies between brands, but typically, a mere tablespoon is sufficient to infuse the entire batch with a wonderfully strong, yet balanced, rose aroma and taste. Always taste a tiny bit before adding to ensure you get the right intensity – a little goes a long way!
Beautiful Dried Rosebuds and Petals
To truly capture the essence and beauty of a rose, edible dried rosebuds and petals are a crucial addition. Not only do they add a subtle textural element, but sprinkling them over the top also visually communicates the exquisite flavor held within. They transform a simple marshmallow into a work of art, perfect for display and gifting. Ensure you purchase food-grade, organic dried roses to avoid any pesticides. Here are some excellent options to consider:
- TwoGet Dried Flower Petals
- Superbloom Rose Petals
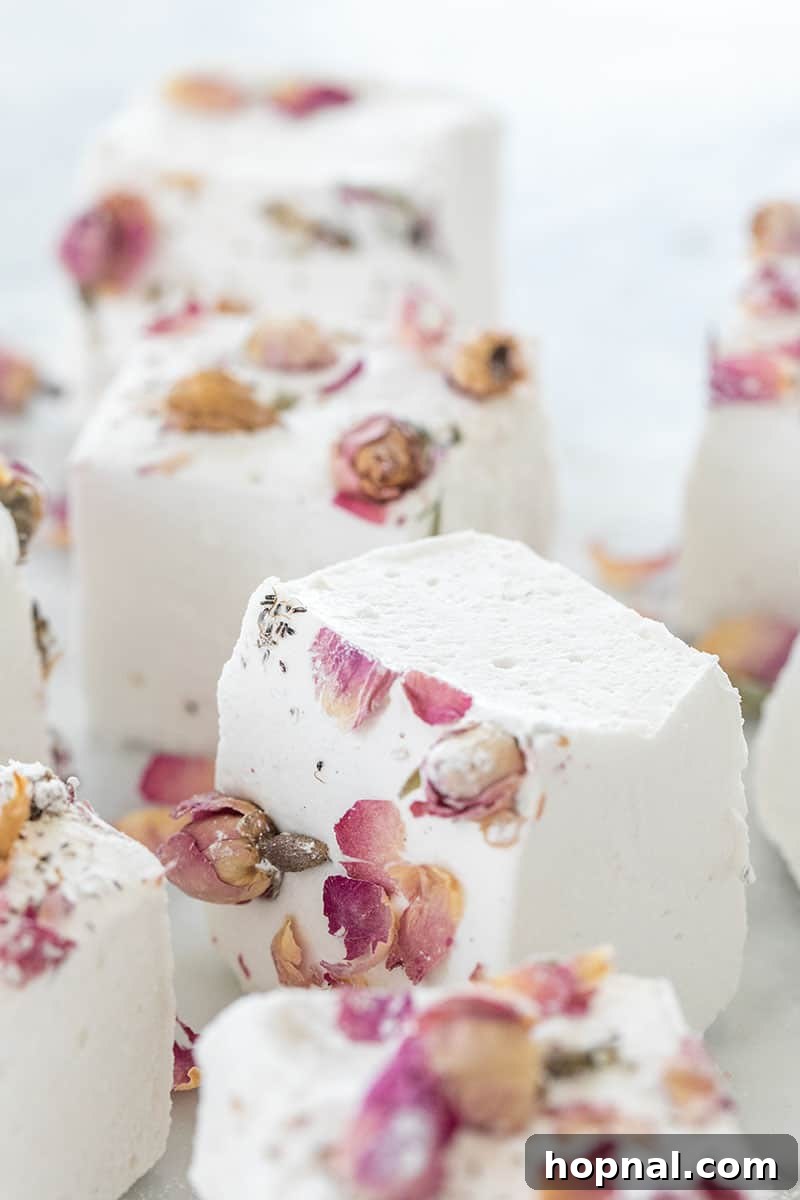
Rose Marshmallows Ingredients List
Here’s a concise list of the core ingredients you’ll need to embark on your marshmallow-making adventure. Precise measurements will be provided in the full recipe card below.
- Unflavored Gelatin (typically in packets)
- Light Corn Syrup
- Granulated Sugar
- Salt (enhances flavor)
- Water (divided)
- Rose Water Extract
- Dried Edible Rosebuds or Petals (for garnish and subtle flavor)
Step-by-Step Directions to Craft Perfect Rose Marshmallows
Making marshmallows involves a few critical steps, but with careful attention to detail, especially regarding temperature, you’ll achieve perfect results every time. Follow these instructions closely for fluffy, aromatic rose marshmallows.
1. Prepare Your Baking Pan
First, select a 6×6 inch (or similar sized) baking pan. This recipe yields a good thickness for cutting into squares. To prevent sticking, lightly grease the bottom and sides of the pan with a small amount of vegetable oil. Don’t overdo it, just a thin, even coat.
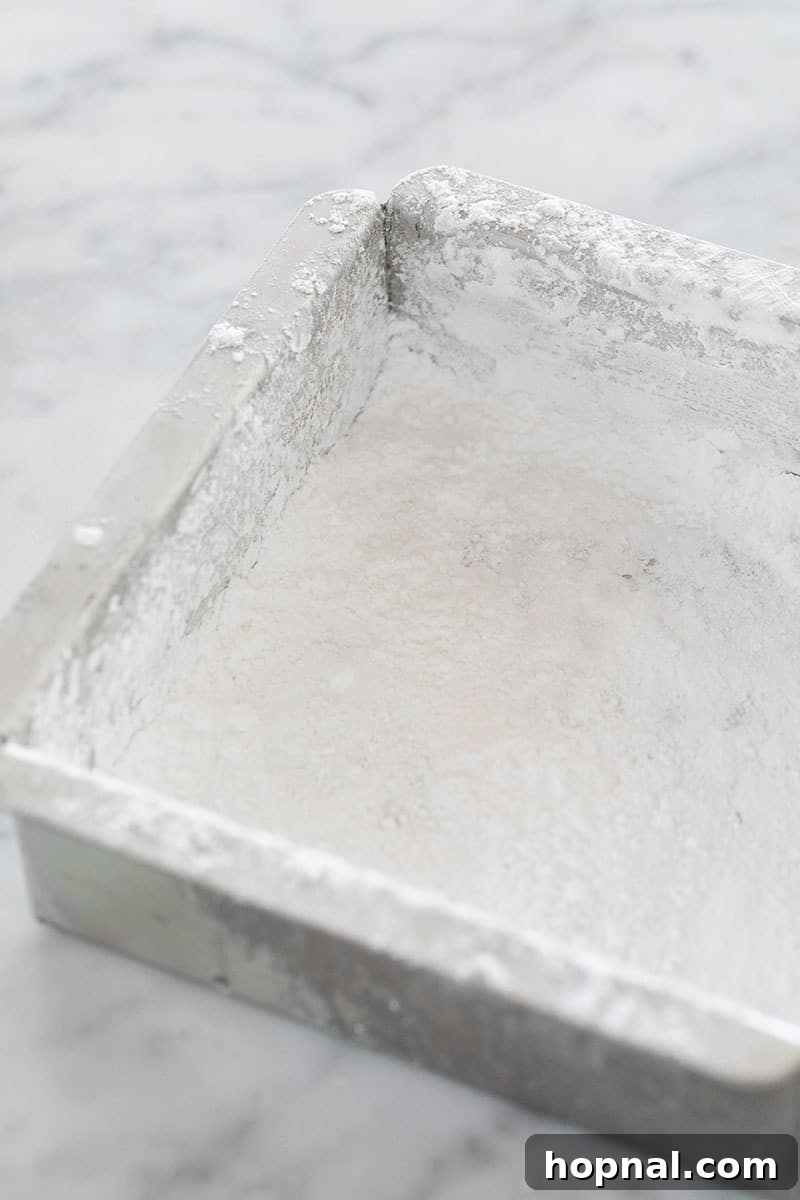
Next, liberally sift a generous amount of powdered sugar over the oiled surfaces, ensuring the entire bottom and sides are thoroughly coated. Aim for a coating of at least 1/8th of an inch. This powdered sugar layer is vital for preventing your sticky marshmallow mixture from adhering to the pan, allowing for easy removal and clean cuts later.
2. Measure and Prepare Ingredients
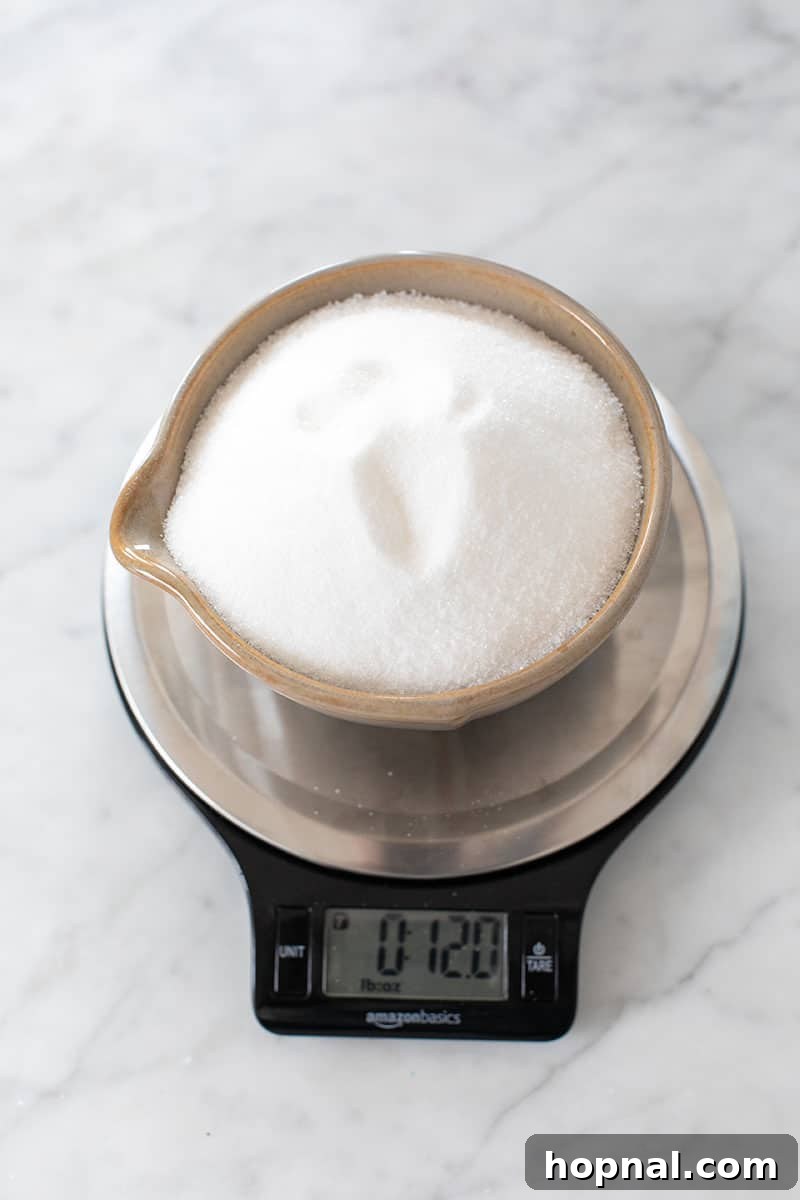
Accuracy is key in confectionery. Before you begin cooking, measure out all your ingredients precisely. Using a kitchen scale for sugar and corn syrup will yield the most consistent results, guaranteeing the right balance for texture and sweetness. This simple step, often called “mise en place,” can prevent mistakes and make the entire process smoother. A basic kitchen scale is an invaluable tool for any baker.
3. Prepare the Sugar Syrup
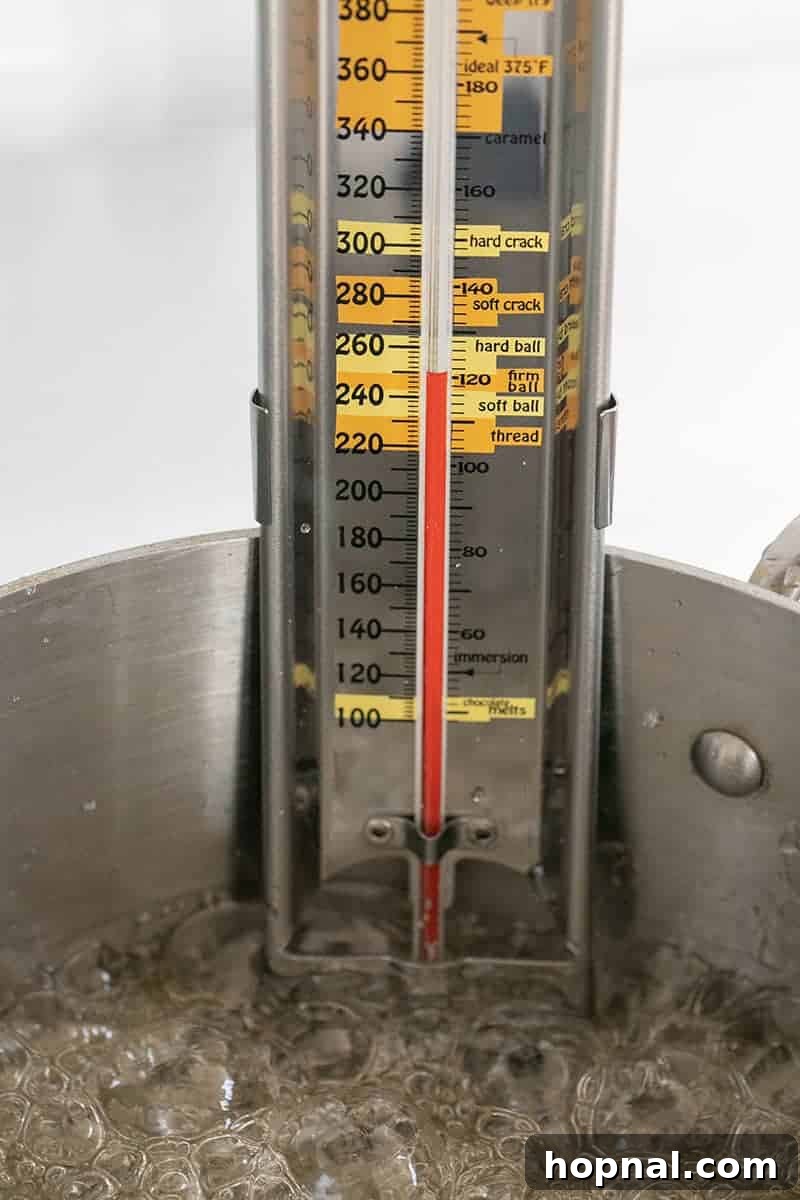
In a medium saucepan, combine the granulated sugar, 1/2 cup of water, and light corn syrup. Attach a reliable candy thermometer to the side of the pan, making sure the bulb is submerged in the mixture but not touching the bottom. Stir the mixture gently but consistently as you bring it to a boil over medium heat. Continuous stirring helps dissolve the sugar and prevents it from crystallizing on the sides of the pan or scorching at the bottom.
4. Achieve the Perfect Temperature
This is arguably the most critical step for successful marshmallows. You need to bring the sugar mixture to a temperature of 240 to 250 degrees Fahrenheit (115-121°C), which corresponds to the “soft ball” to “firm ball” stage on a candy thermometer. Monitor the temperature very carefully. If the temperature is too low, your marshmallows won’t set properly and will remain gooey. If it goes too high, they will become hard and overly dense. Once the mixture reaches precisely 240-250°F, immediately reduce the stove to a very low simmer or turn it off while you prepare the gelatin.
5. Bloom the Gelatin
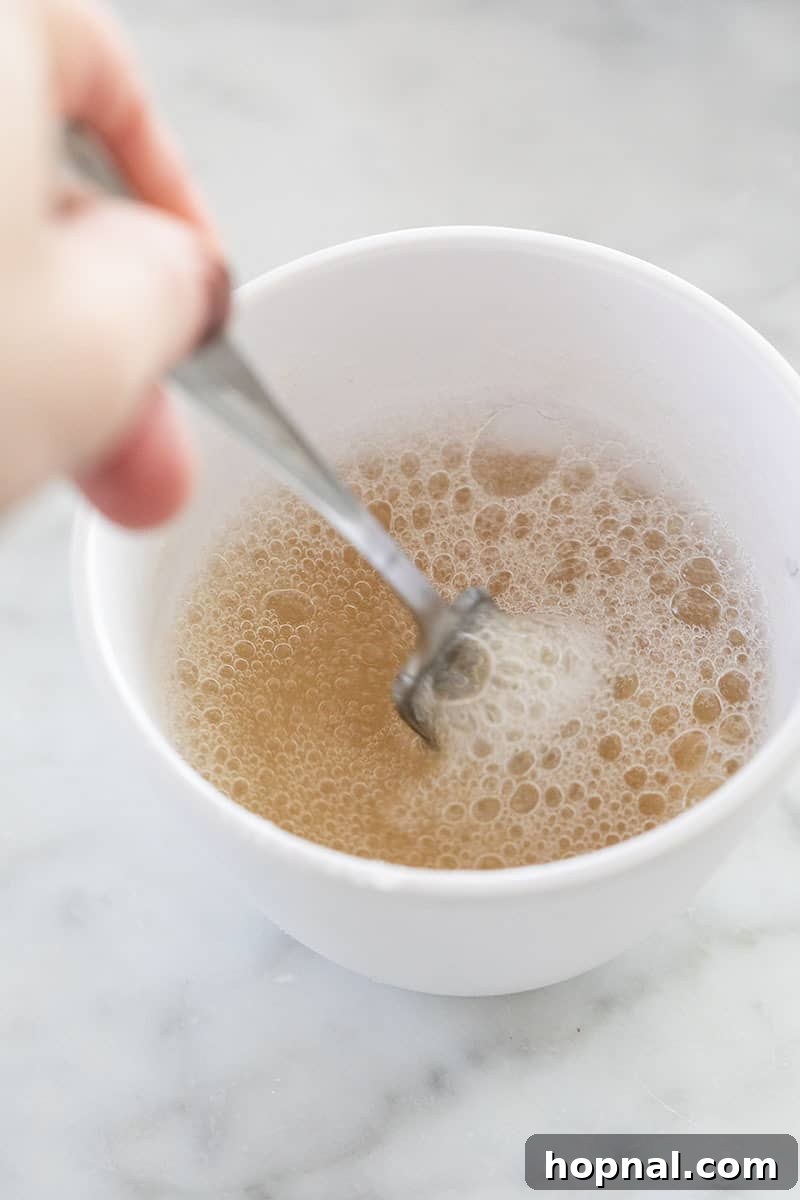
While your sugar syrup is holding at a low simmer, take a small, separate bowl. Pour in the remaining 1/2 cup of cold water and sprinkle the unflavored gelatin powder evenly over the top. Let it sit undisturbed for about 5 minutes. This process, known as “blooming,” allows the gelatin granules to absorb the water and swell, forming a thick, opaque paste. Once bloomed, whisk it briefly with a fork until it’s frothy and smooth, ensuring no dry clumps remain.
6. Combine Gelatin and Hot Syrup
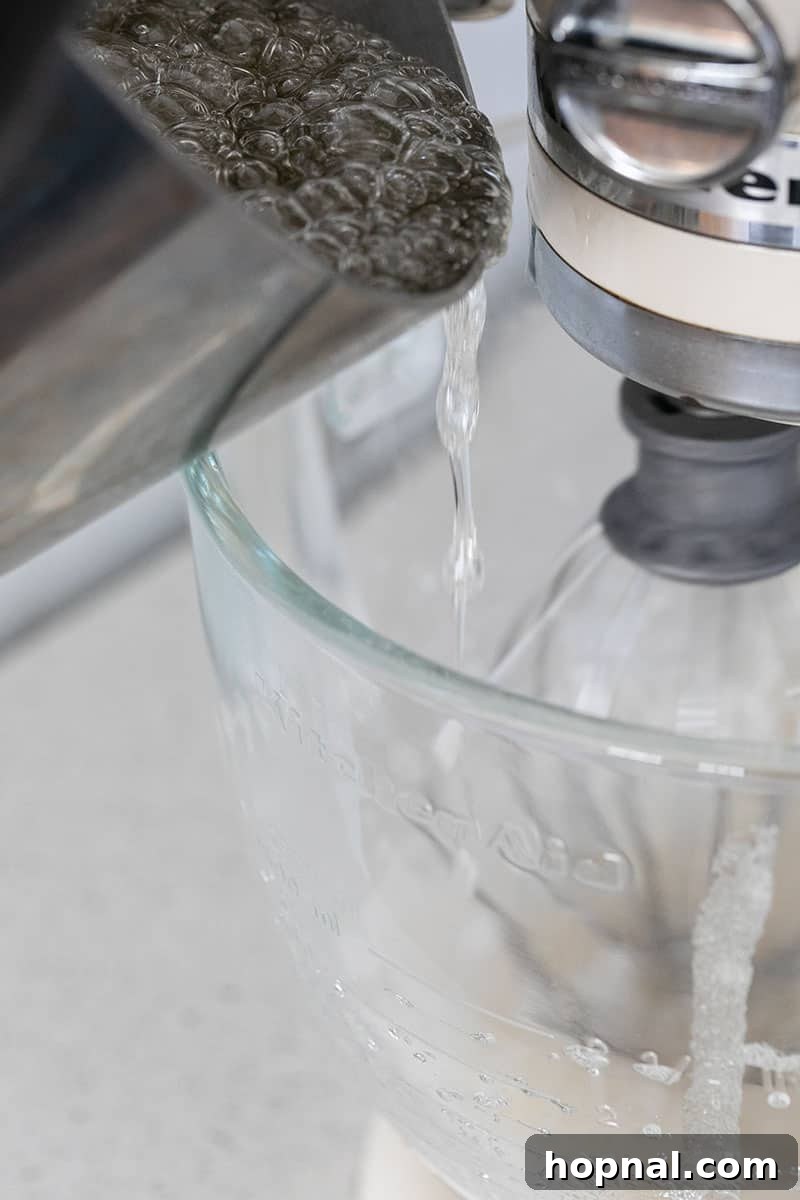
Transfer the bloomed gelatin mixture into the bowl of your electric stand mixer, fitted with a whisk attachment. Begin whisking on a medium-low speed to keep the gelatin moving and prevent it from solidifying or clumping. With the mixer still running, slowly and carefully pour the very hot sugar syrup in a steady, thin stream down the side of the bowl. Avoid pouring directly onto the whisk, as this can splash the hot syrup dangerously. This gradual addition helps to temper the gelatin and ensures a smooth, even mixture.
7. Whip to Fluffy Perfection
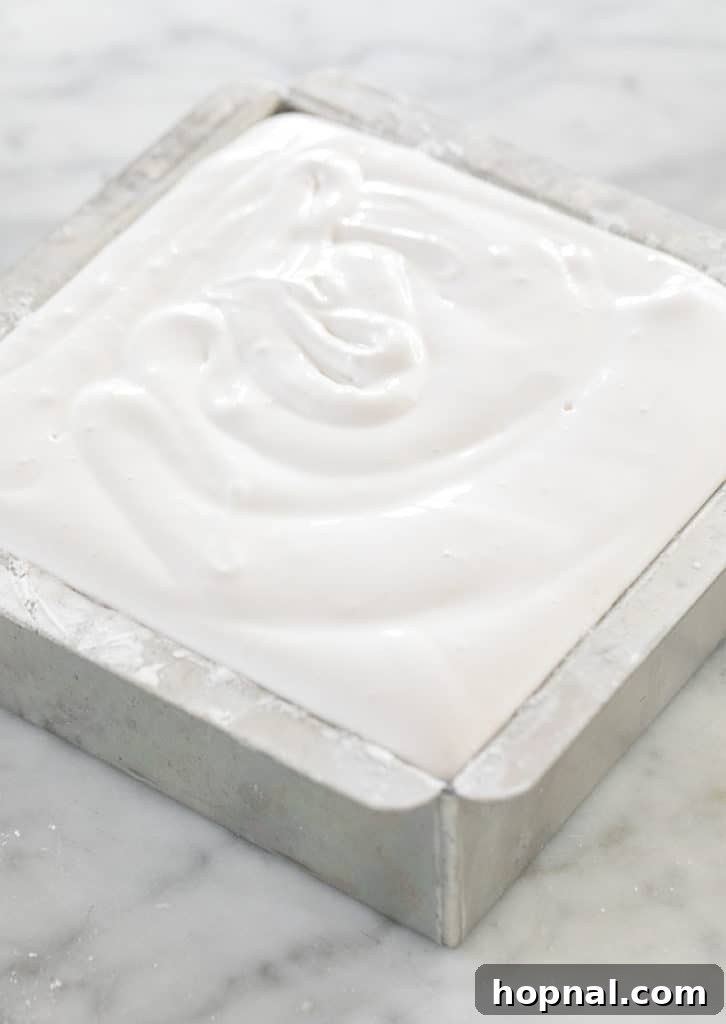
Once all the hot syrup has been added, increase the mixer speed to high. Beat the mixture continuously for about 10 minutes. During this time, you will witness a magical transformation: the thin, translucent syrup will become incredibly thick, voluminous, opaque, and bright white, resembling a cloud. This whipping process incorporates air, which is what gives marshmallows their characteristic fluffy texture. The mixture should be very stiff and hold peaks when the whisk is lifted.
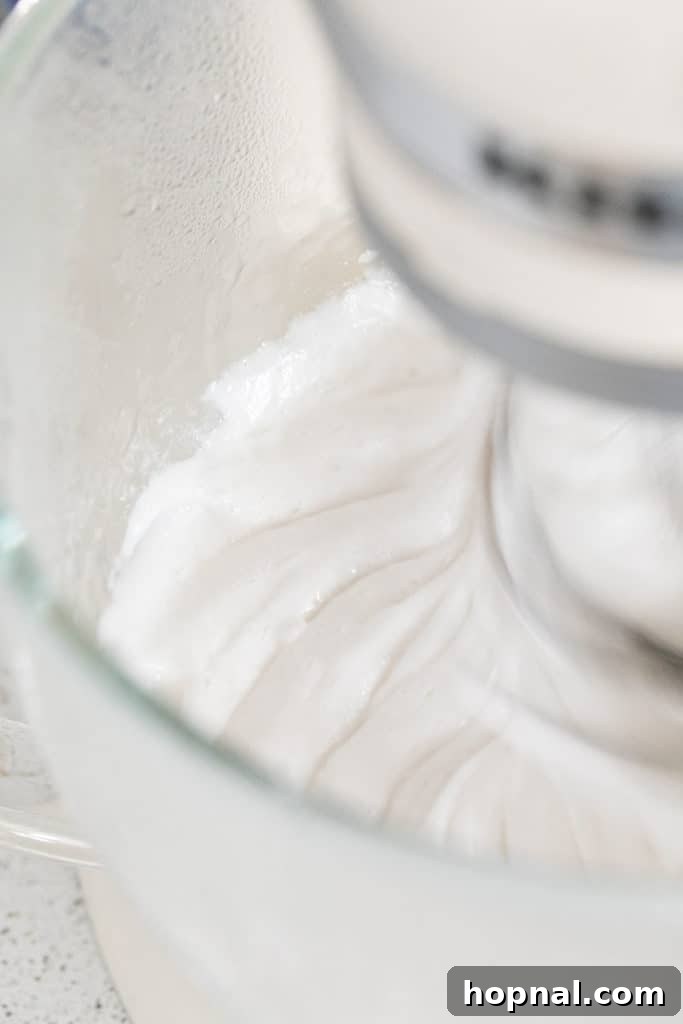
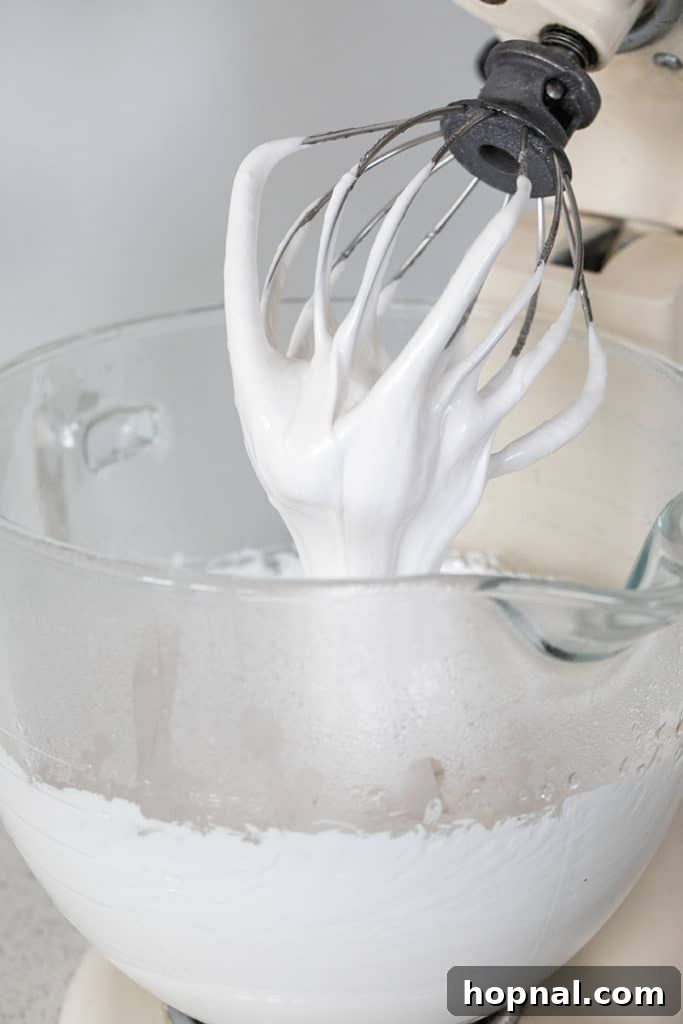
8. Infuse with Rose Flavor and Seasoning
After 10 minutes of whipping, reduce the mixer speed to low. Add the rose water extract and the salt. Continue to whisk for another minute or two, just long enough to ensure these ingredients are thoroughly incorporated into the fluffy marshmallow base. The salt helps to balance the sweetness and enhance the floral notes of the rose.
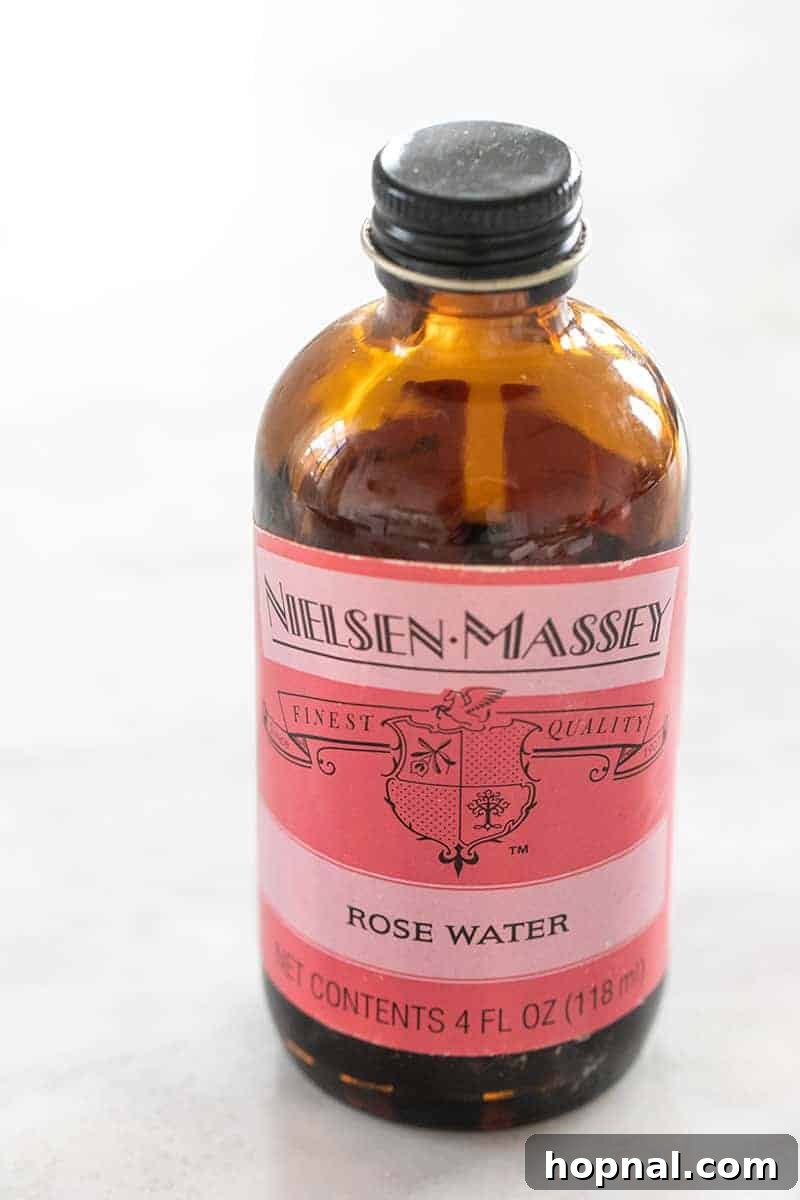
9. Pour and Garnish
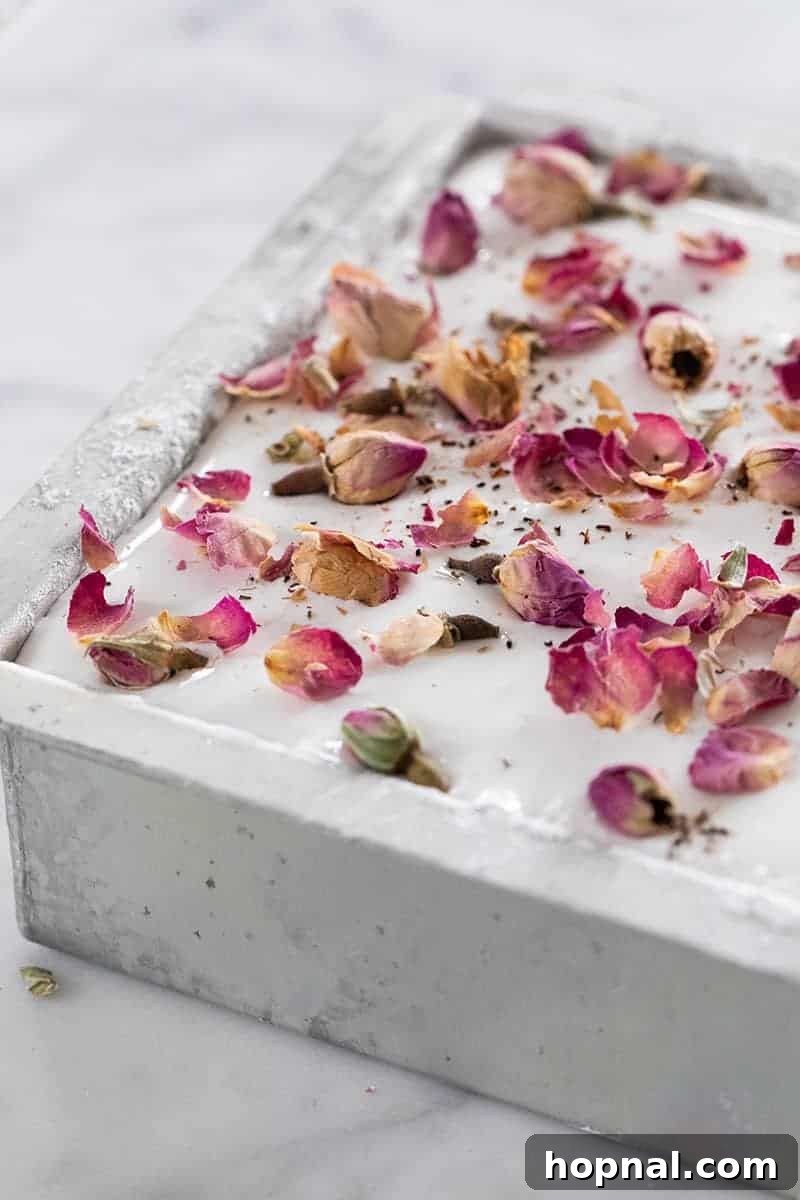
Working quickly, as the marshmallow mixture will begin to set, pour the fluffy, aromatic mixture into your prepared baking pan. Use an oiled spatula to gently spread it evenly into the pan, making sure to reach all the corners. Immediately after pouring, generously sprinkle the dried edible rosebuds or petals over the entire surface of the marshmallow. Press them gently into the surface if needed, ensuring they adhere well. This not only adds beauty but also gives a subtle hint of the delightful flavor within.
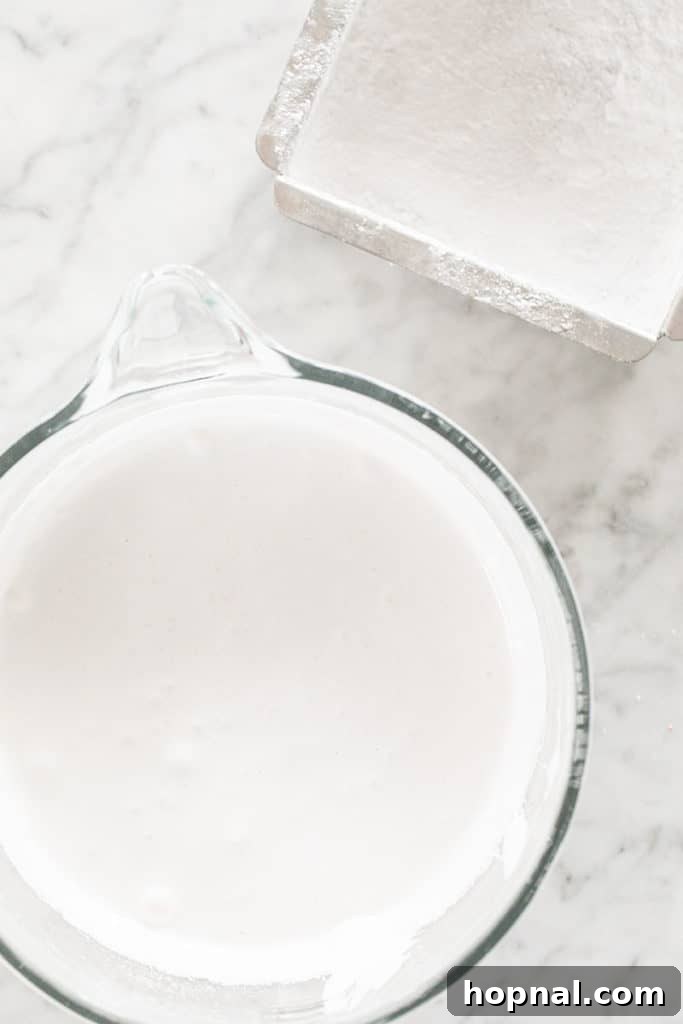
10. Allow to Set
Leave the pan of marshmallows uncovered at room temperature for a minimum of 6-8 hours, or ideally, overnight. This crucial setting time allows the gelatin to fully firm up, resulting in marshmallows that are easy to cut and handle. Resist the urge to cover them, as this can trap moisture and make them sticky.
11. Remove from Pan
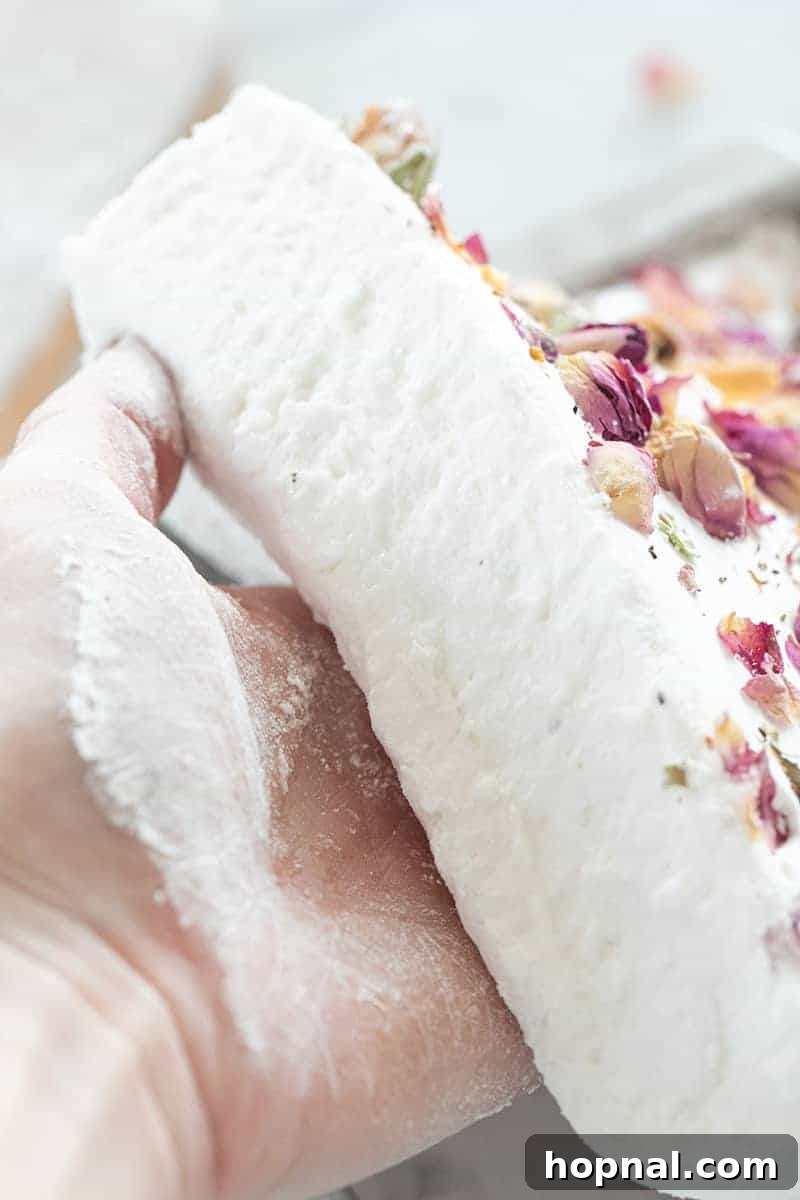
Once fully set, it’s time to release your marshmallow slab. Lightly coat a sharp knife with a thin layer of vegetable oil and dust it with powdered sugar. Run the knife carefully around the edges of the baking dish to loosen the marshmallow from the sides. Next, dust your clean hands with powdered sugar. The marshmallows are quite forgiving and pliable once set, so don’t be afraid to gently pull and lift them out of the pan using your fingers. If you prepared your pan well, it should come out easily in one large sheet.
12. Cut and Coat Marshmallows
Place the large marshmallow sheet onto a cutting board that has been generously sprinkled with powdered sugar. To create individual marshmallows, first, cut the sheet lengthwise into three even strips. Then, cut across these strips to form 3-4 squares from each. You have complete flexibility here; make them as large or as small as you desire for your intended use.
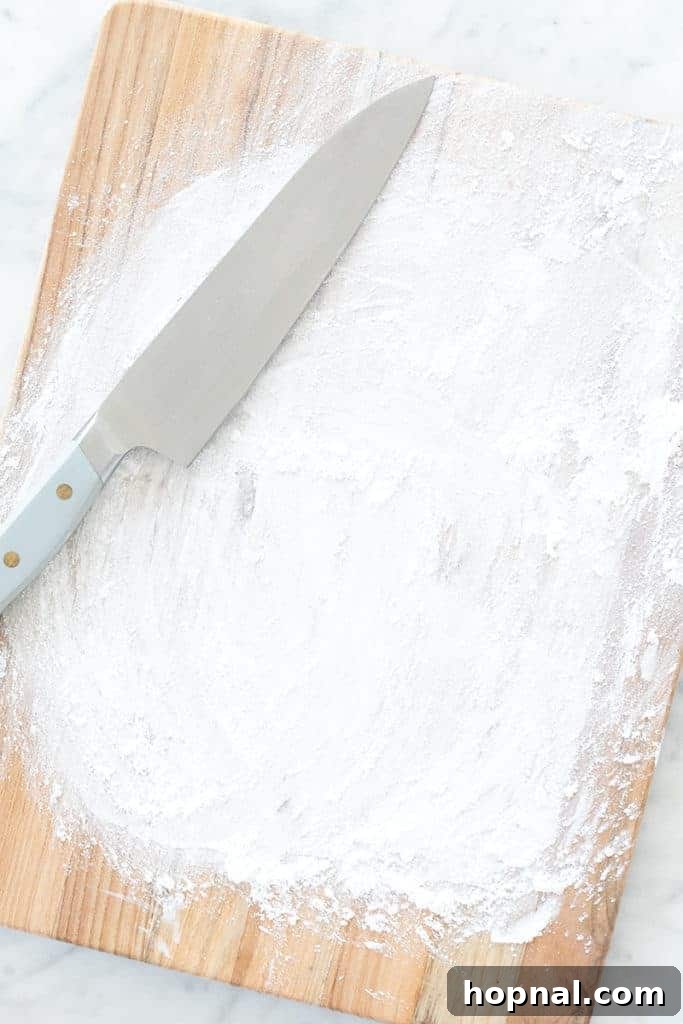
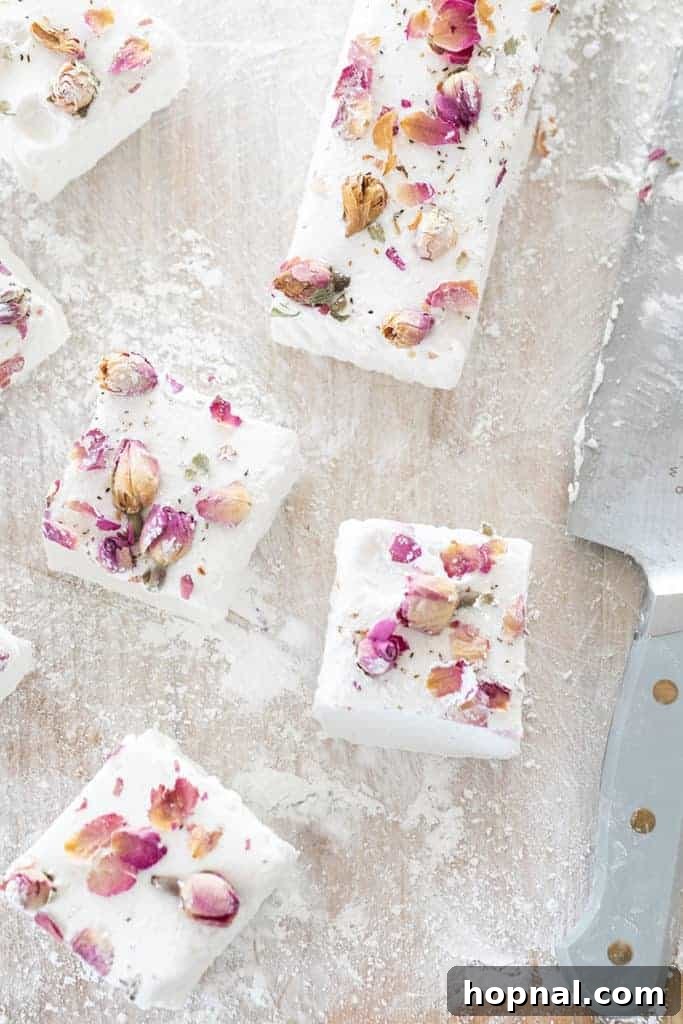
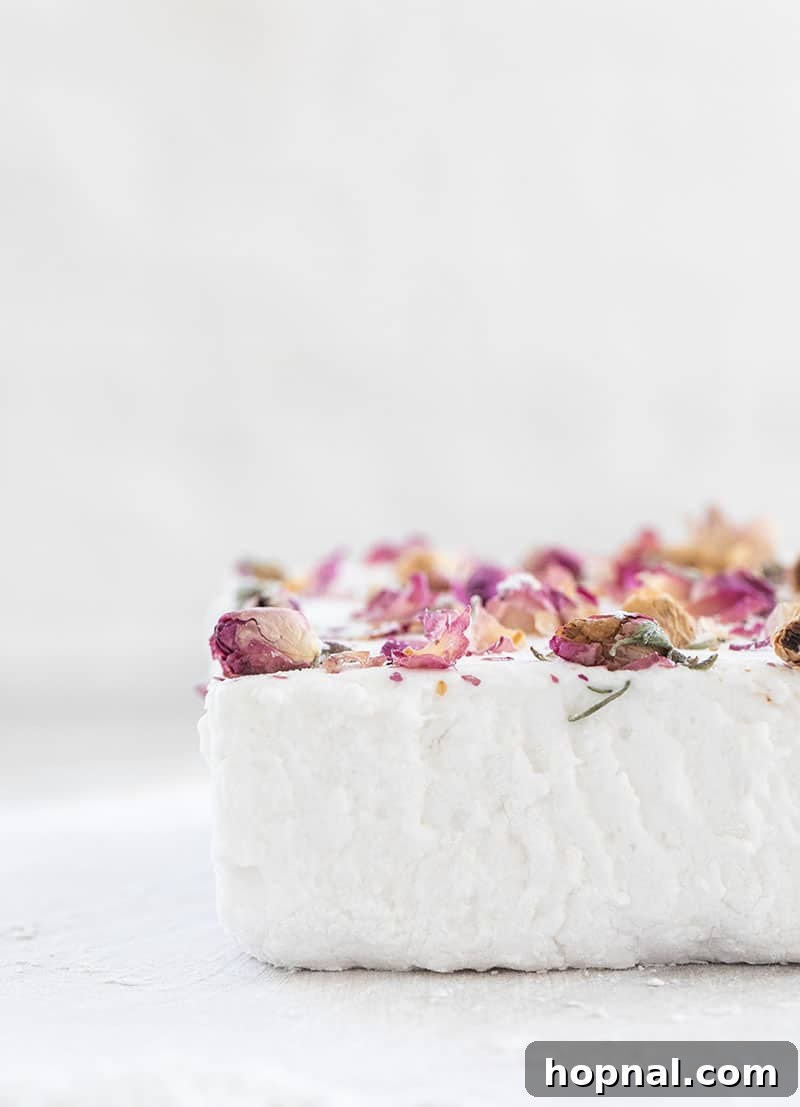
To prevent the freshly cut sides from sticking together, immediately roll each cut side in the powdered sugar dusting the cutting board. This creates a non-stick coating and gives the marshmallows their classic finish. Repeat this process for every cut you make until all your rose marshmallows are perfectly shaped and coated.
Troubleshooting Common Marshmallow Issues
Even experienced bakers can encounter hiccups. Here’s how to address some common marshmallow challenges:
Why Did My Marshmallow Not Set?
This is by far the most frequent issue and almost always points back to the sugar syrup’s temperature. The candy thermometer is your best friend for a reason! The sugar mixture absolutely must reach 240-250 degrees Fahrenheit. If the temperature is anything less, the sugar concentration isn’t high enough, and the gelatin won’t be able to properly set the mixture, resulting in a runny or overly sticky, unset marshmallow. Conversely, if the temperature goes much higher than 250 degrees, your marshmallows will turn out very sticky, hard, and dense, losing their desired fluffiness. Precision here is non-negotiable.
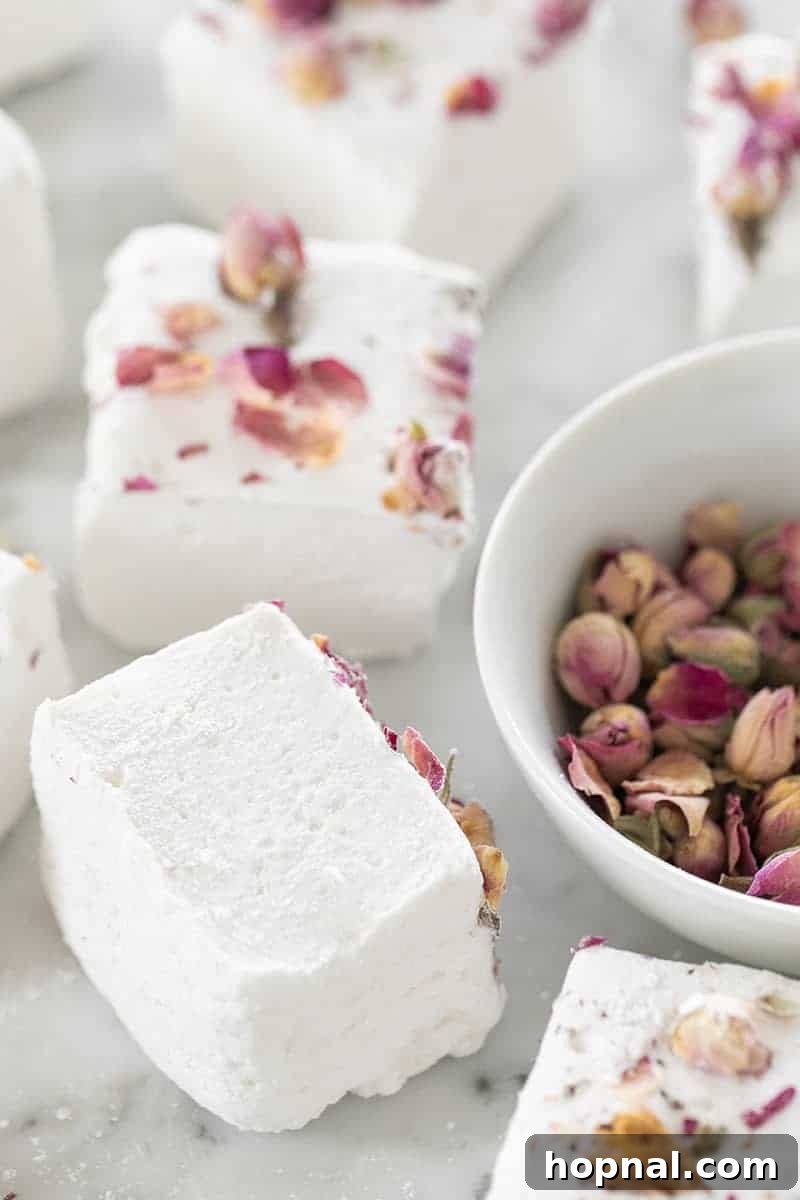
What Makes a Marshmallow Fluffy?
The secret to that irresistible fluffiness lies primarily in the vigorous whipping process. As the hot sugar and gelatin mixture is beaten on high speed in an electric mixer, air is continuously incorporated into the syrup. This trapped air creates myriad tiny bubbles, expanding the volume of the mixture significantly. The gelatin then acts as a stabilizer, setting this aerated structure once it cools, resulting in the beautifully light, airy, and melt-in-your-mouth texture we associate with perfect marshmallows. Without sufficient whipping, your marshmallows would be dense and chewy rather than soft and cloud-like.
How Do You Unstick Marshmallows?
Marshmallows, by nature of their high sugar content, can be quite sticky. The easiest and most effective way to deal with sticky marshmallows is to use powdered sugar. Simply sprinkle a generous amount of powdered sugar over any sticky areas, and it will instantly create a barrier, preventing them from adhering to surfaces or each other. This is why we coat the pan and dust the cutting board and knife.
How Do You Cut Marshmallows Without Them Sticking?
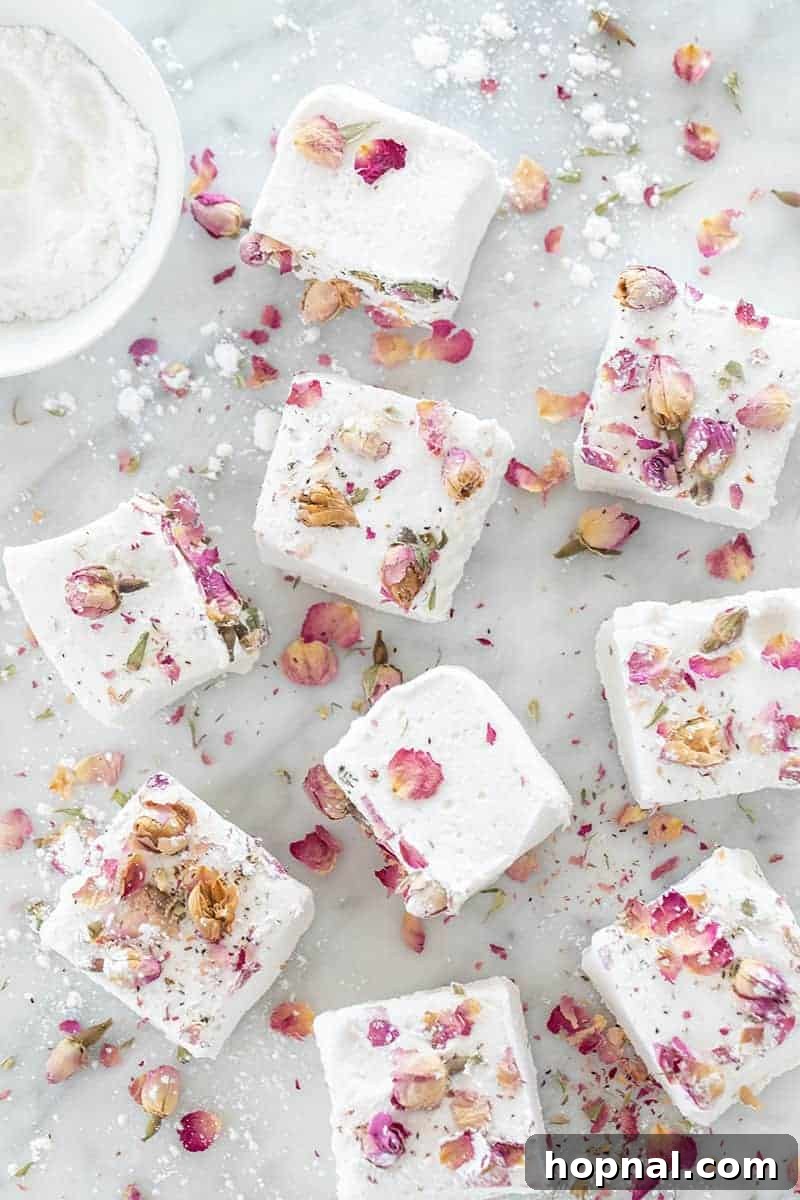
Many online guides suggest using scissors to cut marshmallows, but this often results in squashed, uneven pieces. For clean, sharp edges and perfect squares, a sharp knife and a dusting agent are your best friends. Create a 50/50 mixture of cornstarch and confectioner’s sugar (powdered sugar). This blend works wonders! Liberally dust your work surface with this mixture before laying down the marshmallow sheet. Also, dust the top of the marshmallow sheet. To cut, coat a sharp knife with a thin layer of vegetable oil, then dip it into your powdered sugar/cornstarch mixture. Carefully slice through the marshmallow sheet. If you notice the knife starting to stick, re-coat it with more oil and dusting mixture. Repeat for each cut until you have your desired shapes.
Frequently Asked Questions About Homemade Marshmallows
Are Marshmallows Vegan?
Most traditional marshmallows, including this recipe, are generally not vegan. This is because a primary gelling agent used in their creation is gelatin. Gelatin is derived from collagen found in animal skin and bones. However, the good news for those following a vegan diet is that you absolutely can make homemade marshmallows vegan-friendly! You’ll need to substitute the animal-derived gelatin with a plant-based gelling agent. Popular choices include agar-agar (derived from seaweed) or carrageenan. Be sure to follow specific vegan marshmallow recipes that utilize these alternatives, as their preparation methods might vary slightly from traditional gelatin-based recipes.
Are Marshmallows Gluten-Free?
The vast majority of marshmallows are naturally gluten-free, as their core ingredients (sugar, corn syrup, gelatin, water) do not contain gluten. There are typically only two scenarios where marshmallows might not be considered gluten-free: if they are manufactured in a facility that also processes gluten-containing products, leading to potential cross-contamination, or if specific brands include wheat starch or other gluten-derived ingredients as fillers. When you make your own marshmallows from scratch, you have full control over the ingredients, easily avoiding these concerns. This means your homemade rose marshmallows will indeed be delightfully gluten-free, making them suitable for those with gluten sensitivities or celiac disease.
Can You Freeze Marshmallows?
Absolutely! Freezing is an excellent strategy if you want to extend the shelf life of your homemade marshmallows significantly. When stored properly in an airtight freezer-safe container or bag, homemade marshmallows can last for up to three to four months in the freezer without losing their quality. This is particularly useful if you’re preparing several batches for holiday gifting, special occasions, or simply want to have a supply of these delightful treats on hand. Thaw them at room temperature before enjoying.
Does Homemade Marshmallow Need to Be Refrigerated?
Generally, homemade marshmallows are shelf-stable and do not require refrigeration. They will maintain their freshness and texture when stored in a cool, dry place at room temperature. However, there’s an important exception: if you reside in a particularly tropical or humid climate, storing your marshmallows in the refrigerator is highly recommended. High humidity can cause marshmallows to absorb moisture, become excessively sticky, or even melt and fuse together. In such environments, refrigeration helps to preserve their integrity and prevent stickiness.
What Are Marshmallows Made Of?
For this specific rose marshmallow recipe, the core ingredients are unflavored gelatin, light corn syrup, granulated sugar, a pinch of salt, water, and, of course, the distinctive rose water extract for flavor. These components work in harmony to create the unique texture and taste of homemade marshmallows.
How Long Do Homemade Marshmallows Last?
When stored correctly, your homemade rose marshmallows can last for up to three weeks at room temperature. The most crucial factors for extending their shelf life are protecting them from moisture and humidity. Always keep your marshmallows in an airtight container to prevent them from drying out or absorbing ambient moisture. Additionally, store them in a cooler spot, away from direct sunlight or heat, as high temperatures can cause the sugar to melt and the marshmallows to deteriorate or become excessively sticky. If you’ve incorporated other ingredients, such as chocolate dips or fillings, their shelf life might be slightly shorter, so it’s best to consume them within a week or two.
When to Serve Homemade Rose Marshmallows
Homemade marshmallows possess a quality that simply can’t be replicated by store-bought versions. Their exquisite texture and customizable flavors make them ideal for special occasions or when you want to elevate an everyday moment. Since they require a bit more effort than opening a bag, we often reserve them for memorable events:
- Birthday Parties: A unique, elegant treat for guests.
- Tea Parties: Their delicate rose flavor makes them a perfect accompaniment to tea.
- Hot Chocolate Bars: Offer a gourmet upgrade to hot beverages, especially during colder months.
- Bridal Showers or Baby Showers: As mentioned, their aesthetic appeal and unique flavor are perfect for celebratory gatherings.
- Edible Gifts: Package them beautifully for a thoughtful, handcrafted present.
- Gourmet S’mores: Elevate the classic campfire treat with a sophisticated twist.
More Delicious Recipes You’ll Love!
If you enjoyed crafting these rose marshmallows, you might want to try these other delightful recipes:
- Indoor S’mores and Marbled Marshmallows
- Outrageous S’mores Recipes
- Sweet Potato Casserole (a surprising pairing for marshmallow fluff!)
- Chocolate Parfait with Gingerbread Fluff
Explore More Rose-Infused Recipes
The subtle, romantic flavor of rose can be incorporated into many culinary creations. If you’re a fan of rose, don’t miss these other fragrant recipes:
- Rose Water Gin Cocktail
- How to Make Rose Water (for true DIY enthusiasts!)
- Homemade Rose Lollipops
We absolutely adore hearing from you! If you decide to make these enchanting rose-flavored homemade marshmallows, please share your experience by leaving a comment and a review below. Your feedback helps our community of bakers!
You can also FOLLOW US on FACEBOOK, INSTAGRAM, and PINTEREST to discover more delicious recipes, inspiring cocktails, irresistible desserts, and fabulous party ideas!
Rose-Flavored Homemade Marshmallows
By: Eden
Fluffy, rose-flavored homemade marshmallows! They’re perfect for a treat or with your favorite hot chocolate. These are easy to make when you follow our step-by-step directions!
Rate Recipe
Print Recipe
Equipment
- Candy Thermometer
- 6 x 6 or 8 x 8 Baking Pan
- Electric Stand Mixer with Whisk Attachment
- Small Saucepan
- Kitchen Scale (optional, but recommended for accuracy)
- Rubber Spatula
- Sharp Knife
Ingredients
- 1 1/2 cups granulated sugar
- 1 cup water, divided into two 1/2 cups
- 1 cup light corn syrup
- 3/4 ounce unflavored gelatin, 3 packets
- 1/4 tsp salt
- 1 tbsp rose water extract
- 3 tbsp dried edible rose petals, plus extra for garnish
- Powdered sugar, for dusting
- Vegetable oil, for greasing
Instructions
- Prepare a 6×6 inch (or similar) baking pan by lightly rubbing vegetable oil on the bottom and sides. Then, generously sift powdered sugar over the oiled surfaces until fully coated, about 1/8 inch thick.
- In a medium saucepan, combine 1 1/2 cups granulated sugar, 1/2 cup water, and 1 cup light corn syrup. Attach a candy thermometer. Stir well and bring to a boil over medium heat.
- Continue to cook the sugar mixture until it reaches 240-250°F (115-121°C) on the candy thermometer (soft ball to firm ball stage). Watch carefully. Once the temperature is reached, immediately reduce heat to a very low simmer or turn off the stove.
- In a small bowl, combine the 3/4 ounce unflavored gelatin with the remaining 1/2 cup cold water. Whisk with a fork until frothy and smooth. Let it bloom for about 5 minutes.
- Pour the bloomed gelatin mixture into the bowl of an electric stand mixer fitted with a whisk attachment. Begin whisking on medium-low speed.
- Carefully and slowly pour the very hot sugar syrup in a steady stream down the side of the mixer bowl while the mixer is running on medium speed. Avoid pouring directly onto the whisk.
- Increase the mixer speed to high and beat for 10 minutes, or until the mixture becomes very thick, fluffy, opaque, and bright white, holding firm peaks.
- Reduce mixer speed to low. Add the 1 tbsp rose water extract and 1/4 tsp salt. Continue to whisk for another minute to fully incorporate.
- Working quickly, pour the marshmallow mixture into the prepared baking pan. Use an oiled spatula to spread it evenly.
- Immediately sprinkle 3 tablespoons of dried edible rose petals generously over the top of the marshmallow mixture.
- Leave the marshmallows uncovered at room temperature for 6-8 hours, or overnight, to allow them to fully set.
- To remove, lightly oil a sharp knife and dust it with powdered sugar. Run the knife around the edges of the pan to loosen. Dust your clean hands with powdered sugar and gently lift the marshmallow sheet out of the pan.
- Place the marshmallow sheet on a cutting board generously dusted with powdered sugar (or a 50/50 mixture of cornstarch and powdered sugar).
- Oil and dust your knife again. Cut the marshmallow sheet lengthwise into three strips, then cut crosswise to create 3-4 squares from each strip (or your desired size).
- As you cut each marshmallow, immediately roll the freshly cut sides in the powdered sugar mixture to prevent sticking.
- Store your homemade rose marshmallows in an airtight container at room temperature for up to 3 weeks, or freeze for longer storage.
Nutrition
Carbohydrates: 62g,
Fat: 1g,
Sodium: 90mg,
Sugar: 62g,
Calcium: 5mg
Nutrition information is automatically calculated, so should only be used as an approximation.