
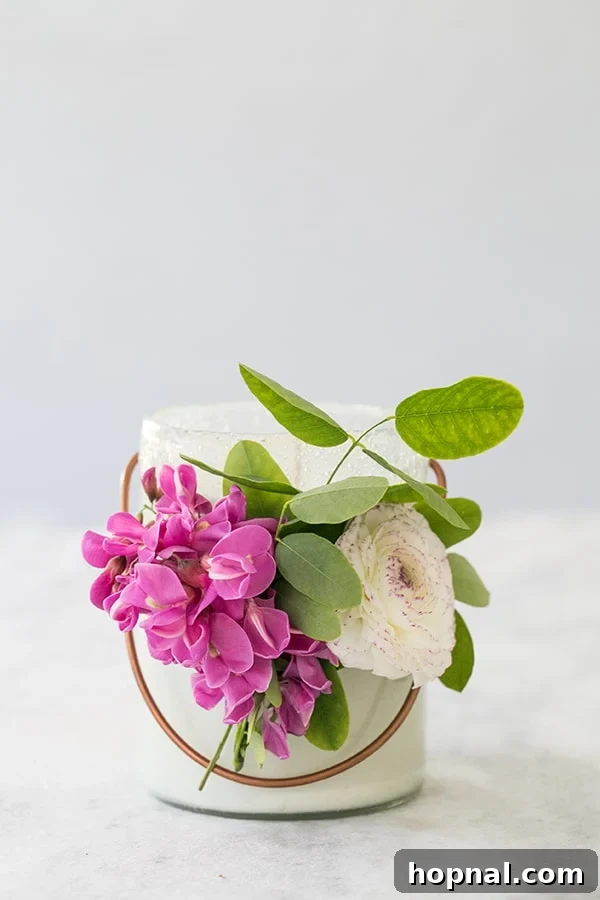
DIY Essential Oil Candles: Crafting Natural Aromatherapy for Your Home
There’s nothing quite like the warm glow and soothing aroma of a homemade candle. Imagine crafting exquisite candles infused with your favorite essential oils, creating a personalized aromatherapy experience right in your living space. This comprehensive tutorial will guide you through making your own beautiful and fragrant DIY essential oil candles, perfect for enhancing your home ambiance or as thoughtful, personalized gifts.
Making candles with essential oils is surprisingly simple and incredibly rewarding. You have complete control over the ingredients, ensuring a non-toxic product free from synthetic fragrances often found in store-bought options. Plus, the ability to create custom essential oil blends means your candles will truly reflect your unique style and desired mood.
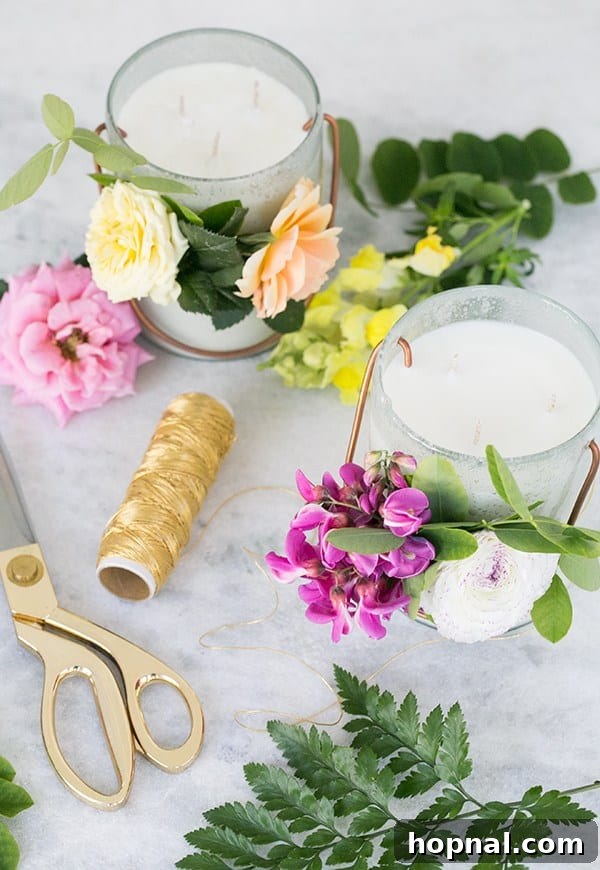
Much like these DIY pine-scented soy candles, homemade essential oil candles are an ideal gift for any occasion, from holidays to housewarmings, or simply as a special treat for yourself. The joy of gifting something handcrafted and infused with natural goodness is unparalleled.
My personal love for essential oils runs deep. Every evening, the calming scent of lavender fills my bedroom from a diffuser, aiding in relaxation, and I even have a special bedtime blend formulated for my son. The versatility of essential oils is truly remarkable. This passion inspired us to create these DIY essential oil candles using natural soy wax, blending two harmonious scents: soothing lavender and uplifting lemon. Lavender is renowned for its calming properties, effectively easing stress and anxiety, while lemon essential oil is celebrated for its invigorating and purifying qualities.
The beauty of making your own essential oil candles lies in the freedom to design a custom fragrance. Whether you’re crafting a tranquil blend for your meditation space, an energizing aroma for your office, or a unique scent for a cherished friend, the possibilities are endless. These personalized candles make truly wonderful gifts that convey thought and care.
Follow our detailed tutorial below and share your creations with us! We are confident you’ll adore these candles as much as we do. This project is also a delightful and engaging craft activity for events like baby showers or bridal showers, offering guests a memorable keepsake.
How to Make Essential Oil Candles: A Step-by-Step Guide
Embark on your candle-making journey with confidence. This guide breaks down the process into easy-to-follow steps, ensuring a successful and enjoyable crafting experience.
Gathering Your Essential Candle Making Supplies
Before you begin, ensure you have all the necessary materials. Quality supplies are key to creating safe, long-lasting, and fragrant candles.
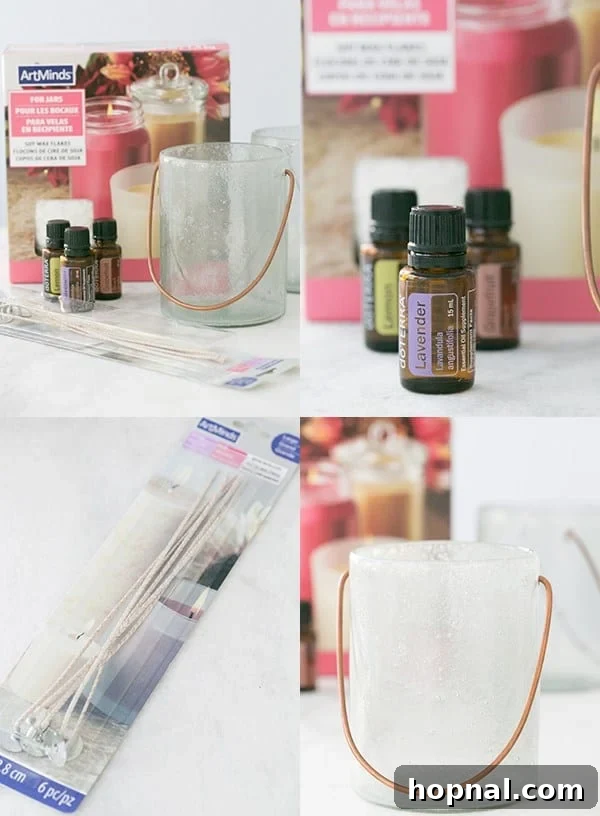
- Thick Glass Jars: Opt for heat-safe jars specifically designed for candles. Mason jars, old jam jars, or decorative glass containers work wonderfully, provided they can withstand heat.
- Candle Wicks: Choose wicks appropriate for the size of your jar and the type of wax you’re using. Cotton wicks are a popular choice for soy wax. Look for pre-tabbed wicks for easy placement.
- Therapeutic Grade Essential Oils: This is where the magic happens! Select 100% pure essential oils for the best aromatherapy benefits and safest burn.
- Soy Wax Chips (3 pounds): Soy wax is a natural, renewable resource that burns cleaner and longer than paraffin wax. It’s also easier to clean up and holds essential oil scents beautifully.
- Sticks or Wick Holders: These are crucial for keeping your wicks centered while the wax hardens. Clothes pins, pencils, or specialized wick clips can be used.
- Microwavable Glass Bowl with Spout: A heat-safe bowl, preferably with a pouring spout, will make melting wax and pouring much easier and safer.
Detailed Candle Making Directions
Follow these instructions carefully to create your beautiful essential oil candles.
- Melt the Wax Chips: Place your soy wax chips into a microwavable glass bowl. Using a bowl equipped with a spout will greatly simplify the pouring process later on. Heat the wax in 30-60 second intervals, stirring well after each interval, until the wax is completely melted and clear. Be cautious not to overheat the wax, as this can affect its ability to bind with essential oils. Alternatively, you can use a double boiler method on the stovetop for more controlled melting.
- Add the Essential Oils: Once the wax is fully melted and slightly cooled (check the manufacturer’s recommended temperature for adding fragrance, usually around 180-185°F or 82-85°C to avoid the oils evaporating too quickly), it’s time to incorporate your essential oils. For a potent, room-filling aroma, we recommend starting with about 20-30 drops of each essential oil per candle. For two candles, this would be approximately 40-60 drops total of each oil. Remember that the scent will be less intense once the wax hardens and when the candle is burning, so don’t be shy! You can adjust the quantity based on your personal preference for scent strength and the size of your jars.
- Prepare the Wick: Take a small amount of the melted wax (you can dip the metal base of the wick into the wax) and use it to adhere the metal disc at the bottom of the wick to the center base of your glass jar. Ensure it’s firmly secured and perfectly centered.
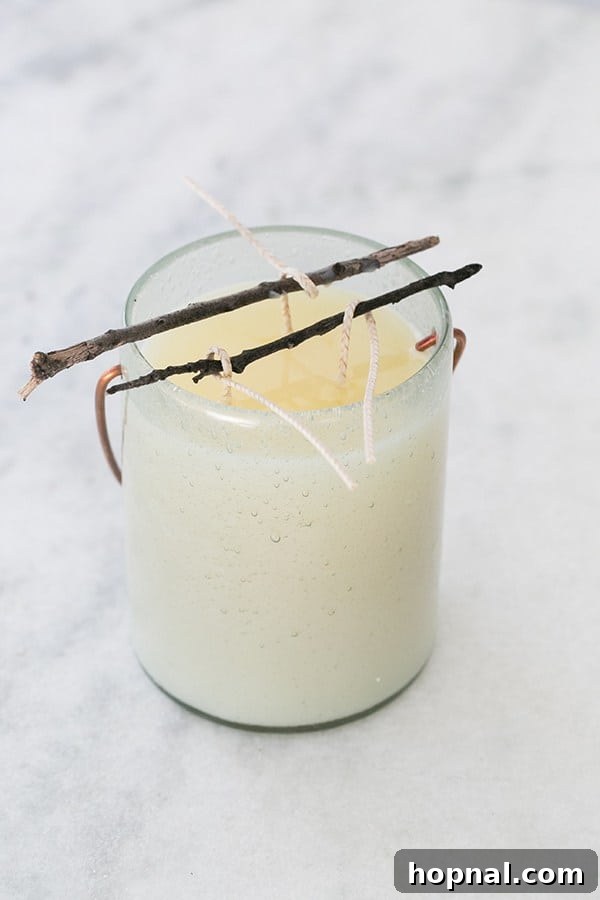
- Secure the Wick: To keep the wick upright and centered while the wax sets, wrap the excess length of the wick around a stick (like a popsicle stick or a pencil) and rest the stick across the top rim of the jar. This ensures an even burn and prevents the wick from sinking or leaning.
- Pour the Wax: Carefully pour the melted wax, now infused with essential oils, into your prepared glass jars. Pour slowly to avoid disturbing the wick. Fill the jars, leaving about half an inch of space from the top.
- Allow to Harden: Place the filled jars in a cool, undisturbed spot and allow the wax to harden completely. This process can take several hours, typically 24 hours, during which the clear liquid wax will transform into a solid, opaque white. Patience is key for a smooth, even candle surface.
- Trim the Wick: Once the wax has fully dried and hardened, carefully remove the stick holding the wick. Using sharp scissors, trim the remaining wick to approximately 1/4 inch above the wax surface. A shorter wick helps ensure a cleaner, safer burn.
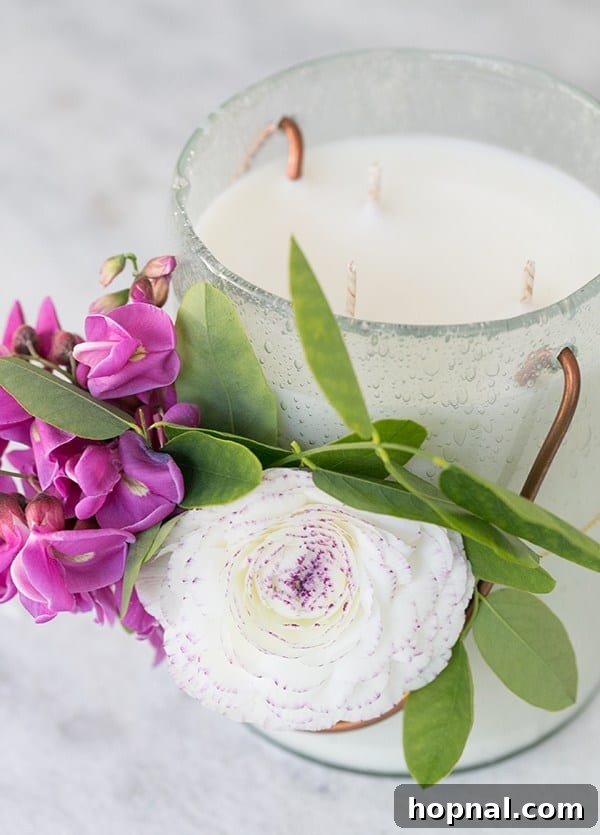
- Decorate and Gift: For an extra touch of beauty, tie some fresh flowers or elegant faux flowers around the outside of the glass jars. Your gorgeous, aromatic essential oil candles are now ready to be enjoyed or presented as a heartfelt gift to a friend or loved one!
Can I Put Essential Oils in Candles? The Science of Scent
Absolutely, you can! Incorporating pure essential oils into melted wax is an excellent way to create custom-scented, therapeutically beneficial candles. Unlike synthetic fragrance oils, which are chemically manufactured, essential oils are natural aromatic compounds typically extracted through distillation from various parts of plants, including flowers, leaves, bark, and roots.
When essential oils are diffused through the heat of a burning candle, their aromatic molecules are released into the air. These molecules interact with your olfactory system, influencing your mood, emotions, and overall well-being—a practice known as aromatherapy. This means your homemade essential oil candles can do more than just smell good; they can help calm your mind, energize your spirit, or promote a sense of focus, depending on the oils you choose.
It’s important to use high-quality, pure essential oils for candle making. The purity not only ensures you receive the full therapeutic benefits but also contributes to a cleaner burn and a more authentic aroma. Always consider the flash point of essential oils (the temperature at which they can ignite) and ensure proper dilution, though for candle making, they are typically added after the wax has cooled slightly from its highest melting point but before it begins to set.
How To Choose The Best Essential Oils for Candle Making
Selecting the right essential oils is paramount for both the aroma and the therapeutic quality of your candles. The most crucial factor is ensuring they are 100% pure, unadulterated essential oils.
Beware of misleading marketing terms such as “therapeutic grade” or “Grade A.” These are often self-assigned labels by companies and are not overseen or regulated by any independent governing body. Such terms do not guarantee purity or quality and can sometimes be used to justify higher prices for inferior products.
Your best approach is to conduct thorough research into a brand or company before purchasing their oils. Reputable companies pride themselves on transparency and should readily provide consumers with third-party test results, such as Gas Chromatography/Mass Spectrometer (GC/MS) reports. These reports are scientific analyses that verify the purity and chemical composition of an essential oil, confirming that it has not been diluted with cheaper carrier oils or adulterated with synthetic additives.
If a company is unwilling or unable to provide GC/MS reports for their essential oils, it’s generally a red flag, and you should probably avoid their products. Even with reports, a degree of trust is involved in believing the authenticity of the results provided. Many ethical companies also prioritize sourcing their plants from farms that practice sustainable agriculture and avoid pesticides, even if they don’t carry a specific ‘organic certified’ label due to the complexities of international regulations.
Ultimately, choosing the best essential oils comes down to finding a trusted brand that is transparent about its sourcing and testing methods. Remember, the most expensive brand is not always the best, and many high-quality, pure essential oils are available at reasonable prices. Buying your essential oils online, after carefully researching the company’s reputation and practices, is often the most convenient and affordable way to source them.
Some of the Most Popular Essential Oils for Candle Blends
Essential oils offer an incredible spectrum of scents and benefits. Here are some of the most popular choices for candle making, along with a brief description of their aromatic profiles and common uses:
- Lavender Essential Oil: A universally loved scent, lavender is renowned for its calming, relaxing, and stress-reducing properties. Its sweet, floral, and herbaceous aroma makes it perfect for bedtime candles.
- Lemon Essential Oil: Uplifting and purifying, lemon oil offers a bright, fresh, and zesty aroma. It’s excellent for energizing spaces and neutralizing odors.
- Rosemary Essential Oil: With a strong, fresh, herbaceous, and slightly camphorous scent, rosemary is invigorating and is often used to promote focus and mental clarity.
- Patchouli Essential Oil: Earthy, musky, and exotic, patchouli has a grounding aroma that can be deeply calming and is often associated with relaxation and meditation.
- Sweet Orange Essential Oil: A cheerful and uplifting citrus scent, sweet orange is warm, refreshing, and known for its mood-boosting properties.
- Marjoram Essential Oil: Herbal, woody, and slightly spicy, marjoram is comforting and warming, often used for relaxation and to soothe tired muscles.
- Grapefruit Essential Oil: Tangy, sweet, and uplifting, grapefruit provides a refreshing and clarifying aroma that can help reduce feelings of stress.
- Cinnamon Essential Oil: Spicy, warm, and inviting, cinnamon creates a cozy and comforting atmosphere, perfect for fall and winter candles.
- Clove Essential Oil: Rich, warm, and sweet-spicy, clove pairs beautifully with cinnamon and orange for a festive and welcoming scent.
- Clary Sage Essential Oil: Herbaceous, earthy, and slightly floral, clary sage is known for its balancing and euphoric effects, promoting a sense of well-being.
- Peppermint Essential Oil: Minty, fresh, and stimulating, peppermint is invigorating and can help clear the mind and boost energy.
- Eucalyptus Essential Oil: Strong, camphorous, and invigorating, eucalyptus is excellent for clearing airways and creating a clean, fresh environment.
Top Tips for Perfecting Your DIY Essential Oil Candles
Here are some additional insights to ensure your candle-making process is smooth and your finished candles are fantastic:
- Microwave Melting Efficiency: For small batches, melting your wax chips in a microwave is a quick and efficient method. Always use short bursts of heat and stir thoroughly.
- Spouted Bowl Advantage: A microwaveable bowl with a spout isn’t just a suggestion; it’s a game-changer. It minimizes spills and provides much better control when pouring hot wax into your jars.
- Ample Oil for Strong Scent: Don’t underestimate how much essential oil is needed for a pronounced fragrance. The wax will ‘hold’ the scent, but its throw (how much scent is released when burning) can be subtle if not enough oil is used. If you desire a robust aroma, be generous with your essential oil drops. Too little oil will result in a barely noticeable scent.
- Enhance Charm with Decorations: Tying fresh or high-quality faux flowers around the outside of the candle jars adds an irresistible visual appeal, making your candles even more charming and gift-ready. Ensure any decorations are on the outside of the glass and not close enough to the flame to pose a fire hazard.
- Cure Time is Crucial: After your candles have hardened, resist the urge to burn them immediately. Allow your candles to “cure” for at least 24-48 hours, or even up to a week. This allows the essential oils to properly bind with the wax, resulting in a stronger scent throw when burned.
- First Burn Matters: On the first burn, let the candle burn long enough for the melted wax pool to reach the edges of the jar. This prevents “tunneling,” where only the center of the candle burns down, leaving wax on the sides.
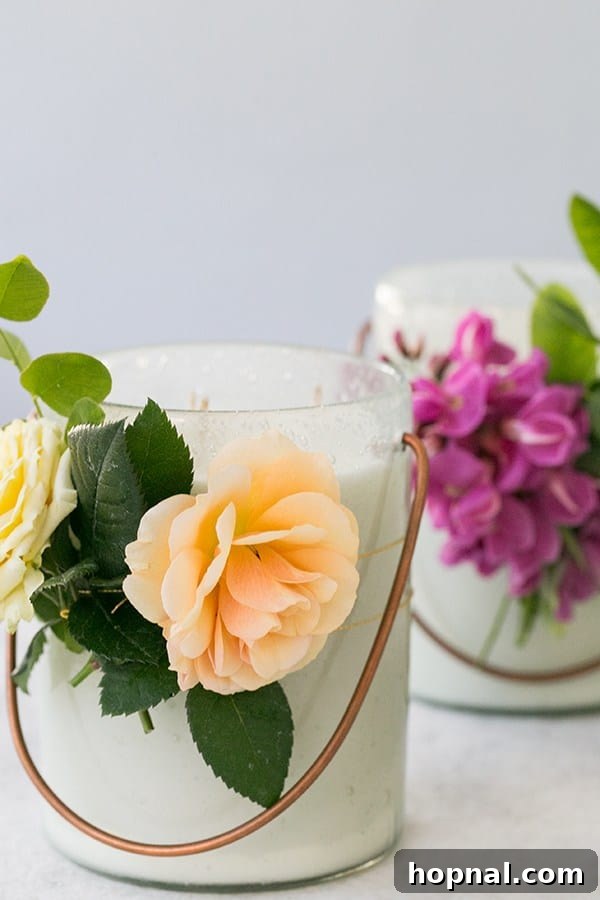
Crafting essential oil candles is a delightful way to infuse your home with natural fragrances and enjoy the numerous benefits of aromatherapy. They are easy to make, offer endless customization options for scents, and serve as thoughtful, personalized gifts for any occasion. Embrace the creative process and enjoy the calming, uplifting, or balancing effects of your homemade creations!
Explore More Charming DIY & Gift Ideas
If you loved making these essential oil candles, you might also enjoy these other creative projects and gift guides:
- 10 Charming Housewarming Gift Ideas
- A Charming Holiday Gift Guide
- A Charming Bubble Bath Gift Box
We encourage you to try these DIY Essential Oil Candles! If you have attempted this or any other DIY tutorial, please share your experience and any feedback in the comments below. We love hearing from you!
You can also FOLLOW ME on FACEBOOK, INSTAGRAM, and PINTEREST to discover more delicious recipes, delightful cocktails, tempting desserts, inspiring party ideas, and engaging DIY projects.
DIY Essential Oil Candles
Create your own customized candles with your favorite blend of pure essential oils for a natural aromatherapy experience.
Course: DIY Crafts
Prep Time: 30 minutes
Cook Time: 1 day (for hardening/curing)
Total Time: 1 day 30 minutes
Servings: 2 Candles
Author: Eden
Ingredients
- 3 lbs soy wax chips
- 2 (12-ounce) thick glass jars
- 40-60 drops essential oils (e.g., Lavender, Lemon), adjust for desired scent strength
- 2 large candle wicks (pre-tabbed cotton wicks recommended)
- 8 fresh or faux flowers to decorate with (optional)
Instructions
- Melt the wax chips in a microwavable glass bowl (a bowl with a spout is highly recommended for easy pouring). Heat in 30-60 second increments, stirring until completely melted and clear.
- Once the wax is melted and slightly cooled (check wax manufacturer’s instructions for fragrance oil temperature, typically around 180-185°F), add your chosen essential oils. Use a generous amount for a strong scent, as the aroma diminishes slightly once the wax hardens and when burning.
- Dip the metal base of a wick into the melted wax, then firmly press it to the bottom center of each glass jar to secure it.
- Wrap the excess length of the wick around a stick (like a pencil) and rest it across the top of the jar to keep the wick centered and upright.
- Carefully pour the wax into the prepared jars, filling them to about half an inch from the top.
- Let the wax harden completely in a cool, undisturbed place. This typically takes 24 hours. The wax will change from clear to opaque white.
- Once the wax is fully dried, remove the wick holder and trim the wick to about 1/4 inch above the wax surface.
- For a beautiful presentation, tie some fresh or faux flowers around the outside of the jars. Your custom essential oil candles are now ready to be enjoyed or given as a lovely gift!
Tried this Recipe? Tag me Today!
Mention @sugarandcharm or tag us #sugarandcharm!