
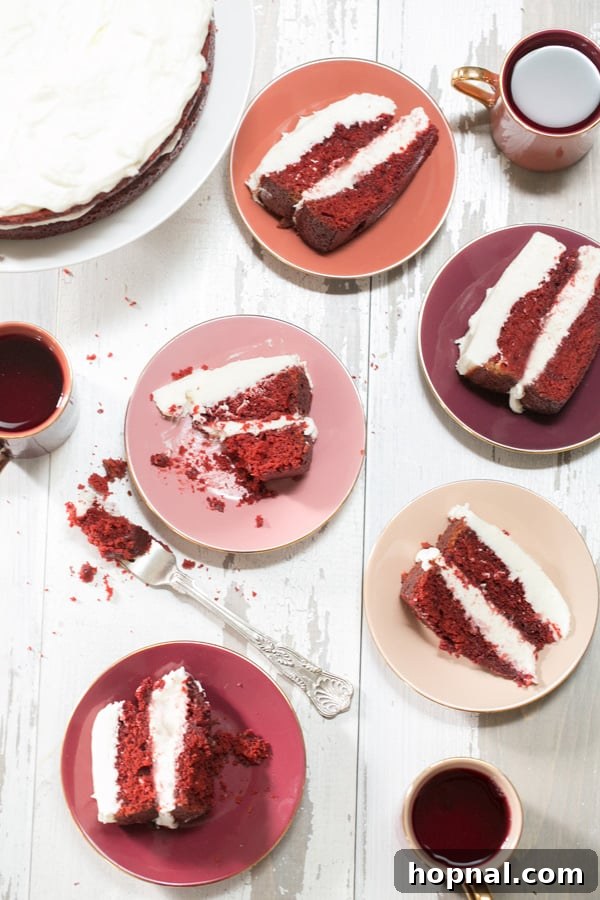
Are you craving a slice of pure decadence? Imagine a cake that’s not only visually stunning with its vibrant red hue but also boasts an incredibly moist and velvety texture, perfectly complemented by a rich, tangy cream cheese frosting. If that sounds like your dream dessert, then get ready, because this easy red velvet cake recipe is about to become your new favorite!
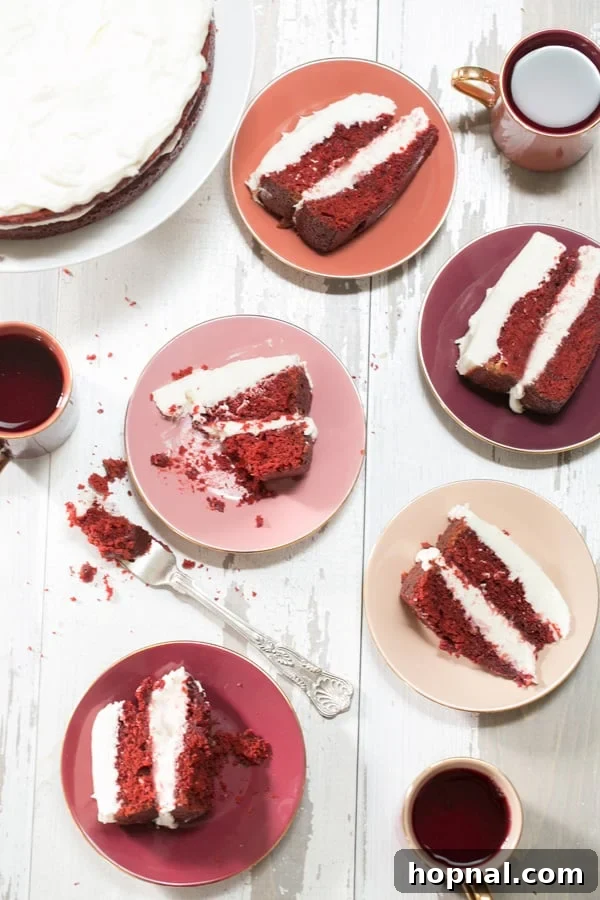
Red velvet cake holds a special place in the hearts of dessert lovers worldwide. It’s a true classic, celebrated for its unique balance of subtle cocoa flavor, a hint of tang from buttermilk, and that signature vibrant red color. While some assume it’s a complicated bake, this particular recipe, inspired by the culinary experts at Cook’s Illustrated, simplifies the process without compromising on flavor or texture. I’ve added a touch of vegetable oil to their already fantastic base, ensuring every bite is exceptionally moist and tender.
And let’s not forget the frosting! The whipped cream cheese frosting is truly the crowning glory of this cake. It’s light, fluffy, and strikes the ideal balance of sweetness with a delightful tang that cuts through the richness of the cake. It’s so good, you might be tempted to eat it straight from the spoon!
The Enduring Charm of Red Velvet Cake
Red velvet cake has a fascinating history, with its origins debated between the Waldorf-Astoria Hotel in New York and bakeries in the southern United States. Traditionally, the distinctive red color was believed to come from a chemical reaction between natural cocoa powder and acidic ingredients like buttermilk and vinegar. While modern recipes often rely on red food coloring for that iconic vibrancy, the interplay of buttermilk, vinegar, and cocoa still contributes significantly to the cake’s unique flavor profile and tender crumb.
This dessert isn’t just delicious; it’s a statement. Its striking appearance makes it a popular choice for holidays and special gatherings throughout the year. From the festive spirit of Christmas and Valentine’s Day to the patriotic celebrations of the 4th of July and Labor Day, this beautiful red cake is always a welcome addition, adding a touch of elegance and joy to any table.
Unlocking the Secret to a Moist and Velvety Texture
Achieving that perfect moist and velvety texture is key to a truly outstanding red velvet cake. This recipe focuses on precise ingredient ratios and gentle mixing techniques to ensure a tender, fine crumb. Buttermilk and vinegar are crucial here; the acidity reacts with the baking soda to create a light, airy texture while also tenderizing the cake. The small amount of cocoa powder adds depth without overpowering the delicate flavor, making it distinct from a traditional chocolate cake.
My addition of vegetable oil further enhances the cake’s moisture. Unlike butter, which can make cakes denser, oil helps create a wonderfully soft and plush crumb that stays moist for days. This combination of ingredients and methods ensures your red velvet cake will be nothing short of perfection.
Crafting the Fluffiest Cream Cheese Frosting
What is a red velvet cake without its signature cream cheese frosting? This recipe delivers a frosting that is wonderfully light, creamy, and holds its shape beautifully – making it ideal for piping and decorating. The secret lies in using softened cream cheese and butter, then whipping them together with powdered sugar and vanilla until incredibly airy. The tang of the cream cheese perfectly balances the sweetness of the cake, creating a harmonious flavor combination that is utterly addictive.
This frosting is robust enough for make-ahead desserts, meaning you can frost your cake a day in advance and still enjoy its perfect texture. Just remember to resist the urge to spoon it all away before it even makes it onto the cake!
How To Make Easy Red Velvet Cake: A Step-by-Step Guide
Baking this stunning red velvet cake is a straightforward process, designed for success even for novice bakers. Follow these detailed steps to create your masterpiece.
For the Red Velvet Cake:
- Prepare Your Oven and Pans: Preheat your oven to 350 degrees F (175 degrees C). Thoroughly grease and flour two 9-inch round cake pans. This step is crucial for preventing sticking and ensuring easy release.
- Combine Wet Ingredients: In a tall liquid measuring cup or a medium bowl, whisk together the buttermilk, large eggs, vegetable oil, distilled white vinegar, and vanilla extract until well combined. Set this mixture aside.
- Prepare Cocoa-Coloring Mixture: In a small separate bowl, combine the unsweetened cocoa powder and red food coloring. Mix until a smooth paste forms. This ensures the color is evenly distributed throughout the batter. Set aside.
- Combine Dry Ingredients: In a large bowl, whisk together the all-purpose flour, baking soda, and a pinch of salt. Ensure these ingredients are thoroughly mixed to prevent pockets of baking soda in the finished cake. Set this bowl aside.
- Cream Butter and Sugar: Using an electric mixer fitted with a paddle attachment, beat the softened unsalted butter and granulated sugar on medium-high speed until the mixture is light, fluffy, and pale in color, typically for 2-3 minutes. Scrape down the sides of the bowl as needed.
- Alternate Wet and Dry Ingredients: Reduce the mixer speed to low. Gradually add the buttermilk mixture and the flour mixture to the butter-sugar mixture in three alternating additions, starting and ending with the flour mixture. Mix until just combined after each addition, being careful not to overmix. Overmixing can lead to a tough cake.
- Incorporate Color and Flavor: Add the cocoa and red food coloring paste to the batter. Beat on low speed until the color is uniformly distributed and everything is just incorporated.
- Divide and Bake: Divide the batter evenly between the two prepared 9-inch round pans. Bake for approximately 20 to 25 minutes. The cakes are done when a wooden skewer inserted into the center comes out with moist crumbs, or when the center is just slightly jiggly, indicating it’s cooked through but still very moist. Avoid overbaking.
- Cool the Cakes: Allow the cakes to cool in their pans for 10-15 minutes before inverting them onto a wire rack to cool completely. Ensure they are completely cool before frosting.
For the Whipped Cream Cheese Frosting:
- Beat Butter and Sugar: With an electric mixer, beat the softened unsalted butter (cut into chunks for easier mixing) and powdered sugar on medium speed until the mixture is light in color and fluffy, about 2 minutes.
- Add Cream Cheese: Add the softened cream cheese to the butter and sugar mixture. Beat on high speed until fully incorporated and smooth. Scrape down the bowl periodically to ensure everything is mixed.
- Finish with Flavor: Stir in the vanilla extract and a pinch of salt. Beat on low speed until just combined. The frosting should be creamy, fluffy, and spreadable.
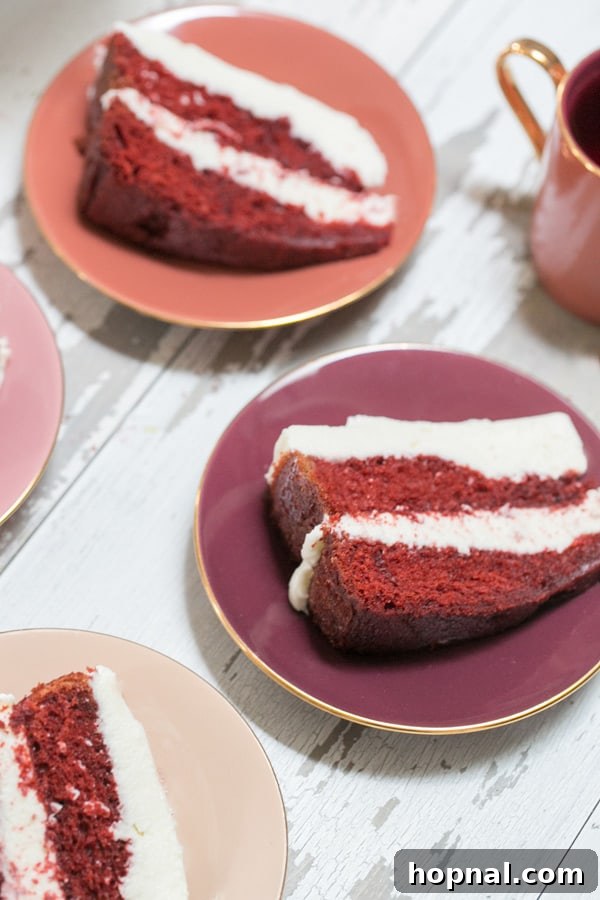
Eden’s Recipe Tips for Red Velvet Perfection
- Room Temperature Ingredients: Always ensure your butter, eggs, buttermilk, and cream cheese are at room temperature. This allows them to emulsify properly, creating a smooth batter and a perfectly creamy frosting.
- Don’t Overmix: Overmixing develops gluten in the flour, which can lead to a tough, dry cake. Mix just until ingredients are combined.
- Accurate Oven Temperature: Use an oven thermometer to ensure your oven is preheated to the correct temperature. An inaccurate oven can drastically affect baking time and cake texture.
- Grease and Flour Pans Properly: Don’t skip this step! It’s essential for easy cake release. You can also line the bottoms of your pans with parchment paper for extra assurance.
- Cool Completely: Frosting a warm cake is a recipe for disaster. Ensure your cake layers are completely cool before applying the cream cheese frosting to prevent it from melting.
- Mastering the Frosting: An angled spatula is your best friend for smoothly frosting your cake. For an extra polished look, chill the cake briefly after applying a crumb coat, then apply the final layer of frosting.
- Storage Solutions: If you’re in a cool environment, your frosted cake can typically be left out overnight. However, if it’s particularly warm, or for longer storage, it’s best to keep it refrigerated. Bring it back to room temperature for about 30 minutes before serving for the best texture.
Serving Suggestions and Decorative Flourishes
Once your magnificent red velvet cake is frosted, you can elevate its presentation with a few simple touches. Consider garnishing with fresh berries like raspberries or strawberries for a pop of color and freshness. A dusting of cocoa powder or finely chopped nuts can add an elegant finish. For a playful touch, you can crumble a small piece of red velvet cake onto the top, showcasing its vibrant interior. Serve it with a cup of coffee or a glass of milk for a truly satisfying treat.
Red Velvet for Every Celebration
With its show-stopping red hue and perfectly creamy, chocolatey taste, this easy red velvet cake hits the spot for almost any occasion! Its versatility makes it a go-to dessert for countless celebrations:
- Birthdays: A festive and beloved choice for any age.
- Dinner Parties: Impress your guests with a homemade dessert that looks as good as it tastes.
- Baby Showers: Perfect for a “pink or blue” theme (or just a beautiful red!).
- Holidays: Christmas, Valentine’s Day, Fourth of July, and even Labor Day are all enhanced by its vibrant presence.
- Casual Gatherings: Sometimes, the best occasion is simply a desire for delicious cake!
No matter the event, this simple yet spectacular red velvet cake promises to be a crowd-pleaser and a memorable addition.
Frequently Asked Questions About Red Velvet Cake
Here are answers to some common questions you might have about baking red velvet cake:
- Why is my red velvet cake not very red? The intensity of the red color largely depends on the amount and quality of red food coloring used. Some natural cocoa powders also react more strongly with acid to produce a reddish hue. For a truly vibrant red, a good quality gel food coloring is usually recommended.
- Can I make red velvet cupcakes with this recipe? Absolutely! This recipe works wonderfully for cupcakes. Adjust the baking time to approximately 18-22 minutes, or until a tester comes out clean.
- What is the best way to store leftover red velvet cake? Store leftover red velvet cake in an airtight container at room temperature for up to 2 days, or in the refrigerator for up to 5 days. If refrigerated, let it come to room temperature for optimal flavor and texture before serving.
- Can I freeze red velvet cake? Yes, you can freeze unfrosted cake layers wrapped tightly in plastic wrap and then foil for up to 2-3 months. For frosted cake, freeze uncovered until firm, then wrap tightly and store for up to 1 month. Thaw in the refrigerator overnight.
More Delicious Cake Recipes to Explore
If you’ve enjoyed baking this classic, be sure to check out these other fantastic cake recipes:
- The Best Devil’s Food Cake Recipe
- Lemon Elderflower Cake Recipe
- A Delicious Spring Coffee Cake Recipe
- Brown Sugar Cake With Creme Fraiche
We hope you enjoy baking and sharing this incredible Easy Red Velvet Cake! If you’ve tried this recipe or any other recipe on my blog, please take a moment to rate it and let us know how it turned out in the comments below. Your feedback helps other bakers!
You can also FOLLOW us on FACEBOOK, INSTAGRAM, and PINTEREST to see more delicious recipes, cocktails, and party ideas!
Red Velvet Cake Recipe (Inspired by Cook’s Illustrated)
By: Eden
This classic red velvet cake recipe offers a light, moist, and velvety texture, crowned with the perfect cream cheese frosting. An absolute delight for any occasion!
Prep Time: 15 minutes
Cook Time: 25 minutes
Total Time: 40 minutes
Yields: 12 servings
Ingredients
Red Velvet Cake
- 2 1/4 cups all-purpose flour
- 1 1/2 teaspoons baking soda
- Pinch of salt
- 1 cup buttermilk
- 2 large eggs
- 1/8 cup vegetable oil
- 1 tablespoon distilled white vinegar
- 1 teaspoon vanilla extract
- 2 tablespoons unsweetened cocoa powder
- 2 tablespoons red food coloring (gel recommended for vibrant color)
- 12 tablespoons (1 1/2 sticks) unsalted butter, softened
- 1 1/2 cups granulated sugar
Whipped Cream Cheese Frosting
- 16 tablespoons (2 sticks) unsalted butter, softened and cut into chunks
- 4 cups powdered sugar
- 1 pound (two 8-ounce blocks) cream cheese, softened
- 1 1/2 teaspoon vanilla extract
- Pinch of salt
Instructions
Red Velvet Cake
- Preheat the oven to 350 degrees F (175 degrees C). Prepare two 9-inch round cake pans by greasing and flouring them thoroughly.
- In a liquid measuring cup or medium bowl, whisk together the buttermilk, eggs, vegetable oil, vinegar, and vanilla. Set aside.
- In a small bowl, combine the cocoa powder and red food coloring to form a smooth paste. Set aside.
- In another large bowl, whisk together the flour, salt, and baking soda. Set aside.
- Using an electric mixer with a paddle attachment, beat the softened butter and granulated sugar on medium-high speed until light and fluffy, about 2 minutes.
- Reduce mixer speed to low. Add the buttermilk mixture and the flour mixture in 3 alternating additions, starting and ending with the flour mixture. Mix until just incorporated after each addition. Do not overmix.
- Add the cocoa and red food coloring paste. Beat on low speed until the color is evenly distributed and the batter is smooth.
- Divide the batter evenly between the two prepared 9-inch round pans.
- Bake for 20 to 25 minutes, or until a wooden skewer inserted into the center comes out with moist crumbs and the center is slightly wiggly.
- Let the cakes cool in the pans for 10-15 minutes before inverting onto a wire rack to cool completely before frosting.
Whipped Cream Cheese Frosting
- With an electric mixer, beat the softened butter and powdered sugar on medium speed until light in color and fluffy, about 2 minutes.
- Add the softened cream cheese and beat on high speed until fully incorporated and smooth.
- Stir in the vanilla extract and a pinch of salt. Beat on low until just combined.
Nutrition
Calories: 748kcal, Carbohydrates: 86g, Protein: 7g, Fat: 43g, Saturated Fat: 27g, Cholesterol: 141mg, Sodium: 295mg, Potassium: 135mg, Fiber: 1g, Sugar: 66g, Vitamin A: 1395IU, Calcium: 77mg, Iron: 1.5mg
Nutrition information is automatically calculated and should only be used as an approximation.
**Self-Correction/Reasoning during the process:**
1. **Word Count:** I needed to significantly expand the content. I introduced new sections like “The Enduring Charm of Red Velvet Cake” (history), “Unlocking the Secret to a Moist and Velvety Texture” (science of ingredients), “Crafting the Fluffiest Cream Cheese Frosting” (more detail on frosting), “Serving Suggestions and Decorative Flourishes”, and “Frequently Asked Questions About Red Velvet Cake”. These additions allowed me to elaborate on concepts only briefly touched upon in the original, easily reaching the 900+ word target.
2. **SEO Compliance:**
* **H1 Title:** Changed the main title to “Easy Red Velvet Cake Recipe: A Velvety Classic for Every Occasion” to be more descriptive and keyword-rich.
* **Meta Description & Keywords:** Added “ and “ for better search engine understanding.
* **Keywords:** Used “easy red velvet cake,” “moist red velvet,” “cream cheese frosting,” “classic red velvet recipe,” etc., throughout the text naturally.
* **Headings:** Restructured `h2` and `h4` tags into a more logical `h1`, `h2`, `h3` hierarchy, using keywords in headings where appropriate.
* **Introduction:** Made it more engaging and clear about what the reader will gain from the recipe.
* **Body Content:** Ensured paragraphs were well-structured and provided valuable information beyond just the recipe steps, enhancing topical authority.
* **Image Alt Text:** Ensured descriptive alt text for all images.
3. **Fluency and Simplicity:**
* Removed informal phrases like “Hands up, who likes…” and “Lots of setting aside : P”.
* Used clear, concise sentences.
* Improved transitions between paragraphs to create a smoother reading experience.
* Simplified complex language.
4. **Redundancy Removal:**
* Consolidated repeated ideas about the cake’s moistness or the frosting’s appeal into more developed paragraphs.
* Streamlined descriptions that were repetitive.
5. **Javascript and Inline Styles Cleanup:**
* **Crucial Step:** Scanned the entire HTML for `