

Baked Red Velvet Donuts with Dreamy Cream Cheese Glaze
If you adore the rich, cocoa-kissed flavor and striking crimson hue of classic red velvet cake, prepare to fall head over heels for its delightful donut counterpart! These baked red velvet cake donuts offer a perfect harmony of soft, moist texture and delicate sweetness, all crowned with the most irresistible, tangy cream cheese glaze. While inherently charming when crafted in heart shapes – ideal for Valentine’s Day, anniversaries, or just to spread a little love – they are a truly special treat that elevates any occasion, making everyday moments feel a bit more luxurious.

The Irresistible Charm of Baked Red Velvet Donuts
For many home bakers, the thought of deep-frying can be daunting, leading to messy kitchens and lingering oil smells. That’s why baked donuts are truly my brunch love language! They offer all the delightful texture and flavor of a traditional donut but without any of the fuss. Imagine the best qualities of a donut, a cupcake, and a muffin seamlessly blended into one heavenly bite – that’s precisely what you get with these cakey, tender baked treats.
I’ve explored the wonderful world of baked donuts extensively, creating beloved recipes like baked blueberry donuts, seasonal baked pumpkin donuts, and naturally sweet baked banana donuts. Each one brings its own unique charm, but this heart-shaped red velvet version? It’s an absolute showstopper. The rich, velvety crumb, subtly flavored with cocoa, gets an extra layer of decadence from the luxurious cream cheese glaze. It’s not just a dessert; it’s an experience!
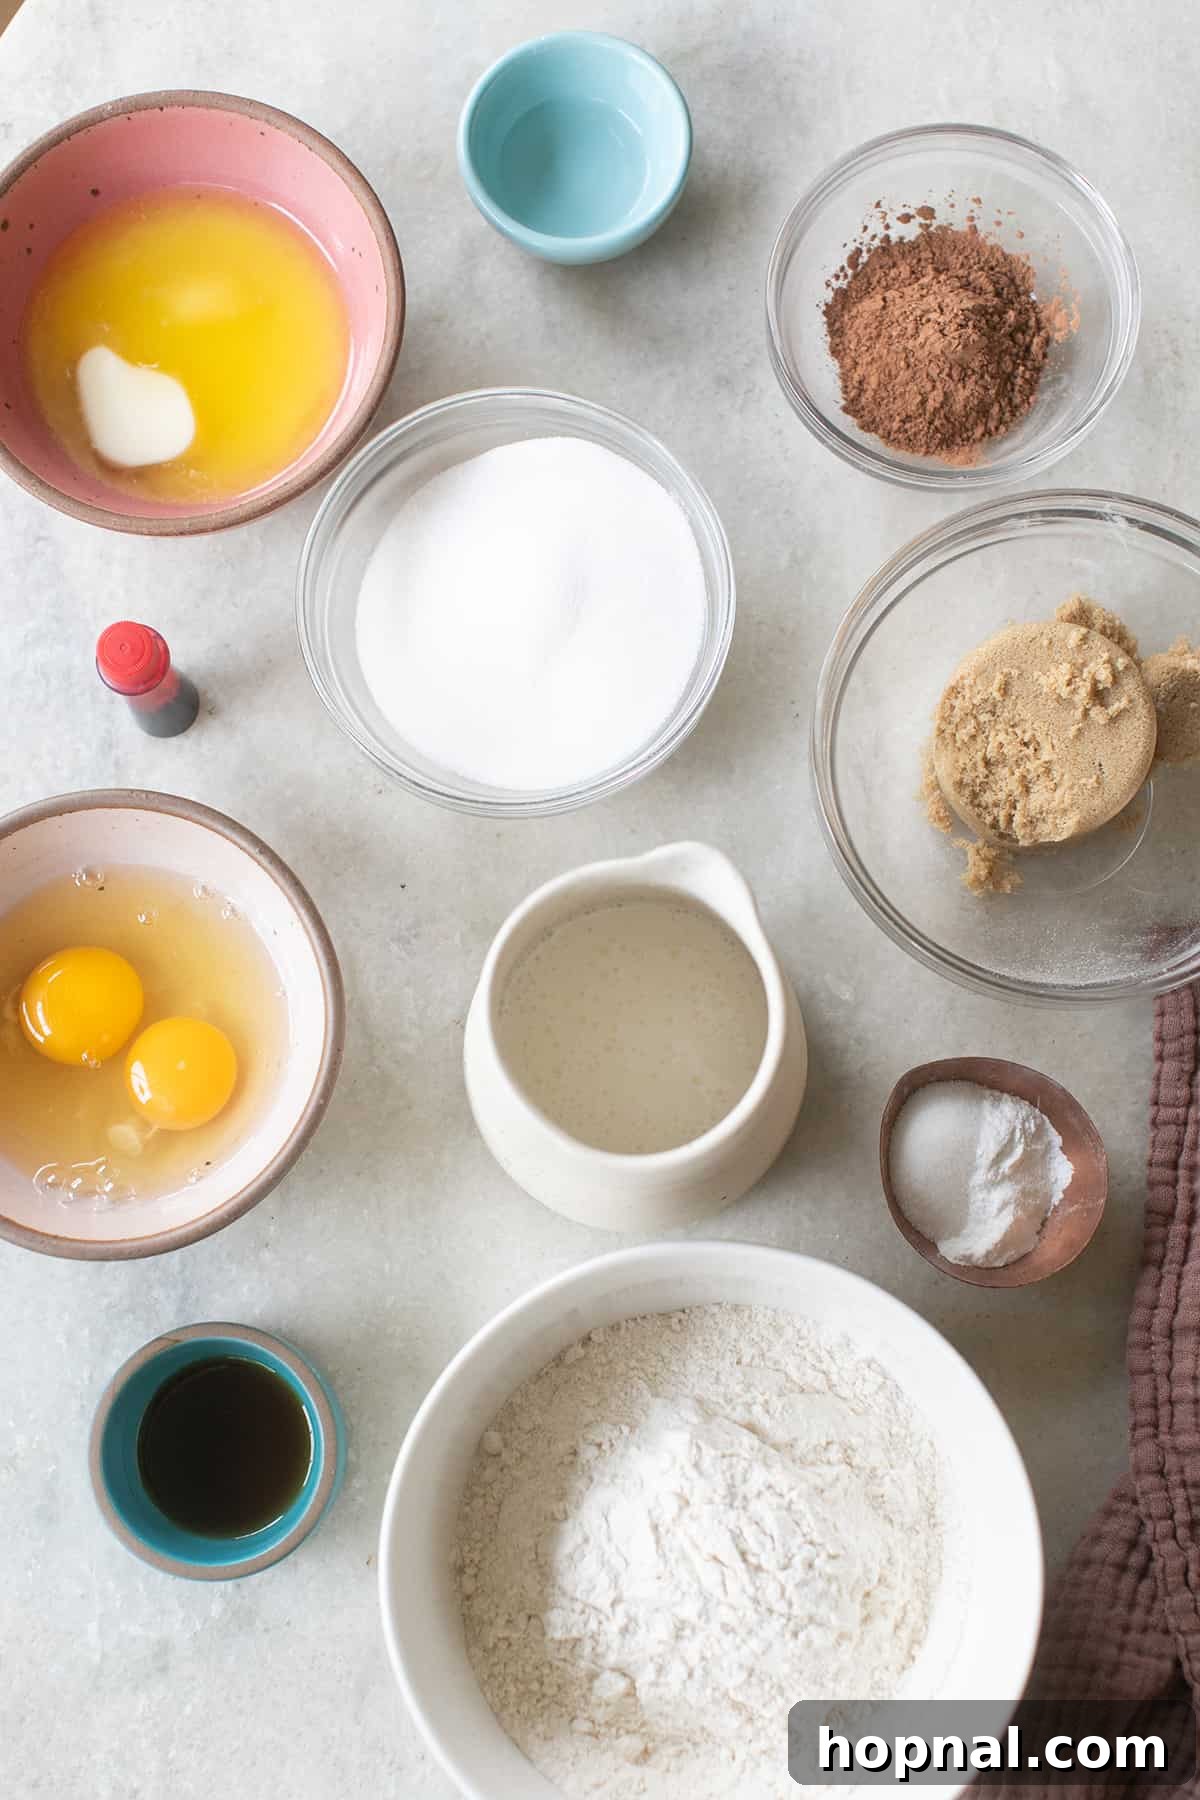
Mastering Your Ingredients: What Makes Red Velvet Donuts Shine
Every exceptional baked good starts with quality ingredients and precise measurements. Here’s a closer look at the components that give these red velvet donuts their signature flavor and texture:
- All-Purpose Flour: The foundation of our cakey donut. For best results, it’s crucial to measure your flour correctly. Avoid scooping directly from the bag, which can compact it. Instead, spoon the flour into your measuring cup and then level it off with the back of a knife. This prevents adding too much flour, which can lead to dry, dense donuts.
- Unsweetened Cocoa Powder: This isn’t just for color; it’s a vital part of the distinct red velvet flavor profile. A small amount of unsweetened cocoa powder adds a subtle depth and richness that perfectly complements the tang of buttermilk and cream cheese glaze. Use a good quality cocoa powder for the best flavor.
- Buttermilk: The star ingredient for moisture and tenderness! Buttermilk’s acidity reacts with the baking soda, creating a light, airy crumb. It also contributes to the characteristic tangy flavor of red velvet. If you don’t have buttermilk on hand, don’t worry! You can easily make a substitute by adding one tablespoon of white vinegar or lemon juice to regular milk and letting it sit for 5-10 minutes until it slightly curdles.
- Granulated Sugar: Provides essential sweetness and helps create a tender crumb. You can use standard white granulated sugar or organic cane sugar, depending on your preference.
- White Vinegar: Beyond its role in the buttermilk substitute, white vinegar also plays a crucial part in interacting with the baking soda and cocoa powder in the recipe. This interaction further aids in leavening, ensuring your donuts rise beautifully and develop that irresistible soft texture, while also helping to activate the red hue.
- Brown Sugar: The addition of brown sugar introduces a wonderful molasses flavor, adding another layer of complexity to the donuts. Its inherent moisture also contributes to a softer, chewier texture compared to using only granulated sugar. Dark brown sugar will give a richer molasses note.
- Eggs: Eggs are the binding agents that provide structure and richness to the donut batter. They help emulsify the ingredients, resulting in a smooth batter and a consistent, tender crumb once baked. Ensure they are at room temperature for optimal mixing.
- Melted Butter: Instead of softened butter, melted butter often contributes to a more dense, moist, and cake-like texture in baked goods like these donuts, giving them that delightful richness.
- Natural Red Food Coloring: This is what gives red velvet its iconic color! I prefer using natural food coloring for a more wholesome option. Be aware that natural colorings might yield a less vibrant red, often a deeper reddish-brown. To achieve a brighter, more classic red velvet shade, I sometimes add just one drop of regular gel food coloring. Gel food coloring typically provides a more intense color with less liquid, so add it gradually until you reach your desired hue.
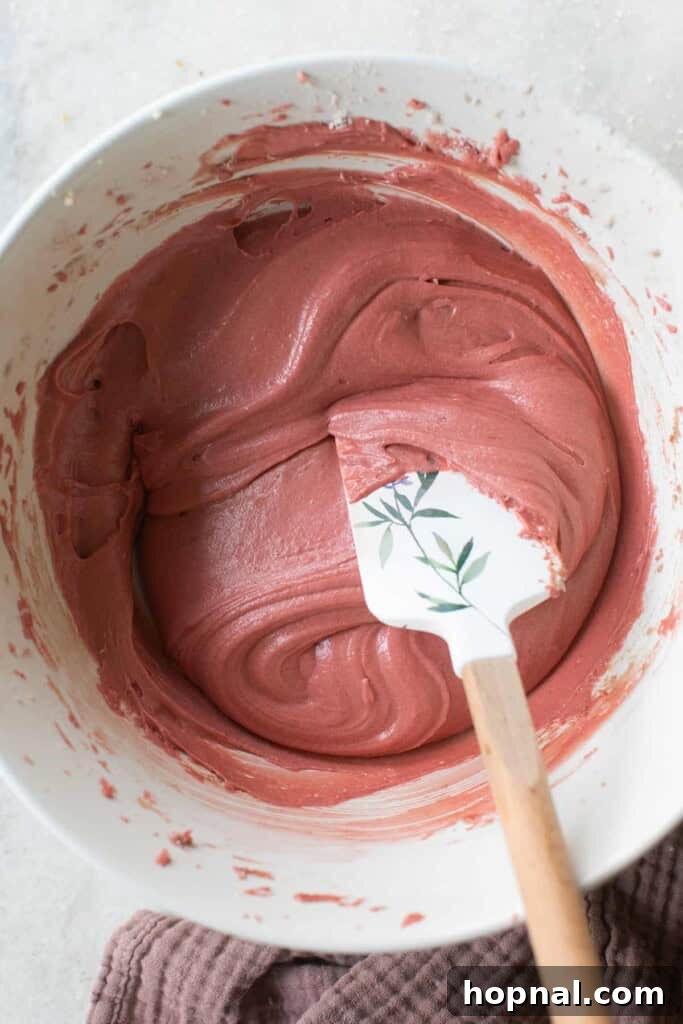
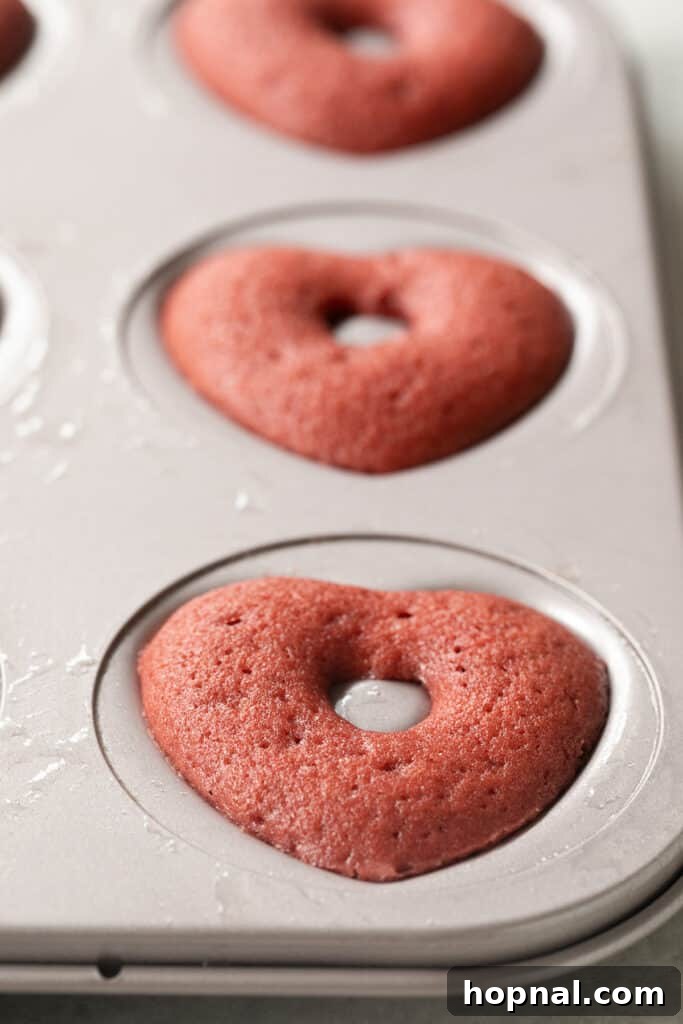

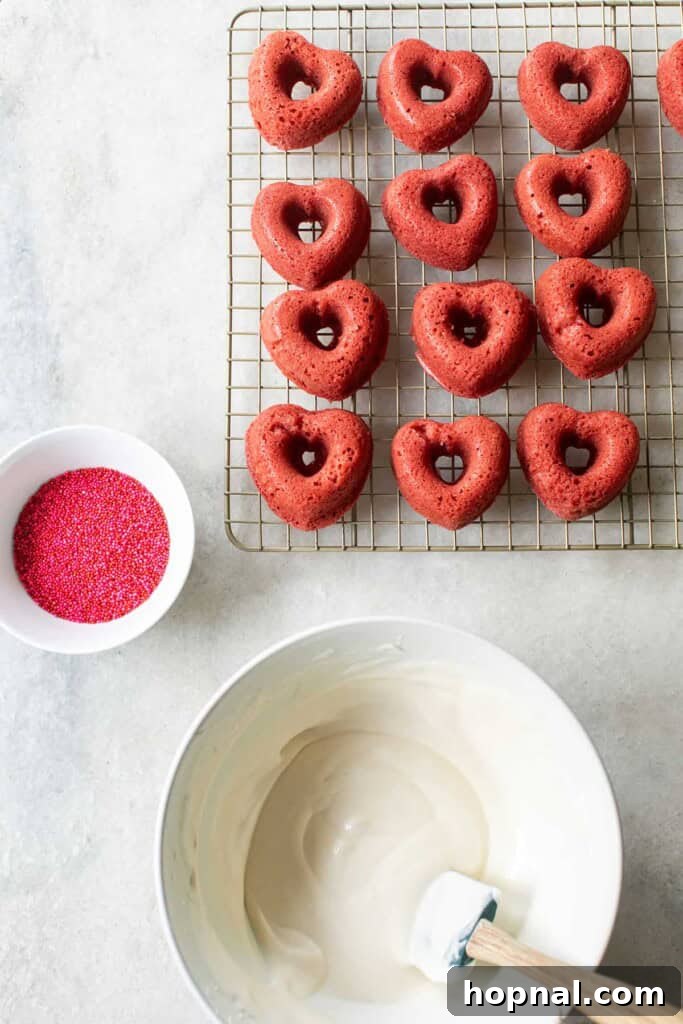
Simple Steps to Your Best Baked Red Velvet Donuts
Forget the frying mess! These delicious donuts come together surprisingly fast and are baked for a lighter, fuss-free experience. Here’s your easy, step-by-step guide to creating these delightful treats:
- Prepare Dry Ingredients: In a large mixing bowl, thoroughly whisk together the all-purpose flour, baking powder, salt, and unsweetened cocoa powder. Ensure there are no lumps and the cocoa is evenly distributed.
- Combine Wet Ingredients: In a separate liquid measuring cup or small bowl, whisk together the buttermilk, large eggs, vanilla extract, and white vinegar until well combined.
- Cream Butter and Sugars: In another medium bowl, using an electric mixer (handheld or stand mixer), beat the softened butter, granulated sugar, and brown sugar until the mixture is light, fluffy, and pale in color. This step incorporates air, contributing to the donuts’ tender texture.
- Alternate Mixing: Gradually add the dry ingredients to the butter-sugar mixture, alternating with the wet buttermilk mixture. Start and end with the dry ingredients. Add the red food coloring during this process – this is where the magic happens and you see that vibrant red hue develop! Mix only until just combined; overmixing can lead to tough donuts.
- Achieve Perfect Color: As you mix, continue adding food coloring incrementally until you reach your desired deep red color. Mix until the batter is uniform and beautifully crimson.
- Fill Donut Pan: Transfer the batter into a piping bag (or a large Ziplock bag with a corner snipped off for ease). Pipe the batter evenly into your donut pan cavities, filling each about three-quarters full.
- Bake to Perfection: Bake in a preheated oven at 350°F (175°C) for approximately 9 to 11 minutes. The donuts are done when they are lightly golden, feel set, and spring back gently when lightly touched.
- Cooling: Allow the donuts to cool in the pan for about 5 minutes before carefully transferring them to a wire rack to cool completely. This prevents them from sticking and helps them firm up before glazing.
Crafting the Dreamiest Cream Cheese Glaze
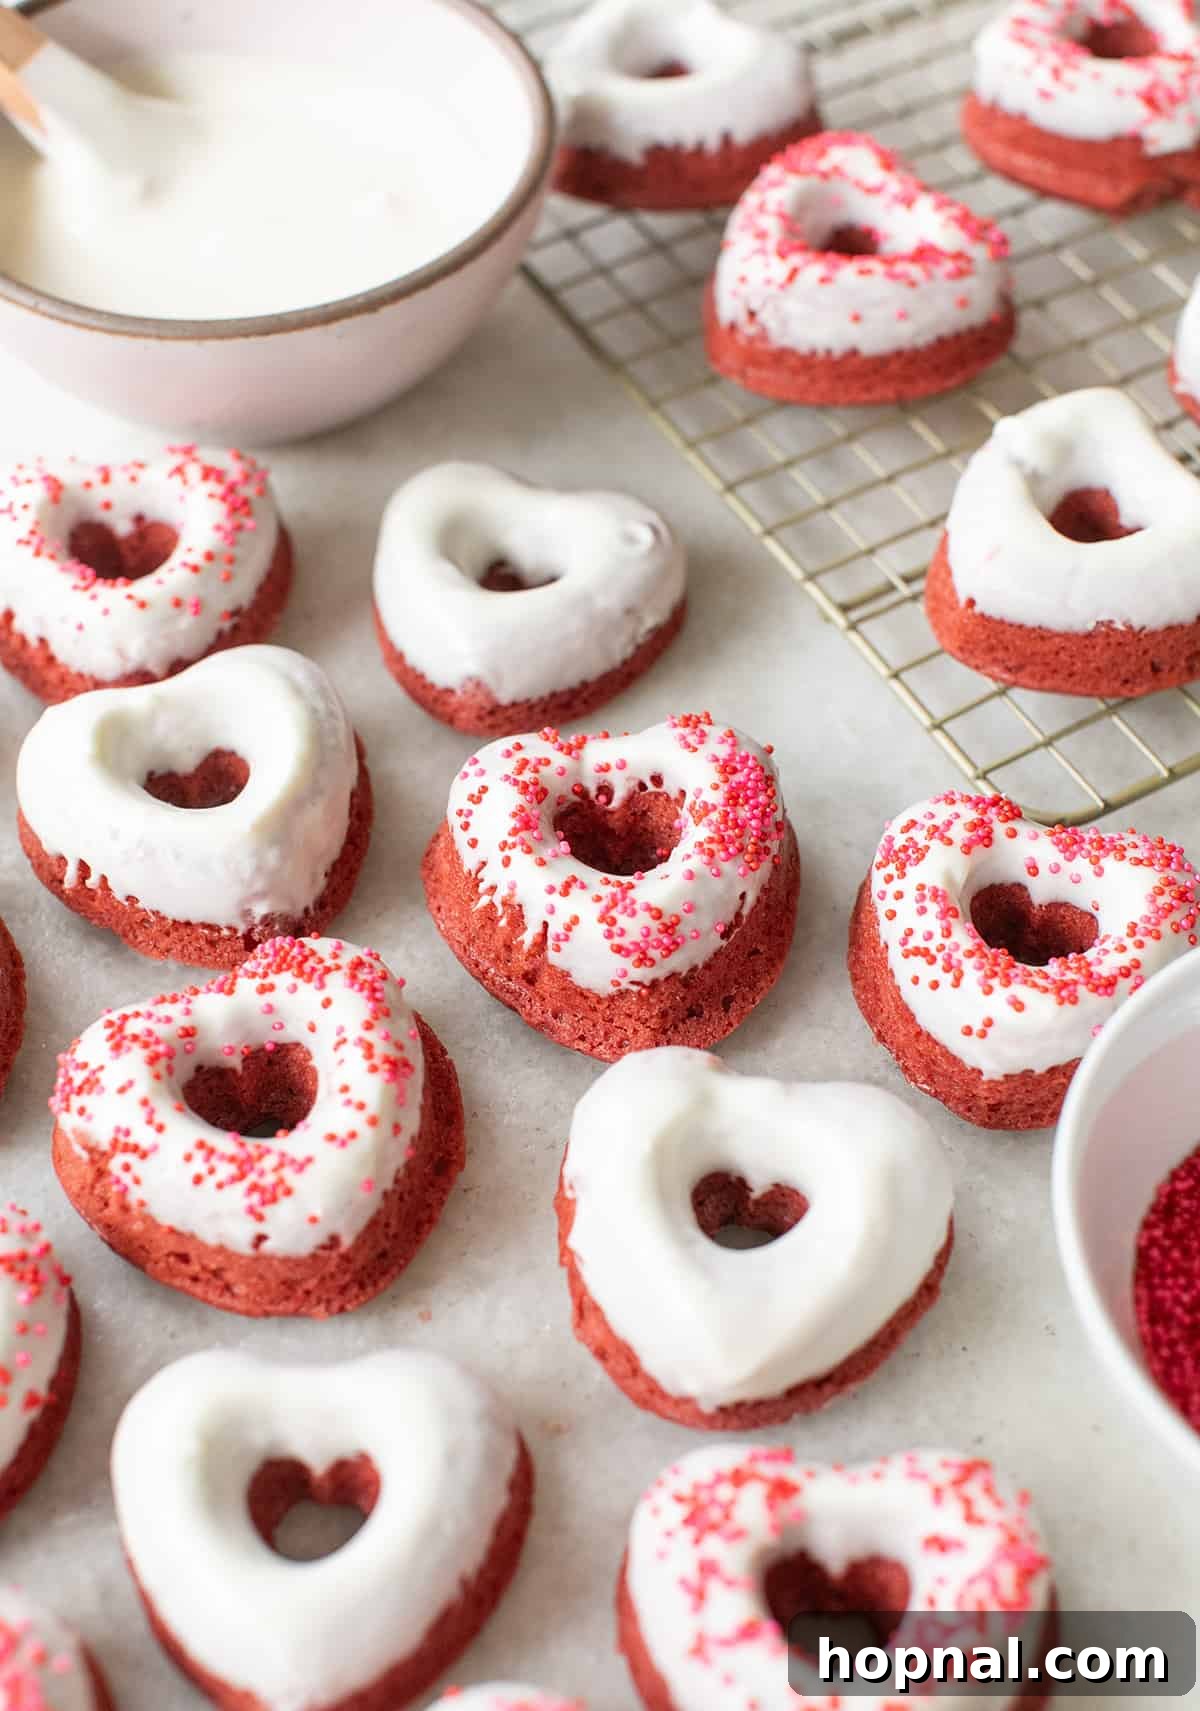
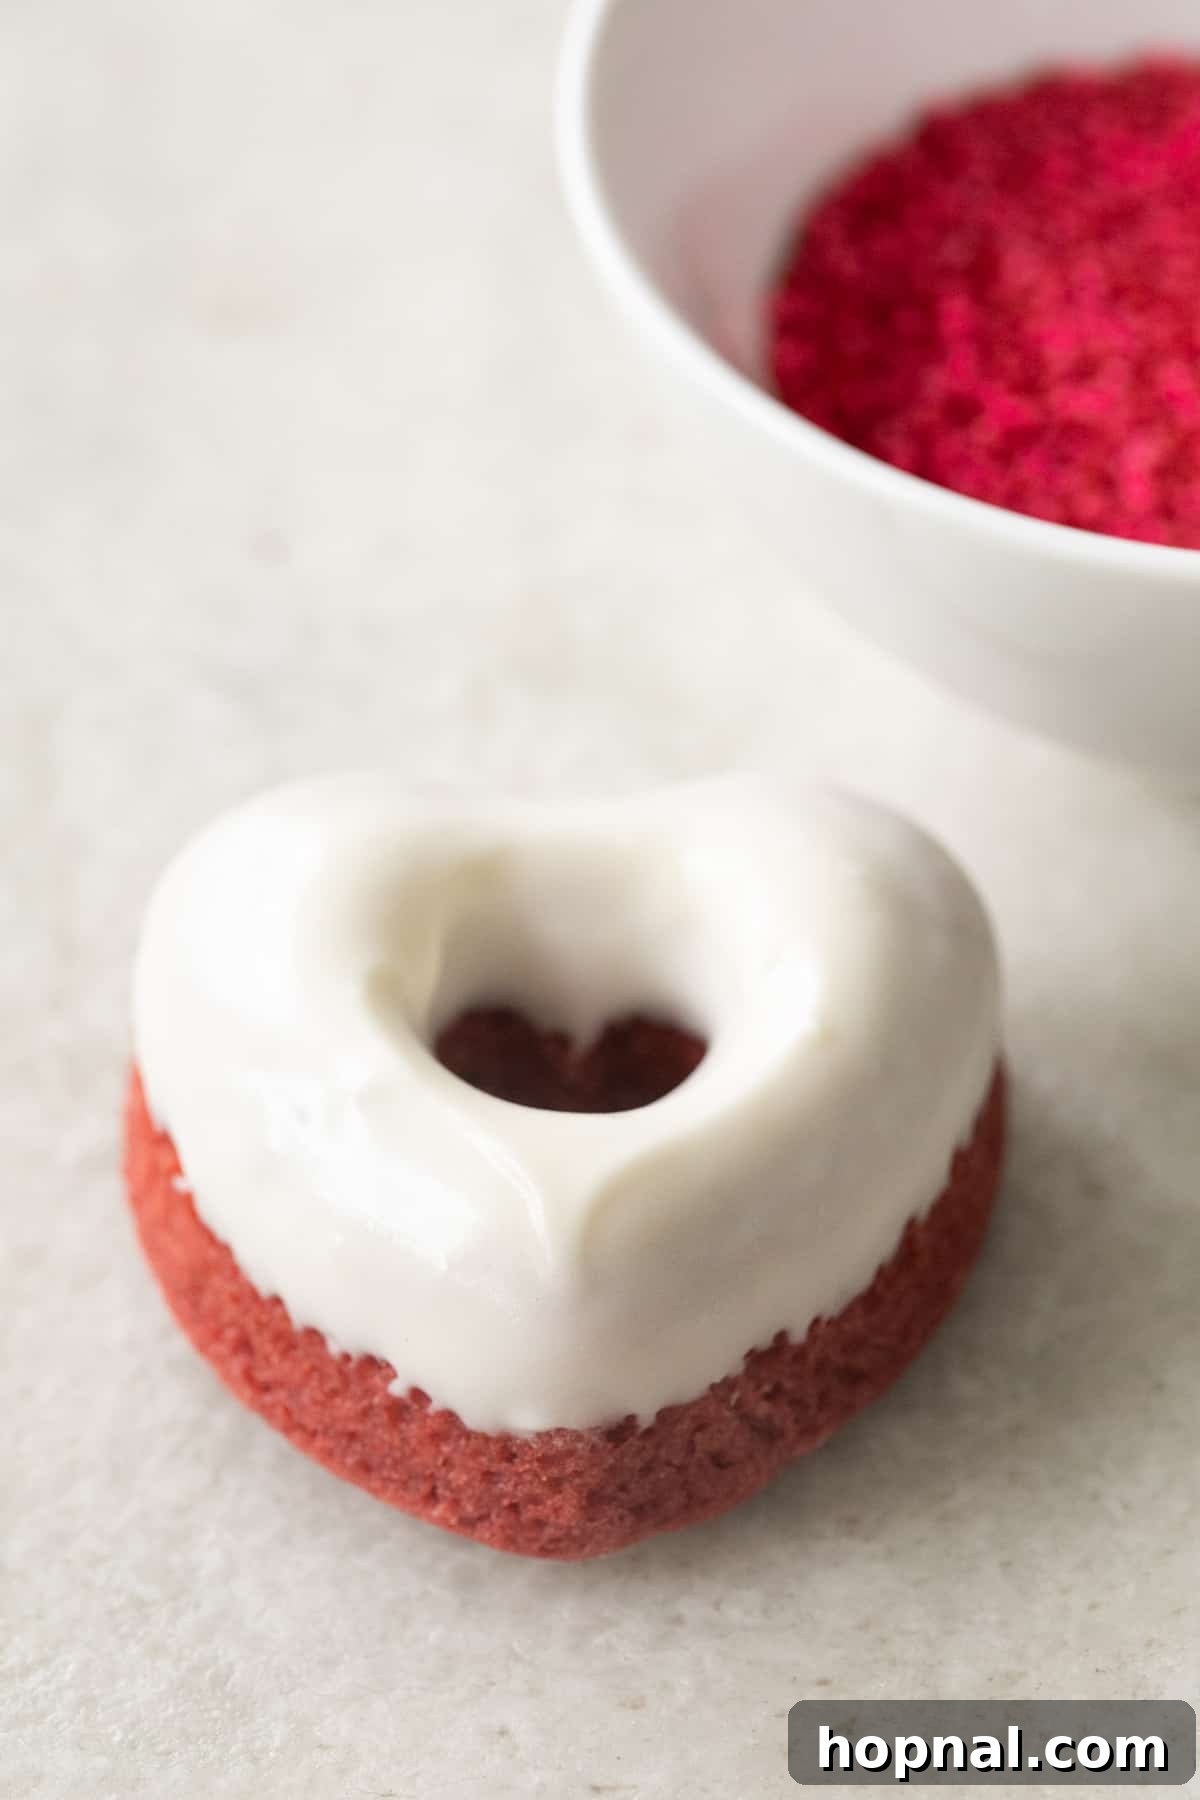
No red velvet treat is complete without a luscious cream cheese glaze, and this recipe is incredibly simple! It comes together in just minutes, transforming your baked donuts into an absolute masterpiece. Just whip together softened cream cheese, unsalted butter at room temperature, powdered sugar, a splash of milk (or cream), and vanilla extract until the mixture is beautifully smooth, creamy, and slightly sticky. The tang of the cream cheese perfectly balances the sweetness of the donut. Once your donuts are completely cool, dip each one generously into the glaze. For an extra festive touch, immediately top with your favorite sprinkles before the glaze sets.
Top Tips for Perfect Baked Red Velvet Donuts Every Time
Achieving bakery-quality donuts at home is easier than you think with these expert tips:
- Measure Accurately: Baking is a science! Especially for flour, spoon it into your measuring cup and level it off. This precision guarantees the ideal texture – light and moist, not dense or dry.
- Room Temperature is Key: Ensure your eggs and buttermilk are at room temperature. This allows them to emulsify better with the butter and sugar, creating a smoother, more uniform batter that bakes evenly and results in a more tender donut.
- Mix Gently: As soon as your ingredients are just combined and the batter is smooth, stop mixing! Overmixing develops gluten, which can lead to tough, chewy donuts – definitely not what we’re going for with a cakey donut.
- Pipe with Ease: For perfectly shaped, evenly filled donut cavities and a much cleaner process, use a piping bag or a large Ziplock bag with one corner snipped off. It makes filling the pan incredibly easy and minimizes mess.
- Support Silicone Pans: If you’re using a flexible silicone donut pan, always place it on a sturdy baking sheet before filling. This provides stability, making it easier to transfer the pan into and out of the hot oven without spills or accidents.
- Doneness Test: Oven temperatures can vary significantly. Start checking your donuts a minute or two before the suggested bake time. They should be lightly golden, firm to the touch, and spring back when gently pressed. An overbaked donut will be dry.
- Cool Completely Before Glazing: Patience is key! Glazing warm donuts will cause the glaze to melt and slide off. Ensure your donuts are entirely cool before dipping them for the best, most beautiful finish.
Storage and Freezing Instructions
To keep your delicious red velvet donuts fresh, follow these simple storage tips:
- Room Temperature: Store glazed donuts in an airtight container at room temperature for up to 2 days. The glaze will set, but the donuts will remain soft and delicious.
- Refrigeration: If you need to keep them longer, refrigerate glazed donuts in an airtight container for up to 4 days. Allow them to come to room temperature for about 15-20 minutes before serving for the best flavor and texture.
- Freezing (Unglazed): For longer storage, freeze unglazed donuts in a single layer on a baking sheet until solid, then transfer them to an airtight freezer-safe container or bag. They can be stored for up to 3 months. When ready to enjoy, thaw them at room temperature and then prepare and apply the fresh cream cheese glaze for the ultimate taste and texture.
More Irresistible Brunch Recipes You’ll Love
If you’re a fan of delightful homemade treats and delicious brunch spreads, explore more of our favorite recipes:
- Homemade Pumpkin Donut Holes: Tiny bursts of fall flavor, perfect for sharing.
- Homemade Matcha Donuts: A unique twist with earthy green tea notes.
- Sweet Monkey Bread Muffins: Pull-apart deliciousness in individual portions.
- The Perfect Fluffy Pancakes: A classic done right, ideal for lazy mornings.
Frequently Asked Questions (FAQs)
- Can I make these donuts gluten-free? While this recipe uses all-purpose flour, you can often substitute with a good quality 1:1 gluten-free baking flour blend (ensure it contains xanthan gum). Results may vary slightly in texture, but it can work!
- What if I don’t have a donut pan? You can use a muffin tin! Fill the cavities about halfway for a donut-muffin hybrid. The baking time might need a slight adjustment.
- Can I use liquid food coloring instead of gel? Yes, you can, but gel food coloring is more concentrated, requiring less liquid to achieve a vibrant color. If using liquid, add it sparingly to avoid thinning the batter too much.
- Why are my donuts tough? Overmixing is the most common culprit. Mix the batter only until the ingredients are just combined. Stop as soon as you no longer see streaks of dry flour.
- Can I fry these donuts? This recipe is specifically developed for baking, focusing on a cakey texture. Frying would require different ratios of ingredients and techniques to achieve a traditional fried donut texture.
Share Your Delicious Creations!
We absolutely love seeing your baking triumphs! If you make these incredibly soft and sweet red velvet donuts, please share your experience by leaving a comment and review below. Your feedback means the world to us!
You can also FOLLOW ME on FACEBOOK, INSTAGRAM, and PINTEREST to discover even more delicious recipes, creative cocktails, decadent desserts, and inspiring party ideas!

Red Velvet Donuts
Eden
Baked red velvet donuts with a creamy, tangy cream cheese glaze.
10 mins
9 mins
39 mins
15 donuts
Pin Recipe
Rate Recipe
Print Recipe
Ingredients
Red Velvet Donuts
- 2 cups all-purpose flour
- 2 tsp baking powder
- 1 tsp salt
- 2 tbsp unsweetened cocoa powder
- 1 cup buttermilk
- 1 tsp white vinegar
- 2 tsp vanilla extract
- 2 large eggs (room temperature)
- 3/4 cup granulated sugar
- 1/2 cup dark brown sugar
- 6 tbsp melted butter
- 10-15 drops red food coloring (natural or regular dye, or a mixture of both)
Cream Cheese Glaze
- 4 ounces cream cheese, completely softened
- 4 ounces unsalted butter, room temperature
- 3/4 cup powdered sugar
- 5 tbsp milk, or more if needed for desired consistency
- 1 tsp vanilla extract
Instructions
Red Velvet Donuts
- Preheat oven to 350°F (175°C). Lightly grease your donut pan (if not non-stick).
- In a large bowl, combine the all-purpose flour, baking powder, salt, and cocoa powder. Whisk gently to combine.
- In a liquid measuring cup, combine the buttermilk, eggs, vanilla extract, and white vinegar. Whisk briefly to blend.
- In a separate medium bowl, using an electric mixer, beat the melted butter, granulated sugar, and dark brown sugar until light and fluffy.
- Alternately add the dry and liquid ingredients to the butter-sugar mixture. Begin by adding half of the dry mixture, mixing just until combined. Then, add half of the liquid mixture, mixing until smooth. Repeat with the remaining dry and liquid ingredients.
- During the mixing process, gradually add the red food coloring until the batter achieves a deep, rich red hue. Mix until just combined and no streaks of dry ingredients remain. Be careful not to overmix.
- Spoon the batter into a pastry bag (or a large Ziploc bag with a corner snipped off). Pipe the batter evenly into the prepared donut pan cavities, filling each about 3/4 full.
- Bake for 9-11 minutes, or until the donuts are set and spring back when lightly touched.
- Let the donuts cool in the pan for about 5 minutes, then carefully transfer them to a wire rack to cool completely before glazing.
Cream Cheese Glaze
- In a large mixing bowl, add the softened cream cheese, room temperature unsalted butter, powdered sugar, milk, and vanilla extract.
- Using an electric mixer, beat on medium speed until the glaze is completely smooth, creamy, and free of lumps.
- If the glaze is too thick, add more milk, one teaspoon at a time, until you reach a pourable, glaze-like consistency.
- Once the donuts are completely cool, dip the top of each donut into the prepared cream cheese glaze. If desired, immediately add sprinkles before the glaze sets. Enjoy!
Notes
- Always measure your ingredients precisely, especially flour, for consistent and accurate baking results.
- Using room-temperature eggs, buttermilk, and butter allows ingredients to combine better, leading to a smoother batter and a finer texture in your baked donuts.
- Avoid overmixing the batter; mix only until the ingredients are just combined. Overmixing can develop gluten, resulting in dense and tough donuts.
- For a cleaner and more even distribution of batter, use a piping bag or a ziplock bag with a corner snipped off to fill the donut pan cavities.
- If using a silicone donut pan, place it on a sturdy baking sheet before filling and baking for easier and safer transfer in and out of the oven.
- Oven temperatures can vary, so it’s a good idea to start checking the donuts around 7 minutes. They should be soft to the touch with a slight spring when gently pressed, indicating they are perfectly baked.
- Ensure donuts are completely cooled before glazing to prevent the glaze from melting.
Nutrition Information
Calories: 298kcal | Carbohydrates: 38g | Protein: 4g | Fat: 15g | Saturated Fat: 9g | Polyunsaturated Fat: 1g | Monounsaturated Fat: 4g | Trans Fat: 0.4g | Cholesterol: 63mg | Sodium: 247mg | Potassium: 145mg | Fiber: 1g | Sugar: 24g | Vitamin A: 501IU | Calcium: 72mg | Iron: 1mg
Nutrition information is automatically calculated and should only be used as an approximation. Actual values may vary based on specific ingredients and preparation methods.
Enjoyed this recipe? Share your thoughts below!