
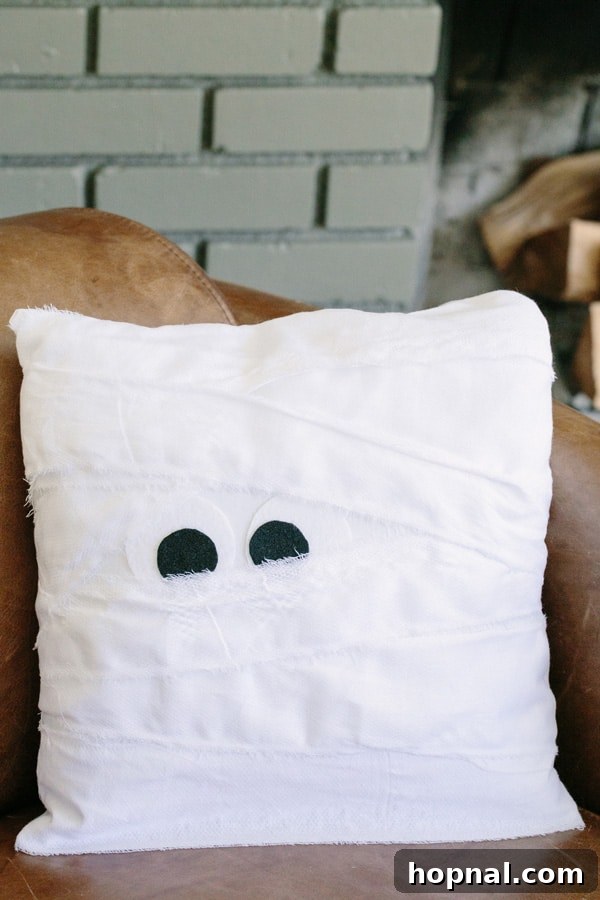
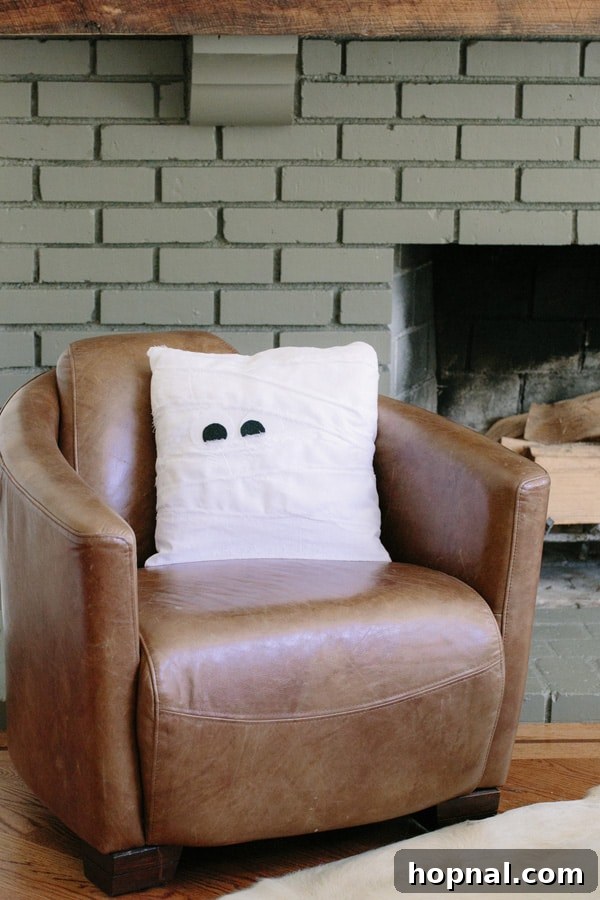
Get ready to infuse your home with a delightful dash of Halloween charm using our incredibly simple and absolutely adorable no-sew DIY mummy pillow! Forget the complexities of needles and thread; this craft promises an effortless creation that will leave you with a perfectly spooky-cute addition to your seasonal decor. It’s a project so straightforward, you’ll wonder why you haven’t tried it sooner.
Imagine these charming mummies gracing a kid’s bedroom, adding just the right amount of playful fright during the entire month of October. Or perhaps, make a collection of them to scatter across your living room as unique throw pillows, instantly transforming your space into a festive Halloween haven. They strike the perfect balance – just enough spookiness to be fun, yet undeniably charming for any age.
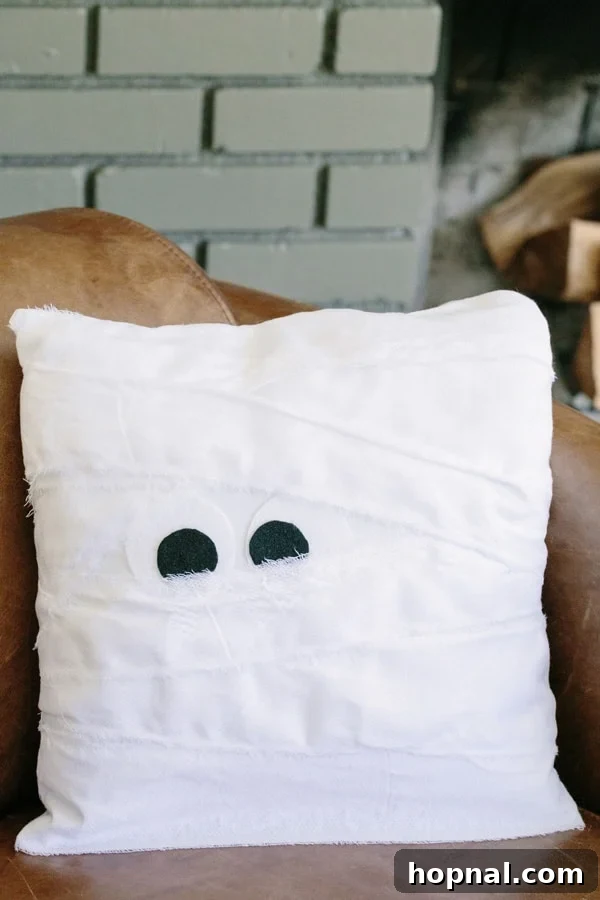
The Ultimate No-Sew Mummy Pillow Tutorial: Spooky Charm Made Easy
If you’re on the hunt for a genuinely fun, budget-friendly, and remarkably simple Halloween decoration or a delightful DIY craft project to enjoy with your kids, these adorable mummy pillows are an absolute must-try! They embody everything we love about homemade holiday decor: personal touch, creativity, and the joy of making something special.
This project is not just about creating a cute pillow; it’s a fantastic way to introduce some unique, spooky charm into your home without the need to splurge on expensive store-bought decorations. Plus, the satisfaction of crafting something with your own hands is truly priceless. Looking for more quick Halloween transformations? Be sure to check out our tips for refreshing your Halloween decor in just 15 minutes!
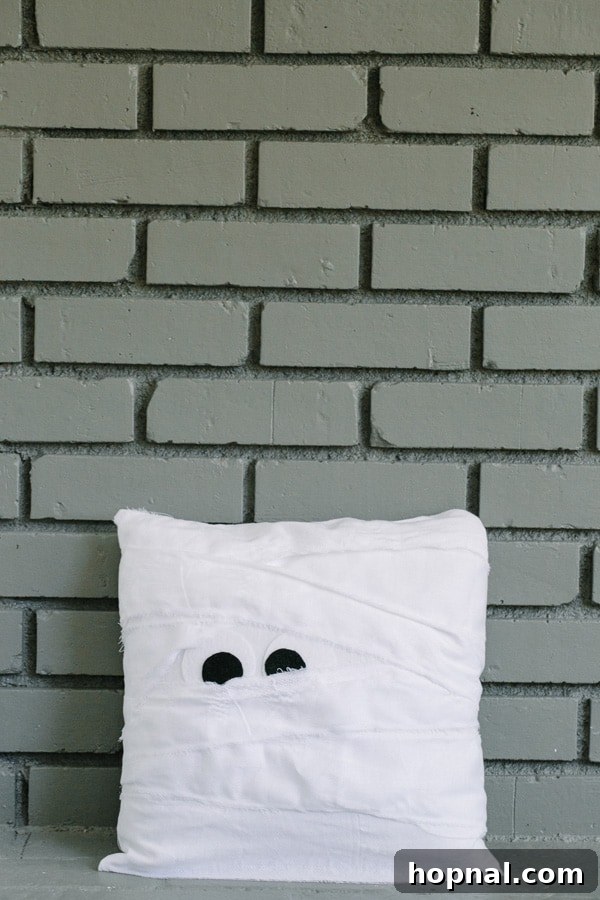
Why Choose a No-Sew Halloween Craft?
In a world full of intricate DIY projects, the beauty of “no-sew” stands out, especially for seasonal crafts. It eliminates barriers, making crafting accessible to everyone, regardless of their sewing machine proficiency or hand-stitching skills. Here’s why a no-sew mummy pillow is the perfect choice for your Halloween festivities:
- Effortless & Quick: Say goodbye to lengthy preparation. This project comes together in about an hour, making it ideal for busy schedules or spontaneous crafting sessions.
- Beginner-Friendly: If you’re new to DIY or crafting with kids, this is a fantastic starting point. The steps are intuitive and require no advanced techniques.
- Budget-Conscious: Many of the materials can be repurposed or found inexpensively, allowing you to create stunning decor without breaking the bank.
- Kid-Safe & Fun: Without sharp needles or hot irons (beyond hot glue if you choose it over fabric glue), this is a safer and more enjoyable activity to do with children. They’ll love tearing the fabric and positioning the bandages!
- Versatile Decor: The finished pillows are incredibly versatile, fitting seamlessly into various decor styles, from whimsical to subtly eerie.
Gather Your Supplies: Everything You Need for Your Spooky Creation
One of the best aspects of this DIY mummy pillow is the minimal and easily accessible list of supplies. You likely have some of these items already, making it even quicker to start your crafting adventure!
- Fabric Glue: This is your secret weapon for a no-sew project. Opt for a high-quality fabric glue that dries clear and provides a strong, lasting bond. Brands like Aleene’s Fabric Fusion or Beacon Fabri-Tac are excellent choices. Ensure it’s suitable for various fabric types.
- Pillow Insert: The heart of your mummy! You can use new pillow forms, often found at craft stores in various sizes (16×16 or 18×18 inches are popular for throw pillows). Alternatively, give an old, unused pillow a new lease on life, or even use a thick piece of foam cut to size for a more rigid look.
- White Fabric: This is where the mummy magic happens. The key is to choose a fabric with a bit of texture to mimic the look of bandages. Excellent choices include:
- Muslin: Affordable and tears beautifully for that frayed edge.
- Cheesecloth: For a more ethereal, wispy, and aged look.
- Old White Sheets or T-shirts: A fantastic way to upcycle! Just make sure they’re clean and mostly cotton for good tearing.
- Gauze Fabric: Specifically designed to look like bandages, this is a perfect choice.
You’ll need enough fabric to generously wrap your pillow several times.
- Black and White Felt: Essential for crafting those iconic mummy eyes. Small sheets of felt are inexpensive and easy to cut. You could also use construction paper, craft foam, or even large googly eyes for a different effect.
- Sharp Scissors: While much of the fabric will be torn, scissors are crucial for cutting the felt eyes precisely and for initial fabric cuts. A good pair of fabric scissors will make the job much easier.
Step-by-Step Guide: Crafting Your Spooky Mummy Pillow
Follow these easy instructions to bring your adorable mummy pillow to life. Remember, there’s no right or wrong way – embrace the slightly messy, rustic look of a mummy!
Time needed: 1 hour
Create a charming and spooky No-Sew DIY Mummy Pillow with this simple tutorial. Perfect for Halloween home decor!
- Prepare the Mummy Eyes
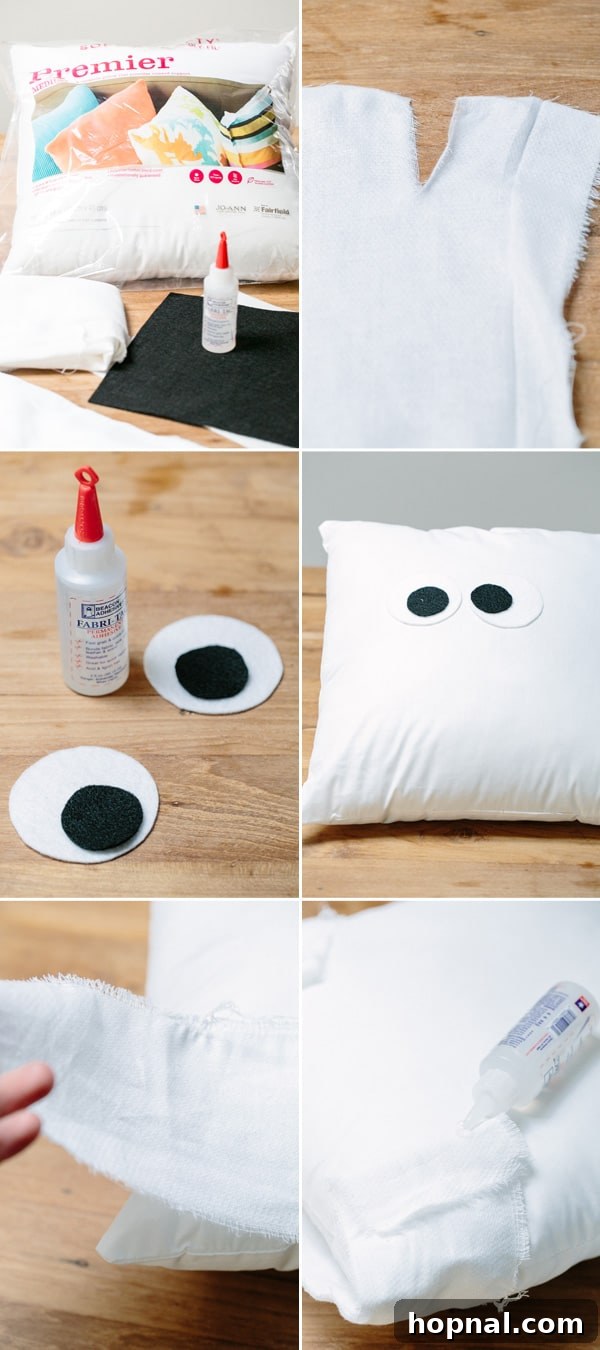
Begin by preparing the mummy’s iconic eyes. On your white felt, trace two circles that are roughly 2-3 inches in diameter (adjust according to your pillow size). Next, take your black felt and trace two slightly smaller circles, about 1-1.5 inches in diameter. Carefully cut out all four felt circles using your sharp scissors. These will form the base of your mummy’s expressive gaze.
- Assemble and Attach the Eyes
Take one large white felt circle and one small black felt circle. Apply a small dot of fabric glue to the back of the black circle and center it onto the white circle, creating the pupil and iris. Repeat for the second eye. Once assembled, decide on the placement for the eyes on your pillow insert. Apply a generous amount of fabric glue to the back of each completed felt eye and firmly press them onto the pillow insert. Allow the glue to set for a few minutes before proceeding.
- Create Your Fabric Bandages
Now for the fun, messy part – creating the mummy’s bandages! Take your white fabric and begin tearing strips along the crosswise thread. This technique creates beautifully frayed, rustic edges that truly enhance the mummy aesthetic. Don’t worry about perfection; varying sizes (from 1 inch to 3 inches wide) and lengths will add to the authentic, aged look. If your fabric doesn’t tear well, use scissors to cut strips, but try to fray the edges gently with your fingers. Prepare a good pile of these strips, enough to completely cover your pillow.
- Wrap the Pillow with Bandages
Starting from one side or corner of your pillow, begin wrapping the fabric strips around it. Position a strip on the pillow, securing one end with a small dot of fabric glue, then wrap it around, overlapping previous strips as you go. Continue this process over the entire pillow, ensuring good coverage. The goal is to create a layered, organic look, just like a real mummy’s bandages. As you wrap, be mindful of the eyes you’ve already attached. Carefully wrap the strips around them, leaving the eyes fully exposed and creating that distinct mummy face opening. Don’t be afraid to cross strips and create texture.
- Secure and Finish the Wrapping
As you near the end of each fabric strip, or when you’ve covered a section, use a few strategic dots of fabric glue to secure the ends and any loose edges. This prevents unraveling and keeps your mummy looking neat (or delightfully dishevelled, depending on your preference!). Continue adding strips and gluing until the entire pillow insert is covered, except for the eye area. Make sure all ends are neatly tucked and glued down. Allow ample time for the fabric glue to dry completely – ideally several hours, or even overnight – before handling or displaying your new mummy pillow. This ensures maximum durability and prevents any accidental unwrapping.
Pro Tips for Your Mummy Pillow Project
To make your crafting experience even smoother and your mummy pillows even more spectacular, consider these helpful tips:
- Experiment with Fabric: While white is classic, consider off-white, cream, or even slightly tea-stained fabric for an aged, antique mummy look. Distressing the fabric slightly with sandpaper before tearing can also add character.
- Vary Strip Widths: Don’t make all your fabric strips the same width. A mix of thin and wider strips will create a more dynamic and authentic “bandaged” appearance.
- Layering is Key: Overlap your fabric strips generously. This creates depth and ensures no part of the pillow insert shows through. Some strips can be wrapped tightly, others a bit looser for more texture.
- Mindful Glue Application: Use fabric glue sparingly but strategically. A few dots are often enough to secure a strip. Too much glue can make the fabric stiff or seep through.
- Kid Involvement: Tearing fabric is a safe and fun task for older children. Let them participate in wrapping and deciding on the mummy’s expression by positioning the eyes. Supervise closely when using scissors and glue.
- Add More Details: Want an even spookier mummy? Use permanent fabric markers to draw a small, jagged mouth below the eyes, or add tiny dabs of red fabric paint for a “bloody” effect (if appropriate for your audience).
- Consider Googly Eyes: For a super playful and less spooky mummy, replace the felt eyes with large googly eyes. They add instant personality!
- Securing Loose Ends: Double-check all fabric strip ends once you’re done wrapping. Any loose ends should be tucked and glued down firmly to ensure durability, especially if the pillow will be handled often.
Ideas for Displaying Your Mummy Masterpiece
Once your no-sew mummy pillows are complete and the glue has fully dried, it’s time to showcase your spooky creations! Here are some imaginative ways to integrate them into your Halloween home decor:
- Kid’s Bedroom Boost: Place them on beds or chairs in children’s rooms for a fun, seasonal touch that isn’t too scary.
- Living Room Accents: Arrange them on your sofa or armchairs as unique throw pillows. They can be easily mixed with other fall or Halloween-themed pillows.
- Entryway Welcome: Position a mummy pillow on an entryway bench or a console table to greet guests with festive cheer.
- Spooky Mantel Decor: Line a few smaller mummy pillows along your fireplace mantelpiece, perhaps alongside some faux cobwebs and decorative pumpkins.
- Halloween Party Props: Use them as part of a larger Halloween party setup. They can sit on serving tables, scattered amongst treats, or even be part of a photo booth backdrop.
- Reading Nook Charm: Add one to a cozy reading nook or a window seat for a comfortable yet themed spot.
- Outdoor Covered Space: If you have a covered porch or patio, these can add a festive touch to outdoor seating arrangements (just ensure they are protected from the elements).
More Hauntingly Good Halloween Ideas You’ll Love
Once you’ve mastered the art of the no-sew mummy pillow, why stop there? Dive into more of our favorite Halloween projects and recipes to make your celebration unforgettable:
- The Ultimate Halloween Candy Board: Create an impressive and delicious display of spooky sweets perfect for parties or a family movie night.
- Three Ingredient Butterbeer: Conjure up this magical beverage from the wizarding world with surprising ease. A treat for Harry Potter fans of all ages!
- Spooktacular Halloween Kids Punch: A vibrant, flavorful, and non-alcoholic drink that will be the highlight of any children’s Halloween gathering.
- Creative Halloween Party Ideas: Get inspired with themes, decorations, games, and food ideas to throw the most memorable Halloween bash.
- Decadent Brown Butter Rice Krispie Treats: A classic treat elevated with a sophisticated twist, perfect for fall festivities or as a sweet snack.
Don’t forget to connect with us and share your creations! You can also FOLLOW US onFACEBOOK, INSTAGRAM, and PINTERESTto see more delicious recipes, cocktails, desserts, and parties. We love seeing how you bring our ideas to life!