
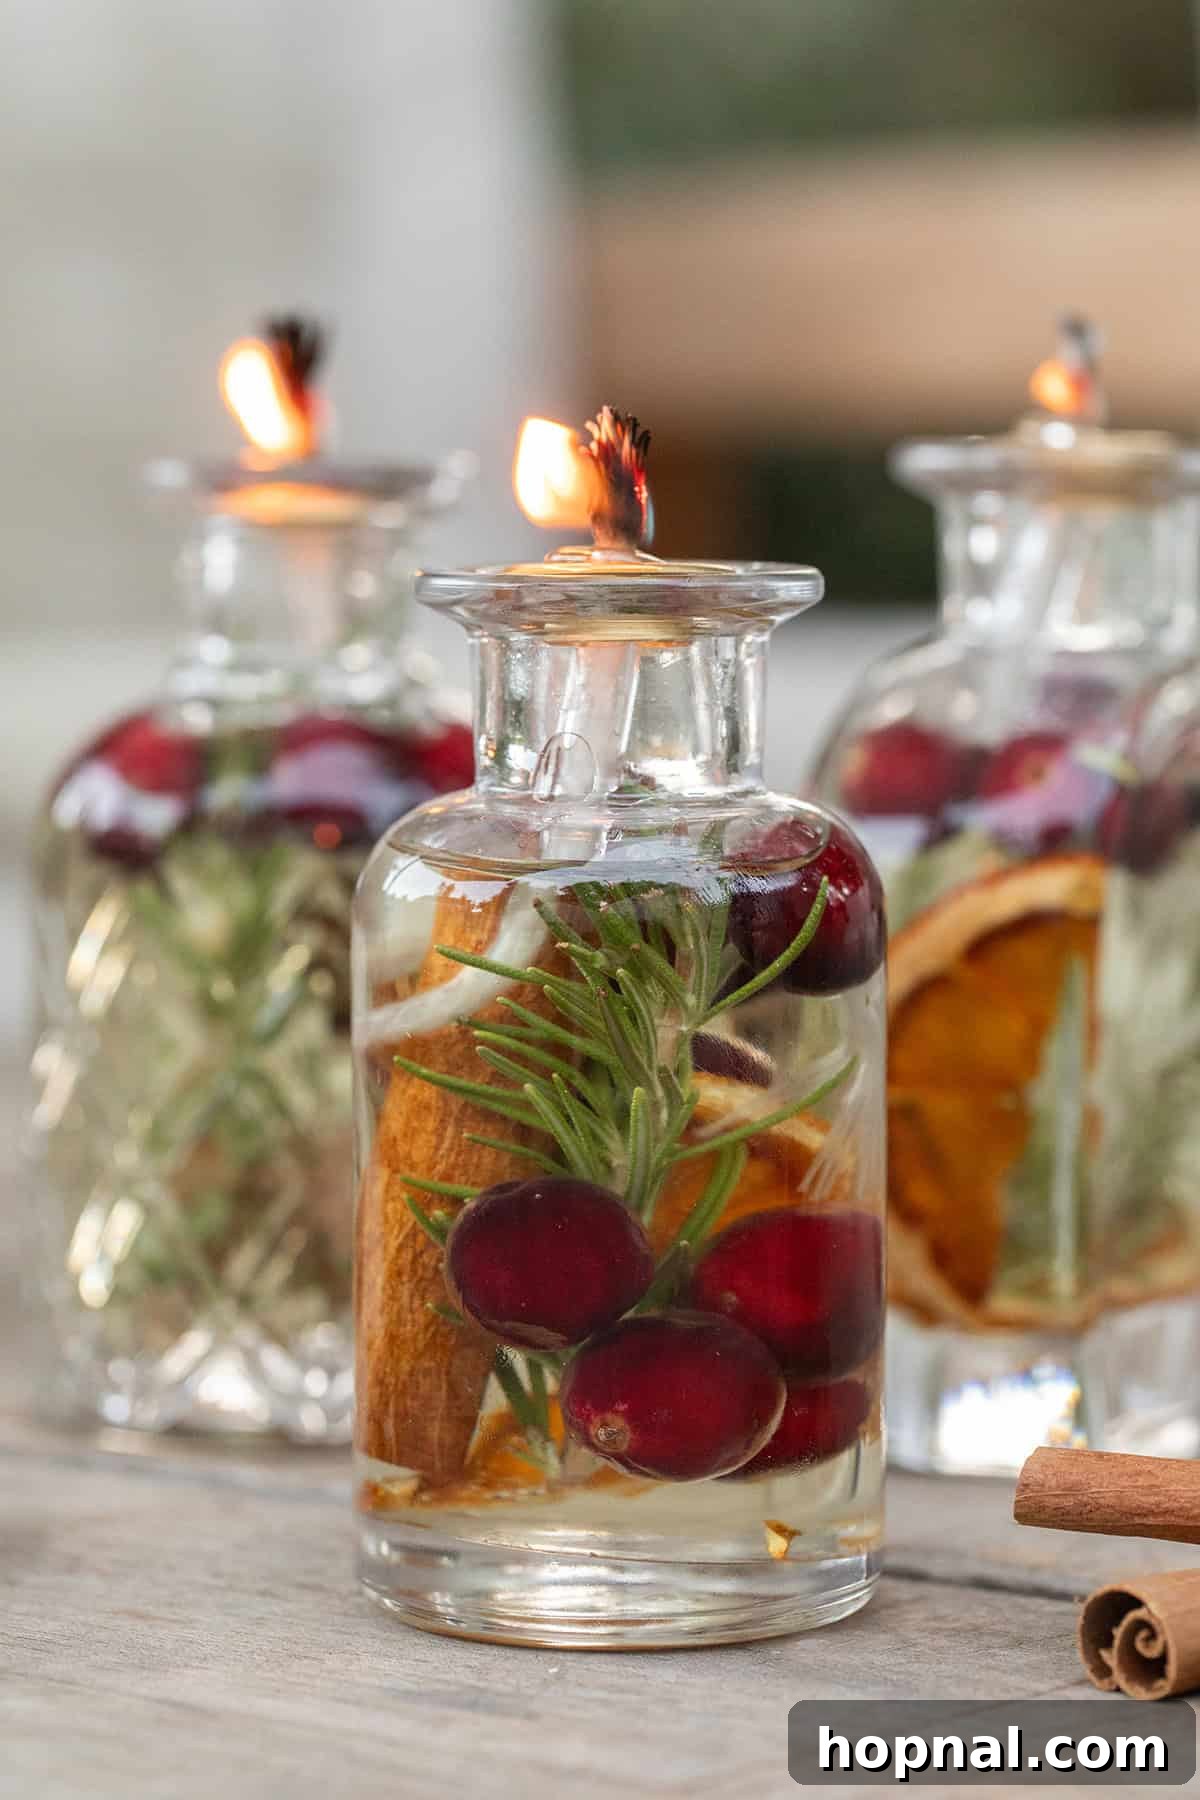
Illuminate Your Home: Crafting Beautiful DIY Oil Candles for Any Occasion
Transform your living space with the enchanting glow of warm, flickering DIY oil candles. These simple yet elegant creations offer a refreshing, customizable alternative to store-bought options, bringing a unique charm to any setting. Made effortlessly with items often found around your home, these handmade oil candles are not just quick to assemble but also add a sophisticated, inviting touch to your gatherings or everyday ambiance.
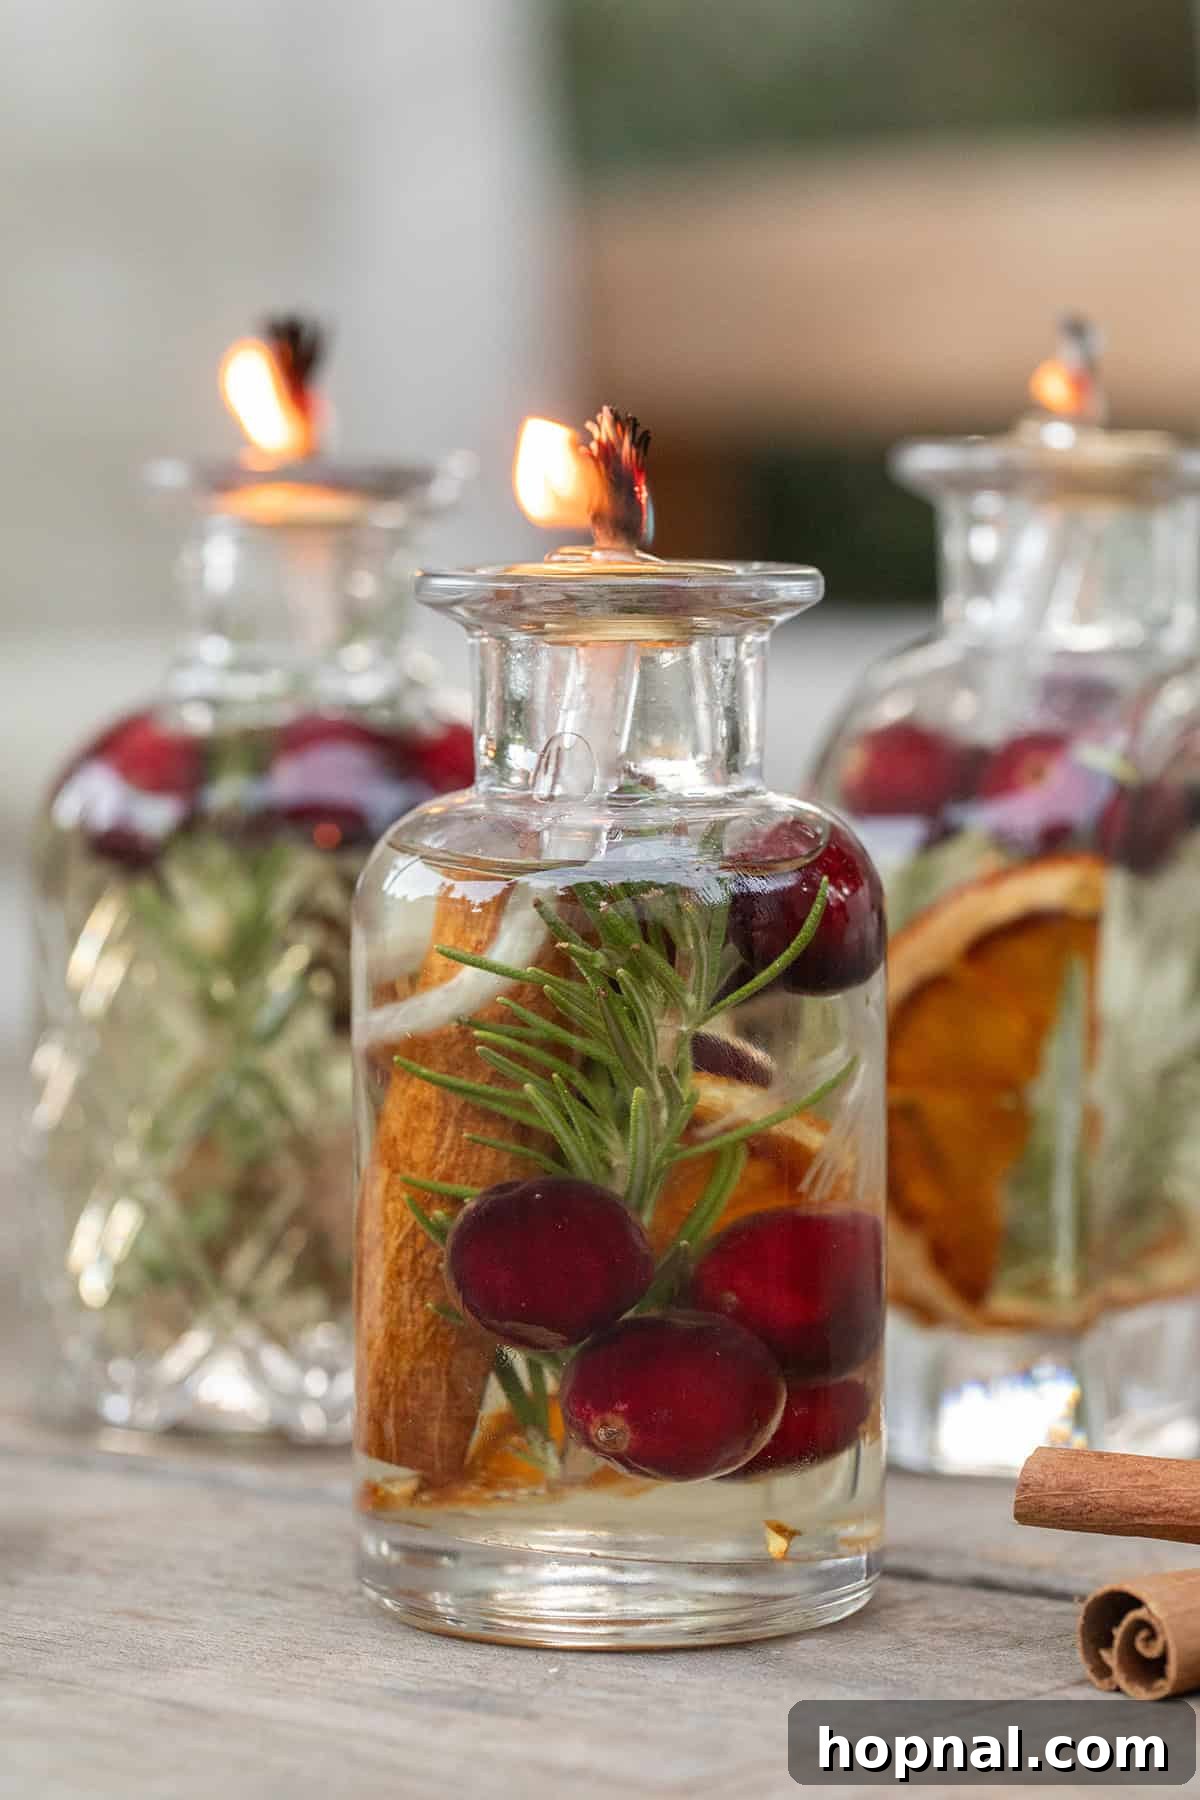
Why Embrace the Art of DIY Oil Candle Making?
Crafting your own oil candles comes with a myriad of benefits, making them a superior choice for both aesthetics and sustainability. They are significantly more cost-effective than continuously purchasing wax candles, as many components are reusable or readily available. Beyond savings, these homemade wonders offer an exceptionally clean and long-lasting burn, far surpassing the typical lifespan of their wax counterparts. Unlike traditional candles, oil candles are less prone to smoking, emitting a pure, natural glow that enhances any atmosphere without the worry of soot or artificial fragrances.
The beauty of DIY oil candles lies in their unparalleled ability to be customized. With just a few easily sourced supplies and your imagination, you can create pieces that are not only functional but also deeply decorative and reflective of your personal style or the occasion. As someone who cherishes hosting friends and family (I even penned a book on the art of entertaining!), I constantly seek ways to infuse handmade touches that cultivate a genuinely inviting atmosphere. My journey into making oil candles, alongside projects like terracotta votives, began for outdoor gatherings, and they quickly evolved into captivating conversation starters.
These natural oil candles effortlessly add a charming, cozy glow to any setting, from intimate dinners to festive celebrations. The ability to personalize the decor for each event, whether through seasonal botanicals or specific scents, makes guests feel even more cherished and welcome. They are an eco-friendly choice, utilizing natural, non-toxic oils and often reusable containers, contributing to a more sustainable home.

Essential Supplies for Crafting Your Own DIY Oil Candles
Embarking on your candle-making journey requires only a few key materials. Gathering these ahead of time will ensure a smooth and enjoyable crafting experience:
- Light Oil: The foundation of your oil candle. The choice of oil impacts burn time, scent, and overall candle performance.
- Olive Oil: A popular, natural choice, known for its clean, slow burn and subtle, pleasant aroma. It’s widely available and safe.
- Sunflower Oil: A more budget-friendly option that burns cleanly and is virtually odorless, making it excellent for showcasing decorative elements or added fragrances.
- Canola Oil: Another economical and neutral-scented oil, ideal for a fragrance-free candle.
- Liquid Paraffin: While not a natural oil, it’s often used in commercial oil lamps due to its long burn time and clear appearance. If choosing this, ensure it’s high-quality and lamp-grade. For a truly natural and non-toxic candle, stick to the edible oils.
- Small Jars or Heat-Safe Glass Containers: These will house your beautiful creations.
- Mason Jars: Versatile, affordable, and widely available, perfect for a rustic or farmhouse aesthetic.
- Bottle Jars: Elegant and slender, ideal if you plan to use a wick fastener system. Wine or olive oil bottles can be upcycled.
- Decorative Glassware: Consider small vases, old perfume bottles (cleaned thoroughly), or unique glass containers that are heat-safe. Ensure the opening is appropriate for your chosen wick system.
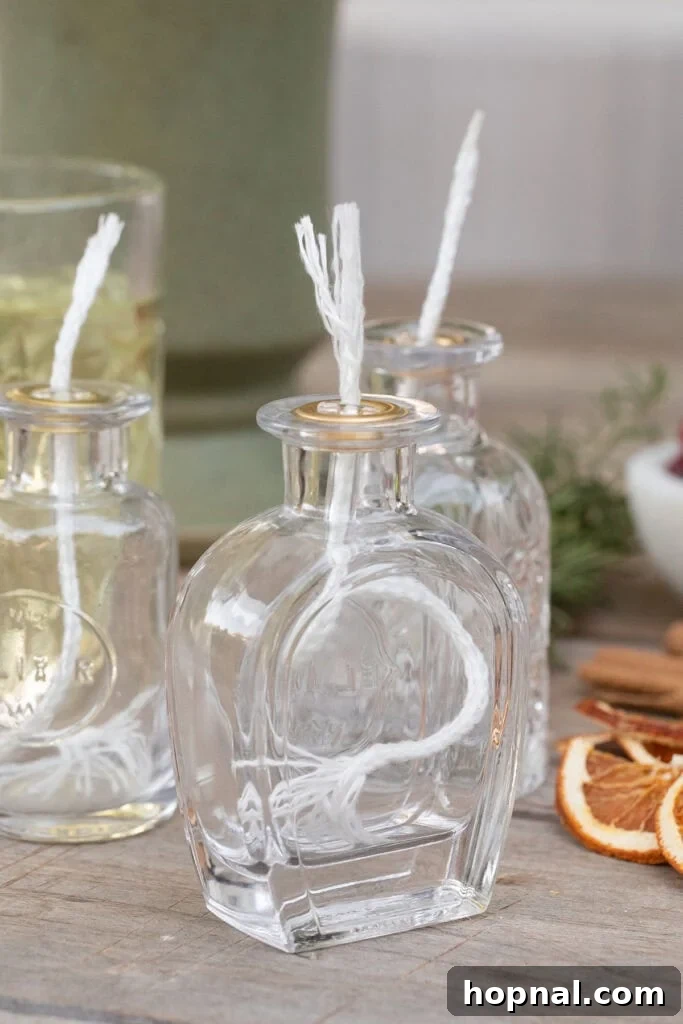
- Wick & Wick Fastener: The heart of your candle’s flame.
- Wick: Simple cotton wicks or wicks specifically designed for oil candles are excellent. Ensure they are untreated and lead-free for a non-toxic burn (more on this below).
- Wick Fastener: These ingenious devices secure your wick, allowing for repeated use with simply a wick replacement. I personally love these copper and glass wick fasteners from Etsy, as they are durable and stylish. For jars with larger openings, a floating wick disk is another fantastic and easy-to-use option.
- Decorative Elements: These are where your creativity truly shines, adding visual appeal and potential subtle aromas. Ensure all elements are non-flammable and will be fully submerged in oil.
- Fresh Herbs: Rosemary, thyme, or lavender sprigs for a natural, aromatic touch.
- Dried Fruits: Dehydrated orange, lemon, or lime slices, apple rings, or cranberries for vibrant color and a hint of scent.
- Spices: Cinnamon sticks, star anise, or whole cloves for warm, cozy aromas and beautiful textures.
- Natural Botanicals: Small pine cones, acorns, smooth pebbles, or even delicate dried flowers (ensure they are completely submerged to avoid fire hazards).
- Glass Beads or Marbles: These can add weight and sparkle to the bottom of your jar.
Step-by-Step Guide to Crafting Your Perfect Oil Candle
Follow these straightforward steps to create your own beautiful and sustainable oil candles:
Step 1: Prepare Your Jar with Decorative Elements
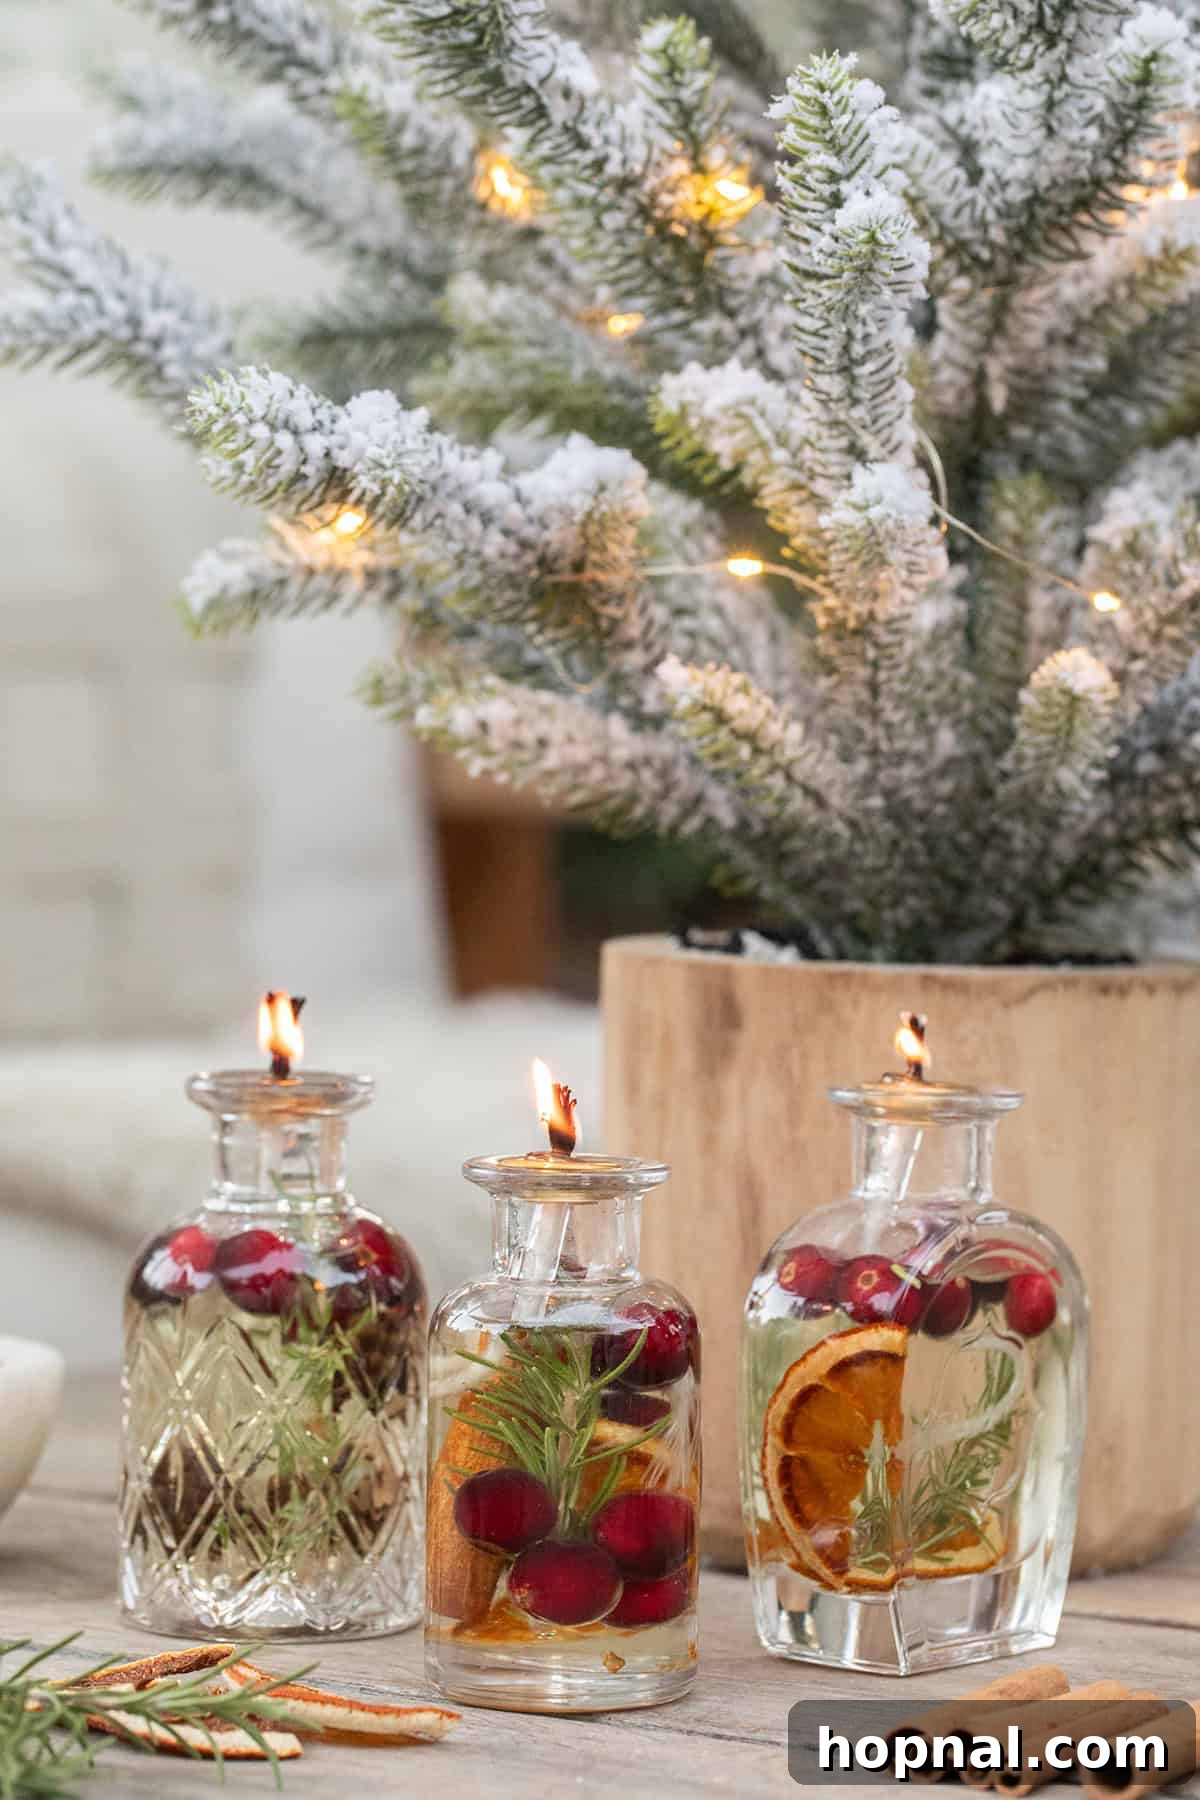
Begin by selecting your small glass jar or Mason jar. This is where you can let your creativity flow! Carefully place your chosen decorative elements directly into the jar. Arrange them artfully near the sides for maximum visual impact, allowing them to truly shine when the candle is lit. Remember, all decorative items must be fully submerged in the oil to prevent them from catching fire. Some inspiring ideas for arrangement include:
- For a Cozy Aroma: A few cinnamon sticks paired with a vanilla bean pod.
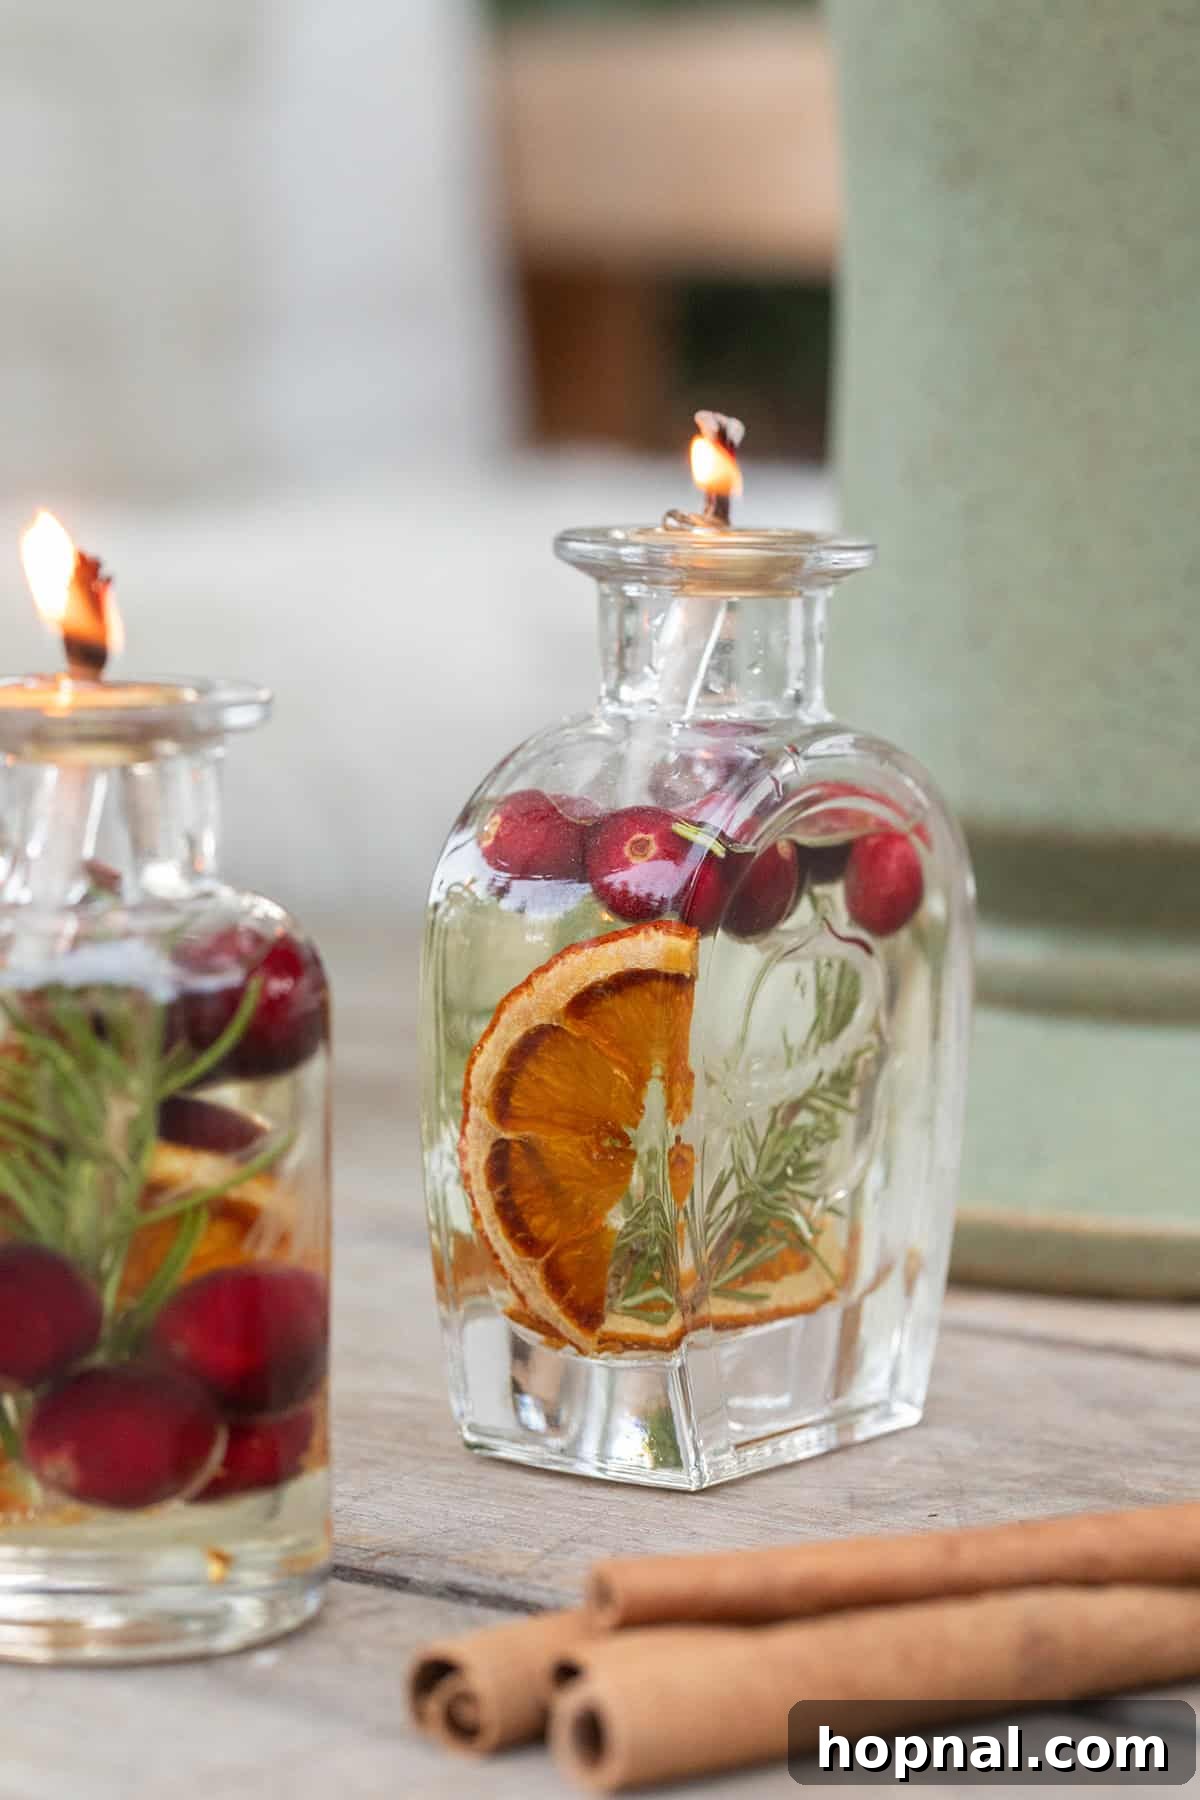
- For a Vibrant Citrus Scent and Color: Several dried orange slices layered with a sprig of fresh rosemary.
- For a Natural Green Touch: Multiple rosemary sprigs or eucalyptus leaves arranged vertically.
- For a Festive Red Hue: A handful of fresh or frozen cranberries (they won’t spoil in oil).
- For a Rustic Look: Tiny pine cones, small polished river stones, or dried flower buds.
- For Layered Visual Interest: Start with a base of pebbles or sand, then add botanicals, ensuring they stay put.
Step 2: Carefully Pour in the Oil
Once your decorative elements are beautifully arranged, it’s time to add the oil. Gently pour your chosen oil into the jar until it is approximately two-thirds full. Be careful not to disturb your decorations. This level leaves enough space for the wick and helps prevent spills. Re-evaluating your oil choice:
- Olive Oil: Still a top recommendation for its clean, consistent burn and subtle, earthy scent that doesn’t overpower.
- Sunflower Oil: An excellent, nearly odorless option that allows the natural scents of your botanicals (if any) or any added essential oils to stand out.
- Canola Oil: A good universal choice, readily available, and completely neutral, perfect if you want to control all scent aspects.
Step 3: Insert and Secure the Wick
The correct placement of your wick is crucial for an optimal, steady burn.
For a Standard Wick Setup with a Fastener (e.g., bottle jars):
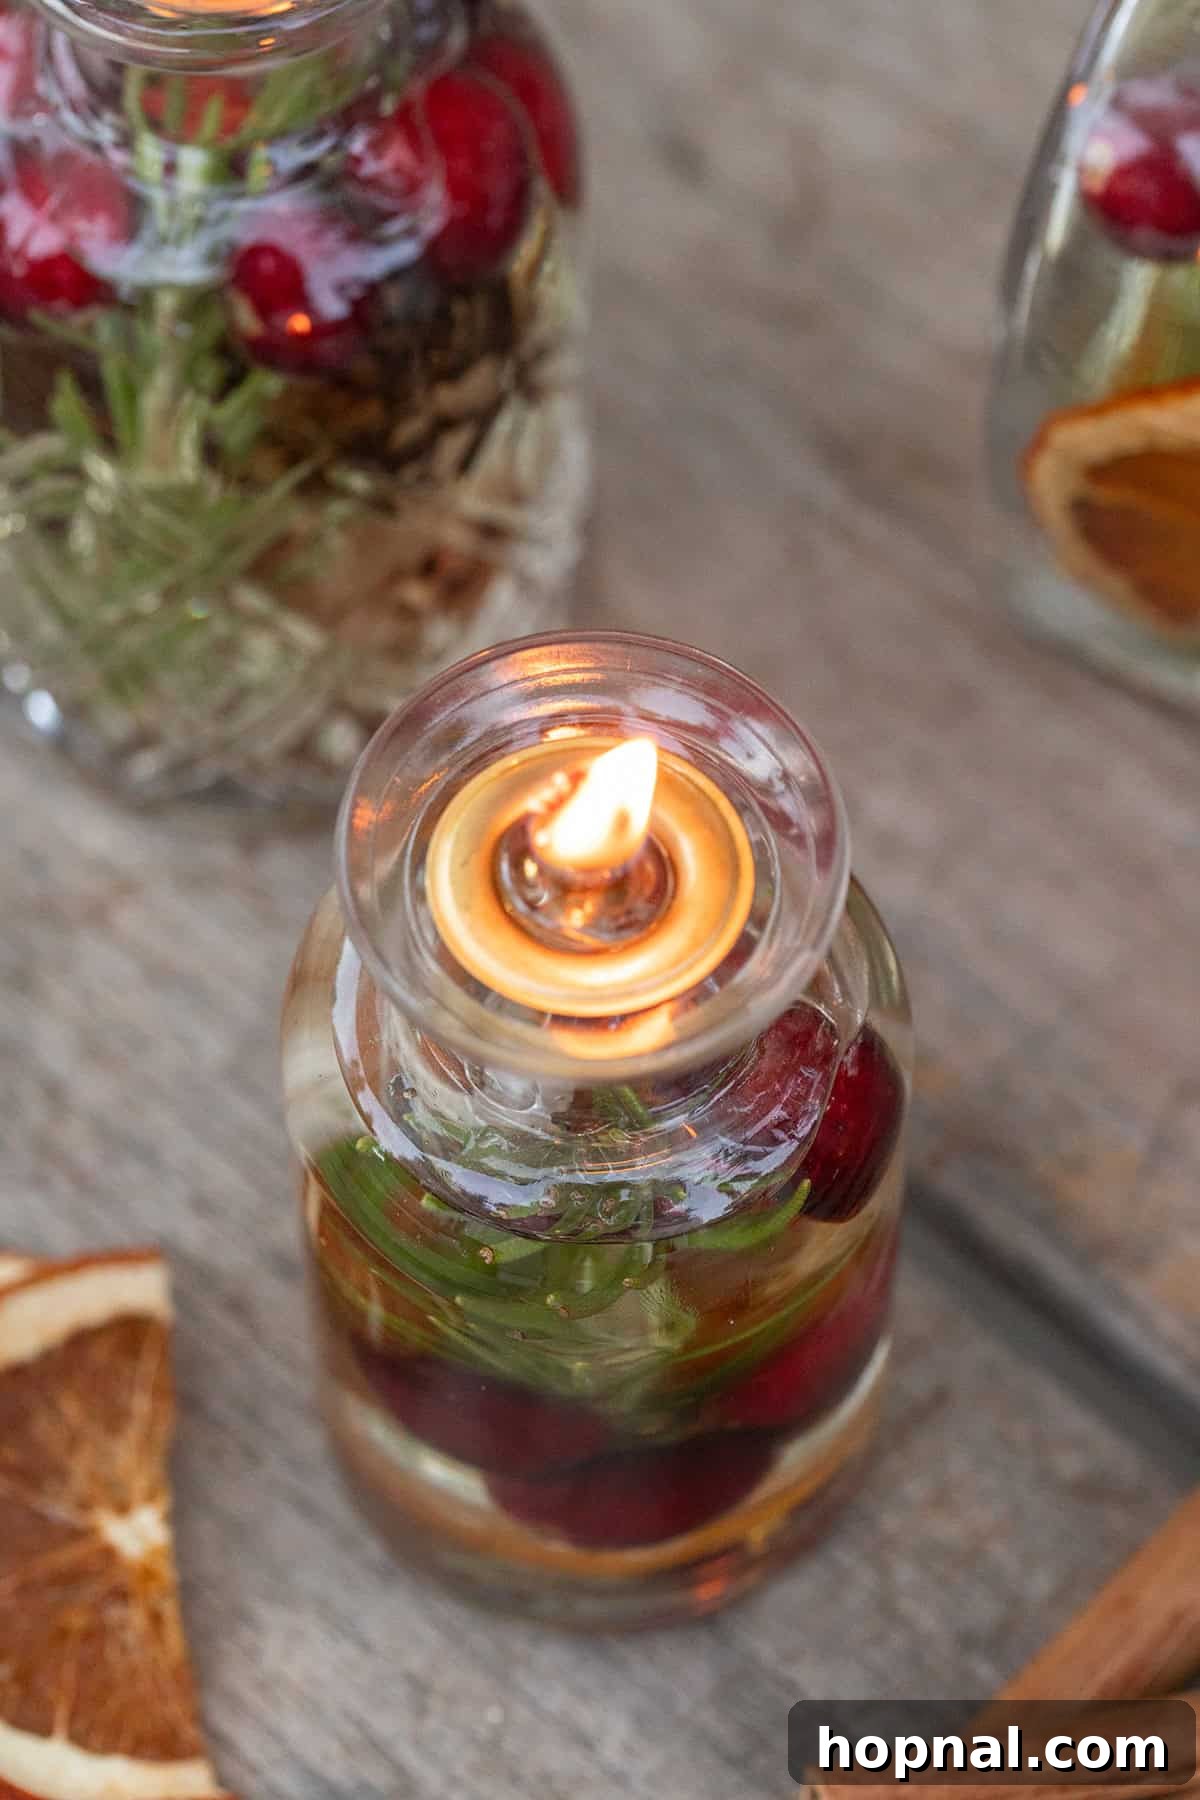
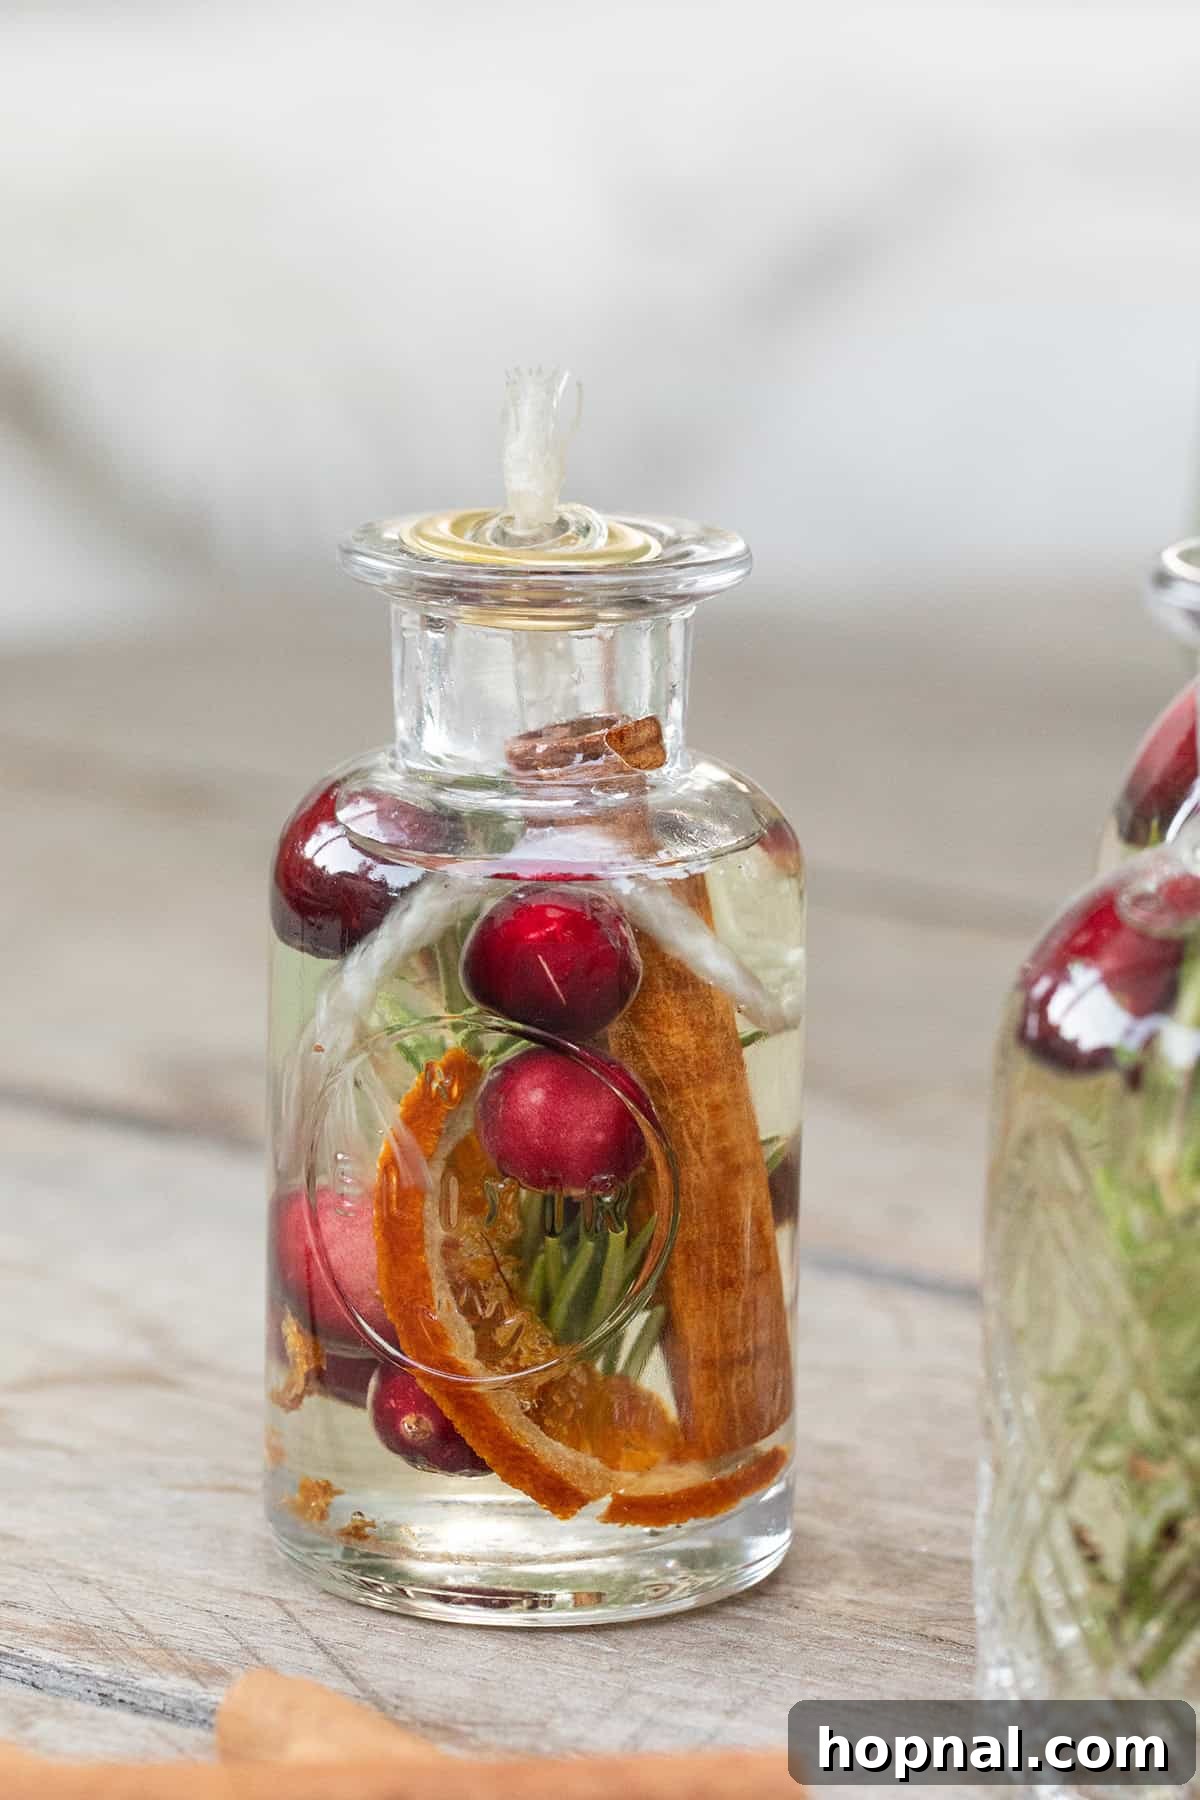
If you’re using a wick fastener, first thread your cotton wick through the fastener. Gently lower the wick and fastener into the jar. Use a skewer or chopstick to ensure the wick reaches the bottom of the oil reservoir. Adjust the wick so that only about a quarter to a half-inch of the wick is exposed above the oil surface. This short length is key to a clean, smokeless burn. If necessary, trim the wick to achieve the ideal height, allowing the fastener to rest securely on the rim of your jar.
For a Floating Wick Setup (e.g., Mason jars or wide-mouth containers):
If your jar has a wider opening, a floating wick disk is an incredibly convenient option. These disks, often made of cork or ceramic with a small hole for a cotton wick, simply float on the oil surface. Thread a short cotton wick through the hole in the floating disk. Place the assembly gently onto the oil surface, allowing it to float freely. Floating wicks are excellent because they automatically adjust to the oil level, making refills and maintenance incredibly simple without the need for repositioning.
Regardless of the method, allow the wick a few minutes to soak up the oil before lighting for the first time.
Step 4: Light and Experience the Glow
Your beautiful homemade oil candle is now ready to illuminate your space! Light the wick, and enjoy the steady, clean flame. Oil candles are known for their impressive longevity; you’ll only need to top up the oil occasionally as it burns down. Always remember the vital safety guidelines when enjoying your candles.
Essential Safety Tips for Using Oil Candles
While oil candles are generally safe and clean-burning, adhering to these guidelines is crucial for ensuring a hazard-free and enjoyable experience:
- Never Leave Burning Candles Unattended: This is the golden rule for all candles. Always extinguish oil candles before leaving a room or going to sleep. A moment of distraction can lead to serious accidents.
- Use Heat-Safe Glass Containers: Only use jars or bottles specifically designed to withstand heat. Regular glass can crack or shatter under prolonged heat, posing a fire risk or causing hot oil to spill.
- Keep the Wick Short: A wick that is too long can produce a larger, uncontrolled flame, leading to excessive smoke and soot. Aim for a wick length of about a quarter to half an inch above the oil surface to ensure a steady, clean, and safe flame. Trim the wick if it starts to mushroom or produce smoke.
- Avoid Placing Flammable Decorations Near the Wick: All decorative items, such as dried fruits, herbs, or botanicals, must be fully submerged in the oil and kept well away from the flame. Any exposed flammable material could catch fire.
- Store Oil Away from the Candle Flame: Never store your reserve candle oil near a burning candle or any open flame. Oil is flammable, and accidental ignition could be dangerous.
- Ensure Proper Ventilation: While oil candles produce less smoke than some wax candles, good ventilation is always recommended for any burning item indoors.
- Keep Out of Reach of Children and Pets: Place burning oil candles on stable surfaces where they cannot be accidentally knocked over by children or curious pets.
- Place on a Stable, Heat-Resistant Surface: Always place your oil candle on a sturdy, non-combustible surface, away from curtains, papers, or anything that could easily ignite.
Creative Customization Ideas for Your Oil Candles
The beauty of DIY oil candles lies in their endless potential for personalization. Let your creativity run wild to match any season, mood, or decor theme:
- Seasonal Scents & Themes:
- Winter Wonderland: Incorporate cloves, star anise, dried cranberries, small pine cones, and a hint of vanilla bean. A few drops of cinnamon or spruce essential oil can amplify the festive aroma.
- Autumn Harvest: Use dried apple slices, cinnamon sticks, whole nutmeg, and tiny acorns. Cedarwood or sweet orange essential oil blends beautifully.
- Spring Bloom: Delicate dried lavender buds, rose petals (fully submerged!), or eucalyptus leaves create a fresh, airy feel. Pair with lavender or lemon essential oil.
- Summer Breeze: Lemon and lime slices, fresh mint sprigs, or small seashells can evoke a vibrant, refreshing atmosphere. Try peppermint or lemongrass essential oils.
- Citrus Freshness: Beyond orange slices, consider dehydrated grapefruit or lime wheels for a zesty aroma and a striking visual. The vibrant colors brighten any space.
- Floral Elegance: For a sophisticated touch, carefully place dried hibiscus, chamomile flowers, or a few drops of rose essential oil (remember to submerge all botanicals completely).
- Adding Fragrance with Essential Oils: For a truly aromatic experience, you can add a few drops of pure essential oils directly to the oil in your candle. Start with 5-10 drops per 8 ounces of oil and adjust to your preference.
- Relaxing: Lavender, Roman Chamomile, Frankincense.
- Uplifting: Wild Orange, Lemon, Grapefruit.
- Invigorating: Peppermint, Eucalyptus, Tea Tree.
Important Note on Essential Oils: Always add essential oils to the carrier oil, not directly to the wick or near the flame, to ensure safe diffusion. Test a small batch first to ensure the scent is to your liking and burns safely.
- Layered Aesthetics: Create visual depth by layering different elements. For example, start with a base of colorful sand or small glass pebbles, then add a layer of cranberries, and top with an orange slice and rosemary sprig.
Choosing Non-Toxic Wicks for Your Oil Candles
For a truly natural and healthy home environment, the choice of wick is as important as the oil itself. Opting for non-toxic wicks ensures a clean burn free from harmful chemicals. Here are some of the best non-toxic options available:
- 100% Cotton Wicks: These are a universally popular and reliable non-toxic choice. They are free from lead, zinc, and other metals often found in conventional wicks. Look for labels that explicitly state “lead-free,” “metal-free,” or “pure cotton” to ensure you’re getting a safe product. Cotton wicks provide a consistent, steady flame.
- Hemp Wicks: Derived from the versatile hemp plant, these wicks are an excellent natural and eco-friendly alternative. Hemp wicks are often coated with beeswax, which helps them burn slowly and steadily, producing minimal smoke. They are known for their durability and natural composition.
- Wood Wicks: For a unique sensory experience, wood wicks are a fantastic choice. Made from natural, untreated wood, they produce a charming, soft crackling sound reminiscent of a miniature fireplace. When selecting wood wicks, it’s paramount to ensure they are untreated and free of any chemicals or synthetic glues to guarantee a non-toxic burn. They also tend to create a wider, more horizontal flame.
By consciously choosing any of these natural wicks, particularly those verified as free from metals or synthetic treatments, you contribute to a cleaner, safer burn for your homemade oil candles, making them an ideal choice for indoor use and a healthier home.
Oil Candle FAQs
Oil candles are celebrated for their impressive burn time. Generally, an ounce of common oils like olive oil can burn for approximately four hours. This means a standard small jar, filled about two-thirds, can provide many hours of continuous light, making them very economical.
While some heavier oils like coconut or very thick vegetable oils *can* burn, lighter oils such as sunflower, olive, and canola oil are highly recommended for the cleanest and most efficient burn. Heavier oils tend to burn less efficiently, potentially producing more smoke or a weaker flame. Always opt for light, food-grade oils for best results and safety.
Not usually, especially when made correctly. One of the main advantages of oil candles is their clean burn. Light oils combust very efficiently, leading to minimal smoke. Ensuring the wick is kept short (about 1/4 to 1/2 inch) also significantly helps prevent any excessive smoking.
Yes, oil candles can indeed be a wonderful non-toxic option for your home. This is especially true if you use natural oils like olive, sunflower, or canola oil, which are food-grade and burn cleanly without releasing harmful chemicals. Unlike many store-bought paraffin candles that might contain synthetic fragrances or questionable additives, homemade oil candles with natural oils and non-toxic wicks are a much safer and healthier choice for enhancing your indoor ambiance.
Absolutely! Adding pure essential oils is a fantastic way to infuse your oil candles with natural fragrance. Simply add a few drops (start with 5-10 drops per 8 ounces of oil) directly into the candle oil, ensuring they are well mixed before lighting. Avoid applying essential oils directly to the wick, as this can affect the burn and potentially create a fire hazard. Always ensure any decorative botanicals are fully submerged when adding fragrance.
Cleaning your oil candle jars for reuse is simple. First, carefully pour out any remaining oil. You can then wash the jars with warm, soapy water. If there’s any stubborn residue, a bit of white vinegar can help cut through the oil. Ensure the jars are completely dry before refilling with fresh oil and decorations.
The size of your flame is usually related to the wick. If the flame is too small or keeps extinguishing, your wick might be too short or too saturated. Try gently pulling a little more wick out. If the flame is too large, it means your wick is too long. Carefully trim a small amount off the top of the wick to achieve a stable, ideal flame size (around 1/4 to 1/2 inch above the oil).
More Inspiring DIY Ideas
Outdoors & Garden
Homemade Fire Starters
Party DIY
DIY Terracotta Votives Candle
Parties
DIY Tiki Torch Bottles
Parties
DIY Citronella Candle Jars to Keep Bugs Away
Crafting your own oil candles is a rewarding and creative endeavor that allows you to infuse your home with warmth, beauty, and a personal touch. I genuinely hope this comprehensive guide inspires you to try this delightful DIY project. Let me know if you create these beautiful oil candles and use them at your next gathering! Leave a comment below with how they turned out and any unique customizations you tried.
DIY Oil Candles
Print
Pin
Rate
Ingredients
- 3 small Glass Wick Holders, 1″ Brass Rings, you can buy them here, and they fit most bottle tops.
- 3 organic cotton wicks
- 3 small Glass Bottles, you can use anything you want with a bottle top, large, small… wine bottles even work! I used something similar to these
- 16 ounces oil , of your choice
- 4 ounces berries, cinnamon sticks, rosemary and dried orange slices. , or pick organic material you like
Instructions
-
Start by arranging a few decorative items in each jar. Place 1-2 cinnamon sticks, a dried orange slice, a few cranberries, or a sprig of rosemary in each jar. Get creative with the arrangement, ensuring they’re positioned near the sides for a beautiful visual effect when the candles are lit.
-
Submerge the wick into the oil to soak for a few seconds.
-
Pour about the oil of your chosen oil into each jar, filling them to about two-thirds full. Make sure the decorative elements are submerged, as this helps prevent them from overheating when the candle burns.
-
Place the wick in the center of the jar, using a skewer or chopstick to press it down and secure it to the jar’s bottom. Ensure the wick stands upright, with about a quarter-inch above the oil for an even burn. Trim the wick if it’s too long for the jar’s size.
-
If you use a Mason jar with a large opening, you must use a floating wick for the top.
-
Light and enjoy the glow of a naturally made candle! Blow them out when you’re not using and never leave them unattended.