
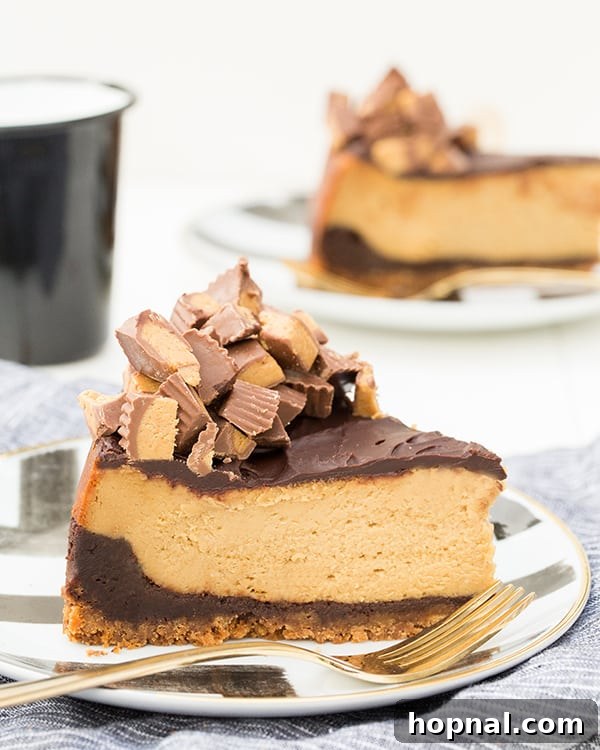
Welcome to a truly extraordinary dessert experience – the Ultimate Layered Chocolate Peanut Butter Cheesecake! For anyone who adores the classic combination of rich chocolate and creamy peanut butter, this cheesecake is an absolute dream come true. Cheesecake has always held a special place in our hearts as one of the most beloved and versatile desserts. Its smooth, creamy texture provides the perfect canvas for endless flavor creativity. This particular recipe elevates the traditional cheesecake by introducing multiple decadent layers, ensuring every single bite is an unforgettable journey of taste and texture. Get ready to impress your family and friends with a show-stopping dessert that’s surprisingly straightforward to create at home.
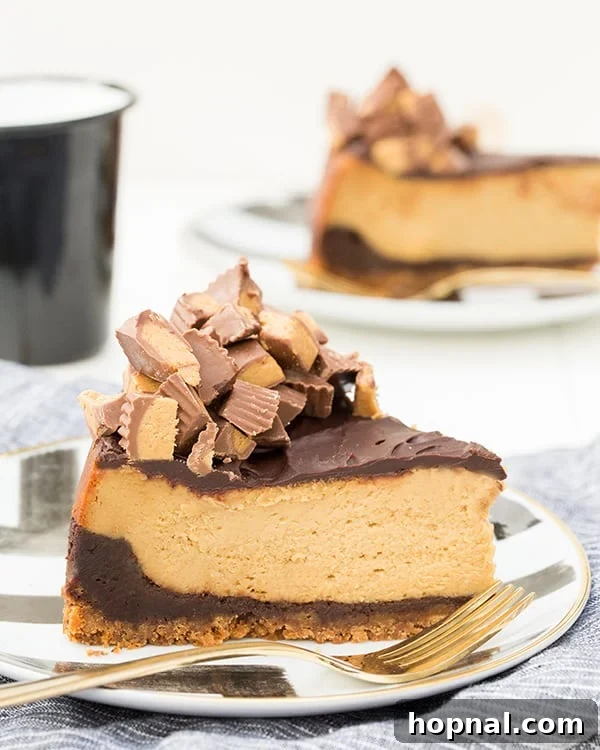
Indulge in the Ultimate Layered Chocolate Peanut Butter Cheesecake
Prepare yourself for a symphony of flavors and textures with our incredible Chocolate Peanut Butter Cheesecake. This isn’t just any cheesecake; it’s a meticulously crafted dessert featuring three distinct and utterly delicious layers, each contributing to a harmonious whole. We start with a perfectly crisp graham cracker crust, providing that essential sweet and crumbly base that cheesecake lovers crave. Above this, a rich, fudgy chocolate layer adds depth and intensity, creating a delightful contrast. Then comes the star of the show: a wonderfully smooth and creamy peanut butter cheesecake layer, bursting with the irresistible nutty flavor we all adore. Finally, the entire masterpiece is crowned with a silky chocolate ganache, making for a truly luxurious finish. To push the indulgence even further, we liberally sprinkle chopped Reese’s Peanut Butter Cups on top, adding a delightful crunch and an extra burst of chocolate-peanut butter goodness. This cheesecake is undeniably rich and satisfyingly dense, but it’s also remarkably balanced and, dare we say, not nearly as complicated to make as its impressive appearance suggests. It’s truly a labor of love that pays off in every glorious slice!
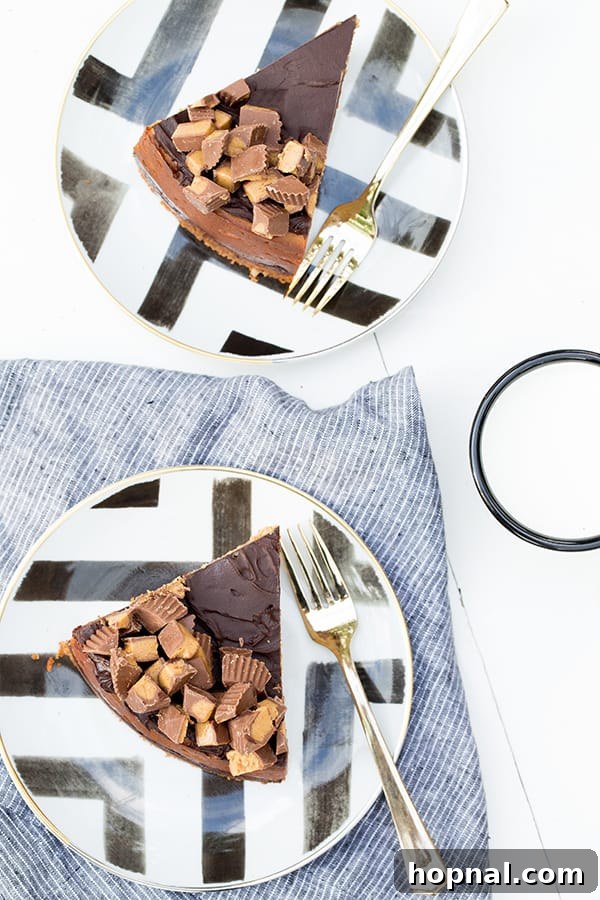
Why You’ll Love This Chocolate Peanut Butter Cheesecake Recipe
This isn’t just another dessert; it’s an experience waiting to happen. Here’s why this layered chocolate peanut butter cheesecake will quickly become a cherished favorite in your recipe collection:
- Irresistible Flavor Combination: Chocolate and peanut butter are a timeless match made in heaven. This cheesecake masterfully blends their rich, complementary profiles into a sophisticated and utterly addictive dessert. The sweetness of the chocolate perfectly balances the savory notes of peanut butter.
- Multi-Textural Delight: Every bite offers a captivating journey through various textures. From the satisfying crunch of the graham cracker crust to the soft, fudgy chocolate base, the incredibly smooth and dense peanut butter cheesecake, and finally, the silky pour of chocolate ganache – it’s a symphony for your palate.
- Show-Stopping Presentation: With its beautifully defined layers and decadent topping, this cheesecake is guaranteed to be the centerpiece of any dessert table. It looks incredibly impressive, making it ideal for celebrations, dinner parties, or any occasion where you want to truly wow your guests.
- Perfect for Special Occasions: While simple enough for a weekend treat, this recipe truly shines when brought out for birthdays, holidays, anniversaries, or any moment that calls for something extra special. It’s a dessert that feels luxurious and celebratory.
- Surprisingly Manageable for Home Bakers: Despite its elaborate appearance and multiple layers, the steps are broken down into clear, achievable stages. With a little patience and attention to detail, home bakers of all skill levels can successfully create this stunning cheesecake.
Essential Tips for Baking a Perfect Cheesecake
Achieving that perfectly smooth, crack-free cheesecake isn’t just luck; it comes down to a few key techniques and careful execution. Don’t worry, we’re here to guide you every step of the way to ensure your cheesecake turns out flawlessly!
- Room Temperature Ingredients are Crucial: This is arguably the most important tip for any cheesecake. Cold cream cheese, peanut butter, and eggs don’t cream together smoothly, leading to lumps and requiring more mixing. Overmixing can incorporate too much air into the batter, which expands during baking and then collapses as the cheesecake cools, causing unsightly cracks. Always plan ahead and let your dairy products and peanut butter sit out for at least an hour (or up to two) before you begin baking.
- Don’t Overmix the Batter: Once you add the eggs to the cream cheese mixture, mix just until they are combined. As mentioned, overmixing introduces excessive air. Use an electric mixer on a low to medium speed, or even a whisk for the final egg additions, and stop as soon as the ingredients are homogenous. A slow, steady hand is your best friend here.
- The Water Bath (Bain-Marie) is Your Secret Weapon: This method is essential for creating a moist, even heat environment in your oven. It prevents the cheesecake from drying out around the edges and ensures a perfectly even, gentle bake from edge to center, which significantly reduces the risk of cracking. Make sure your springform pan is tightly wrapped in two layers of heavy-duty aluminum foil to prevent any water from seeping into the crust.
- Slow Cooling is Key: After baking, resist the urge to pull the cheesecake out of the oven immediately. Instead, turn off the oven, prop the door open slightly with a wooden spoon, and let the cheesecake gradually cool inside for at least an hour. This slow, controlled cooling process allows the cheesecake to slowly adjust to room temperature, preventing drastic temperature changes that can shock the cheesecake and lead to cracks.
- Patience with Chilling: Cheesecake needs ample time to chill and set properly. At least 6-8 hours, or ideally overnight, in the refrigerator will ensure the flavors meld beautifully and the texture becomes perfectly firm, dense, and sliceable. Rushing this step will result in a soft, potentially unset cheesecake that won’t hold its shape or flavor as well.
Ingredient Breakdown: What You’ll Need
Here’s a detailed look at the components that make this chocolate peanut butter cheesecake so extraordinary. Using high-quality ingredients will always yield the best results, ensuring a truly decadent and memorable dessert.
Chocolate Peanut Butter Cheesecake Recipe!
12 people
Print Recipe
For more delicious recipes and updates, consider following us on social media! (Links provided at the end of the article)
Ingredients
Graham Cracker Crust
- ½ cup unsalted butter, melted
- 2 cups fine graham cracker crumbs (about 1.5 sleeves)
- 3 tbsp light brown sugar, packed
- Pinch of fine sea salt
Chocolate Layer
- 6 ounces semi-sweet chocolate, finely chopped or chips
- 6 tbsp unsalted butter
- ½ cup granulated sugar
- 2 large eggs, at room temperature
- 2 tbsp all-purpose flour
Peanut Butter Cheesecake
- 24 ounces (three 8-oz blocks) cream cheese, fully softened to room temperature. This is absolutely essential for a smooth, lump-free batter!
- 1½ cups light brown sugar, packed
- 1 cup creamy peanut butter, at room temperature (not natural, separated peanut butter)
- ½ cup heavy cream
- 3 large eggs, at room temperature
- 1 egg yolk, at room temperature
Chocolate Ganache
- 3 ounces semi-sweet chocolate, finely chopped
- 2 tbsp heavy cream
Garnish (Optional)
- ½ cup chopped Reese’s Peanut Butter Cups or other chocolate-peanut butter candy
Instructions
-
Step 1: Prepare for Baking. Begin by preheating your oven to 300°F (150°C). Fill a kettle with water and bring it to a boil; this will be used for the crucial water bath later in the baking process. Ensure you have a 9-inch springform pan ready and your cream cheese, peanut butter, and eggs are at room temperature.
-
Step 2: Craft the Graham Cracker Crust. In a medium-sized bowl, combine the graham cracker crumbs, packed brown sugar, and a pinch of salt. Pour in the melted butter and stir thoroughly with a fork until all the crumbs are evenly moistened and resemble wet sand. Press this mixture firmly and evenly into the bottom of your 9-inch springform pan. For the best compacted crust, use the bottom of a flat glass or measuring cup to press down. Bake for 6 minutes, then remove from the oven and set aside to cool completely on a wire rack while you prepare the next layers.
-
Step 3: Create the Rich Chocolate Layer. In a medium microwave-safe bowl, combine the 6 ounces of finely chopped semi-sweet chocolate and 6 tablespoons of butter. Microwave on high in 30-second intervals, stirring well after each interval, until the chocolate is fully melted and the mixture is smooth and glossy. This typically takes about 1.5 to 2 minutes total. Be careful not to overheat the chocolate, as it can seize.
-
Step 4: Bake the Chocolate Layer. Once the chocolate and butter mixture is smooth, whisk in the ½ cup of granulated sugar until fully incorporated. Then, add the 2 large eggs one at a time, whisking gently on low speed just until each egg is combined before adding the next. Finally, fold in the 2 tablespoons of all-purpose flour until no streaks of flour remain. Pour this chocolate batter evenly over the cooled graham cracker crust in the springform pan. Bake for 15 minutes. Remove from the oven and allow it to cool completely before proceeding to ensure the layers remain distinct.
-
Step 5: Prepare the Creamy Peanut Butter Cheesecake Layer. In a large mixing bowl, using an electric mixer on medium speed, beat the softened cream cheese and 1½ cups of packed brown sugar until the mixture is light, fluffy, and completely smooth. Scrape down the sides of the bowl as needed to ensure even mixing. Add the room temperature creamy peanut butter and beat until fully incorporated and the mixture is wonderfully creamy. Next, add the 3 large eggs and 1 egg yolk, one at a time, beating on low speed just until each egg is combined before adding the next. Remember not to overmix at this stage, as it can introduce too much air, which may cause cracks during baking. Finally, gently stir in the ½ cup of heavy cream until just blended. Pour this rich peanut butter cheesecake batter evenly over the cooled chocolate layer in your springform pan, spreading it smoothly with a spatula.
-
Step 6: Set Up the Water Bath (Bain-Marie). To prevent cracks and ensure an incredibly creamy texture, it’s crucial to bake the cheesecake in a water bath. Tightly wrap the bottom and sides of your springform pan with two layers of heavy-duty aluminum foil to create a waterproof seal, preventing any water from seeping into the crust. Place the foil-wrapped springform pan into a larger roasting pan. Carefully pour the boiling water you prepared earlier into the roasting pan, ensuring it comes halfway up the sides of the springform pan. This creates a moist, consistent cooking environment, similar to baking a delicate soufflé.
-
Step 7: Bake the Cheesecake. Carefully transfer the roasting pan with the cheesecake (and water bath) to your preheated 300°F (150°C) oven. Bake for approximately 1 hour, or until the edges of the cheesecake are set, and the center still has a slight jiggle when gently shaken (it will continue to cook and firm up as it cools). The top of the cheesecake should appear beautifully golden brown. Once baked, turn off the oven, prop the oven door open slightly with a wooden spoon, and let the cheesecake sit in the cooling oven for another hour. This gradual cooling prevents drastic temperature changes that can cause cracks.
-
Step 8: Chill Thoroughly. After the hour in the cooling oven, carefully remove the cheesecake from the water bath and the roasting pan. Remove the foil from around the springform pan. Let it cool completely on a wire rack at room temperature. Once it has reached room temperature, transfer the cheesecake to the refrigerator and chill for at least 6-8 hours, or preferably overnight, for optimal setting and flavor development. This chilling period is non-negotiable for the best results.
-
Step 9: Prepare the Silky Chocolate Ganache. Once the cheesecake is thoroughly chilled and set, prepare the ganache. In a small microwave-safe bowl, combine the 3 ounces of finely chopped semi-sweet chocolate and 2 tablespoons of heavy cream. Microwave on high in 30-second intervals, stirring after each, until the chocolate is fully melted and the ganache is smooth and glossy. This typically takes about 1 minute total. Let the ganache cool for a few minutes until it’s slightly thickened but still pourable.
-
Step 10: Finish and Serve. Pour the cooled chocolate ganache evenly over the top of the chilled cheesecake, gently spreading it to the edges with a small offset spatula or the back of a spoon. Immediately garnish with your chopped Reese’s Peanut Butter Cups, or any other chocolate-peanut butter candy of your choice, before the ganache sets. Return the cheesecake to the refrigerator for about 30 minutes to allow the ganache to firm up. When ready to serve, carefully run a thin, warm knife around the edge of the pan before releasing the springform sides. Slice with a sharp knife, wiping it clean between each slice for neat, beautiful cuts, and savor this incredibly decadent dessert!
Nutrition Information (per serving)
Carbohydrates: 68g,
Protein: 14g,
Fat: 60g,
Saturated Fat: 30g,
Polyunsaturated Fat: 5g,
Monounsaturated Fat: 19g,
Trans Fat: 1g,
Cholesterol: 210mg,
Sodium: 536mg,
Potassium: 449mg,
Fiber: 4g,
Sugar: 53g,
Vitamin A: 1500IU,
Vitamin C: 1mg,
Calcium: 140mg,
Iron: 3mg
Nutrition information is automatically calculated and should only be used as an approximation. Actual values may vary based on specific ingredients and preparation methods.
Did you make this incredible Chocolate Peanut Butter Cheesecake? We’d love to hear about it! Please leave a comment below and share your experience. Your feedback helps us and other bakers!
Leave a Comment or Rate This Recipe!
Troubleshooting Common Cheesecake Issues
Even experienced bakers can encounter a snag or two. Here are some common cheesecake problems and how to avoid them:
- Cracked Top: This is the most common issue! It’s usually caused by overmixing the batter (introducing too much air), baking at too high a temperature, or cooling the cheesecake too quickly. Always follow our tips on using room temperature ingredients, gentle mixing, implementing a water bath, and allowing for slow cooling in the oven.
- Soggy Crust: A soggy crust can happen if the crust isn’t pre-baked sufficiently before adding the layers, or if your springform pan wasn’t properly wrapped for the water bath, allowing water to seep in. Ensure your foil wrapping is robust and your crust is lightly browned during pre-baking.
- Lumpy Batter: Almost always due to using cold cream cheese or peanut butter. These ingredients need to be at proper room temperature to cream smoothly without lumps. If you find lumps, gently warm the mixture slightly and beat again, ensuring not to incorporate too much air.
- Cheesecake Not Setting: If your cheesecake seems too soft and jiggly even after chilling, it was likely underbaked. The center should still have a slight jiggle when gently shaken, but it shouldn’t look liquid. It will firm up completely during the extensive chilling process. Make sure your oven temperature is accurate.
Creative Variations & Serving Suggestions
While this chocolate peanut butter cheesecake is perfect as is, you can always put your own spin on it or enhance the serving experience.
Variations:
- Nut Butter Alternatives: Experiment with other creamy nut butters like almond butter or cashew butter for a slightly different nutty flavor profile. Ensure they are smooth and at room temperature.
- Dark Chocolate Twist: For those who prefer a more intense chocolate flavor and less sweetness, use dark chocolate (60-70% cacao) for both the chocolate layer and the ganache. This adds a sophisticated bitterness that pairs wonderfully with the peanut butter.
- Different Toppings: Instead of Reese’s Peanut Butter Cups, consider other delicious garnishes like chopped salted peanuts, chocolate shavings, a drizzle of homemade caramel sauce, a sprinkle of flaky sea salt on the ganache, or even a few chocolate-covered pretzels for added crunch.
- Mini Cheesecakes: Adapt the recipe for individual servings by baking mini cheesecakes in muffin tins lined with paper liners. Adjust baking times accordingly (typically much shorter, around 20-30 minutes).
- Swirl Effect: For a marbled look, try swirling a small amount of extra melted chocolate or peanut butter into the top of the peanut butter cheesecake layer before baking.
Serving Suggestions:
- With Coffee or Espresso: The richness of this cheesecake pairs beautifully with the robust flavors of a hot cup of freshly brewed coffee, a shot of espresso, or a creamy latte.
- Fresh Berries: A side of fresh raspberries, sliced strawberries, or blueberries can cut through the richness of the cheesecake and add a lovely tart, refreshing contrast.
- Ice Cream: For ultimate indulgence, serve a slightly warmed slice (just gently, don’t melt it!) with a scoop of premium vanilla bean ice cream or a scoop of peanut butter swirl ice cream.
- Cold Milk: Sometimes, the simplest pairing is the most satisfying – a tall, cold glass of milk can be surprisingly refreshing and nostalgic with this decadent treat.
- Whipped Cream: A dollop of lightly sweetened homemade whipped cream can add an airy contrast to the dense cheesecake.
Storage Instructions
This chocolate peanut butter cheesecake stores beautifully, making it an excellent make-ahead dessert for entertaining or simply enjoying throughout the week.
- Refrigerator: Once fully chilled and set, cover the cheesecake loosely with plastic wrap or aluminum foil. Store it in the refrigerator for up to 5-7 days. For best flavor and texture, remove it from the fridge about 20-30 minutes before serving.
- Freezer: For longer storage, you can freeze individual slices or the entire cheesecake (after it’s fully chilled and ganache has set). Wrap individual slices tightly in plastic wrap, then in a layer of aluminum foil. For a whole cheesecake, first chill uncovered until very firm, then wrap tightly in plastic wrap, followed by a layer of heavy-duty aluminum foil. It can be stored in the freezer for up to 1-2 months. Thaw frozen cheesecake overnight in the refrigerator before serving.
More Delicious Cheesecake Recipes You’ll Love
If you’ve enjoyed mastering this indulgent creation, be sure to explore more of our delightful cheesecake recipes and expand your baking repertoire:
- Classic Goat Cheese Cheesecake Recipe – Discover a sophisticated and unique twist on a savory-sweet favorite that’s surprisingly approachable.
- Light & Creamy Ricotta Cheesecake with Sour Cream Topping – For those who prefer a lighter, airier texture, this recipe offers a delicate and refreshing alternative to the traditional dense cheesecake.
- Vibrant Blood Orange Cheesecake Recipe – Indulge in a zesty and visually stunning seasonal treat that brings a burst of citrus brightness to your dessert table.
Stay connected with us for even more inspiring recipes, delightful cocktails, irresistible desserts, and fabulous party ideas! You can FOLLOW US on FACEBOOK, INSTAGRAM, and PINTEREST. Join our community and never miss out on our latest culinary adventures!