
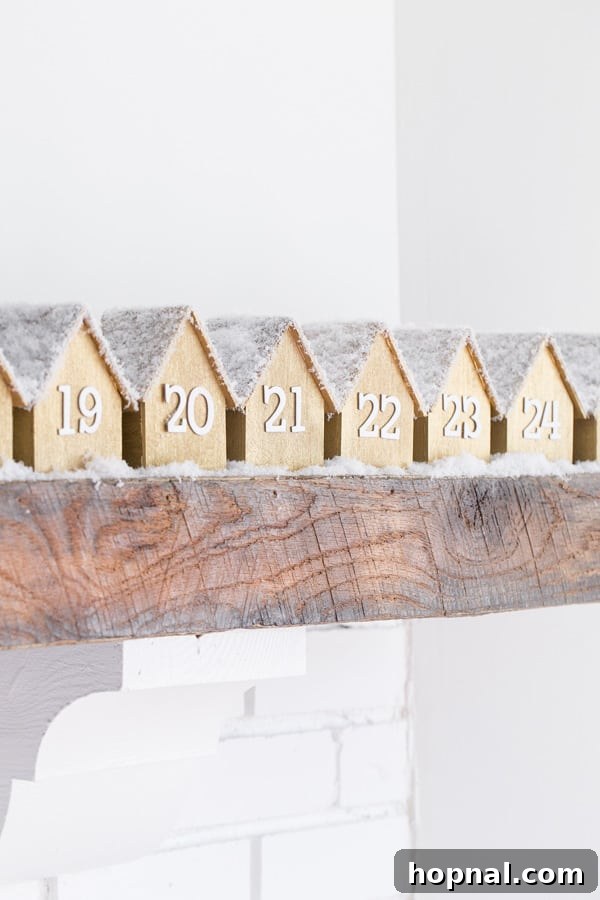
Embark on a delightful journey to create your most cherished holiday tradition yet: a stunning DIY Advent Calendar crafted from charming wooden houses. This project isn’t just about counting down the days to Christmas; it’s about building lasting memories, fostering creativity, and adding a unique, heartwarming touch to your festive home decor. These miniature abodes, meticulously arranged, promise to become a focal point, brimming with anticipation and joy. We’ve thoughtfully designed a free printable template to simplify the process, ensuring that even novice crafters can achieve a beautiful, professional-looking advent display. Get ready to transform simple materials into a magical countdown experience that your family will adore for years to come!
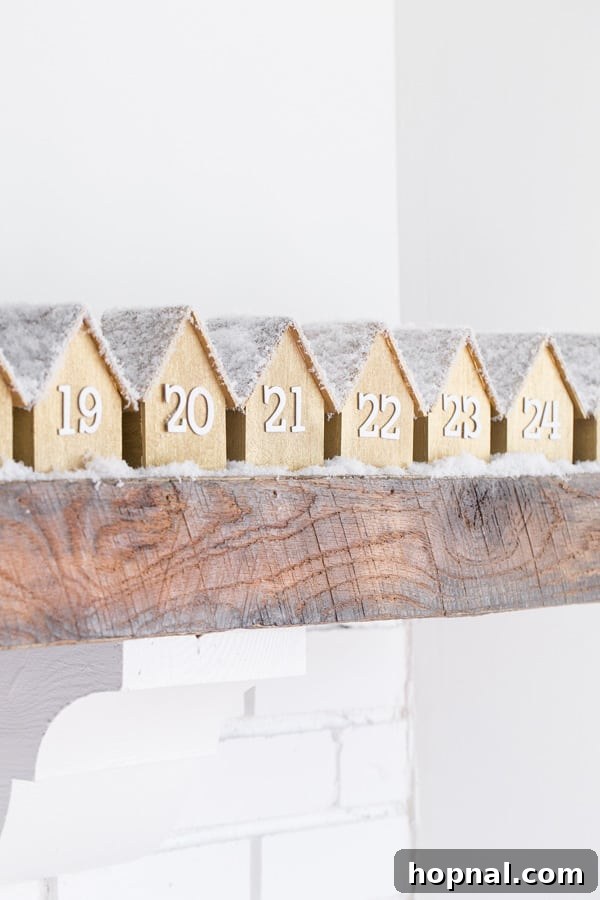
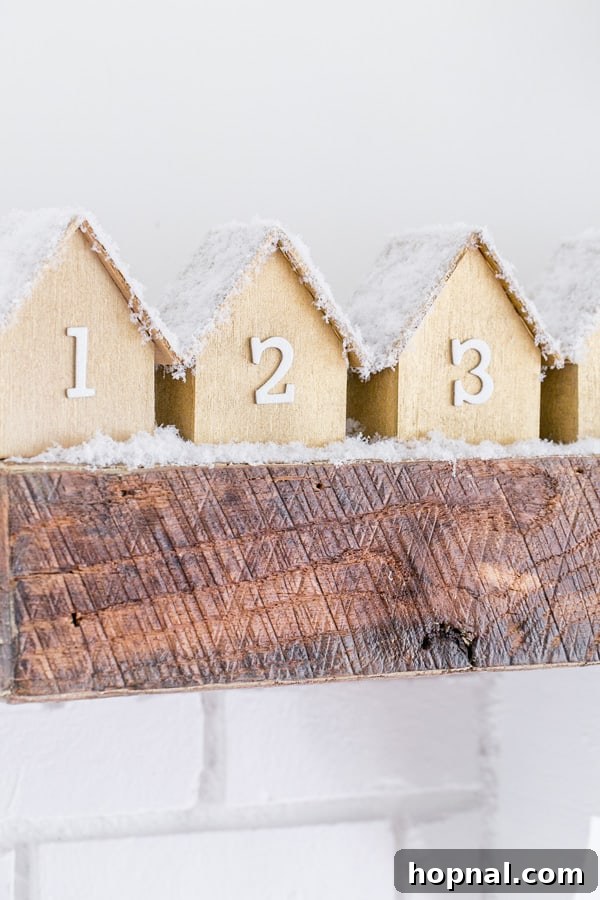
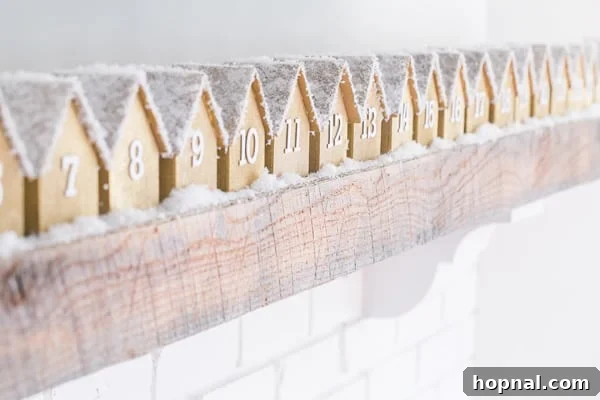
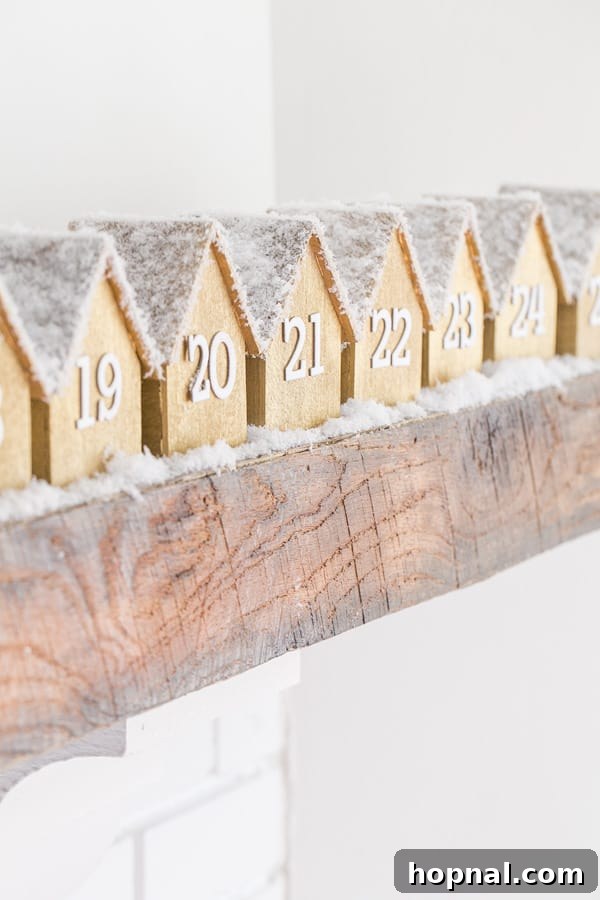
This year, elevate your holiday decorations with an Advent calendar that truly stands out. Our collection of tiny wooden houses, elegantly lined up on your mantle, presents an unparalleled vision of Christmas charm. The rustic appeal of natural wood, combined with the warmth of personalized touches, creates an atmosphere of cozy sophistication that modern and traditional homes alike will appreciate. Far from a mere seasonal item, this DIY project transforms into a treasured heirloom, year after year, as each little house holds a secret delight or a meaningful message, building excitement and strengthening family bonds during the most wonderful time of the year. It’s more than just a calendar; it’s a piece of art infused with holiday spirit.
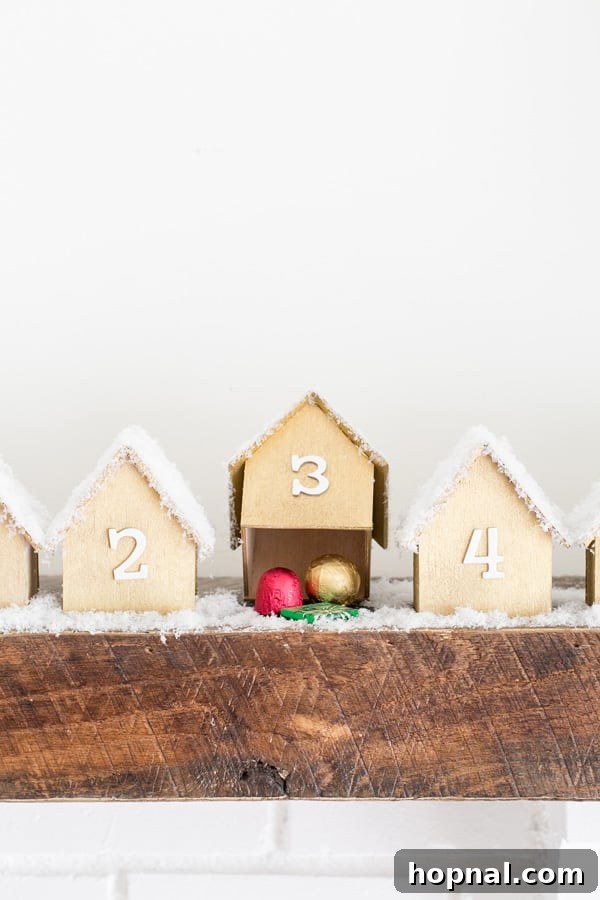
The secret to the effortless creation of these adorable wooden houses lies in the choice of material: Balsa wood. Renowned for its lightweight nature and exceptional ease of cutting, Balsa wood allows you to work with simple tools like scissors or a craft knife, making this project accessible and enjoyable for everyone. To ensure perfect symmetry and simplify your crafting journey, we’ve developed an awesome printable template. Just download, print, and cut – it’s that easy! A brilliant design feature of these houses is their bottomless construction. This clever detail means that instead of fumbling with tiny doors or drawers, you simply lift each house to reveal the special treat, scripture, or activity hidden beneath, adding an element of surprise and delight to each day of the countdown.
Craft Your Own Wooden House Advent Calendar: Step-by-Step Guide
Creating this enchanting DIY Advent Calendar is a straightforward and rewarding process. Follow these detailed steps to bring your miniature Christmas village to life. Precision and patience will yield the most beautiful results, ensuring your calendar is a festive masterpiece.
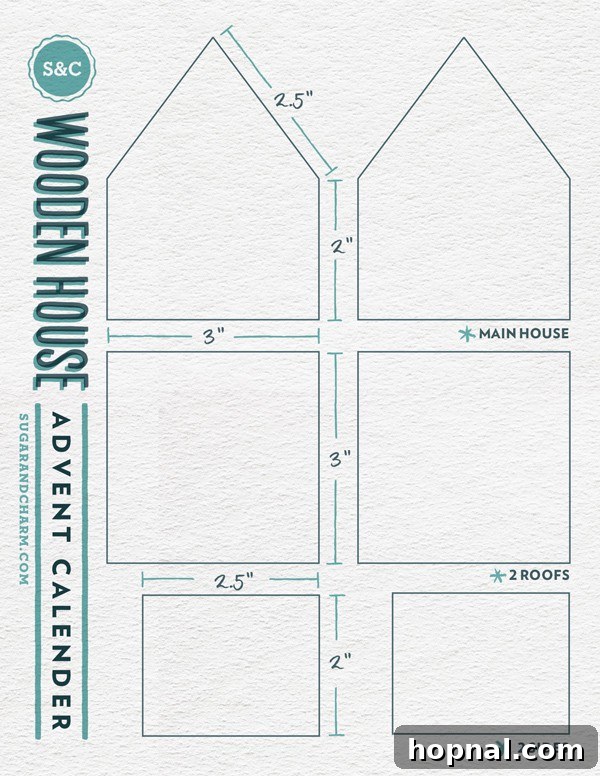
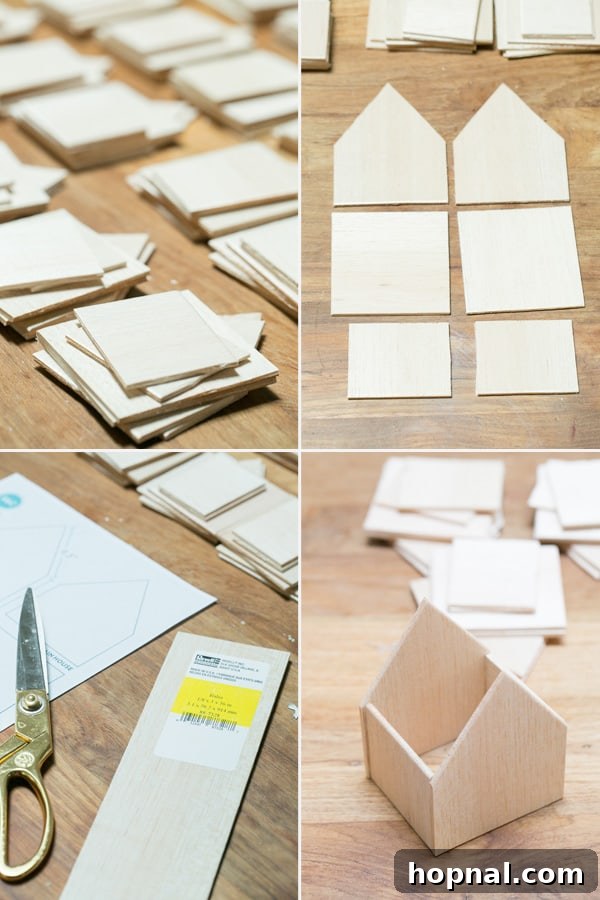
- Prepare Your Template: Begin by downloading and printing the provided template. For best results and durability, consider printing it on slightly thicker paper or cardstock. Carefully cut out each individual house component from the printed template. Take your time to ensure clean, precise edges, as this accuracy will directly impact the final look and ease of assembly for your wooden houses.
- Cut Your Balsa Wood: With your template pieces meticulously cut, it’s time to transfer these shapes onto your Balsa wood sheets. Place each paper template firmly onto the Balsa wood and carefully trace around its edges using a pencil or a fine-tip marker. For precision and safety, it’s highly recommended to use a sharp craft knife on a self-healing cutting mat, guided by a metal ruler for all straight lines. While Balsa wood is soft enough for scissors, a craft knife will give you cleaner, more professional edges, which are crucial for a sturdy and aesthetically pleasing final structure. Each house will require six distinct pieces: two identical side walls, two identical roof pieces, and two identical front/back pieces. You will need to cut 24 sets of these six pieces if you’re creating a traditional 24-day advent calendar, or 25 for a full countdown including Christmas Day. Double-check your cuts to ensure they are as accurate as possible, as this will greatly simplify the assembly process and result in a neater finish.
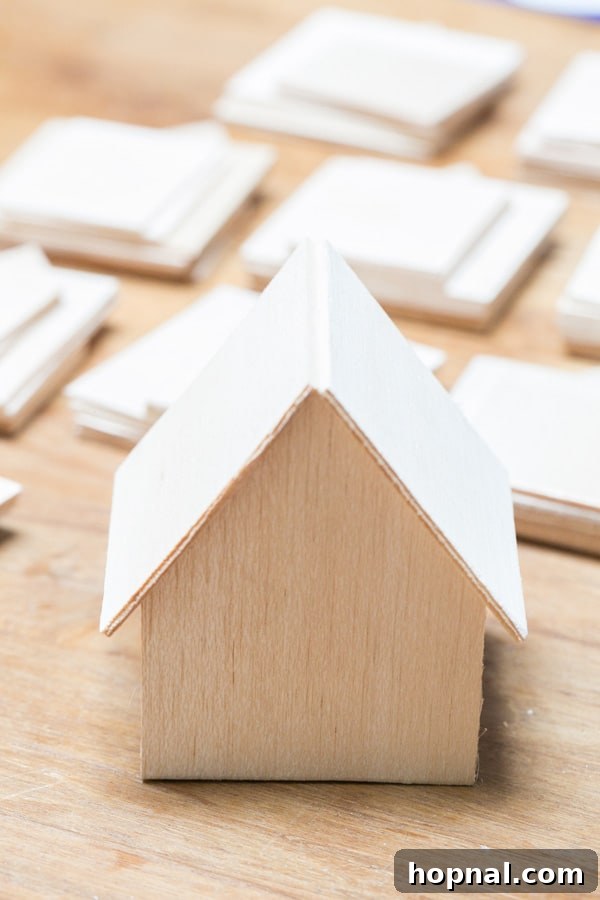
- Assemble the House Structures: Now comes the exciting part of seeing your houses take shape! Using a hot glue gun, carefully apply a thin bead of glue along the edges of the Balsa wood pieces. Start by joining the side walls to one of the front/back pieces, then attach the second side wall, forming a basic box shape. Finally, secure the remaining front/back piece to complete the main structure. Work quickly but carefully with hot glue, as it dries fast. Ensure each joint is flush and square for the strongest bond. Once the main body is secure, attach the two roof pieces, making sure they meet perfectly at the apex to form a classic A-frame roof. Hold each joint firmly for a few seconds until the glue sets. Repeat this process for all 24 (or 25) houses.
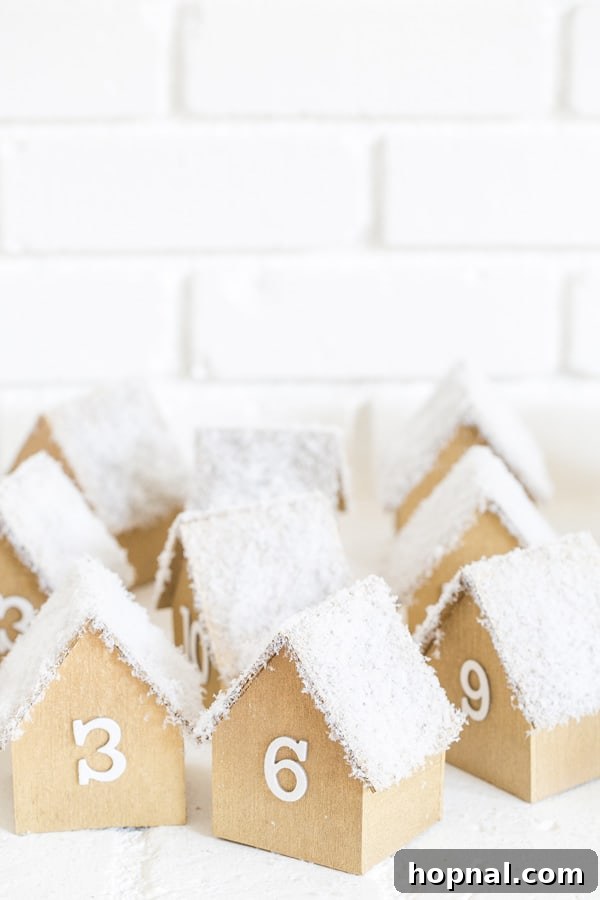
- Prime and Paint Your Houses: Once all your houses are assembled and the glue has thoroughly dried, it’s time to add color! For a smooth, even finish and vibrant color, consider applying a light coat of primer, especially if you’re planning on using lighter paint colors. After the primer dries, spray paint your houses in your chosen color. Gold offers a luxurious, festive shimmer, but feel free to explore other options like classic Christmas red and green, crisp white for a snowy village look, or even modern pastels to match your home decor. Apply multiple thin coats, allowing each coat to dry completely in a well-ventilated area, to prevent drips and ensure even coverage.
- Add Snowy Details: To infuse your advent calendar with enchanting winter magic, apply clear liquid glue (such as Elmer’s glue or Mod Podge) along the roofline and eaves of each house. Before the glue dries, generously sprinkle faux snow (available at most craft stores) over the glued areas. Gently tap off any excess snow. This creates a beautifully realistic, freshly fallen snow effect, adding texture and visual interest. For an extra touch of sparkle, you can mix fine glitter with your faux snow or apply a light dusting of glitter after the snow has set.
- Number Your Countdown: Mark each house with its corresponding advent number, from 1 to 24 (or 25). There are several creative ways to do this: use pre-made number stickers for a quick and clean look, stencil numbers using acrylic paint, hand-paint them for a rustic, personalized touch, or even use small vinyl decals. Ensure the numbers are clear, visible, and evenly placed on each house, perhaps on the front or a prominent side.
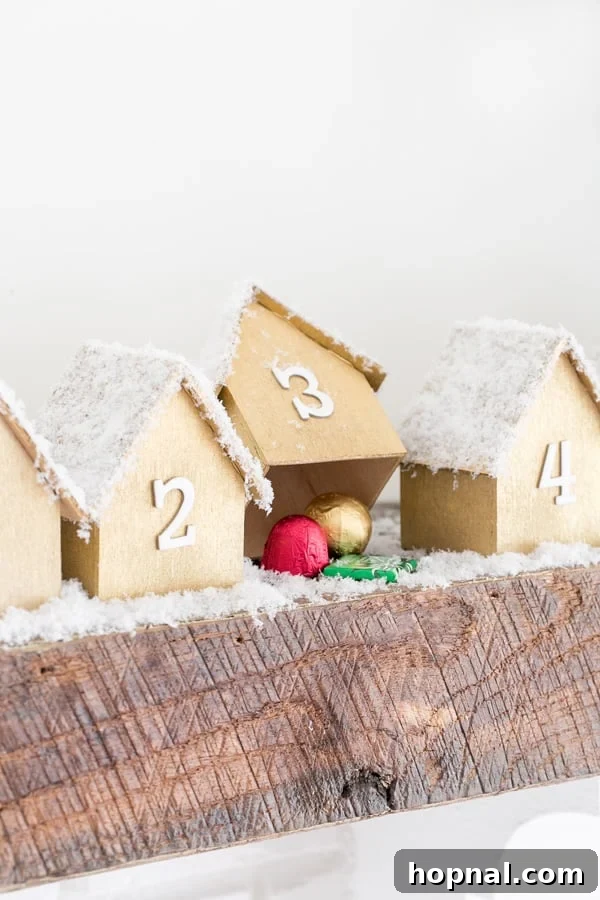
- Fill with Festive Surprises: With your houses complete, it’s time for the daily delights! Since these houses are cleverly designed without bottoms, simply arrange them on your chosen display surface – a mantle, shelf, or tabletop. Underneath each house, place a small treat, a piece of candy, a personalized scripture, a fun holiday activity suggestion, or any other special surprise. The joy of lifting each house to discover the day’s surprise is a cornerstone of the advent experience.
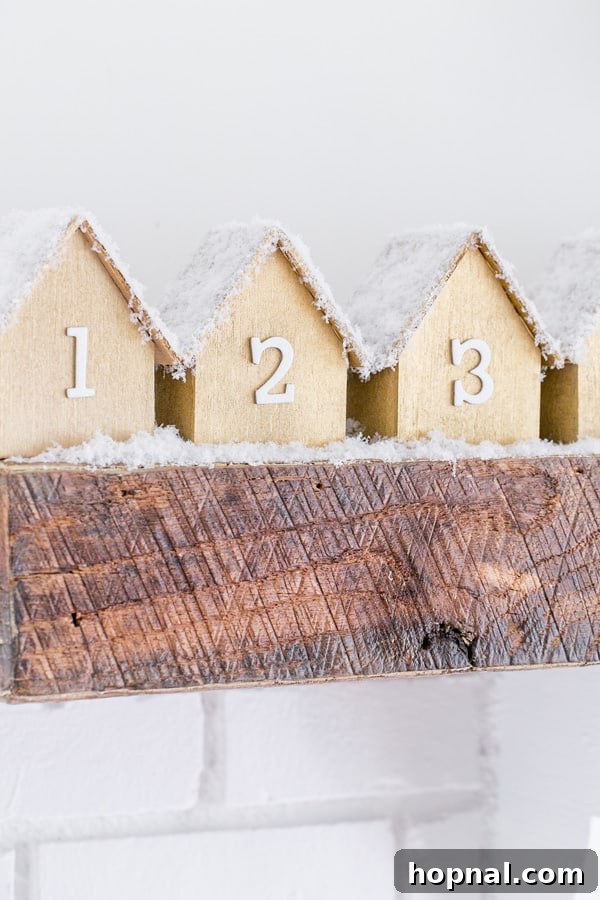
- Display and Enjoy Your Creation: Line up your beautifully crafted houses in numerical order, creating a charming miniature village. Add surrounding festive elements like evergreen garland, fairy lights, miniature trees, or extra faux snow to complete the winter wonderland scene. As December 1st arrives, begin your magical countdown to Christmas, enjoying the anticipation and daily discoveries with your family. This DIY Advent Calendar is sure to become a cherished part of your holiday traditions!
Personalizing Your DIY Advent Calendar: Endless Decorating Possibilities
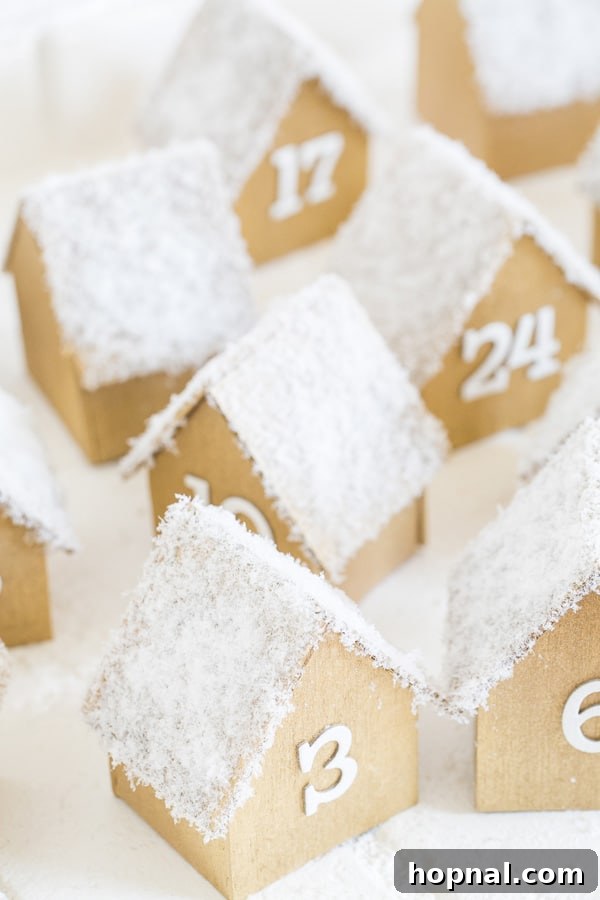
The true beauty of a DIY project lies in the freedom to make it uniquely yours. While our example showcases elegant gold spray paint and a generous dusting of faux snow, consider these wooden houses a blank canvas awaiting your creative flair. Don’t limit yourself to traditional colors; let your imagination guide you in designing an advent calendar that perfectly complements your personal style and existing holiday decor.
For a classic, vibrant Christmas aesthetic, you could alternate houses with rich shades of deep green and holly red, perhaps adding subtle white window details or tiny miniature wreaths. If your living room boasts a more contemporary or minimalist style, consider a Scandinavian-inspired palette of crisp whites, soft grays, and natural wood tones, accented with metallic silver or copper. A rustic farmhouse look might involve distressed paint finishes, twine embellishments, and small burlap accents. For a touch of glam, opt for iridescent glitter on the roofs, or even a different metallic shade like rose gold or silver.
Beyond paint and snow, think about additional embellishments. Tiny decorative beads can mimic Christmas lights along the eaves. Stencils can add intricate patterns, snowflakes, or even miniature words like “Joy” or “Peace.” Small pieces of felt cut into tiny doors and windows can give each house a more realistic and whimsical appearance. You could even incorporate miniature bottle brush trees or small figurines around the base of your houses to create an even more immersive miniature winter village scene. The possibilities are truly boundless, allowing you to craft a one-of-a-kind advent calendar that not only serves its purpose but also acts as a stunning, personalized piece of festive decor that truly reflects your taste.
Inspiring Ideas for Advent Calendar Surprises
The heart of any Advent calendar lies in the daily discovery, and our bottomless wooden houses offer the perfect vessel for a wide array of delightful surprises. Starting December 1st, each house can hold a unique treat or activity, building excitement as Christmas Day approaches. Here are some expanded ideas to fill your advent houses, catering to every family member and interest:
Sweet & Savory Treats:
- Chocolates & Candies: Small, individually wrapped chocolates (like the premium Godiva treats mentioned, or even simple candy canes, festive gummy candies, or mini chocolate Santas) are always a hit.
- Baked Goods: Tiny cookies, mini gingerbread men, or small shortbread biscuits can be charming. Ensure they are well-sealed to stay fresh.
- Healthy Snacks: Small packs of dried fruit, nuts, or festive granola bars can offer a balanced option.
Meaningful Activities & Experiences:
Transform your calendar into a bucket list of holiday fun! Write down one holiday activity on a small slip of paper for each day:
- Bake and decorate Christmas cookies.
- Watch a classic Christmas movie (e.g., “Elf,” “Home Alone,” “It’s a Wonderful Life”).
- Visit a local light display or drive around to see decorated houses.
- Make homemade ornaments for the tree.
- Write letters to Santa or send holiday cards to loved ones.
- Read a different Christmas story or chapter from a book each night.
- Have a hot cocoa bar evening with all the fixings.
- Sing Christmas carols together as a family.
- Volunteer or do a small act of kindness for someone in need.
- Create a festive craft project (e.g., paper snowflakes, pinecone decorations).
- Play a Christmas-themed board game or puzzle.
- Go ice skating or sledding (weather permitting).
- Have a holiday-themed scavenger hunt.
- Plan a family game night.
- Enjoy a special Christmas breakfast or dinner.
Small Gifts & Keepsakes:
- Mini Toys: Small cars, figures, building blocks, or trinkets suitable for children.
- Craft Supplies: Stickers, mini glitter pens, small rolls of washi tape, or craft pom-poms.
- Accessories: Festive hair clips, small keychains, or holiday-themed socks.
- Personalized Items: A small custom magnet, a mini photo print, or a charm.
- Books: Very thin storybooks or small coloring books.
- Seed Packets: Flower or herb seeds for spring planting.
- Coins or Small Bills: A little spending money for a holiday treat.
Spiritual Reflection:
For those who wish to focus on the spiritual significance of the season, consider printing out daily scriptures or reflective passages that narrate the story of Christmas. Each day can unveil a new piece of the biblical narrative, offering a quiet moment for contemplation and reminding everyone of the true meaning of the holidays. This thoughtful approach can bring a profound sense of peace and reverence to your Advent countdown.
Whatever combination of surprises you choose, these sweet, little advent houses will undoubtedly create cherished moments and a magical anticipation for Christmas. Tailor the contents to the ages and interests of your family members for a truly personalized experience!
Simplify Your Crafting with Our Easy-to-Use Template
We understand that crafting projects can sometimes feel daunting, especially when precise cuts and measurements are involved. That’s why we’ve gone the extra mile to provide a truly simple and intuitive template for constructing these adorable wooden houses. This downloadable and printable template is your secret weapon for making the entire project super straightforward and incredibly efficient. Forget about complex calculations or struggling with freehand shapes; our pre-designed outlines ensure that every piece you cut will be the perfect size and shape. Simply lay the template outlines over your Balsa wood sheets, trace, and cut. Because Balsa wood is exceptionally easy to work with – it cuts cleanly with just scissors or a craft knife – you’ll find yourself assembling your house parts with remarkable speed and accuracy. This template transforms a potentially challenging task into a quick, enjoyable, and stress-free crafting session, guaranteeing beautiful, consistent results for all your advent houses.
Pro Tips for an Impeccable DIY Advent Calendar
To ensure your DIY Advent Calendar project goes smoothly and yields the most stunning results, consider these valuable tips and tricks:
- Utilize the Template: Always start by printing out and meticulously using the provided wooden house template. This is your foundation for consistent sizing and neat cuts, which are crucial for stable and attractive house structures. Don’t eyeball it!
- Maintain a Clean Glue Gun: A clean hot glue gun is essential for smooth, uninterrupted adhesive application. To clean your glue gun, simply plug it in and let it heat up for a few minutes. Once warm, carefully use a crinkled piece of aluminum foil or an old cloth to gently scrub off any dried or excess glue from the nozzle. This prevents clogs and ensures precise glue lines.
- Personalize Treats for Each Family Member: Go beyond generic candies! If you have multiple children or family members, tailor the treats or activities under each house to their individual preferences. One child might love mini toy cars, while another prefers a new sticker pack or a “coupon” for extra screen time. This personal touch makes each daily reveal even more special.
- Create a Winter Wonderland Display: Don’t just line up the houses! Elevate your advent calendar into a captivating scene by sprinkling faux snow liberally around the bases of the houses. Add miniature evergreen trees, small festive figurines, pinecones, or even tiny battery-operated fairy lights to create a magical winterscape that enhances the overall festive ambiance.
- Work on a Protected Surface: When cutting, gluing, and painting, always protect your work surface. Use a self-healing cutting mat for knife work, and cover your table with old newspapers, cardboard, or a plastic drop cloth to catch any glue drips or paint overspray.
- Allow Adequate Drying Time: Patience is key! Ensure you allow sufficient drying time between paint coats and after all glue has been applied. Rushing this step can lead to smudges, uneven finishes, or unstable structures.
- Involve the Kids (Safely): Depending on their age, children can assist with various parts of the project, such as tracing templates, decorating painted houses, or helping to choose and place the daily surprises. Supervise closely, especially with cutting tools and hot glue.
- Consider Storage: Once the holiday season is over, gently pack your wooden houses in a sturdy box, separated by tissue paper or bubble wrap, to protect them. This way, they’ll be ready to bring joy again for many Christmases to come.
Explore More Festive DIY Christmas Inspiration
The spirit of holiday crafting doesn’t have to end with your Advent calendar! Dive deeper into the world of handmade festive decor with these other wonderful DIY Christmas ideas from our collection. Each project offers a unique way to personalize your home for the holidays, adding warmth, charm, and that special touch only a handmade item can provide. Expand your creative endeavors and fill your home with even more bespoke Christmas cheer!
- Transform Your Space with Christmas Living Room Decor Ideas
- Craft a Stylish Modern Christmas Wreath and Garland
- Fold Your Way to Festive with Origami Christmas Trees
- Create Elegant DIY Floral Christmas Tree Ornaments

We absolutely adore seeing your creative interpretations! If you decide to embark on this joyful project and craft these adorable advent calendar houses, please don’t hesitate to share your wonderful creations with us. Tag us on FACEBOOK, INSTAGRAM, and PINTEREST so we can admire your festive designs and share in your holiday cheer! Happy crafting, and warm wishes for a truly magical holiday season!