
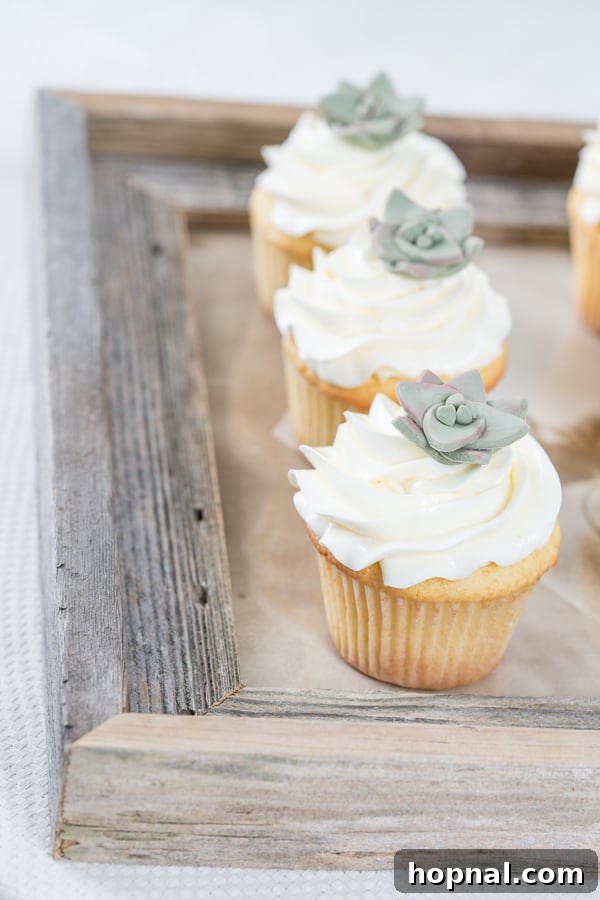
Elevate your dessert presentation with these absolutely charming DIY edible succulent cupcake toppers! Perfectly shaped and incredibly realistic, these delightful decorations are not only beautiful to behold but also wonderfully tasty. They offer a unique and sophisticated touch to any event, from elegant weddings and heartwarming baby showers to vibrant garden parties and casual gatherings with friends. Imagine the smiles when your guests discover these tiny botanical masterpieces atop their sweet treats.
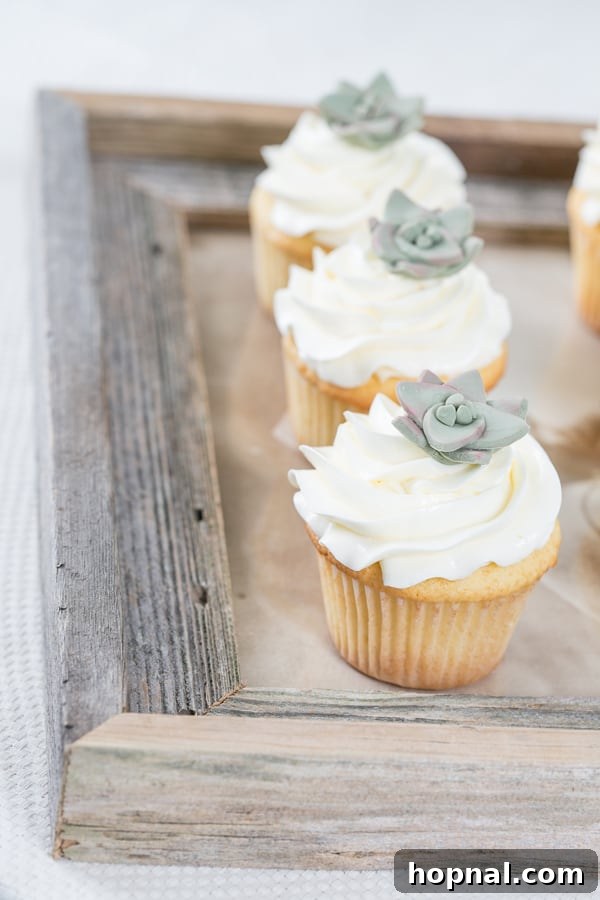
These tiny fondant succulents on mini cupcakes are undeniably captivating. We’re thrilled to share the expertise of Sarah Lange, a talented pastry chef from the chic cafe The Hart and The Hunter, who demonstrates exactly how to craft these stunning edible creations. Sarah’s insights ensure that even novice decorators can achieve professional-looking results. She has also created a fun and informative video guiding you through the process, which is an invaluable resource for visual learners and anyone serious about perfecting these yummy succulents. It addresses common questions and provides clear visual demonstrations, making your crafting journey even smoother. Whether you’re planning a summer wedding, a lively fiesta, or simply want to impress your loved ones, these toppers are guaranteed to be a hit!
Crafting Exquisite Edible Succulent Cupcake Toppers: A DIY Guide
Welcome to the enchanting world of edible sugar succulents! This comprehensive guide will walk you through every step of creating these beautiful botanical marvels that will transform your ordinary cupcakes into extraordinary works of art. Perfect for adding a touch of nature-inspired elegance to any celebration, these toppers are simpler to make than you might think.
Materials and Tools You’ll Need
Before diving into the crafting process, gather all your necessary ingredients and tools. Having everything at hand will make the experience smooth and enjoyable.
- Gumpaste and Fondant: A blend of these two gives you the perfect consistency – gumpaste provides strength and dries hard, while fondant offers flexibility and a smooth finish.
- Green Food Dye (Juniper Shade Recommended): To achieve that authentic succulent color.
- Poppy Red Luster Dust (by Linnea’s or similar brand): For adding a vibrant, natural blush to the tips of your succulent petals.
- Small, Soft Paintbrush: Ideal for applying luster dust delicately.
- Rolling Pin: To flatten your sugar paste evenly.
- Balling Tool (or other sugarcraft modeling tool): Essential for shaping and thinning the edges of your leaves.
- Leaf Cutters (two sizes): To create uniform petals. You’ll need both a slightly larger and a smaller size for a realistic layered effect.
- X-Acto Knife (or a sharp craft knife): For precise cuts, especially for the inner cone of the succulent.
- Plastic Wrap: Crucial for keeping your unused fondant and gumpaste from drying out.
- Water: For creating your edible adhesive.
- Egg Carton: A fantastic drying rack for your finished succulents, allowing them to maintain their shape as they harden.
Step-by-Step Guide to Crafting Your Edible Succulent Toppers
Follow these detailed instructions to create stunning, realistic succulent cupcake toppers that will impress everyone.
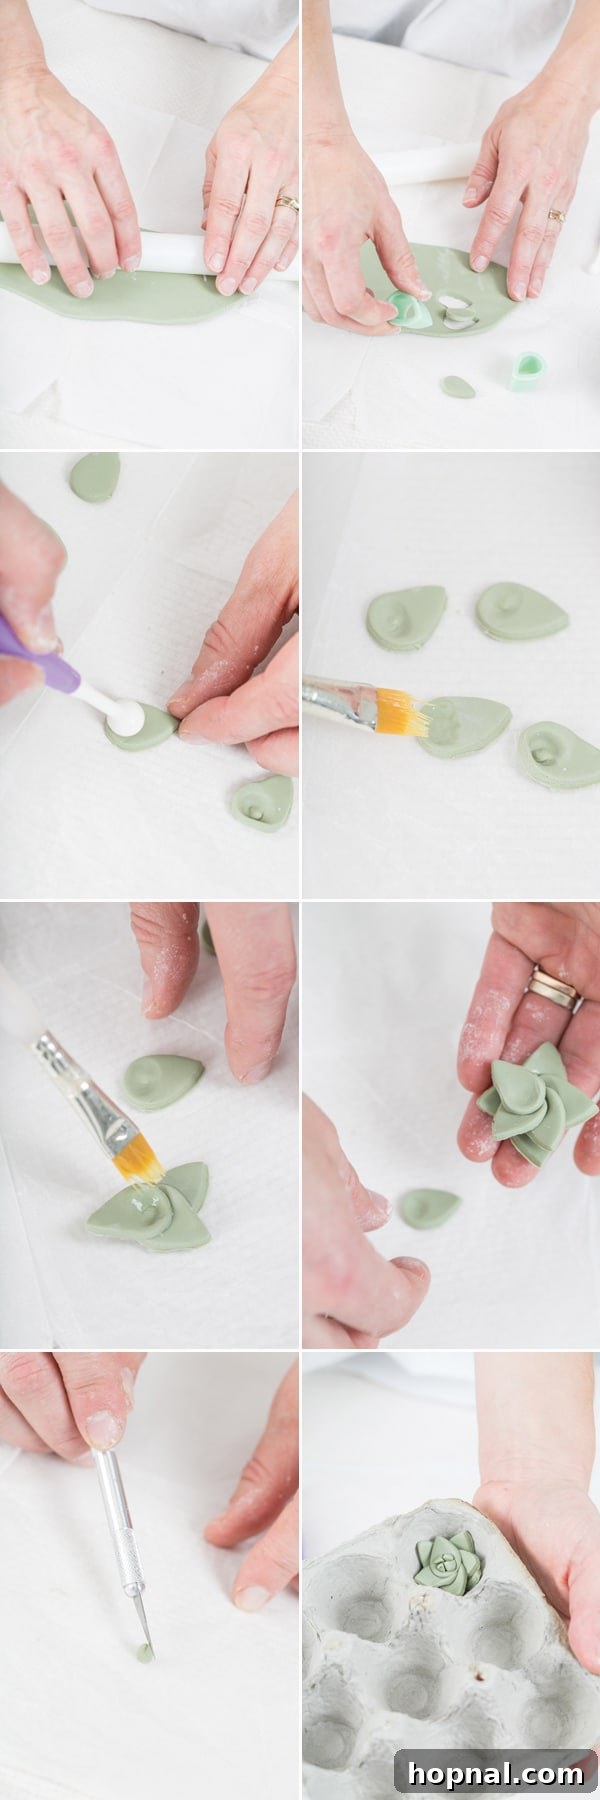
- Step 1: Prepare Your Sugar Paste. Begin by mixing your gumpaste, fondant, and a few drops of green food dye. Knead the mixture thoroughly with your hands until the color is evenly distributed and the paste is smooth and pliable. This blend provides the ideal texture – firm enough to hold shape, yet flexible enough to work with.
- Step 2: Roll and Cut Your Leaves. On a clean, lightly cornstarch-dusted surface, roll out your prepared sugar paste to an even 1/4 inch thickness. Using your leaf cutters, cut out eight individual leaf shapes. You’ll need four slightly larger leaves for the outer layers and four smaller ones for the inner layers of your succulent.
- Step 3: Create Your Edible Adhesive. Fashion a simple, effective “glue” by taking a pea-sized piece of gumpaste and dissolving it in approximately 1/4 cup of water. Stir the mixture until it forms a slightly sticky, paste-like consistency. This edible adhesive will be vital for securely attaching your delicate leaves.
- Step 4: Shape the Leaves for Realism. Take each cut leaf and, using a balling tool, gently smooth out the rounded side. This process thins the edges and creates a subtle curve, which is crucial for achieving the natural, fleshy appearance of succulent petals and ensures they fit together seamlessly during assembly.
- Step 5: Apply the Adhesive Base. Dab a small amount of your homemade gumpaste “glue” onto the middle of the base of each leaf. Remember, less is more; you only need a tiny bit to secure the leaves without making them too wet.
- Step 6: Assemble the Succulent Layers. Begin by layering the four larger leaves. Position them on top of each other in opposing directions, creating a sturdy and full base. Next, carefully stagger the four smaller leaves on top of the larger ones, gently fanning them out to mimic the natural growth pattern of a blooming succulent.
- Step 7: Secure the Structure. Once all the leaves are precisely attached and fanned out to your liking, gently pinch the very center of the assembled succulent. This action firmly secures all the layers together, ensuring the topper maintains its beautiful shape as it dries.
- Step 8: Add the Inner Core Detail. Form a tiny cone out of a small piece of green fondant. Carefully cut this cone in half lengthwise using an X-Acto knife for a clean, precise cut. Apply a minuscule amount of edible glue to the base and place this half-cone in the absolute center of your succulent. Repeat this step a few more times to create additional small inner “petals,” enhancing the realism and depth of your succulent.
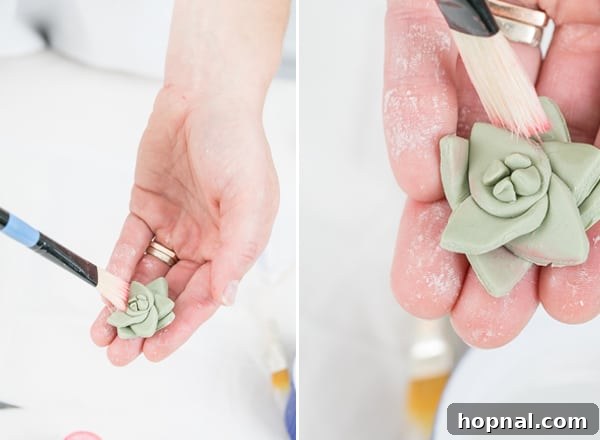
- Step 9: The Finishing Touch with Luster Dust. Allow your assembled succulent toppers to dry completely until firm. Once dry, take your small paintbrush and delicately dust the very edges of each succulent petal with poppy red luster dust. This step adds a gorgeous, subtle blush, perfectly mimicking the sun-kissed tips often seen on real succulents, bringing your edible creations to life.
- Step 10: Fondant Care Reminder. Always remember to keep any unused gumpaste or fondant tightly wrapped in plastic wrap. Exposure to air will cause it to dry out quickly, making it brittle and difficult to work with. Proper storage ensures your materials remain fresh for future projects.
The Allure of Succulents: Nature’s Edible Inspiration
Succulent plants, known simply as succulents, are a marvel of nature. Botanically defined, they are plants with parts that are more than normally thickened and fleshy, primarily to retain water in arid climates or challenging soil conditions. The very word “succulent” originates from the Latin term “sucus,” which means “juice” or “sap,” aptly describing their plump, water-filled leaves.
Beyond their remarkable survival mechanisms, succulents have surged in popularity in recent years, becoming a beloved choice for both indoor and outdoor gardening. Their diverse shapes, intriguing textures, and beautiful muted color palettes make them highly sought after for home decor, landscaping, and even as gifts. This growing appreciation for succulents extends beautifully into the culinary world, making them an ideal and trendy inspiration for edible art. Creating succulent cupcake toppers isn’t just about decorating; it’s a subtle nod to environmental beauty and a celebration of these resilient plants. Their inherently simple yet geometric shapes translate into incredibly elegant and striking cake and cupcake toppers, bringing a touch of botanical charm to any dessert table.
Mastering Fondant and Gumpaste: Tips for Success
Working with fondant and gumpaste can be incredibly rewarding, allowing you to sculpt intricate designs with ease. To ensure your succulent toppers turn out perfectly, keep these expert tips in mind:
- Maintain Optimal Consistency: The texture of your sugar paste is key. If your fondant feels dry and crumbly, knead a small amount of vegetable shortening into it until it regains its smooth, pliable consistency. Conversely, if it becomes too sticky, knead in a bit of confectioners’ sugar (powdered sugar) until it’s easy to handle without sticking to your hands.
- Prevent Drying: Fondant and gumpaste dry out very quickly when exposed to air. Always keep any unused portions tightly wrapped in plastic wrap. For longer storage, after wrapping, place the fondant in an airtight container. This preserves its moisture and workability for future projects.
- Hygiene is Paramount: Always ensure your hands are thoroughly clean when handling sugar paste. Even small crumbs or lint can get incorporated into your delicate decorations. It’s also advisable to avoid wearing fuzzy sweaters or clothing that might shed fibers while you’re decorating.
- Innovative Rolling Techniques: While a traditional rolling pin works perfectly, did you know you can also use a pasta maker to roll out fondant? This method provides an incredibly even and consistent thickness, which can be particularly helpful for creating uniform petals and details for your succulents.
- Seek Natural Inspiration: For truly realistic results, get yourself a real succulent and use it as a reference. Observing the subtle curves of its leaves, the way they overlap, and the natural variations in color can significantly help you create more lifelike edible versions. Plus, it makes a lovely addition to your home decor!
- Storage of Leftover Fondant: If you have any colored or plain fondant leftover, don’t waste it! Roll it into a ball or log shape, apply a thin film of white vegetable shortening to its surface, and then wrap it tightly in several layers of plastic wrap. Store this wrapped fondant in an airtight container at room temperature, away from direct sunlight, for extended freshness.
Illuminating Your Creations with Luster Dust
Luster dust is a magical ingredient that adds a beautiful, shimmery finish to your edible creations, making them truly sparkle. It’s perfect for mimicking the subtle, often iridescent sheen found on real succulent leaves.
To use dry luster dust, no special preparation is required. Simply dip a clean, dry, soft-bristled paintbrush directly into the dust and gently brush it onto the desired areas of your dried succulent toppers. Apply it lightly in layers until you achieve the desired intensity. Luster dust is incredibly versatile and ideal for adding vibrant shimmer or metallic effects to a wide array of confections, including cakes, cupcakes, petit fours, and cookies. It works particularly well on surfaces made with fondant, royal icing, or other frostings that dry hard to the touch, ensuring the dust adheres beautifully and creates a lasting, enchanting glow.
Elevate Your Cupcake Game: Perfect Pairings and Presentation
Once your beautiful edible succulents are crafted, the next step is to showcase them on cupcakes that complement their aesthetic and flavor. The right cupcake flavor and presentation can truly elevate these toppers from mere decorations to an integral part of an unforgettable dessert experience.
- Flavor Pairings: Consider cupcake flavors that evoke natural, earthy, or subtly sweet notes. Think lemon, vanilla bean, pistachio, or even a light carrot cake. A delicate buttercream or cream cheese frosting provides a perfect soft bed for your firm succulent toppers. Avoid overly vibrant or contrasting frosting colors that might detract from the succulents’ natural beauty; muted greens, creams, or light browns work wonderfully.
- Creative Display Ideas: For a garden party, arrange your succulent-topped cupcakes on tiered stands adorned with real moss or small potted succulents for a cohesive theme. At a wedding or baby shower, a minimalist display on white platters allows the intricate details of your edible succulents to shine. For a rustic theme, use wooden serving boards or vintage crates.
- Personal Touch: The beauty of DIY toppers lies in the personal touch they add. Each succulent, with its unique nuances, tells a story of care and creativity. These aren’t just desserts; they’re handcrafted expressions of artistry that will undoubtedly be a talking point at any gathering.
Explore More Charming Cupcake Recipes
Looking for the perfect cupcake base to showcase your stunning edible succulent toppers? Or simply seeking more delightful baking inspiration? Check out these charming cupcake recipes:
- American Flag Cupcake Cake
- Magical Lucky Charms Cupcakes
- Chocolate Toffee Cupcakes with Buttercream
- Lemon Cupcakes with Buttercream Meringue Frosting
- Carrot Cake Cupcakes by Pinch of Yums
- Red Velvet Cupcakes by Live Well Bake Often
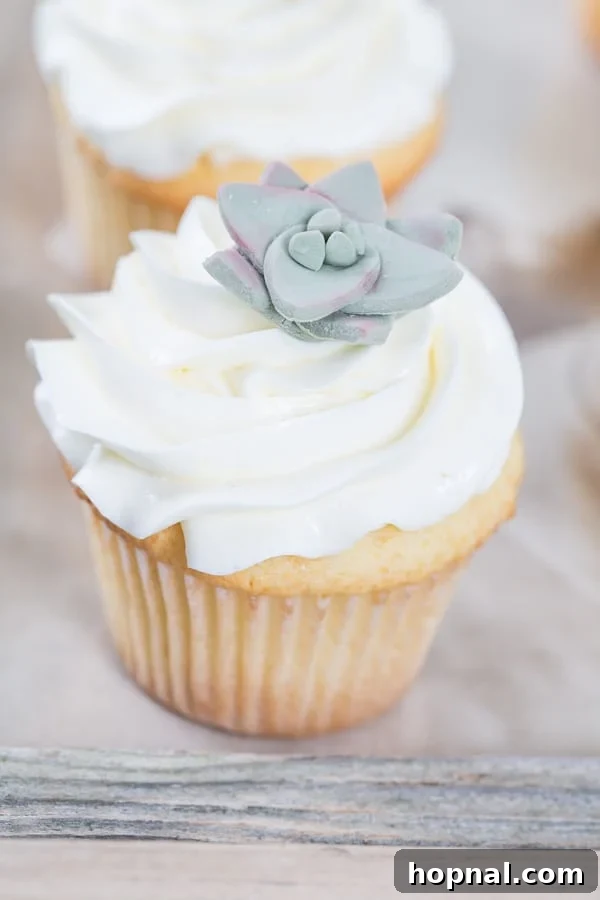
We hope this guide inspires you to create your own beautiful edible succulent cupcake toppers. If you’ve tried these DIY cupcake toppers or any other projects from our site, please share your experience! We’d love for you to rate this project and let us know how your creations turned out in the comments below.
For more delicious recipes, inspiring party ideas, and delightful desserts, be sure to FOLLOW US on FACEBOOK, INSTAGRAM, and PINTEREST!
5 from 1 vote
DIY Cupcake Toppers
Eden
24
succulents
Print Recipe
Ingredients
- Gumpaste and fondant
- Green dye in Juniper
- Luster Dust in Poppy Red by Linnea’s
- Paint brush
- Rolling Pin
- Balling tool
- Leaf cutouts, two sizes
- X-Acto Knife
- Egg carton to let the succulents dry
Instructions
-
Mix gumpaste, fondant and green dye. Blend together with hands.
-
Roll the fondant out to 1/4 inch thick and cut out 8 leafs. 4 small and 4 large.
-
Create a “glue” using a pea size piece of gumpaste and 1/4 cup water.
-
Take the balling tool and smooth out the rounded side on the leaf to form a base so the leaves fit together easily.
-
Dab some gumpaste “glue” in the middle of the base of the leaves.
-
Layer the large leaves on top of each other in opposite directions and then stagger the small ones on top, but fan them out a little.
-
When all of the leaves are attached, pinch the middle to secure them.
-
Create a tiny cone out of fondant and cut it in half with an X-Acto knife. Place it in the center of the succulent with the glue. Then make a few more to place in the center as well.
-
Once the gumpaste adhesive has dried, dust the edge of each succulent with some poppy red luster dust.
-
Don’t forget to wrap your fondant in plastic wrap when you’re not using it so it doesn’t dry out!
Like this? Leave a comment below!