
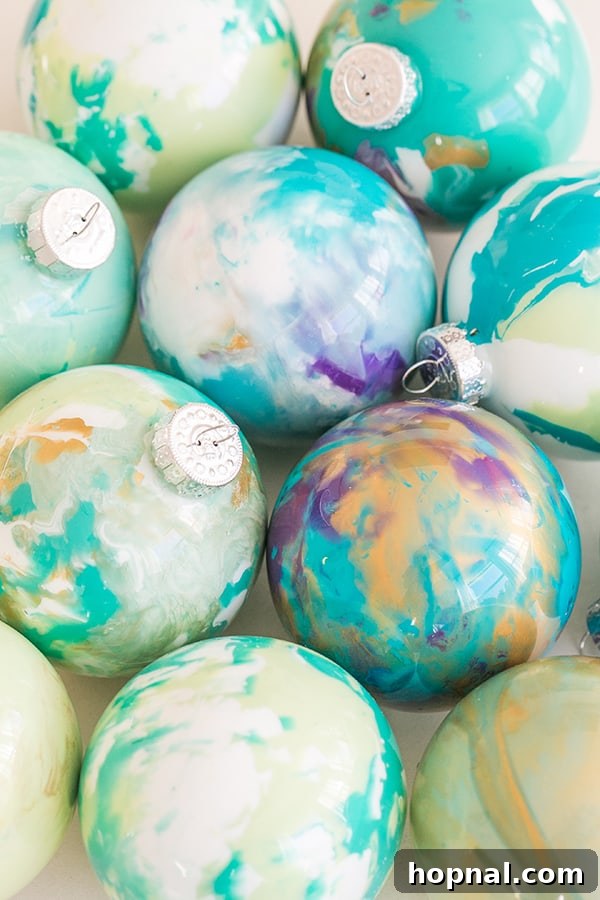
DIY Marbled Christmas Ornaments: A Festive Family Craft
There’s an undeniable charm to homemade Christmas ornaments, especially when they boast a unique, artistic flair. This holiday season, why not gather the family and dive into the delightful world of marbling to create your own stunning Christmas tree decorations? Our DIY marbled ornaments are not only beautiful and festive but also incredibly simple to make, making them a perfect crafting project for all ages.
Marbling projects have captivated crafters with their elegant, swirling patterns, and we’ve successfully adapted this technique to transform ordinary clear ornaments into personalized treasures. After experimenting with various methods, we discovered that the easiest and most effective approach involves just a few simple materials: clear glass ornaments, a selection of vibrant enamel paints, and a touch of water. The results are truly eye-catching, adding a bespoke touch of color and sophistication to your holiday display. Get ready to unleash your creativity and craft some unforgettable memories!
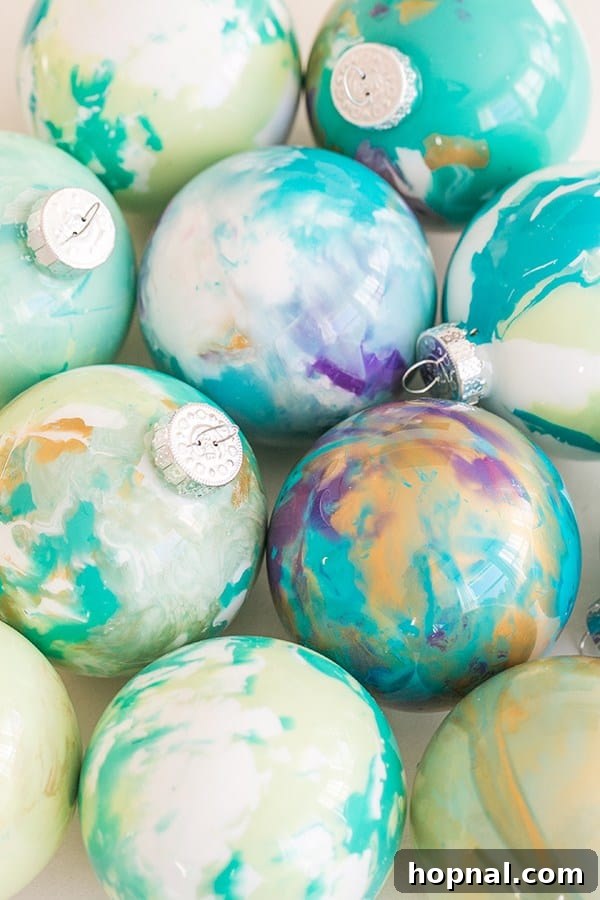
Why Choose Marbled Ornaments for Your Holiday Decor?
In a world saturated with mass-produced decorations, there’s something truly special about displaying ornaments crafted with love and personal touch. Marbled ornaments offer a distinctive aesthetic that stands out on any Christmas tree or in any festive arrangement. Unlike intricate hand-painted designs that can be time-consuming and require advanced artistic skills, marbling allows for gorgeous, intricate patterns to emerge with minimal effort. Each ornament becomes a unique work of art, reflecting the fluid movement of colors without the need for painstaking detail.
These DIY ornaments are more than just decorations; they are keepsakes that hold the memories of family crafting sessions. Imagine pulling out these beautiful creations year after year, reminiscing about the fun you had making them. They infuse your home with a sense of warmth, nostalgia, and genuine holiday spirit that store-bought items simply cannot replicate. Plus, they make fantastic personalized gifts for friends and loved ones, showcasing your thoughtfulness and creativity.

Crafting Your Own Marbled Christmas Ornaments: A Step-by-Step Guide
Creating these charming marbled ornaments is a straightforward process that yields impressive results. Follow these detailed steps to bring your vision to life and add a touch of handmade elegance to your Christmas festivities.
Materials You’ll Need:
- Clear glass ornaments (various shapes and sizes work well)
- Enamel paint (crucial for adhesion and durability on glass)
- Small amount of water
- Wooden skewer sticks or disposable stirrers
- Paper towels or old cloths
- Original packaging or a drying rack for ornaments
- Optional: Funnel for easier paint pouring
Detailed Instructions:
- Prepare Your Ornaments: Begin by swirling a small amount of water inside each clear glass ornament – approximately one tablespoon. Swirl it around gently to coat the interior, then completely dump the water out. This step helps clean the inside of the ornament from any dust or debris and can slightly prime the surface for better paint adherence. Ensure the ornament is as dry as possible after this step.
- Introduce the Enamel Paint: Carefully pour your chosen enamel paint directly into the ornament. Start with one color, then add a second, or even a third, for a multi-layered marbled effect. Don’t overfill; a little paint goes a long way. If using multiple colors, try not to mix them too much at this stage. Use a wooden skewer stick to gently guide the paint to different areas on the interior of the glass before you begin the marbling process. This initial spread helps create a base for the swirls.
- Master the Marbling Technique: This is where the magic happens! To get the paint to marble and blend beautifully, hold the ornament with your thumb or a paper towel covering the opening to prevent spills. Gently tap the ornament against the palm of your hand in a circular motion. This continuous, rhythmic tapping and swirling will cause the paint to spread, shift, and mix, creating those coveted marbled patterns. Continue until the entire inside surface of the ornament is coated with your desired design. Experiment with different tapping speeds and angles to achieve unique patterns.
- The Drying Process: Once you are satisfied with the marbled effect and the interior is fully coated, place the ornament back into its original plastic container, or a designated drying rack, with the opening facing upwards. This allows any excess paint to drip out and ensures proper air circulation for drying.
- Curing for Durability: Let the ornaments dry for a full 24 hours. During this drying period, it is important to periodically turn the ornament to different sides (every few hours for the first 8-12 hours). This prevents the enamel paint from settling too heavily in one area and ensures an even, durable coating across the entire interior surface. Full curing can take several days, so handle gently until completely dry.
Congratulations! You’ve just created beautiful, personalized marbled Christmas ornaments that will shine brightly on your tree for years to come. Be creative with your color combinations and enjoy the unique results!

Christmas Decorations to Make Yourself: Adding a Personal Touch to Your Home
Homemade Christmas decorations go far beyond just saving money; they inject soul and personality into your festive environment. Each piece tells a story, evokes a memory, and contributes to the unique ambiance of your holiday season. Crafting together as a family fosters bonding and creates cherished traditions that children will remember for a lifetime.
These lovely marbled ornaments are particularly effective at making a Christmas tree or an entire room “pop.” Their vibrant, swirling patterns catch the light beautifully, adding depth and visual interest that plain baubles often lack. The beauty of marbling lies in its effortlessness; you achieve stunning, intricate designs without the painstaking detail required for traditional hand-painting. This efficiency saves you time during the busy holiday season while still delivering gorgeous, bespoke decor.


Bringing Your Christmas Tree to Life: Tips for Decorating
The Christmas tree is often the centerpiece of holiday celebrations, and decorating it is a beloved annual tradition. Knowing when and how to set up your tree can enhance its beauty and longevity. For fresh trees, timing is key: they typically last about four weeks, so consider putting yours up the weekend after Thanksgiving. This schedule prevents the tree from drying out before Christmas Day arrives.
When placing a real tree, choose a cool spot away from heat sources like radiators, fireplaces, or direct sunlight, as heat accelerates drying. Always keep the tree stand filled with water to keep the tree fresh. If you opt for an artificial Christmas tree, you have more flexibility and can set it up any time in November. However, many still follow the tradition of putting it up the day after or the weekend of Thanksgiving, marking the official start of the festive season.
How To Decorate a Christmas Tree In a Few Simple Steps:
Once your tree is in place, these homemade Christmas ornaments will look fantastic, whether hung strategically throughout your living room or proudly displayed on your tree. Christmas trees instantly herald the arrival of the festive period. Here are some simple steps to help you decorate your tree easily and beautifully:
- Assemble the Tree: If you have an artificial tree, begin by assembling it according to the manufacturer’s instructions. For a real tree, secure it firmly in a sturdy tree stand filled with water.
- Fluff and Spread Branches: Take the time to gently spread out and shape each branch, ensuring a full, natural look. This step is crucial for both real and artificial trees to create a welcoming canvas for your decorations.
- Evenly Wrap the Lights: Start from the top and weave your lights around the tree, working downwards and inwards towards the trunk. For a dazzling effect, use approximately 100 lights per foot of tree height. Ensure an even distribution for consistent sparkle.
- Add the Core Baubles: Begin with your standard, larger baubles, distributing them evenly across the tree. These form the base of your decoration scheme and help fill out any gaps.
- Layer Some Color and Texture: Next, introduce your special ornaments, like your beautiful DIY marbled creations! Place them in prominent spots where they can truly shine. Add ribbons, garlands, or floral picks to introduce varying textures and colors, creating depth and visual interest.
- Place the Finishing Touches & Star on Top: Hang your most delicate or sentimental ornaments last. Finally, crown your tree with a magnificent tree topper – whether it’s a star, an angel, or a personalized ornament.
- Start Adding Presents Underneath: Once the tree is fully decorated, arrange your wrapped presents around the base. This completes the festive scene and builds anticipation for Christmas morning!

Top Tips for Perfect Homemade Marbled Christmas Ornaments
Achieving the best results with your marbled ornaments is easy with a few insider tips:
- Pre-clean with Water: Always swirl a little water into your ornaments and then dump it out completely before adding paint. This simple step helps remove any manufacturing residue or dust, ensuring a clean surface for your paint to adhere to.
- Utilize Skewers: Wooden skewers are invaluable for initially guiding the enamel paint around the inside of the ornament. They help spread the paint to different areas before you start the circular tapping motion, which ensures better coverage and more dynamic marbling patterns.
- Consistent Tapping: The key to beautiful marbling is consistent, gentle tapping. Don’t shake vigorously; instead, use a steady, circular motion against your hand to allow the paint to swirl and blend naturally.
- Mindful Drying: After coating, place your ornaments back in their box or on a rack with the opening facing up for initial drying. Crucially, turn the ornaments to different sides every few hours during the first 24-hour drying period. This prevents the paint from pooling at the bottom and ensures an even, smooth finish all around the interior.
- Patience is Key: Enamel paint needs time to fully cure and harden. While they might feel dry to the touch after 24 hours, handling them gently for a few days ensures the durability of your beautiful creations.

Explore More DIY Christmas Ideas
The spirit of DIY crafting doesn’t have to end with these beautiful marbled ornaments! If you’re looking to further personalize your holiday season with handmade touches, explore these other fantastic Christmas project ideas:
- Elevate Your Christmas Living Room Decor
- Create a Modern Christmas Wreath and Garland
- Craft Charming Origami Christmas Trees
- Design Your Own DIY Floral Christmas Ornaments
Each project offers a unique way to infuse your home with festive cheer and personal style. Happy crafting!
If you’ve tried making these homemade Christmas ornaments, or any other wonderful project from our blog, please take a moment to rate it and share your experience in the comments below! Your feedback and creations inspire us and our community. You can also FOLLOW ME on FACEBOOK, INSTAGRAM, and PINTEREST to discover more delightful, family-friendly craft ideas and inspiration.

Homemade Marbled Christmas Ornaments
5 minutes
30 minutes
1 day
1 day 35 minutes
24
ornaments
Eden
Ingredients
- Clear glass ornaments
- Enamel paint (various colors for marbling)
- Wooden skewer sticks
- Water
Instructions
-
Swirl about a tablespoon of water inside each clear glass ornament, then completely dump it out. This helps clean the interior.
-
Carefully pour enamel paint (one or more colors) into the ornament. Use wooden skewer sticks to gently guide the paint to different areas on the glass before marbling begins.
-
To achieve the marbled effect, hold the ornament with a finger or paper towel over the opening and gently tap it against your hand in a circular motion. Continue until the entire inside surface is coated with the marbled pattern.
-
Once the inside is fully coated, place the ornament back in its plastic container or on a drying rack, with the opening facing up, to dry.
-
During the initial 24-hour drying period, turn the ornament to different sides a few times to prevent the paint from settling in one area and ensure an even, smooth finish. Allow sufficient time for the enamel paint to fully cure.
Notes