
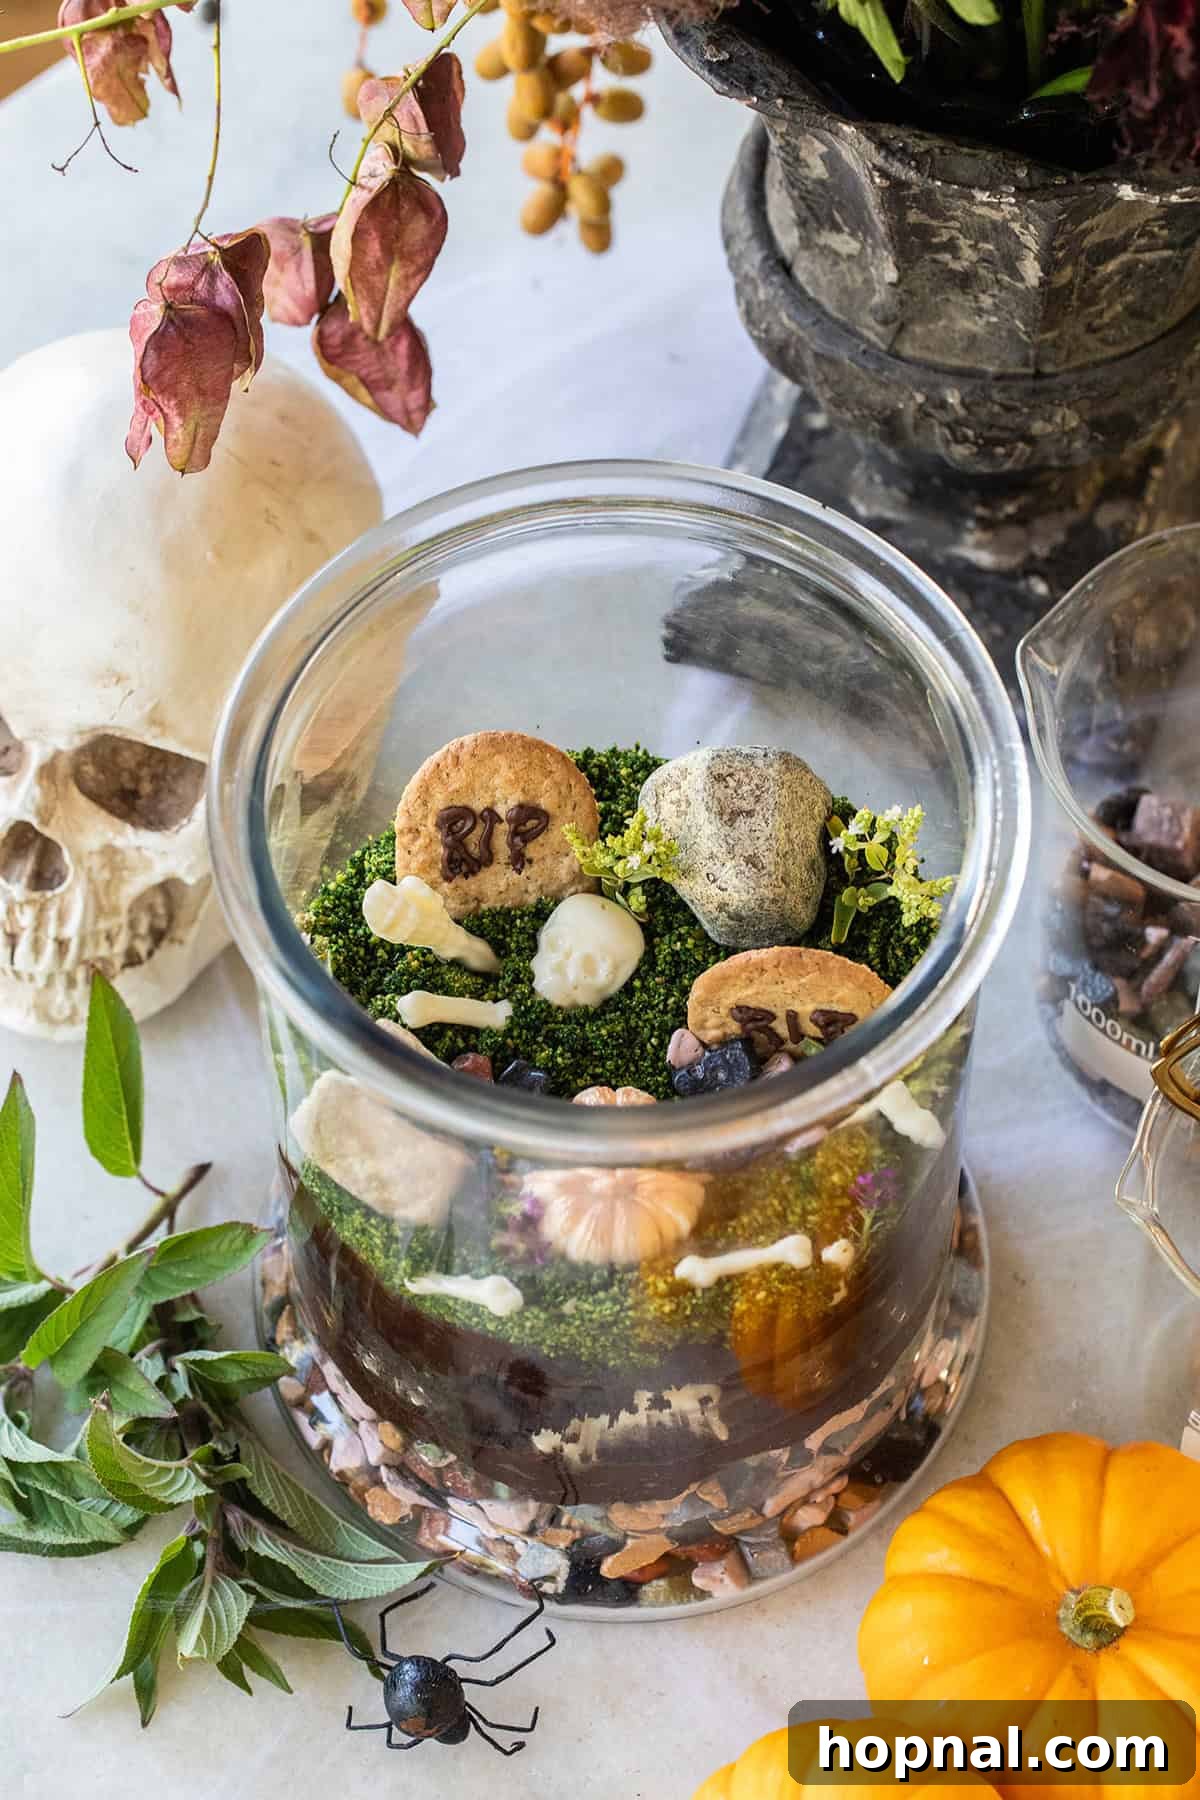
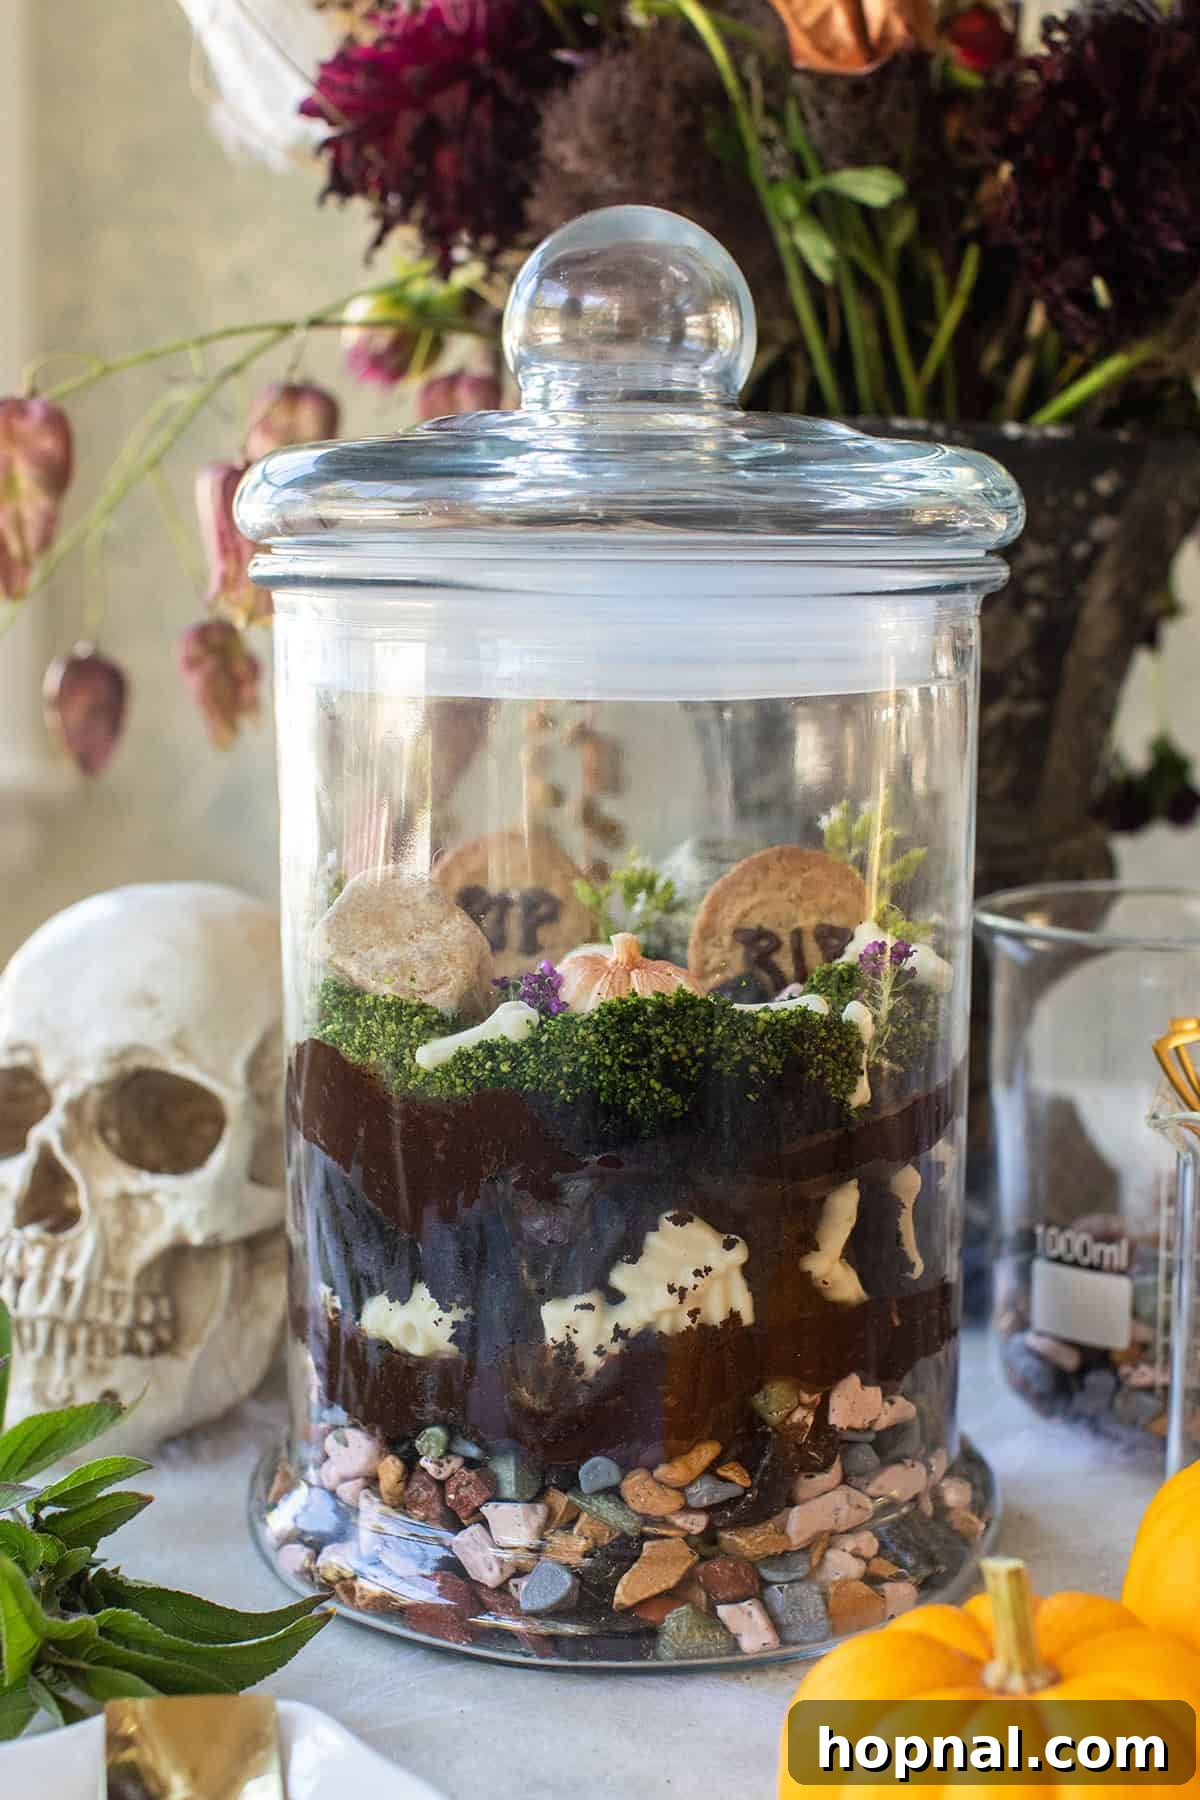
This edible Halloween terrarium is more than just a dessert; it’s a show-stopping centerpiece that promises to be the talk of any large gathering! Imagine a miniature haunted landscape, meticulously crafted with layers of rich, crumbled chocolate cake, glistening candy rocks, and eerie green-dyed cookie moss. This creative concoction brings to life a spooky cemetery scene, complete with towering edible gravestones and chillingly realistic hidden chocolate bones. It’s the perfect blend of gothic charm and delicious indulgence, guaranteed to mesmerize your guests.
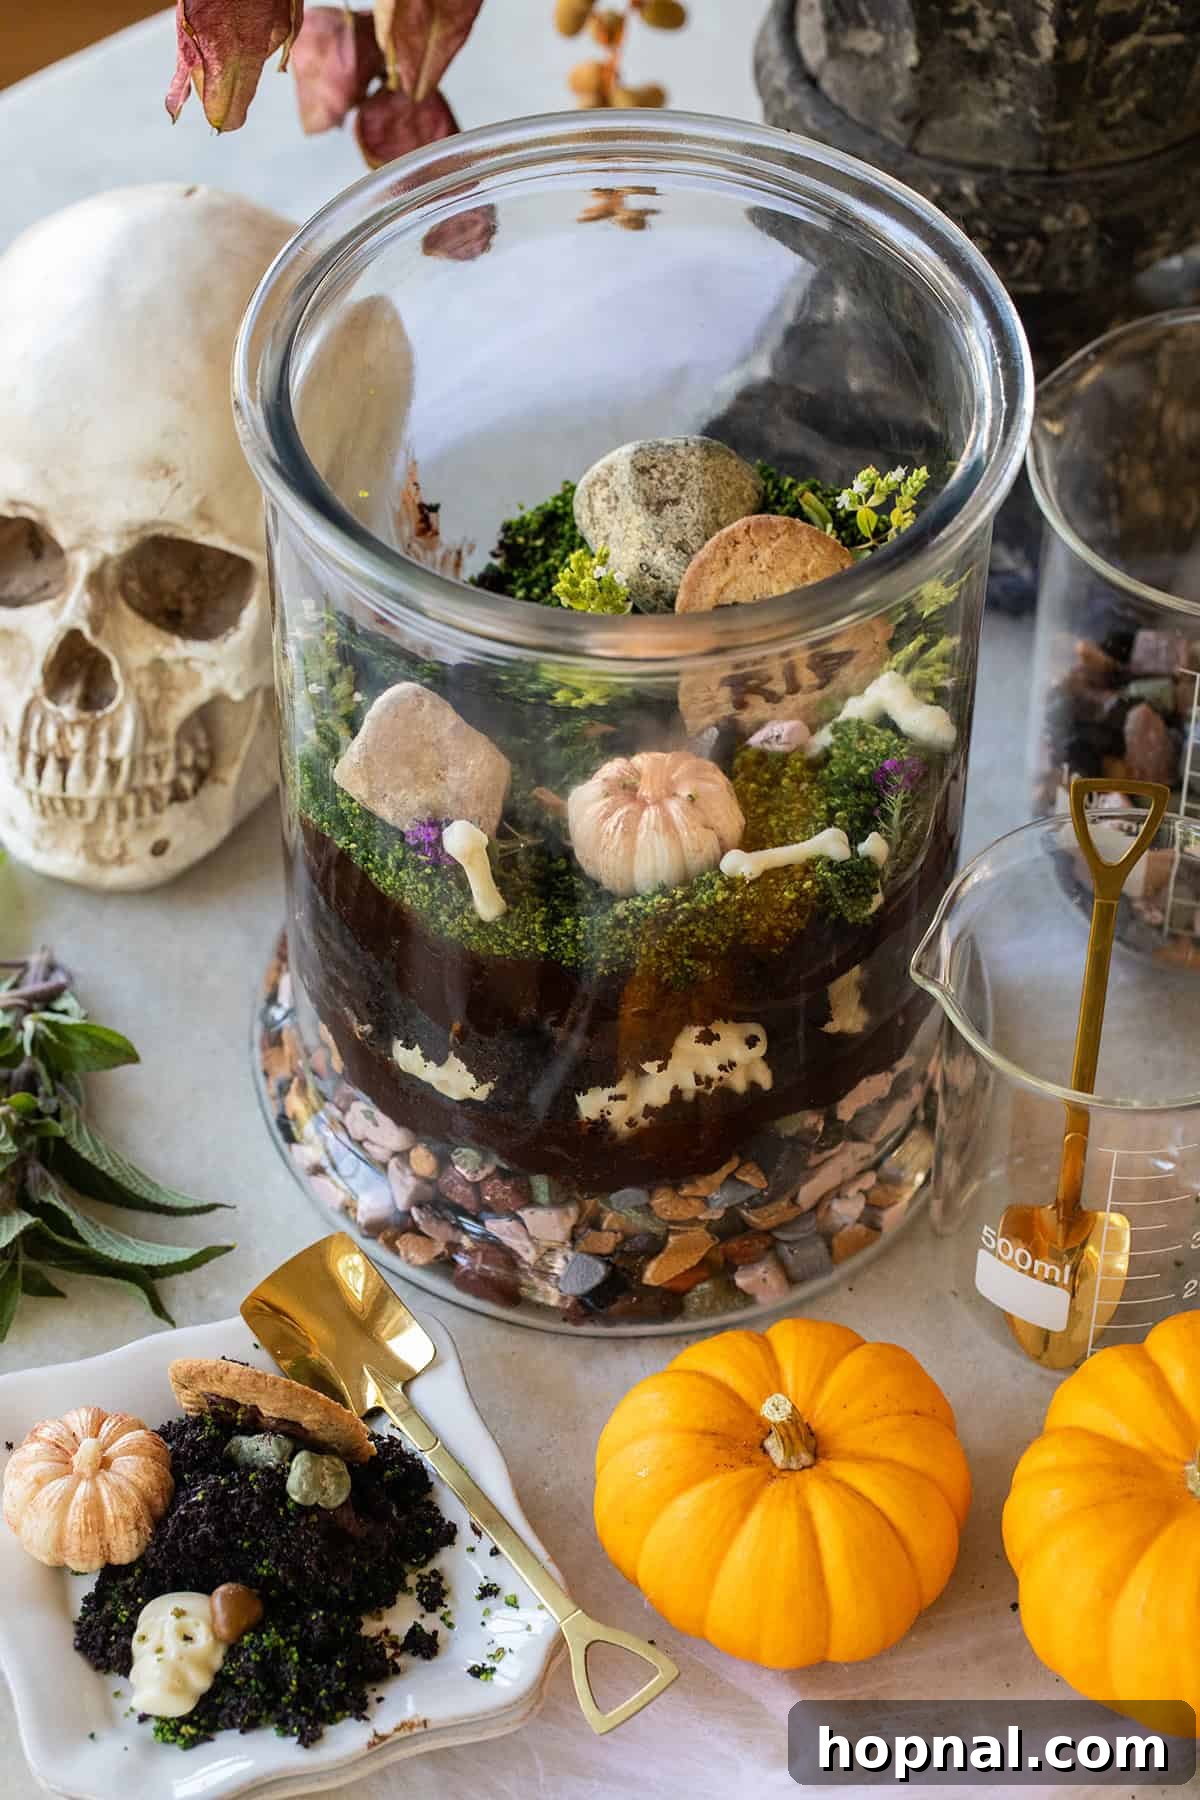
Not only is this spooky creation a visual masterpiece, designed with intricate details like realistic candy rocks and delightful chocolate cake crumbles, but it’s also completely edible and generously serves up to 18 people. This makes it an ideal solution for feeding a crowd while simultaneously providing a captivating conversation starter for any Halloween gathering or themed party. Get ready for compliments and eager requests for the recipe!
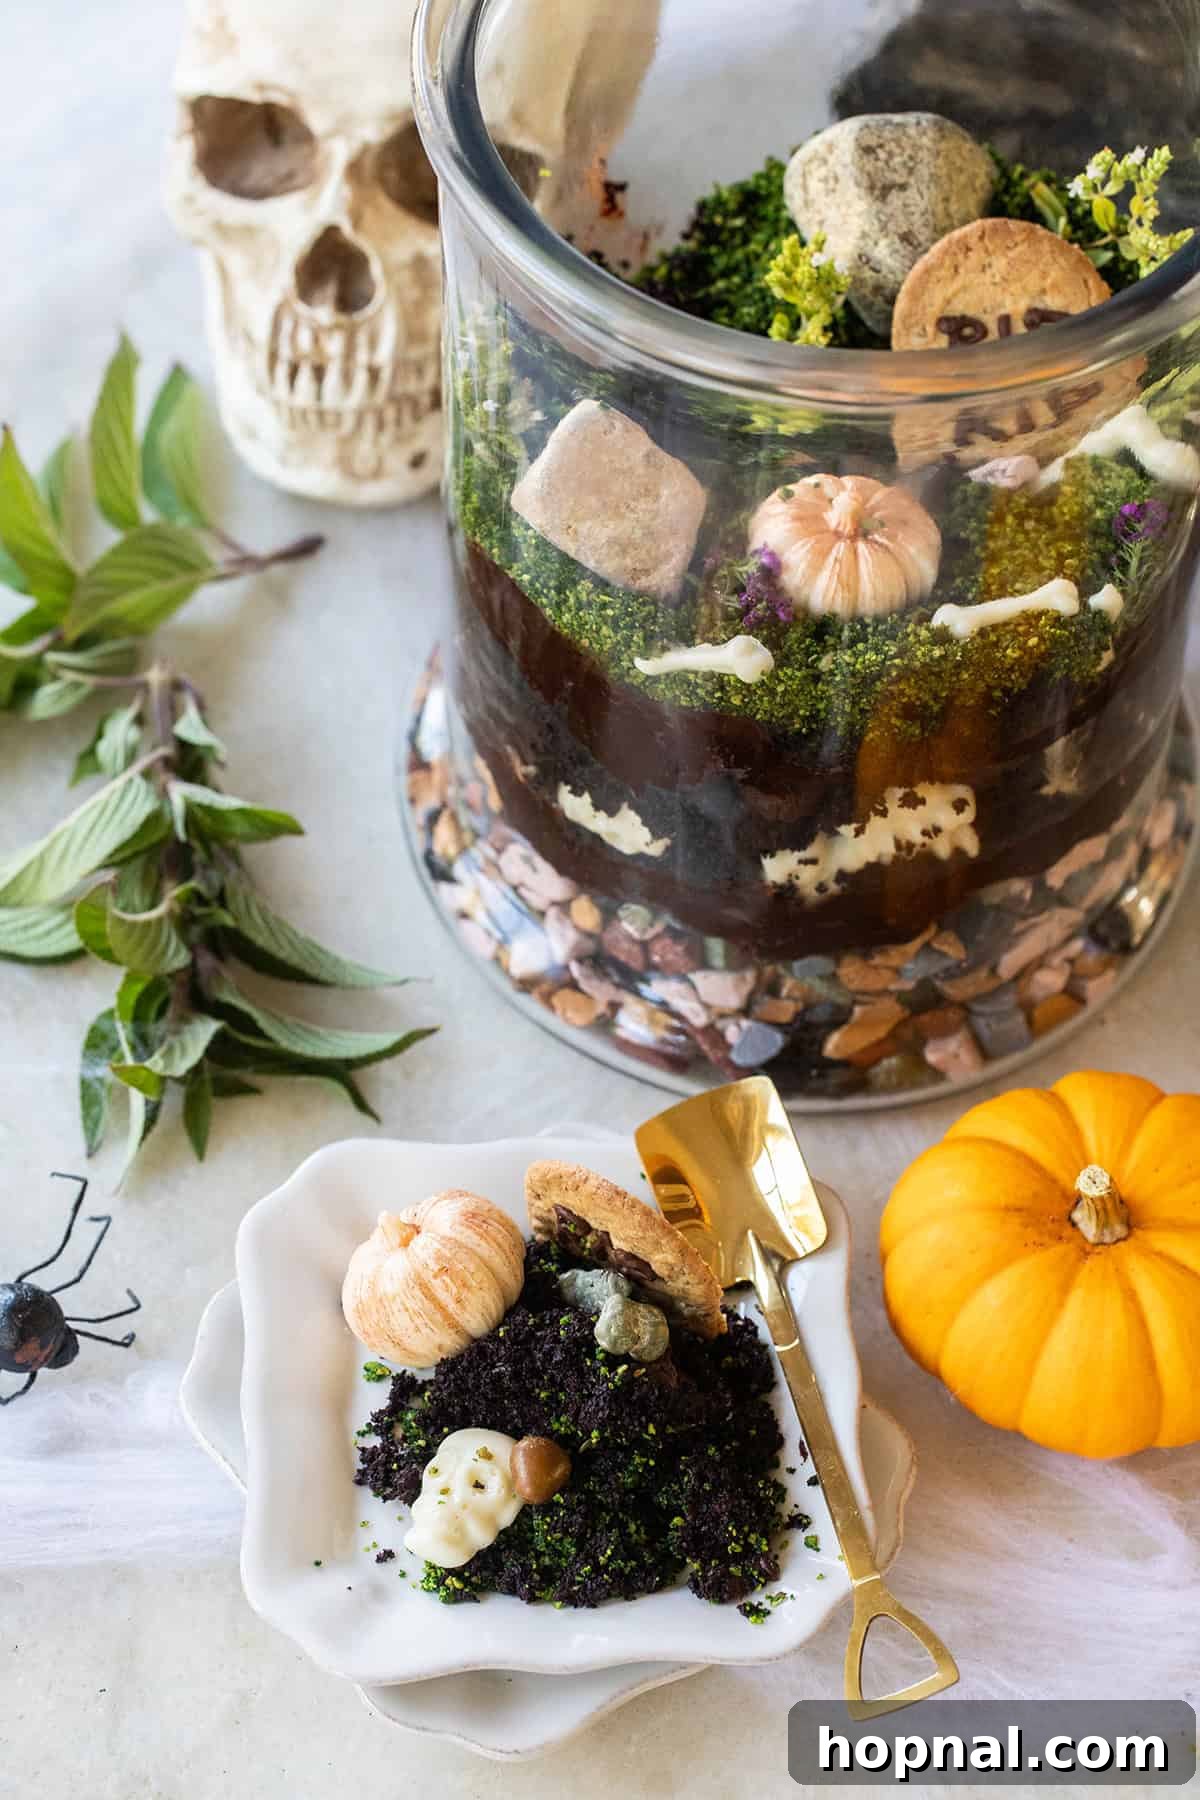
For the best flavor experience, I highly recommend using a rich, homemade chocolate cake recipe and pairing it with a decadent sour cream chocolate frosting. The moistness of the cake combined with the creamy frosting and crunchy elements creates an exquisite taste sensation. However, for convenience, a high-quality boxed cake mix and store-bought frosting work wonderfully too, allowing you to focus more on the creative assembly. Serving this delightful dessert is half the fun; guests love “digging in” with charming gold shovel spoons, which always get a fantastic reaction!
Why This Edible Terrarium is the Ultimate Halloween Treat
This extraordinary Halloween dessert transcends typical party fare, serving as both a delicious treat and a stunning decorative element. Its unique appeal makes it an absolutely unforgettable addition to your Halloween festivities, creating a memorable experience for everyone.
- A Feast for the Eyes and Palate: Unlike a simple cake, this terrarium offers a captivating visual display that will draw every eye. The intricate layers and spooky details transform it into a piece of edible art. From the moment your guests see it, they’ll be intrigued, and upon tasting, they’ll be delighted by the incredible combination of textures and flavors – from the satisfying crunch of candy rocks to the moist, rich chocolate cake. It’s a sensory experience that will have everyone coming back for seconds, and even thirds!
- Feeds a Crowd Effortlessly: Designed with larger gatherings in mind, this terrarium is inherently generous, easily serving up to 18 people. This eliminates the need for multiple smaller desserts, streamlining your party planning and ensuring all your guests get a substantial, satisfying slice of spooky fun.
- Interactive and Engaging: The very act of serving this terrarium is an experience. Guests can delight in “excavating” the layers, discovering hidden bones and gravestones. It encourages interaction and provides a unique talking point, making your party more lively and memorable.
- Customizable Creativity: Whether you’re a seasoned baker or a novice, this recipe offers immense flexibility. You can unleash your creativity with the decorations, personalizing the spooky scene to perfectly match your Halloween theme. It’s a wonderful project for involving kids too, letting them add their own creepy touches.
Essential Ingredients for Your Spooky Halloween Terrarium
Crafting this edible masterpiece requires a thoughtful selection of components that not only taste delicious but also contribute to its realistic, eerie aesthetic. Here’s a detailed look at the ingredients you’ll need:
- Chocolate Candy Rocks & Boulders (approximately 3 cups): These small, irregular chocolate candies are absolutely essential for mimicking natural pebbles and stones. They form the gritty “gravel” layer at the base of your terrarium and add a delightful, unexpected crunch with every bite. Look for varieties with varied sizes and colors to enhance realism.
- One 9-by-13-inch Chocolate Cake (crumbled): The foundation of your edible landscape, this cake is crumbled to perfectly resemble rich, dark soil or dirt. Its moist texture is key to the dessert’s deliciousness, and it serves as the main edible “terrain” where all your spooky elements will reside.
- One Package Digestive Biscuits (or similar plain cookies, like Belvita): These cookies are the secret to creating realistic, mossy patches. When crushed and combined with green food coloring, they transform into a vibrant, earthy “moss” that adds both visual appeal and a unique texture to your haunted scene.
- Neon Green Food Coloring (2-3 tablespoons, or to desired shade): A few drops of this vibrant food coloring are crucial for tinting your crumbled digestive biscuits. It creates the illusion of lush, eerie moss or algae, giving your edible landscape an authentic and vibrant, yet spooky, green hue.
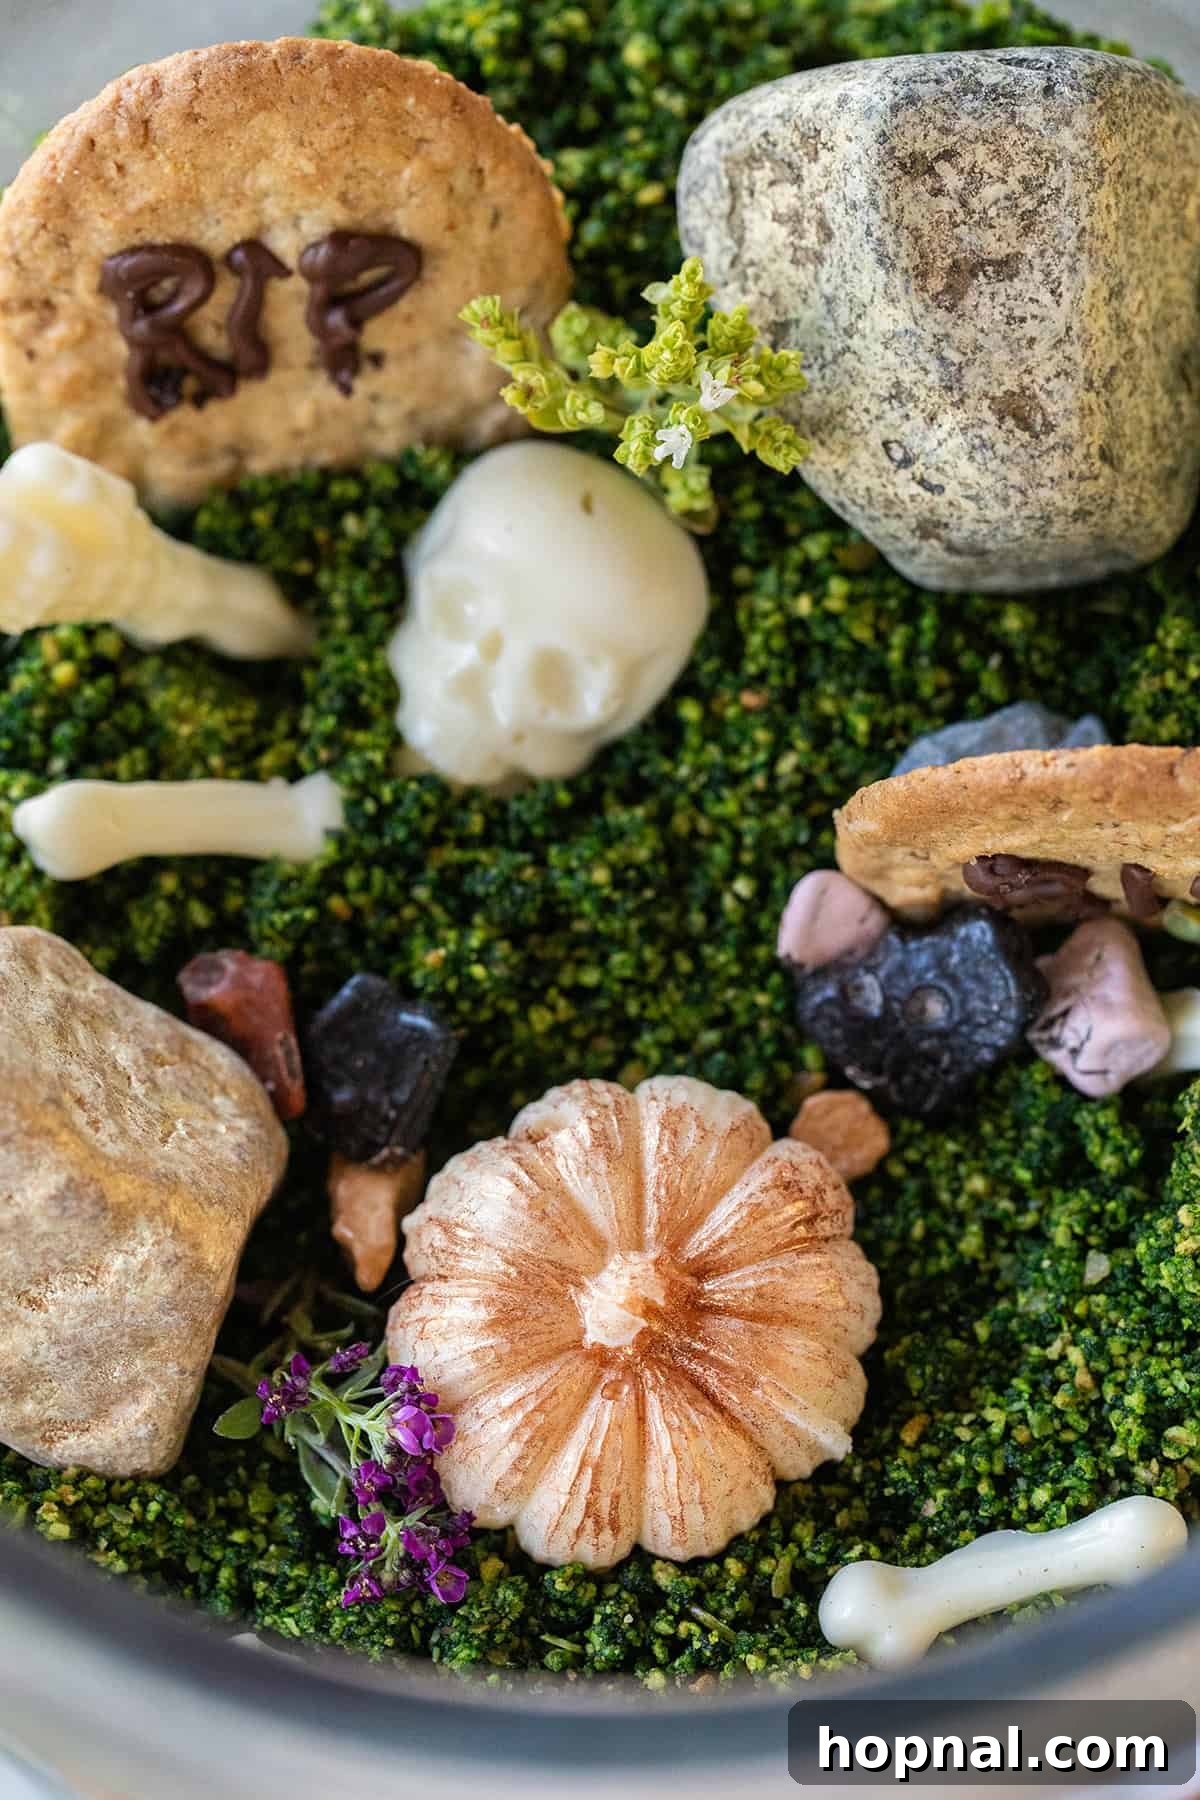
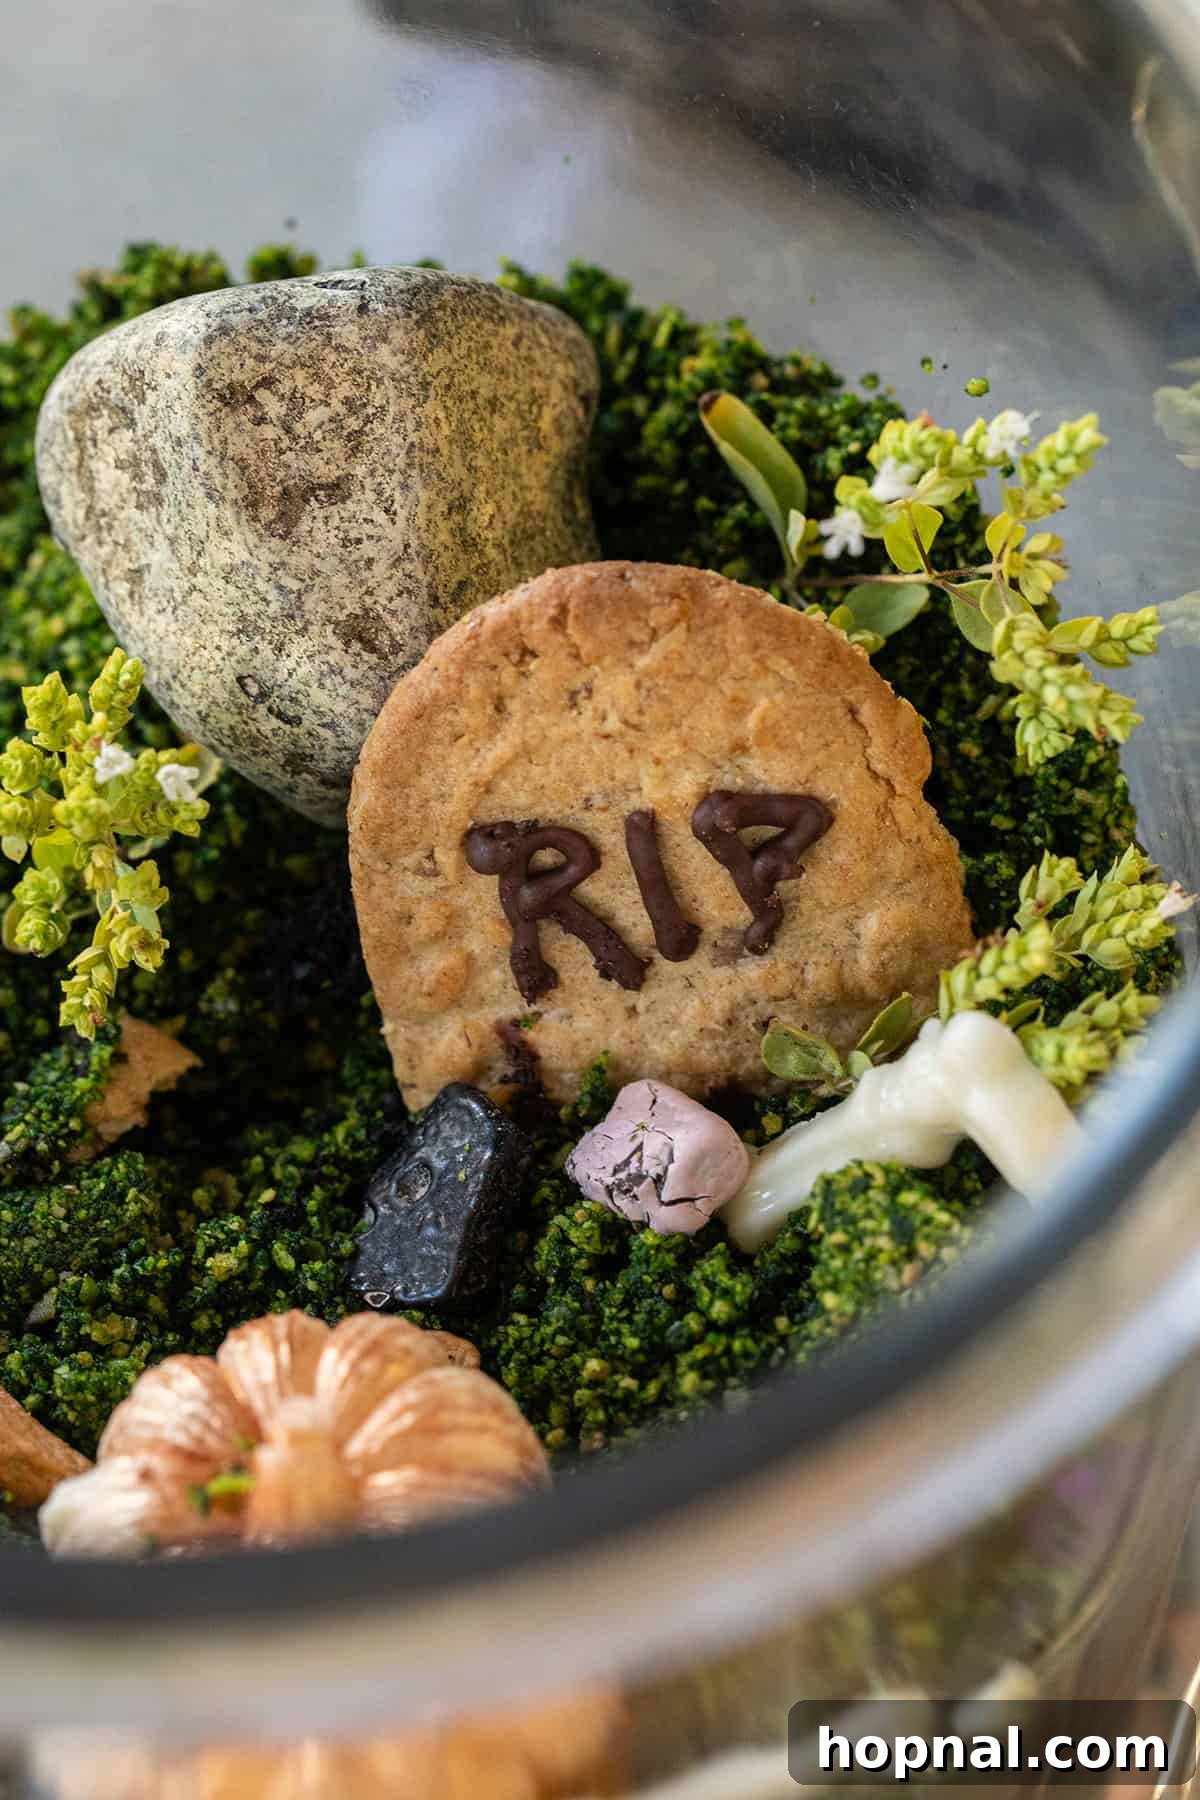
- Ladyfinger Cookies (1-2 packages, for Gravestones): These delicate, elongated cookies are perfect for fashioning into edible gravestones. Their shape and slightly firm texture make them ideal for standing upright in your terrarium. You can easily personalize them by writing “RIP,” “Boo,” or other spooky messages with icing or melted chocolate, transforming them into chilling cemetery markers.
- Rich Chocolate Frosting (approximately 1.5 cups): More than just a flavor enhancer, the chocolate frosting plays a vital role in binding the layers of your terrarium together. It adds a luxurious richness between the crumbled cake layers, creating a cohesive structure and an even more decadent taste. You can use homemade or a high-quality store-bought option.
- Chocolate Pumpkins (store-bought or homemade, 6-10 small ones): These festive, miniature pumpkins provide a quintessential fall and Halloween touch to your edible scene. They can be strategically placed around the “cemetery” for decorative flair, offering a sweet, chocolatey burst of flavor that complements the cake perfectly.
- White Candy Melts or White Chocolate (4 ounces) & Skeleton Bone Mold: Essential for crafting realistic, eerie skeleton bones. Melt the candy melts or white chocolate and pour it into a bone-shaped silicone mold (similar to this one). They harden quickly, making it easy to produce a collection of bones to scatter throughout your terrarium, creating a truly spine-chilling effect.
- Fresh Herbs (a few sprigs of Thyme or Rosemary): These herbs are used sparingly to create a spooky, forest-like atmosphere. Their delicate branches resemble tiny, gnarled trees or bushes, adding an organic, aromatic touch and enhancing the illusion of a miniature haunted woodland. (Ensure they are clean and visually appealing, and inform guests to remove before eating if they prefer not to consume them.)
Expert Tips for Crafting Your Perfect Edible Halloween Terrarium
Creating a truly memorable edible terrarium is all about thoughtful planning and creative execution. Here are some expert tips to help you achieve a stunning and delicious result:
- Choose the Right Vessel: The success of your terrarium starts with the container. Opt for a large, tall glass jar, a wide fishbowl, or even a deep trifle dish. A clear container is crucial to showcase all those beautiful, eerie layers. Ensure it has a wide opening for easy layering and serving. The larger the vessel, the more dramatic your display will be, making it highly visible from all angles.
- Master the Art of Layering: Don’t rush the layering process. Alternate between cake crumbles, frosting, and candy rocks. For an extra rich taste and visual appeal, consider adding a thin layer of chocolate ganache or a contrasting-colored frosting (like green or orange) between some of the layers. This adds depth and makes each spoonful an adventure.
-
Embrace Custom Decorations: This is where your creativity truly shines! Beyond the basic gravestones and bones, feel free to customize your terrarium with other edible decorations. Consider adding:
- Gummy worms or candy centipedes crawling out of the “dirt.”
- Tiny candy spiders or plastic spider rings (remove before eating) perched on the moss.
- Edible glitter for a magical, spooky shimmer over the “moss.”
- Mini candy corn or candy eyeballs peeking from the cake layers.
- Fondant ghosts or bats for added whimsy.
- Preparation is Key (Mise en Place): Before you start assembling, prepare all your components. Crumble the cake, crush the cookies, melt and mold the bones, and have all your decorative elements ready. This will make the assembly process smooth, enjoyable, and prevent any last-minute stress.
- Chill for Stability: Once assembled, lightly chill your terrarium for at least an hour. This allows the frosting to firm up slightly, helping the layers settle and preventing any shifting, especially if you plan to transport it.
- Serving with Flair: As mentioned, gold shovel spoons are a huge hit! Small dessert plates or bowls are ideal for serving individual portions. You can also offer a variety of toppings like whipped cream, extra sprinkles, or a drizzle of chocolate sauce on the side for guests to customize their dessert.
- Dietary Considerations: If hosting a diverse group, consider offering a small, separate mini-terrarium with gluten-free or dairy-free alternatives if possible, ensuring everyone can enjoy a spooky treat.
How to Craft Your Own Edible Halloween Terrarium: Step-by-Step Guide
Creating this captivating edible Halloween terrarium is a fun and rewarding process. Follow these detailed steps to bring your spooky vision to life:
Recipe Instructions
- Prepare Your Chocolate Cake: Begin by baking your 9-by-13-inch chocolate cake. You have the flexibility to use either your favorite homemade chocolate cake recipe for a truly gourmet touch or a convenient boxed cake mix if you’re short on time. A smart tip for efficient party prep is to bake the cake a few days in advance and freeze it. When you’re ready to assemble, simply let it thaw completely at room temperature. Once thawed, crumble the entire cake into fine, uniform pieces. These crumbles will serve as the rich, dark “dirt” for your terrarium, forming the bulk of your edible landscape.
- Fashion the Spooky White Chocolate Bones: While your cake is baking or thawing, it’s time to create the eerie skeleton bones. Carefully melt your white chocolate or white candy melts according to package directions (typically in a microwave or double boiler). Once smooth and fluid, pour the melted chocolate into a bone-shaped silicone mold. Allow the chocolate to set completely, either at room temperature or by refrigerating for a quicker process. These hardened white chocolate bones will add a chillingly realistic element to your edible cemetery scene.
- Create the Vibrant Green “Moss”: In a food processor, combine the digestive biscuits (or Belvita cookies) with a few drops of neon green food coloring. Pulse the mixture until the cookies are finely crumbled and have achieved a texture that closely resembles damp moss. The vibrant green hue and crumbly texture will provide a realistic and slightly eerie mossy layer, perfect for topping your terrarium.
- Assemble Your Ingredients (Mise en Place): Before you begin the actual layering, gather and prepare all your ingredients. This crucial step ensures a smooth and efficient assembly process. Have your crumbled cake, crushed green cookies (“moss”), finished chocolate bones, chocolate frosting, candy rocks, ladyfinger “gravestones,” chocolate pumpkins, and fresh herbs all neatly organized and within reach. This will allow for fast, creative layering without interruptions.
- Lay the Rocky Foundation: Begin assembling your terrarium by adding approximately 3 cups of chocolate candy rocks to the bottom of your chosen tall glass jar or container. Spread them evenly to create a solid, gravel-like foundation. This initial layer provides visual depth and a satisfying crunch from the very first scoop.
- Build the First Layer of “Dirt” and Frosting: Next, carefully add a generous layer of your crumbled chocolate cake over the candy rocks. Gently press the cake crumbles down to create a relatively firm and even base. Then, spread a thick, smooth layer of rich chocolate frosting over the cake. This not only adds delicious flavor and moisture but also helps to secure the subsequent layers.
- Integrate the Hidden Bones: Now for the truly spooky part! Take the white chocolate bones you prepared earlier and carefully slide them into the cake “dirt” layer, positioning them near the glass edges. Arrange them so they are partially visible from the outside of the terrarium, creating a chilling effect as if ancient bones are eerily peeking through the soil.
- Continue Layering for Depth: After positioning your bones, add another generous layer of crumbled chocolate cake, followed by another layer of chocolate frosting. Repeat this layering process until you’ve used most of your cake and frosting, ensuring each layer is distinct yet harmonious. The multiple, visible layers will create an impressive visual depth and promise a decadent flavor profile when served.
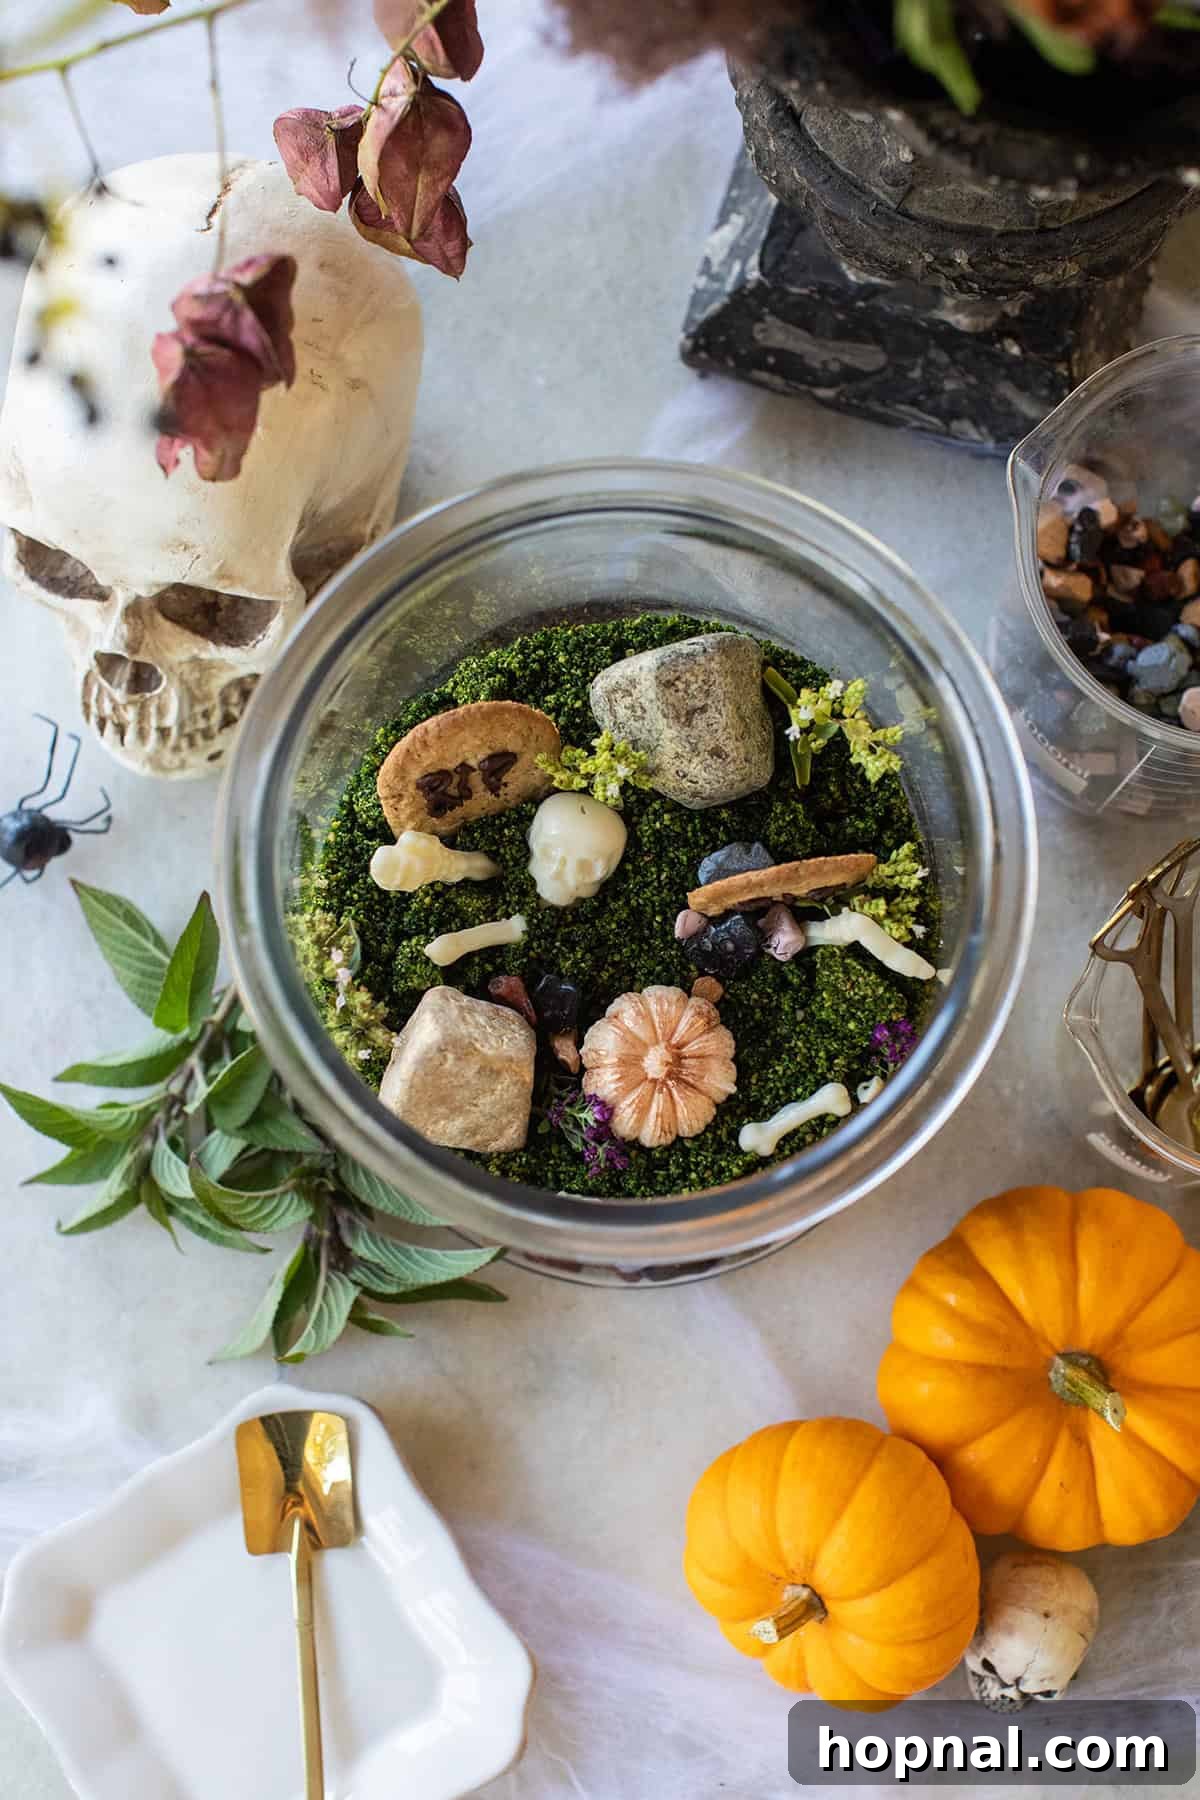
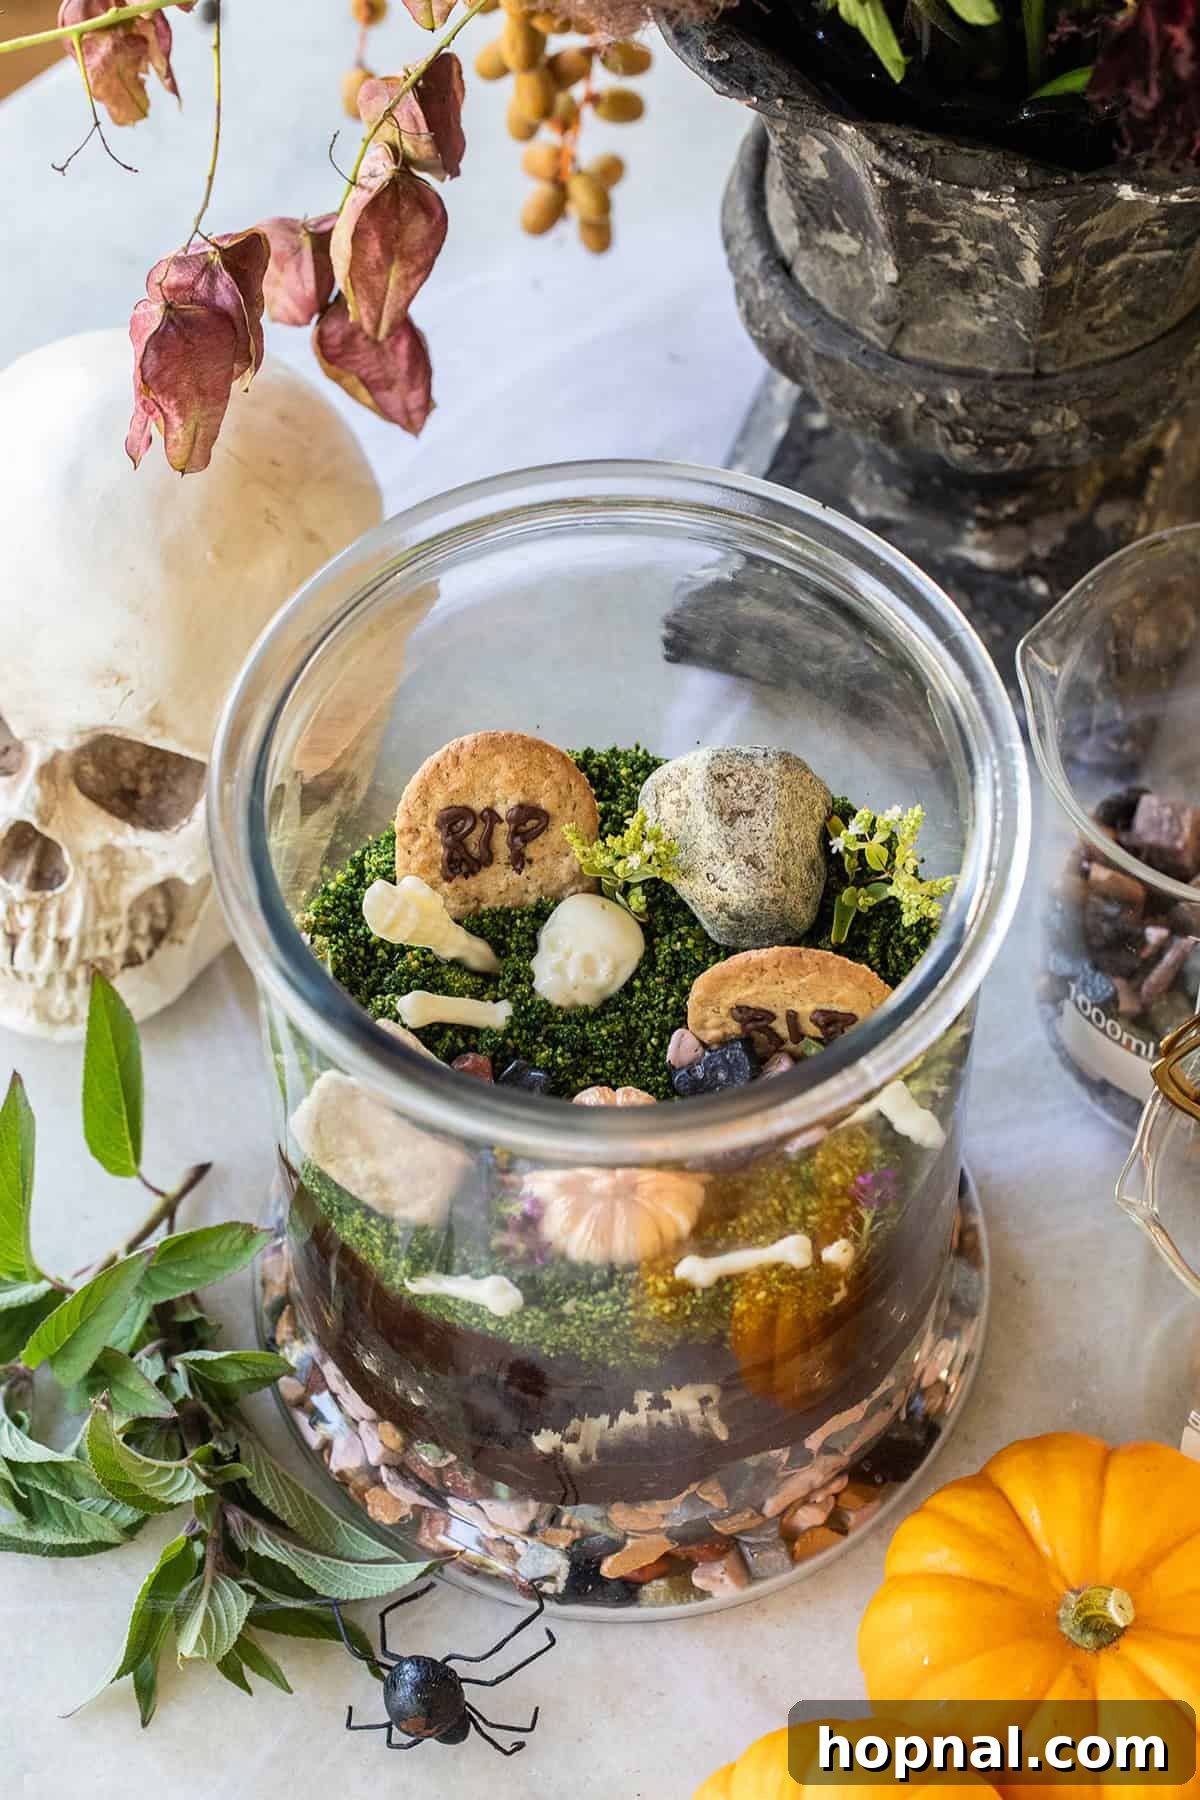
- Decorate the “Cemetery” Surface: Finally, it’s time to bring your cemetery scene to life. Generously sprinkle the vibrant green “moss” over the top layer of chocolate cake and frosting, gently pressing it down to adhere. Carefully insert your ladyfinger “gravestone” cookies (decorated with “RIP” or other spooky messages) into the moss layer. Artfully scatter a few more candy rocks, chocolate bones, and any small chocolate pumpkins across the surface. For an extra touch of realism, tuck in sprigs of fresh herbs like thyme or rosemary to mimic miniature, gnarled trees, completing your hauntingly beautiful Halloween terrarium.
Your stunning edible Halloween terrarium is now complete and ready to be displayed! The intricate layers of candy rocks, chocolate cake, and eerie decorations will create a breathtaking centerpiece, and guests will be absolutely thrilled to dig into this incredible, spooky dessert.
More Spooktacular Halloween Desserts You’ll Love
If you enjoyed crafting and devouring this edible terrarium, you’re sure to love these other creative and delicious Halloween treats. Explore more ways to make your holiday festivities unforgettable:
- Halloween Dirt Cups: A classic spooky treat, perfect for individual servings and customizable with gummy worms.
- Marbled Candy Apples: Elevate traditional candy apples with a stunning, swirled design.
- Mummy Rice Krispie Treats: Easy to make and incredibly adorable, these mummified treats are always a hit.
- Witch Finger Pretzels: Creepily realistic and deliciously sweet and salty, these are fun for all ages.
- Black Velvet Cupcakes: A sophisticated yet spooky dessert, perfect for adding a touch of elegance to your Halloween spread.
Don’t forget to let me know if you create this incredible edible Halloween terrarium! Share your spooky masterpiece and leave a comment below—I’d love to hear about your experience!
You can also FOLLOW ME on FACEBOOK, INSTAGRAM, and PINTEREST to discover more delicious recipes, creative cocktails, enchanting desserts, and inspiring party ideas!
Edible Halloween Terrarium Recipe
This edible Halloween terrarium combines layers of crumbled chocolate cake, candy rocks, and green-dyed cookie moss to create a spooky cemetery scene. Complete with edible gravestones and hidden chocolate bones, it’s the perfect Halloween dessert for large gatherings.
Prep Time: 20 minutes
Cook Time: 30 minutes
Assembly Time: 15 minutes
Total Time: 1 hour 5 minutes
Servings: 16 people
Ingredients
- 3 cups chocolate candy rocks
- 1 (9×13 inch) chocolate cake (homemade or boxed mix)
- 14 ounces digestive biscuits (or ladyfinger cookies, for gravestones and moss)
- 1 1/2 cups chocolate frosting
- 4 ounces white chocolate (or white candy melts)
- 2 tbsp neon green food coloring (adjust as needed for desired moss color)
- Fresh herbs (e.g., thyme, rosemary, for decoration)
- Candy pumpkins (for decoration)
Instructions
- Bake the Chocolate Cake: Bake your 9×13-inch chocolate cake according to your chosen recipe or package directions. Once cooled, crumble it completely into fine pieces. For best results, you can bake and freeze the cake ahead of time, then thaw before crumbling.
- Make White Chocolate Bones: Melt the white chocolate or candy melts in a microwave-safe bowl or double boiler. Pour the melted chocolate into a bone-shaped silicone mold and allow it to harden fully.
- Prepare Green “Moss”: In a food processor, combine the digestive biscuits (or plain cookies) with neon green food coloring. Pulse until the cookies are finely crumbled and resemble bright green moss.
- Organize Ingredients: Ensure all your components are prepared and ready for assembly: crumbled cake, green moss, chocolate bones, frosting, candy rocks, gravestone cookies (ladyfingers), chocolate pumpkins, and fresh herbs.
- Create the Base Layer: Add about 3 cups of chocolate candy rocks to the bottom of a large, tall glass terrarium or trifle dish, forming an even layer.
- First Cake and Frosting Layer: Spread a generous layer of crumbled chocolate cake over the candy rocks. Gently press it down. Follow with a smooth layer of chocolate frosting.
- Insert Bones: Carefully place some of the white chocolate bones into the cake layer near the glass edges, positioning them to be visible from the outside, creating a spooky effect.
- Continue Layering: Add another layer of crumbled chocolate cake, followed by another layer of chocolate frosting. Repeat this process until you’ve used most of your cake and frosting, creating distinct, impressive layers.
- Final Decorations: Sprinkle the green “moss” over the top layer of cake and frosting. Insert the ladyfinger cookies (decorated as gravestones) into the moss. Arrange the remaining candy rocks, chocolate bones, candy pumpkins, and sprigs of fresh herbs (like thyme or rosemary) to complete your miniature cemetery scene.
Notes
This recipe serves as a flexible guide. Feel free to adjust ingredient quantities based on the size of your glass jar or container. Whether you’re making a small individual terrarium or a grand centerpiece, you can layer as much or as little cake, frosting, and candy rocks as desired. Get creative with decorations: add more gravestones, pumpkins, or herbs for an even spookier effect. The possibilities are endless, allowing you to customize this dessert to perfectly fit your vision and event!
Nutrition (Approximate per serving)
Nutrition information is automatically calculated and should only be used as an approximation.
- Calories: 425 kcal
- Carbohydrates: 52g
- Protein: 5g
- Fat: 23g
- Saturated Fat: 11g
- Polyunsaturated Fat: 2g
- Monounsaturated Fat: 7g
- Trans Fat: 0.01g
- Cholesterol: 2mg
- Sodium: 180mg
- Potassium: 339mg
- Fiber: 5g
- Sugar: 30g
- Vitamin A: 16 IU
- Vitamin C: 0.04mg
- Calcium: 59mg
- Iron: 5mg
Like this? Leave a comment below!