
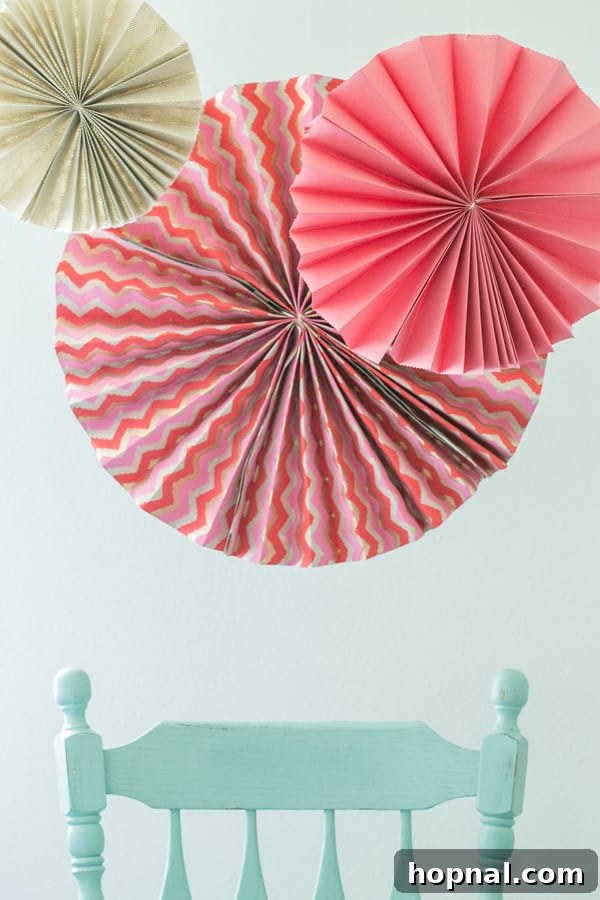
Create Stunning DIY Paper Fans for Any Celebration
Transform your next party or special event with these beautiful, handcrafted DIY paper fans! They are incredibly easy to make, highly customizable in a myriad of colors and patterns, and add a charming, whimsical touch to any decor. Whether you’re planning an intimate gathering or a grand celebration, these delightful accordion fans offer a unique, personalized backdrop that will captivate your guests.
The Inspiration Behind the Craft
My journey into crafting these lovely paper fans began with a serendipitous visit to my local Paper Source shop. I was immediately struck by a mesmerizing window display featuring dozens of these elegant fans, showcasing a spectrum of colors and intricate patterns. They looked so professional and unique that I instinctively inquired about purchasing a few for an upcoming event. To my absolute delight and surprise, the staff revealed, “You can make them yourself!”
That revelation sparked an immediate excitement! The idea that such intricate-looking decorations could be a simple DIY project was thrilling. I left the store armed with a few sheets of rectangular paper, eager to put my newfound knowledge to the test. What I discovered was a surprisingly straightforward and immensely rewarding crafting experience. These fans are genuinely simple to create, allowing for endless possibilities in size, color, and pattern to perfectly match any party theme or seasonal decor.
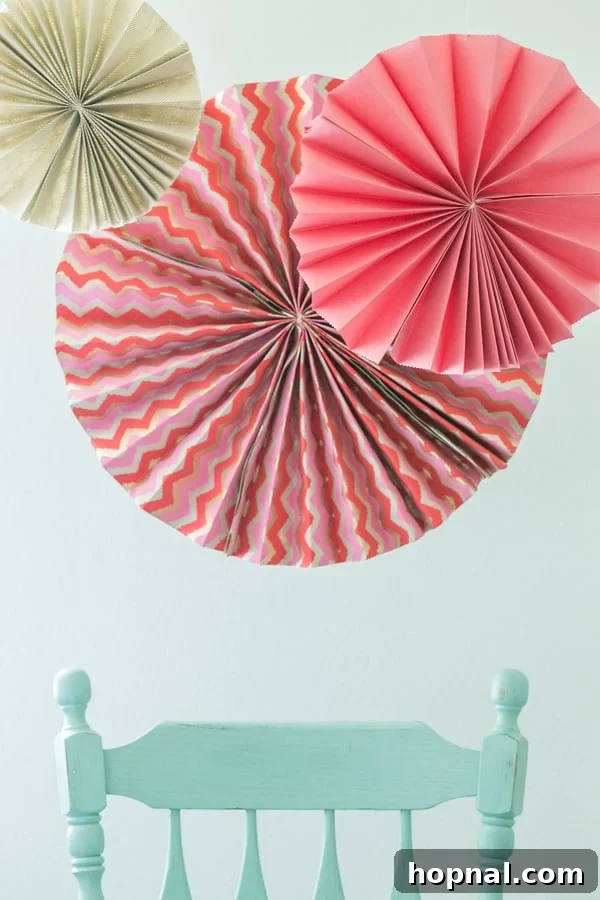
The finished fans have a magical quality when hung with clear string at varying heights and positions. They seem to float effortlessly, adding depth and visual interest to any space. Their charm is undeniable, making them an ideal and truly beautiful backdrop for weddings, birthday parties, baby showers, or even just to brighten up your home decor.
Why Choose DIY Paper Fans: The Benefits of Handcrafted Decor
Opting for DIY paper fans over store-bought alternatives offers a multitude of advantages that go beyond just cost savings:
- Unmatched Customization: The most significant benefit is the freedom to customize every aspect. You’re not limited to off-the-shelf colors or patterns. Choose paper that perfectly matches your event’s theme, incorporate specific designs, or even mix and match for a truly eclectic look. This level of personalization makes your event truly unique.
- Budget-Friendly Decor: Parties and events can quickly become expensive. These paper fans are incredibly economical, often costing just a few dollars per fan, especially if you already have basic crafting supplies on hand. This allows you to create a grand, impactful display without breaking the bank.
- Therapeutic Crafting Experience: The process of folding paper can be meditative and enjoyable. It’s a fantastic way to relax, unleash your creativity, and produce something beautiful with your own hands. It can also be a fun group activity for friends or family preparing for an event.
- Sustainable and Eco-Friendly: By using paper, you’re choosing a recyclable and often renewable material. You can even upcycle old maps, book pages, or magazines for a unique, vintage aesthetic, adding an eco-conscious touch to your decor.
- Impressive Visual Impact: Despite their simple construction, these fans create a stunning visual impact. Hung in clusters, layered, or arranged geometrically, they can transform a plain wall into a vibrant focal point, providing a fantastic backdrop for photos.
Essential Materials for Your DIY Paper Fans
Before you dive into the crafting process, gather these simple supplies. You likely have many of them already!
- Rectangular Sheets of Paper: For each fan, you’ll need two identical rectangular sheets of paper. The size is entirely up to you and will determine the final fan’s dimension. For large, impactful fans, opt for poster board or large craft paper. For delicate accents, regular printer paper or scrapbook paper works wonderfully. Ensure the two sheets for each fan are exactly the same size to ensure a symmetrical, clean finish. Experiment with various colors, patterns, and textures – from solid hues to polka dots, stripes, floral prints, or metallic finishes.
- Twine or String: A sturdy piece of twine, embroidery floss, or even ribbon to tie the folded paper together at the center.
- Tape: Clear tape is ideal for securing the fanned-out sides, making the connection virtually invisible. Double-sided tape can also work beautifully for a seamless look.
- Scissors: For any necessary trimming or cutting.
- Clear String or Fishing Line: To hang your finished fans. Clear string provides a “floating” effect, making the fans appear to hover in the air, enhancing their ethereal beauty.
- Hole Punch: A standard single-hole punch for creating the hanging point.
- Bone Folder (Optional but Recommended): A bone folder helps create crisp, sharp creases, which are crucial for a professional-looking accordion fold. If you don’t have one, the back of a spoon or a ruler edge can also work.
Mastering the Accordion Fold: A Step-by-Step Guide
The accordion fold is the fundamental technique behind these beautiful fans, and it’s surprisingly simple to perfect. If you’ve never attempted one before, don’t worry – it’s a cinch!
Begin by taking one of your rectangular sheets of paper. The goal is to create a series of even, alternating folds, much like a traditional accordion. For best results and crisp lines:
- Establish Your Reference Fold: Start by folding the paper in half lengthwise (short end to short end). Press firmly along this crease, ideally with a bone folder or the edge of a ruler, to make it as crisp as possible. This central fold will serve as your main reference point, ensuring all subsequent folds are evenly spaced.
- Folding the First Section: Unfold the paper. Now, fold one edge of the paper towards the central crease you just made, creating a new fold. Press firmly.
- The Alternating Fold: Flip the paper over. Fold the other edge of the paper towards the central crease, aligning it with your first fold but on the opposite side. Press firmly.
- Continue the Pattern: Continue folding the paper back and forth, flipping it each time, creating uniform strips. Each new fold should align perfectly with the previous one, maintaining consistent panel sizes.
- Ensure Evenness: The key to a beautiful accordion is consistency. Take your time to ensure each fold is straight and even. Uneven folds will result in a lopsided fan.
- Colored Side Down Tip: As you fold, make sure the colored or patterned side of your paper is facing down when you make your initial folds. This ensures that the outer edges of your finished fan will have the desired color, resulting in a cleaner, more vibrant look. Start and end your folding in this orientation.
Once both sheets are fully accordion-folded, you’ll have two long, flat, pleated strips of paper, ready for assembly.
Step-by-Step Assembly: Creating Your DIY Paper Fans
With your paper beautifully folded, assembling the fans is quick and easy. Follow these steps to bring your decorative fans to life:
- Accordion Fold Both Sheets: As detailed above, take both rectangular sheets of paper and accordion fold them. Remember to ensure the colored or patterned side is facing down as you make your initial and final folds for a clean, consistent look on the finished fan.
- Tie the Centers: Once both papers are folded, gently gather each folded strip at its exact center. Take your twine or string and securely tie both folded papers together in the middle. A double knot will ensure it holds firmly. This central tie forms the pivot point for your fan.
- Gently Fan Out the Sides: Carefully begin to fan out one side of the tied paper. The accordion folds will naturally open up. Do this for both sides of the first paper, and then for both sides of the second paper. You should now have two semi-circular fan shapes.
- Connect to Form a Full Circle: Take the open ends of your two semi-circular fans. Bring them together and carefully tape them securely to form a complete, beautiful circular fan. Use clear tape on the inside ridges where the paper meets to make the connection almost invisible. Ensure the folds align perfectly at the taped seams for a smooth, continuous circle.
- Punch and Hang: To prepare your fan for hanging, punch a small hole through one of the top folds. Thread your clear string or fishing line through this hole and tie it securely. Now your stunning DIY paper fan is ready to be suspended and admired!
A Cheap, Easy, and Gorgeous Party Backdrop!
Coordinated decor can elevate any event, making the occasion feel truly special and demonstrating the thought and love poured into the party planning. However, achieving a cohesive backdrop can often seem like a monumental task. You’re probably not keen on repainting your living room electric pink just for one party night – though kudos for that level of commitment if you are!
This is where DIY paper fans shine as the perfect solution. They are not only incredibly easy to make but also cost-effective, typically just a couple of dollars per fan. More importantly, they offer an unparalleled ability to infuse color, texture, and a celebratory mood into any space. By strategically placing these fans, you can effortlessly tie your entire decor theme together, creating a vibrant and engaging atmosphere without permanent alterations to your venue.
Creative Display and Layering Techniques for Your DIY Fans
The beauty of these fans lies in their versatility. You can display them individually for subtle accents or combine them to create a dramatic, layered collage. Here are some ideas for impactful arrangements:
- Simple Suspensions: Hang individual fans at varying heights with clear string from ceilings, doorways, or tree branches for an airy, whimsical effect.
- Wall Art Clusters: Group several fans of different sizes and colors together on a wall to create a dynamic art installation.
- Layered Collages: For a truly stunning and full backdrop, create a layered collage. Here’s how:
- Plan Your Layout: Before gluing anything, lay your larger fans down on the floor in the desired configuration. Experiment with different overlaps and positions.
- Capture the Design: Once you’re happy with the arrangement, take a picture with your phone. This will serve as your guide.
- Secure the Base: If you’re using a cardboard base, use a hot glue gun to secure the largest fans onto the cardboard. Apply glue on the ridges touching the cardboard in as many places as possible to ensure stability.
- Add Smaller Fans: Layer in your smaller fans, gluing them either to the cardboard base or directly onto the larger fans. This adds depth and visual interest.
- Embellish (Optional): Once the structure is secure, consider adding extra touches like glitter, small faux flowers, or ribbons for extra flair.
- Table Centerpieces: Arrange smaller fans flat on tables, perhaps around a vase or candles, for a unique centerpiece.
- Photo Booth Backgrounds: A dense cluster of layered fans creates an irresistible backdrop for a photo booth, adding a fun and interactive element to your party.
Pro Tips for Perfecting Your DIY Paper Fans
To ensure your paper fans turn out perfectly and last through your event, keep these handy tips in mind:
- Consistent Paper Size: Always double-check that the two rectangular pieces of paper you use for each individual fan are exactly the same size. This is crucial for a symmetrical and well-formed circle.
- Crisp Folds are Key: Take your time with the accordion folds. The crisper and more uniform your folds, the more elegant and professional your final fan will look. A bone folder or the back of a spoon can be very helpful here.
- Clear String for “Floating” Effect: For an ethereal and magical touch, use clear fishing line or transparent string for hanging. This makes your fans appear to float unsupported in the air, drawing more attention to their design.
- Pre-Plan Layered Designs: If you’re creating a layered fan collage, always lay out your design on a flat surface first. Take a picture of your preferred arrangement before applying any glue. This allows you to visualize the final look and make adjustments without commitment.
- Consider Paper Weight: Thicker paper (cardstock) will create sturdier, more durable fans that hold their shape better, especially for larger sizes. Lighter paper offers a more delicate appearance and is easier to fold for smaller fans.
- Experiment with Edges: Before folding, you can use decorative scissors or a craft punch to create scalloped or patterned edges on your paper, adding another layer of intricate detail to your fans.
- Storage Solutions: After your event, these fans can be carefully folded back down and stored flat, making them reusable for future celebrations or seasonal decor.
DIY Fans: Project Summary
These beautiful DIY fans are an ideal project for adding a personal and festive touch to any special event or party! They are wonderfully easy to make and offer endless possibilities for customization in terms of colors, patterns, and sizes.
Prep Time: 5 minutes
Cook Time: 10 minutes
Total Time: 15 minutes
Yields: 1 fan (easily scalable)
Author: Eden
Project Ingredients
- Rectangular sheets of paper (2 large for a big fan. You decide the size, just ensure two sheets are identical.)
- Twine
- Tape (clear or double-sided recommended)
- Scissors
- Clear String or Fishing Line
- Hole Punch
- Bone Folder (optional)
Project Instructions
-
Accordion fold both sheets of paper. For a polished look, make sure the colored/patterned side is facing down as you begin and end your folds.
-
Repeat the accordion folding process for the second sheet, ensuring consistent panel sizes.
-
Gather both folded paper strips at their centers and securely tie them together using twine or string.
-
Gently fan out the pleated paper on both sides of the central tie. Bring the open ends together and tape them firmly to form a complete circular fan.
-
Punch a small hole at the top of the fan and tie on a piece of clear string or fishing line. Your beautiful paper fan is now ready to hang and display!
Share Your Creations!
If you’ve had a go at making these DIY Paper Fans or any other creative ideas from Sugar and Charm, we’d love to see your results! Please leave a comment below to let us know how they turned out. Your feedback and shared experiences inspire us all!
Don’t forget to connect with us on social media for more delightful recipes, cocktails, desserts, and party inspiration. You can also FOLLOW ME on FACEBOOK, and PINTEREST!
Tried this Recipe? Tag me Today!
Mention @sugarandcharm or tag us #sugarandcharm!