
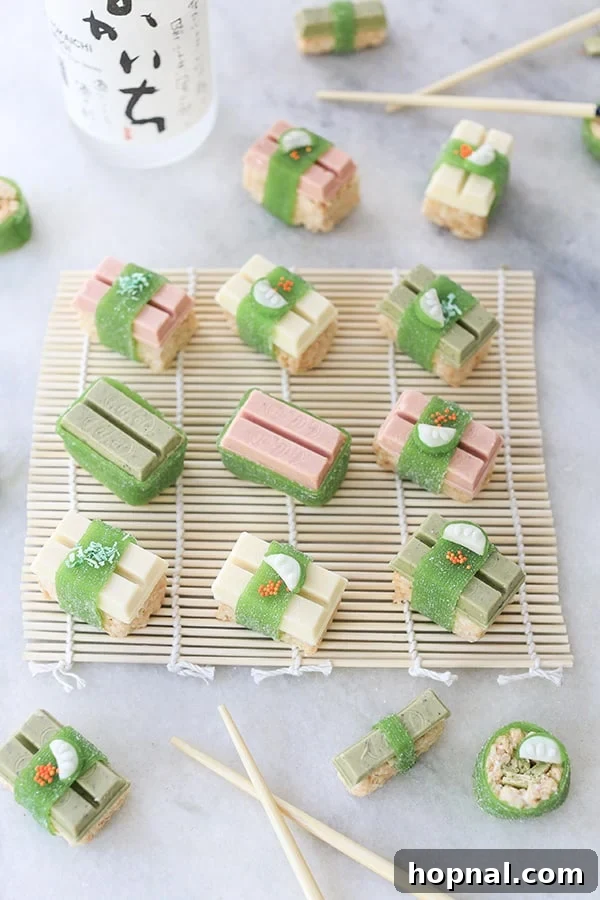
Get ready to roll out some serious fun with this delightful and incredibly easy Kit Kat candy sushi recipe! Forget traditional raw fish; we’re diving into a world where sweet meets whimsical, creating an edible masterpiece that’s guaranteed to be the star of any gathering. This quirky, charming, and utterly delicious dessert offers a playful twist on a culinary classic, making it an ideal treat for birthday parties, playdates, themed events, or simply a fun afternoon activity with the kids. Prepare to bring smiles to your guests’ faces and spark conversations with these unique, bite-sized sweet rolls!
Making Kit Kat candy sushi isn’t just simple; it’s an absolute blast, especially when you involve the little ones. This no-bake recipe requires minimal effort but delivers maximum impact, transforming humble candy bars and treats into visually stunning, mock-sushi pieces. While these sugary delights certainly won’t boost your omega-3 intake, the sheer happiness and novelty they bring to a party are priceless. It’s a fantastic way to engage children in the kitchen, teaching them basic assembly skills and encouraging their creativity without the need for heat or sharp utensils. Let’s embark on this sweet adventure and craft some unforgettable dessert sushi!
Why Kit Kat Candy Sushi is Your Next Party Hit
In a world full of conventional desserts, Kit Kat candy sushi stands out as a true conversation starter. It’s more than just a sweet treat; it’s an experience, a novelty that guests of all ages will adore. Here’s why this creative candy craft should be at the top of your list for your next event:
- Unforgettable Impression: Imagine the delight when guests discover a platter of “sushi” that’s actually candy! It’s an instant “wow” factor that adds a playful and memorable touch to any party.
- Effortlessly Fun: Unlike intricate baking projects, candy sushi is incredibly forgiving and requires no special culinary skills. It’s perfect for beginners and seasoned dessert makers alike.
- Kid-Friendly Activity: This is a dream project for kids! They can help press the “rice,” unwrap candies, arrange toppings, and sprinkle decorations. It’s a wonderful way to foster creativity and fine motor skills in a delicious context.
- Highly Customizable: With an endless array of candies and Kit Kat flavors, you can tailor your sushi to fit any theme, color scheme, or taste preference. Create seasonal variations or personal favorites!
- No-Bake Perfection: Skip the oven and the stress of precise measurements. This dessert is entirely no-bake, making it a quick and easy option for spontaneous treats or last-minute party preparations.
- Sweet Satisfaction: Each piece offers a delightful combination of textures and flavors – the chewy “rice,” the crunchy Kit Kat, and the soft, fruity “fillings.” It’s a treat for both the eyes and the taste buds!
Gather Your Sweet Sushi Ingredients
The magic of Kit Kat candy sushi lies in transforming everyday candies into something extraordinary. Here’s a detailed look at the simple yet ingenious components you’ll need to create your sweet masterpieces:
Flavored Kit Kats: The Main Event
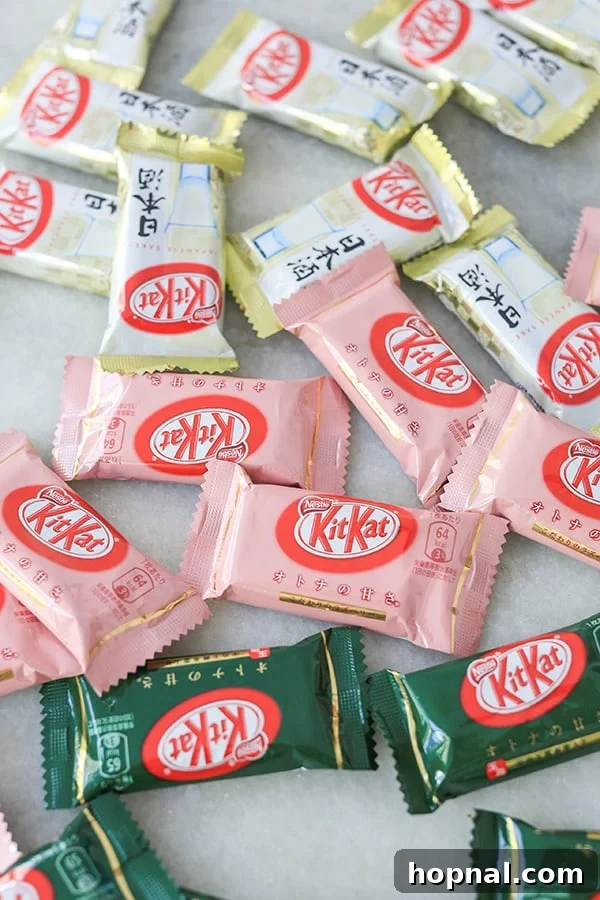
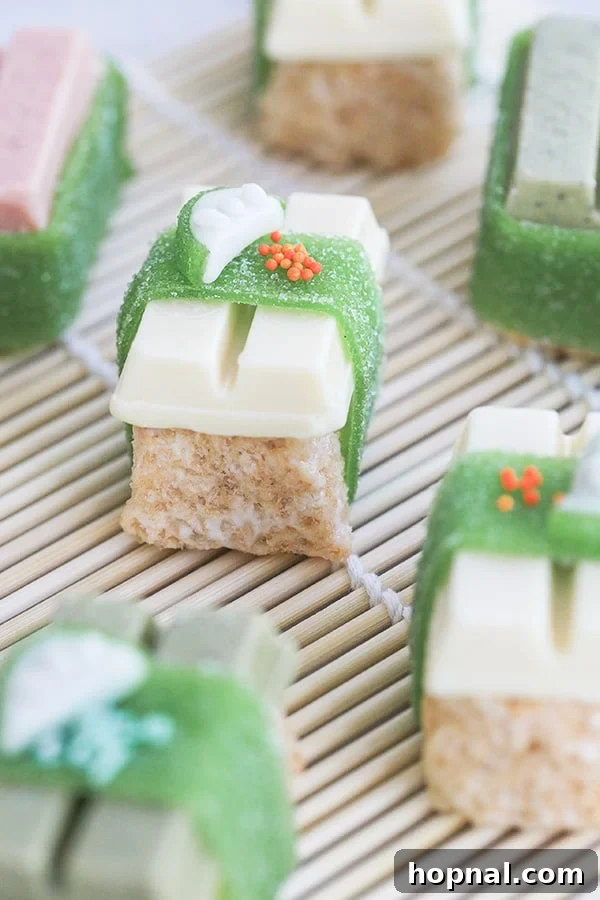
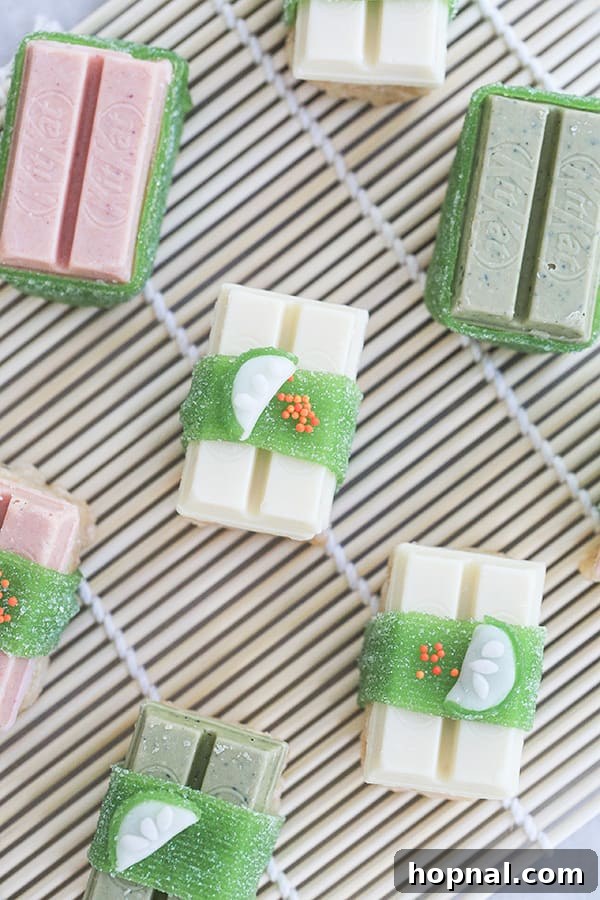
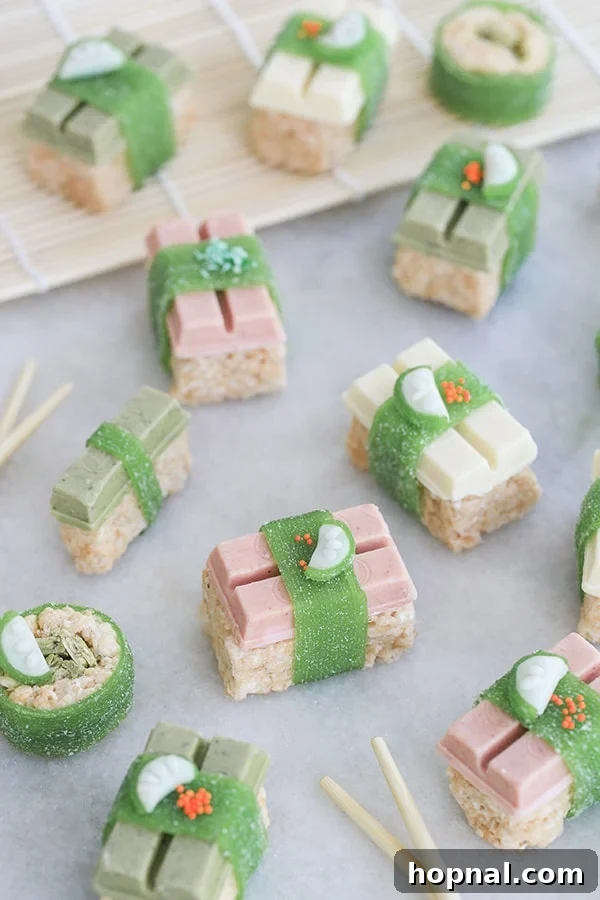
The star of our candy sushi show, Kit Kat bars provide the perfect “fish” or “topping” for your sweet nigiri and rolls. While standard milk or white chocolate Kit Kats work wonderfully, venturing into the world of unique flavors elevates the experience. We had an incredible time experimenting with Japan’s distinct Kit Kat varieties, which are renowned for their incredible range and sometimes surprising tastes. Imagine the excitement of using strawberry for a vibrant pink hue, sake for an intriguing adult twist, or earthy matcha for a sophisticated green touch! These exotic flavors add an authentic “Japanese” flair to your candy sushi. We ordered our wild flavors online, and they arrived in just a few days – truly impressive! If specialty Kit Kats aren’t readily available, don’t fret; classic chocolate, white chocolate, or even dark chocolate Kit Kats are fantastic alternatives. Simply break them into individual fingers, and they’re ready to top your “rice.”
Hi-Chew Candy: For Adorable Fillings
To create those adorable little “cucumber slices” or colorful “fish” fillings, Hi-Chew candy is an absolute game-changer. This popular Japanese chewy candy, known for its vibrant fruit flavors and satisfying texture, is incredibly pliable. We used Hi-Chew Green Apple to mimic cucumber, but feel free to explore other flavors like mango, strawberry, or grape for different color accents. Hi-Chew is becoming increasingly common and can often be found in the international aisle of your local grocery store or in Asian markets. To prepare, simply unwrap the Hi-Chew, roll it out slightly with a rolling pin (or your fingers) to create a flatter strip, and then cut into small, thin pieces or even shape them into tiny “fish” or roe-like balls. Its chewiness holds its shape perfectly, adding another layer of texture to your sushi.
Rip Roll: The Perfect “Seaweed” Wrapper
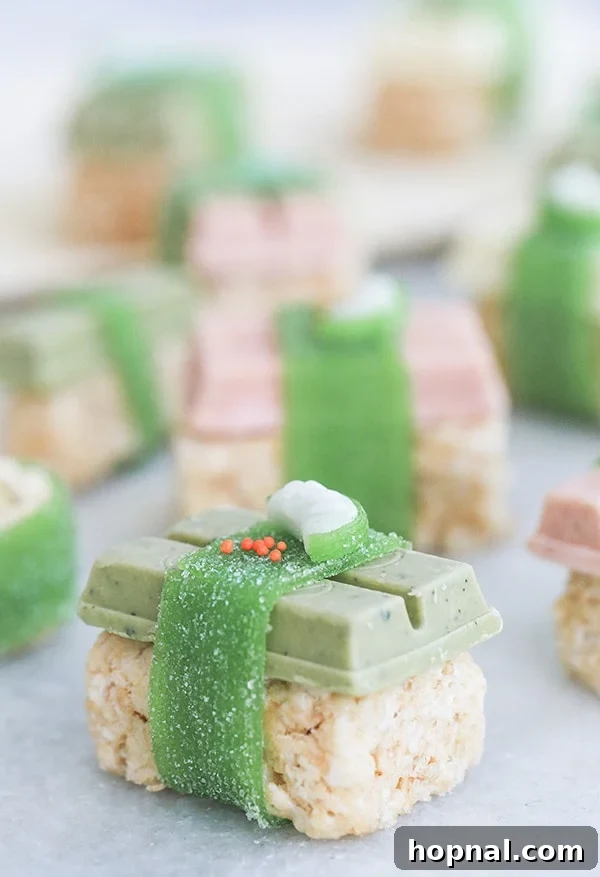
For the essential “seaweed” wrapper that holds your maki-style candy sushi together, Rip Rolls are an ingenious choice. These long, flat, and somewhat stretchy fruit-flavored candies work perfectly to encapsulate your “rice” and fillings. Their bright colors and slightly sour-sweet taste add another dimension to the overall experience. You can easily buy Rip Rolls online or find them in many candy stores. Simply unroll them and cut them into strips of the desired width, usually about 1/2 to 1 inch wide. One little tip: A tiny dab of water applied to the end of the Rip Roll will help it stick firmly, ensuring your candy sushi rolls stay perfectly intact. If Rip Rolls are hard to find, fruit leather or fruit roll-ups can serve as excellent substitutes, offering similar flexibility and a variety of colors.
Rice Krispies Treats: The Sweet “Rice” Base
Every piece of sushi needs its “rice,” and for our candy version, nothing beats the classic, chewy goodness of Rice Krispies Treats. You have two excellent options here: whipping up a homemade batch or opting for the convenience of prepackaged treats. A homemade batch allows you to control the sweetness and texture, making them slightly less sticky if desired. To make them from scratch, you’ll need marshmallows, butter, and Rice Krispies cereal – a simple recipe that comes together in minutes. Once prepared, press the mixture firmly into a pan and allow it to cool slightly before cutting. If you’re short on time, store-bought Rice Krispies Treats are a fantastic shortcut; just cut them to the appropriate sushi-sized rectangles or squares. The goal is to create a firm yet pliable base that can hold its shape and support your Kit Kat “toppings.”
Orange Round Sprinkles: The “Fish Eggs”
To complete the authentic sushi aesthetic, a sprinkle of orange round sprinkles perfectly mimics the appearance of “tobiko” or “masago” (fish eggs). These tiny, vibrant pearls add a delightful pop of color and a subtle crunch, elevating the visual appeal of your candy sushi. They are the ideal finishing touch, transforming your sweet creations into truly convincing miniature sushi pieces. You can easily buy them here. For a different look, consider chocolate sprinkles for a “caviar” effect or even rainbow sprinkles for an extra whimsical touch. The key is to add them just before serving for maximum visual impact.
Optional Ingredients for Extra Flair
Want to take your candy sushi to the next level? Consider these fun additions:
- Gummy Candies: Small gummy fish, worms, or fruit slices can add a playful topping or filling.
- Thin Fruit Slices: Mango, kiwi, or strawberry slices can mimic fresh sashimi for a slightly healthier, yet still sweet, touch.
- Melting Chocolate or Icing: Drizzle melted white or dark chocolate, or use a thin line of icing, for decorative patterns or to help toppings stick.
- Powdered Sugar: A light dusting can create a snowy, elegant finish.
Step-by-Step Directions for Making Kit Kat Candy Sushi
Now that you have all your delightful ingredients ready, let’s assemble these charming candy creations! The process is incredibly straightforward and perfect for engaging aspiring young chefs.
- Prepare Your “Rice”: If making homemade Rice Krispies Treats, follow your favorite recipe. Press the warm mixture firmly into a parchment-lined baking dish (about 8×8 or 9×13 inches, depending on desired thickness). Allow it to cool and set completely. If using store-bought treats, simply unwrap them. Once cool, use a sharp knife (lightly greased if needed) to cut the Rice Krispies Treat slab into sushi-sized pieces. For nigiri-style sushi, aim for rectangles about 1×2 inches. For maki rolls, you might cut wider strips or a larger rectangle to roll.
- Prep Your “Toppings” & “Fillings”:
- Kit Kats: Carefully unwrap your chosen Kit Kat bars and break them into individual fingers. These will be your “fish” for nigiri or filling for rolls.
- Hi-Chew “Cucumber”: Unwrap the Hi-Chew candies. Using clean hands, gently roll or flatten them slightly with a small rolling pin. Cut them into thin, round slices or small, rectangular strips to resemble cucumber or other sushi fillings.
- Rip Roll “Seaweed”: Unroll the Rip Rolls and use kitchen scissors to cut them into thin strips, approximately 1/2 to 1 inch wide and long enough to wrap around your sushi pieces.
- Assemble Nigiri-Style Candy Sushi:
- Take one of your Rice Krispies “rice” rectangles.
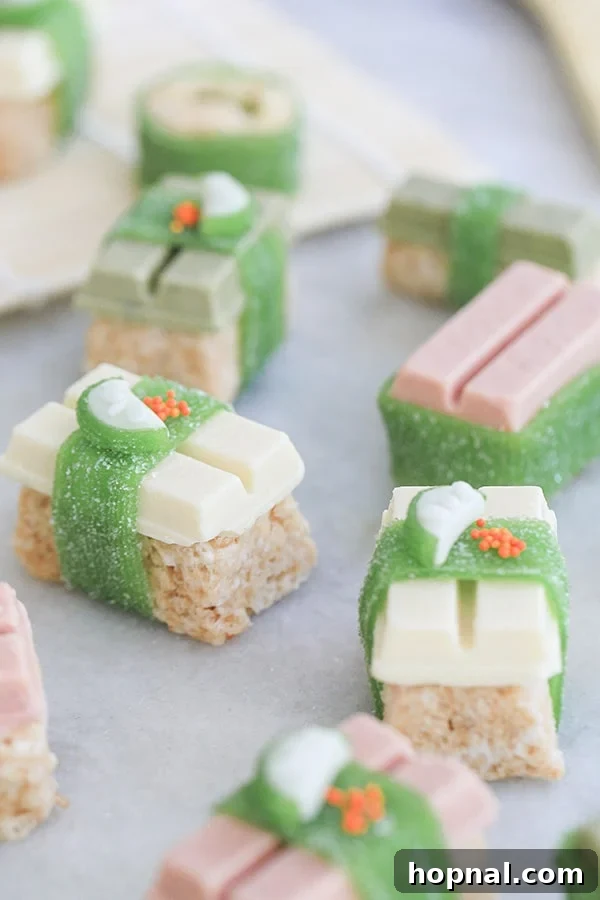
- Place one Kit Kat finger on top of the “rice,” pressing gently to secure.
- Take a thin strip of Rip Roll “seaweed” and wrap it around the Kit Kat and the Rice Krispies “rice,” securing it with a tiny dab of water at the seam if needed.
- Finally, sprinkle a few orange round sprinkles on top of the Kit Kat to mimic fish roe.
- Assemble Maki-Style Candy Sushi Rolls (Optional):
- If you want to create rolls, you can use a bamboo sushi mat (covered in plastic wrap for easy cleanup) or simply your hands.
- Lay out a wider strip of Rice Krispies Treat.
- Arrange broken Kit Kat pieces and Hi-Chew strips across one end of the Rice Krispies “rice.”
- Carefully roll the Rice Krispies over the fillings to form a log, shaping it gently.
- Wrap the entire Rice Krispies log with a wider strip of Rip Roll “seaweed.”
- Once rolled, use a sharp, lightly greased knife to cut the log into individual sushi rolls. Decorate with sprinkles if desired.
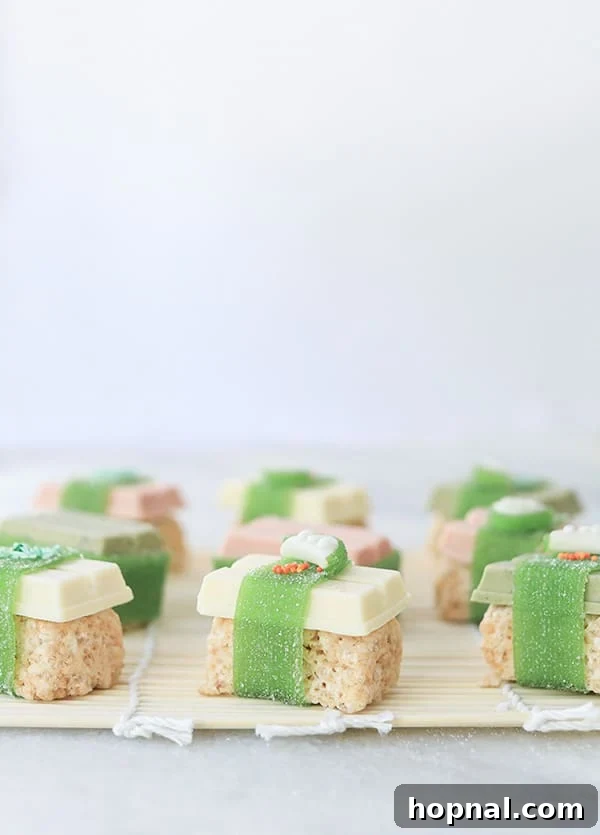
- Present and Serve: Arrange your beautiful candy sushi pieces on a platter, perhaps even a traditional sushi tray, for an authentic presentation. Consider adding small dishes of “soy sauce” (chocolate syrup) or “wasabi” (green icing) for an extra playful touch.
For a dynamic visual guide, be sure to watch our charming video tutorial on how to make this adorable candy sushi!
Tips for Perfect Candy Sushi Every Time
- Keep Hands Clean and Moist: Working with Rice Krispies Treats can be sticky. Lightly moisten your hands with water or spray with cooking oil before handling to prevent sticking.
- Press Firmly: When shaping the Rice Krispies “rice,” press it down very firmly. This ensures your bases are sturdy and hold their shape well.
- Sharp Knife is Key: For clean cuts on both the Rice Krispies and other candies, use a sharp knife and wipe it clean periodically.
- Chill for Stability: If your Rice Krispies Treats or other candies become too soft, a quick 10-15 minute chill in the refrigerator can make them easier to handle and cut.
- Get Creative with Colors: Don’t limit yourself to the suggested ingredients! Explore different colored sprinkles, fruit chews, or even small pieces of licorice for varied textures and appearances.
- Make it a Group Activity: Candy sushi is perfect for a family fun night or a party activity. Assign different roles to keep everyone engaged!
Frequently Asked Questions About Candy Sushi
Curious about some aspects of making this sweet treat? Here are answers to common questions:
Q: Can I use other types of candy besides Kit Kats and Hi-Chew?
A: Absolutely! The beauty of candy sushi is its versatility. You can use almost any rectangular candy bar (like Twix or Snickers, cut to size) for the “fish,” or other soft fruit chews (like Starburst or Laffy Taffy) for fillings. Gummy candies are also great for unique toppings.
Q: How far in advance can I make Kit Kat candy sushi?
A: You can prepare most components a day in advance. Assemble the sushi no more than 1-2 days before serving. Store them in an airtight container at room temperature to prevent the Rice Krispies Treats from hardening too much or the candies from getting stale. Avoid refrigerating, as it can make the Rice Krispies hard.
Q: Where can I find unique Japanese Kit Kat flavors?
A: Specialty Asian markets often carry a selection. Online retailers like Amazon, Bokksu, or dedicated Japanese snack websites are excellent sources for a wide variety of flavors, even those that are seasonal or regional exclusives in Japan.
Q: Are there any healthier alternatives for candy sushi?
A: While this is definitely a treat, you can incorporate fresh fruit. For example, use thin slices of mango or kiwi on top of the Rice Krispies, or mix dried fruit into your Rice Krispies Treat base. For the “seaweed,” thin strips of dried fruit leather with no added sugar could be an option. However, the core concept is a fun, sugary indulgence!
Q: Can I use a different base instead of Rice Krispies Treats?
A: Rice Krispies Treats are ideal because they are easy to mold and hold their shape. However, you could experiment with pressed cookie dough (no-bake varieties), or even thick pieces of brownie, cut into sushi shapes, though this might change the texture and sweetness significantly.
More Fun Desserts You’ll Love!
If you enjoyed the playful spirit of making candy sushi, explore these other delightful dessert recipes:
Elegant Rose Flavored Marshmallows
Simple Guide to Making Marshmallow Fondant
The Absolute Best Blondie Recipe for Any Occasion
The Yummiest and Easiest Banana Pudding Recipe
Festive Ice Cream Sundae Sheet Cake
Charming Sunflower Cupcakes (Perfect for Fall!)
We hope you have an absolute blast making and sharing your Kit Kat candy sushi! It’s a wonderfully inventive way to add a sprinkle of joy and a dash of whimsy to any gathering. Watch our quick video tutorial one more time for any last-minute tips, and then get rolling! We’d love to hear what you think in the comments below. Share your creative variations and success stories!
You can also FOLLOW US on FACEBOOK, INSTAGRAM, and PINTEREST to see more delicious recipes, innovative cocktails, delightful desserts, and inspiring party ideas!