
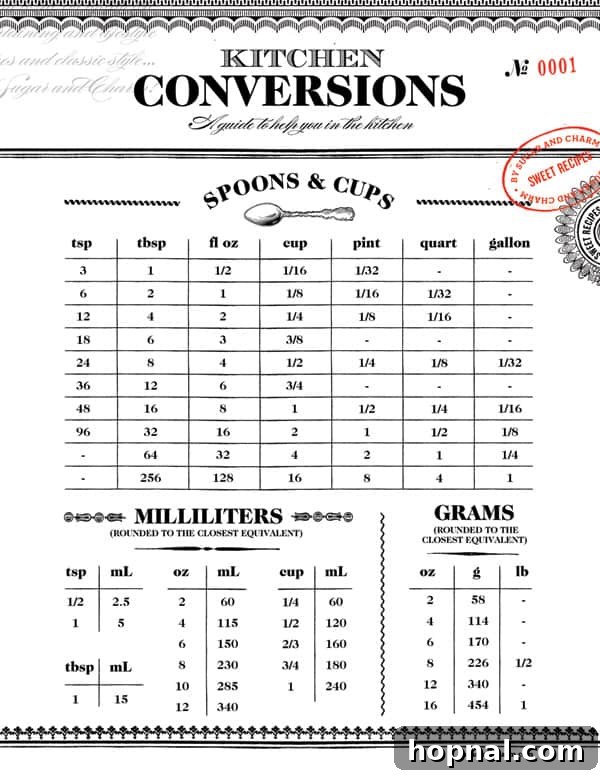
As the baking and cooking seasons unfold, finding precise measurements becomes paramount for culinary success. Whether you’re a seasoned chef or a budding home baker, encountering recipes that call for unfamiliar units or require scaling can transform a delightful cooking experience into a confusing mathematical puzzle. Questions like, “How many cups are in a pint?” or “How many quarts make a gallon?” are incredibly common, and having quick, reliable answers at your fingertips can make all the difference, ensuring your culinary creations are consistently perfect.
We’re thrilled to introduce our **charming and highly practical printable kitchen conversion chart**, designed to be your go-to reference for all cooking and baking endeavors. Alongside this invaluable tool, we present a **comprehensive guide to mastering culinary measurements**, ensuring every dish you create is a masterpiece of precision and flavor.
Engaging in cooking and baking offers more than just delicious outcomes; studies consistently highlight its positive impact on self-esteem, creativity, and overall quality of life. Yet, the joy can quickly turn to frustration when faced with complex recipes demanding exact measurements, especially if you lack the specific tools or need to perform tricky conversions on the fly. This guide aims to alleviate that stress and bring back the joy of effortless cooking.
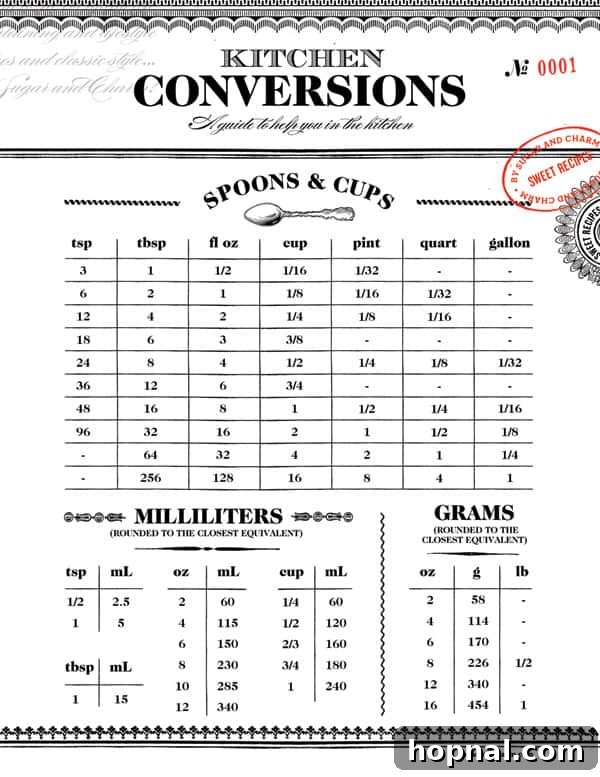
If you often find yourself grappling with ingredient conversions, rest assured, you’re not alone. Measurement conversions can be notoriously tricky, and even experienced cooks can benefit from a quick reference. That’s precisely why we’ve meticulously crafted this guide: to demystify the process and equip you with the knowledge and tools for perfect results every single time, from understanding basic units to tackling complex international recipes.
Delve into the essential measuring conversions vital for both cooking and baking. Discover how to effortlessly navigate different units, understand the nuances of various ingredients, and gain confidence in adapting any recipe to suit your needs or available tools. Be sure to print our elegant kitchen conversion chart for instant answers to pressing questions like, “How many quarts in a cup?” or “How many quarts are in a gallon?”—it’s designed for rapid, on-the-spot reference, saving you time and preventing errors.
Essential Cooking and Baking Conversions
Let’s lay the groundwork with the fundamental conversions that are indispensable for any kitchen task. Understanding these basic relationships between units will empower you to tackle almost any recipe with confidence, ensuring accuracy from start to finish and making your cooking process smoother and more enjoyable.
Dry Measurement Conversions
Precision is especially key in baking, and dry ingredients often demand the most careful attention due to their varying densities. Here’s a detailed breakdown of common dry measurement equivalents:
- 3 teaspoons (tsp) = 1 tablespoon (tbsp) = 1/16 cup
- 6 tsp = 2 tbsp = ⅛ cup
- 12 tsp = 4 tbsp = ¼ cup
- 15 tsp = 5 tbsp + 1 tsp = ⅓ cup (approximately)
- 24 tsp = 8 tbsp = ½ cup
- 36 tsp = 12 tbsp = ¾ cup
- 48 tsp = 16 tbsp = 1 cup
- A “pinch” or “dash” typically signifies less than ⅛ teaspoon, an informal measurement often used for potent ingredients like salt, pepper, or spices where exactness is less critical.
When measuring dry ingredients, always opt for dedicated dry measuring cups and spoons. For larger quantities like flour or sugar, use cups, and for smaller amounts like spices or leavening agents, use spoons. To ensure accuracy, especially with ingredients like flour or granular sugar, use a flat edge (such as the back of a knife or a straight spatula) to level off the top of your measuring tool. Remember to pack moist ingredients, like brown sugar, firmly into the cup to remove air pockets, ensuring a denser and more accurate measurement that matches recipe specifications.
Liquid Measurement Conversions
Measuring liquids requires a slightly different approach than dry ingredients, primarily to avoid air pockets and ensure a level read. The conversions themselves are equally straightforward within the Imperial system:
- 8 fluid ounces (fl oz) = 1 cup (C) = ½ pint (pt) = ¼ quart (qt)
- 16 fl oz = 2 C = 1 pt = ½ qt
- 32 fl oz = 4 C = 2 pt = 1 qt = ¼ gallon
- 128 fl oz = 16 C = 8 pt = 4 qt = 1 gallon
For liquid ingredients, always use transparent liquid measuring cups, which typically feature pour spouts and graduated markings. Place the cup on a flat, level surface and then position yourself so your eyes are level with the liquid’s surface to read the measurement accurately. Avoid lifting the cup, as this can lead to inaccurate readings due to parallax error. For very small liquid quantities, such as vanilla extract or food coloring, accurate measuring spoons are the preferred tool.
Understanding Volume vs. Weight Ounces
A common point of confusion in the kitchen, especially for those new to baking, is the crucial distinction between volume ounces (fluid ounces) and weight ounces. While both use the term “ounce,” they measure fundamentally different properties:
- **Volume ounces (fluid ounces – fl oz)** measure the space an ingredient occupies. These are primarily used for liquids and are clearly labeled as “NET OZ FL” or “FL OZ” on product packaging.
- **Weight ounces (oz)** measure the mass or heaviness of an ingredient. These are essential for dry ingredients and are typically indicated as “NET WT OZ” or simply “OZ” on product labels.
Crucially, 8 fluid ounces of water weighs approximately 8 ounces, because water has a density very close to 1. However, 8 fluid ounces of flour or sugar will weigh significantly less than 8 ounces, as their densities are much lower than water. Attempting to convert directly between fluid ounces and weight ounces for dry ingredients without knowing the ingredient’s specific density is often inaccurate and can lead to baking disasters. This is precisely why using a kitchen scale for dry ingredients in baking, where precision is paramount for chemical reactions and texture, is highly recommended by professional bakers.
Imperial vs. Metric Conversions for Global Recipes
The culinary world is incredibly diverse, and so are its measurement systems. The United States predominantly uses the Imperial System (cups, ounces, pounds), while most other countries around the globe operate on the Metric System (grams, milliliters, liters). When following an international recipe, whether it’s for an authentic Italian pasta or a delicate French pastry, knowing how to convert between these systems is absolutely essential to ensure your dish turns out as intended and tastes true to its origin.
Metric to Standard (Imperial) Volume Conversions
Here are the crucial volume conversions you’ll need when adapting metric recipes to the Imperial system, allowing you to seamlessly work with recipes from around the world:
- 1 milliliter (ml) = approximately ⅕ teaspoon
- 5 milliliters = 1 teaspoon
- 15 milliliters = 1 tablespoon
- 240 milliliters = 1 cup (or 8 fl oz) – Note: While technically 236.59 ml, 240 ml is a common, practical approximation for 1 standard US cup in recipes.
- 500 milliliters = 2 cups = 1 pint
- 1 liter (L) = 4 cups = 2 pints = 1 quart (approximately 34 fl oz)
Metric to Standard (Imperial) Weight Conversions
For dry ingredients, converting by weight from grams to ounces or pounds is often the most accurate and reliable method, minimizing potential errors from varying densities when measuring by volume:
- 1 gram (g) = approximately 0.035 ounces (oz)
- 100 grams = approximately 3.5 ounces
- 454 grams = 1 pound (lb)
- 500 grams = approximately 1.1 pounds
- 1 kilogram (kg) = 2.2 pounds = approximately 35 ounces
What Does 1 Cup Equal? The Versatile Measurement
Even if your kitchen is sparsely equipped, a standard 1-cup measuring tool is often a staple. Understanding its various equivalents can be incredibly powerful and practical, especially when you need to half or double a recipe without a full set of measuring devices, or when you simply need to convert on the fly. Here’s a comprehensive look at what 1 cup is equal to:
- 8 fluid ounces
- 16 tablespoons
- 48 teaspoons
- ½ pint
- ¼ quart
- 1/16 gallon
- 240 milliliters
Baking Pan Conversions and Their Impact
A recipe might call for a specific baking pan, but what if you don’t have it, or you want to achieve a different presentation, like turning a round cake into cupcakes? Knowing the volume capacity of various baking pans allows you to confidently substitute. Keep in mind that altering pan size can significantly affect baking time and the final texture of your baked goods, so careful monitoring and potential adjustments to cooking duration are often necessary.
- 9-inch round cake pan = holds approximately 12 cups of batter
- 9×5 inch loaf pan = holds approximately 8 cups of batter
- 9-inch square pan = holds approximately 8 cups of batter
- 9-inch springform pan = holds approximately 10 cups of batter
- 10-inch tube pan = holds approximately 16 cups of batter
- 10-inch bundt cake pan = holds approximately 12 cups of batter
When substituting pans, try to choose one with a similar total volume to maintain the intended bake time and rise. If your new pan has significantly less surface area (e.g., a deeper, narrower pan), you may need to increase baking time. Conversely, a shallower or wider pan might require a shorter bake. Always monitor your baked goods closely for doneness using visual cues and traditional tests like the toothpick method.
Common Baking Ingredients by Weight (in Ounces)
As discussed, the weight of an ingredient often provides a more precise measurement than its volume, especially for dry goods. This is critical for baking consistency, where the ratio of ingredients directly impacts the final texture and structure. Remember, 8 fluid ounces is a volume measurement, while 8 ounces is a weight measurement, and they are rarely interchangeable for dry ingredients. Here are some indispensable weight conversions for common baking staples, allowing for greater accuracy in your recipes:
- 1 cup rolled oats = 3 ounces
- 1 cup milk = 8 ounces (for most liquids like water or milk, volume and weight are very close)
- 1 cup vegetable oil = 7.7 ounces
- 1 cup butter = 8 ounces (note that 1 stick of butter is commonly 4 ounces, or ½ cup)
- 1 large egg = 1.7 ounces
- 1 cup all-purpose flour = 4.5 ounces (when spooned and leveled, not scooped)
- 1 cup granulated sugar = 7.1 ounces
- 1 cup unsifted powdered sugar = 4.4 ounces
- 1 cup heavy cream = 8.4 ounces
- 1 cup chocolate chips = 6 ounces
- 1 cup peanut butter = 9.5 ounces
- 1 cup sour cream = 8 ounces
- 1 cup sweetened coconut flakes = 3 ounces
Egg Conversions for Baking Perfection
Eggs are a cornerstone in many recipes, contributing to structure, moisture, binding, and leavening. Most recipes that simply state “egg” are typically referring to a large whole egg. However, egg sizes vary significantly, and sometimes recipes call for only whites or yolks, or even liquid egg products. Knowing how to convert ensures your recipe achieves the desired texture, consistency, and chemical balance.
Whole Egg Size Conversions
If your recipe calls for large eggs but you only have medium or small on hand, here’s how to adjust to maintain the correct liquid content and balance of ingredients:
- 1 large egg = 1 medium egg OR 2 small eggs
- 2 large eggs = 2 medium eggs OR 3 small eggs
- 3 large eggs = 4 medium eggs OR 4 small eggs
- 4 large eggs = 5 medium eggs OR 6 small eggs
- 5 large eggs = 6 medium eggs OR 7 small eggs
For general substitutions, a helpful rule of thumb is that one large whole egg typically equals about ¼ cup of liquid egg substitute, or two large egg whites, in terms of volume. This can be useful for dietary restrictions or when you simply run out of whole eggs.
Liquid Egg Conversions
For recipes specifying liquid eggs or egg components, often found in larger batch baking or catering contexts, these conversions are invaluable:
- 50 mL liquid whole eggs = 1 large egg
- 100 mL liquid egg whites = 3 large egg whites
Frequently Asked Kitchen Measurement Questions
There are 4 quarts in a gallon. This is a fundamental liquid volume conversion in the Imperial system, crucial for scaling large-batch recipes or preparing beverages.
There are 4 cups in a quart. This applies to liquid measurements and is a frequently used conversion when working with recipes that specify quarts but you’re measuring in cups.
There are 2 cups in a pint. Two pints make one quart, which then consistently leads back to the 4 cups per quart conversion. This is very useful when dealing with smaller quantities of liquids.
There are 16 tablespoons in one standard cup. This is a very useful conversion for smaller quantities or when you only have tablespoon measures available, and need to build up to a cup measurement.
A ‘dash’ or ‘pinch’ is an informal measurement, typically referring to a quantity less than 1/8 of a teaspoon. It’s often used for potent spices, salt, or flavorings where precise measurement isn’t critical, allowing for a small amount to be added by hand, “to taste.”
Weighing dry ingredients like flour or sugar offers superior accuracy compared to measuring by volume (cups). Volume measurements can vary significantly depending on how compactly an ingredient is packed, how it’s scooped, or even humidity. Weight provides a consistent, exact amount every time, leading to more reliable and repeatable baking results.
Mastering the Measurement of Common Baking Ingredients
Achieving baking excellence hinges on precise measurements. Even slight discrepancies in key ingredients can dramatically alter the outcome of a recipe, affecting texture, flavor, and rise. Here are specific tips for accurately measuring some of your most frequently used baking components, ensuring consistency and delicious results every time:
Flour: Measuring Accuracy is Key
Flour is arguably one of the trickiest ingredients to measure accurately by volume due to its tendency to compact. Over-measuring flour is a common mistake that leads to dry, dense baked goods. For optimal precision, especially in delicate baked goods, investing in a kitchen scale to measure flour by weight is highly recommended. However, if you’re using measuring cups, follow these crucial steps:
- **Avoid Scooping Directly:** Never scoop flour directly from its container with your measuring cup. This compresses the flour, leading to significantly more flour than the recipe intends, resulting in a dense, heavy product.
- **The “Spoon and Level” Method:** Instead, gently fluff up the flour in its container with a spoon or whisk to aerate it. Then, lightly spoon the fluffed flour into your measuring cup until it’s overflowing.
- **Level Off Precisely:** Use the straight edge of a knife or a flat spatula to scrape off the excess flour, ensuring a perfectly level and accurate measurement.
Butter: Straightforward Measurements
Butter measurements are often simplified by the convenient markings on its packaging, indicating tablespoons, quarter cups, and ounces. A standard stick of butter typically weighs 4 ounces and contains 8 tablespoons. This makes conversions incredibly easy and visually verifiable:
- 1 stick of butter = 8 tablespoons = ½ cup = 4 ounces = 113 grams
- A whole box (4 sticks) = 1 pound
For best baking results, ensure your butter is at the temperature specified by the recipe (e.g., softened, cold, melted).
Sugar: Sweet Precision
Measuring sugar varies slightly depending on its type and texture. Here’s what you need to know for each common variety to achieve sweet precision in your recipes:
Granulated White Sugar
Granulated sugar, with its fine, free-flowing crystals, is relatively easy to measure by volume as it doesn’t compact easily. Simply scoop it into your measuring cup and level off the top.
- 1 cup = 7.05 ounces = 199 grams
Brown Sugar: The Packing Technique
Brown sugar, with its molasses content, is moist and requires packing to ensure accurate measurement. Always follow the recipe’s specific instructions, which usually specify “lightly packed” or “densely packed.” For most recipes, “packed” implies pressing the sugar firmly into the cup so it retains its shape when inverted, indicating all air pockets have been removed.
- 1 cup packed light or dark brown sugar = 7.05 ounces = 200 grams
Powdered Sugar (Confectioner’s Sugar)
Powdered sugar, also known as confectioner’s sugar, is very fine and can be prone to clumping, making accurate measurement tricky and often messy. The best way to measure it is by spooning it into the measuring cup and then leveling off the excess with a flat edge. Pay close attention to whether the recipe calls for sifted or unsifted powdered sugar, as this significantly impacts the volume and weight:
- **”1 cup sifted powdered sugar”:** Sift the sugar *before* measuring. This incorporates air and removes clumps.
- **”1 cup powdered sugar, sifted”:** Measure the sugar first, then sift it. This means you measure the quantity of unsifted sugar, then sift that measured amount.
These distinctions are important because sifting incorporates air, significantly reducing the density and therefore the weight per cup. Ignoring this can lead to an excess of sugar in your recipe.
- 1 cup powdered sugar, sifted = 3.6 ounces = 102 grams
- 1 cup powdered sugar, unsifted = 4.4 ounces = 125 grams
Baking Soda and Baking Powder: Leavening Agents
These leavening agents are crucial for texture and rise, making their accurate measurement vital. Before measuring, gently shake the container to break up any potential clumps. Use a measuring spoon and then level it off with a flat edge. Ensure your baking soda and baking powder are fresh, as their potency diminishes over time; typically, anything older than six months should be replaced for optimal leavening results.
Liquid Sweeteners and Sticky Ingredients
Measuring sticky liquids like honey, molasses, or corn syrup can be a challenge, as they tend to cling to measuring cups. A simple trick to prevent them from clinging and ensure a full transfer of the ingredient is to first spray the measuring cup with non-stick cooking spray, or, if your recipe includes oil, measure the oil first. This will lightly grease the cup, allowing the sticky sweetener to slide out easily and completely.
- **Honey:** 1 cup = 8 ounces = 227 grams
- **Molasses:** 1 cup = 12 ounces = 340 grams
- **Maple/Corn Syrup:** 1 cup = 11 ounces = 311 grams
Baking Time and Temperature Conversions
Beyond ingredient measurements, oven temperature is a critical factor in baking success. Recipes originating from different regions might use Celsius instead of Fahrenheit, or vice versa. Understanding these temperature conversions ensures your baked goods are cooked perfectly, achieving the correct browning, internal doneness, and desired texture.
- 120° Celsius = 250° Fahrenheit (Very low heat, ideal for slow roasting or dehydrating)
- 160° Celsius = 320° Fahrenheit (Low to moderate heat, common for custards or slow bakes)
- 180° Celsius = 350° Fahrenheit (Moderate heat, the most common baking temperature for cakes, cookies, and quick breads)
- 205° Celsius = 400° Fahrenheit (Moderately high heat, often used for crisping or roasting vegetables)
- 220° Celsius = 425° Fahrenheit (High heat, excellent for bread crusts or quick bakes)
It’s also worth noting that oven temperatures can vary significantly from the dial setting due to calibration issues. Investing in an affordable oven thermometer can help you verify your oven’s actual temperature against its setting, allowing for even more consistent and reliable baking results every time you preheat.
Your Ultimate Kitchen Conversion Resource
As you can see, the world of kitchen measurements encompasses a wide array of conversions and techniques. While it might seem daunting at first, with practice and the right resources, mastering these skills becomes second nature. This comprehensive guide, coupled with our handy printable conversion chart, is designed to be your unwavering companion in the kitchen. Bookmark this page or keep the chart close by; it’s an indispensable tool for every home cook and baker looking to elevate their culinary precision.
The Indispensable Kitchen Conversion Chart – So Useful!
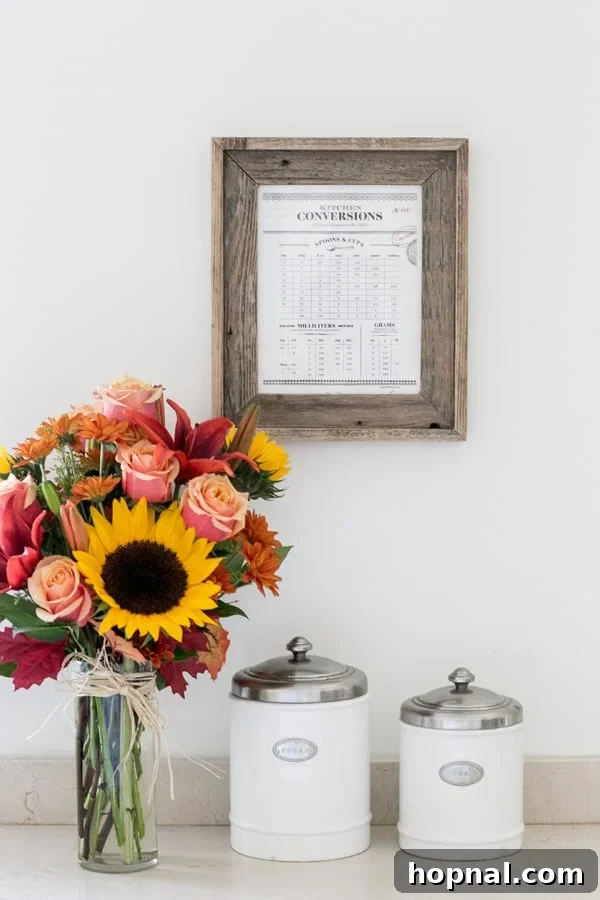
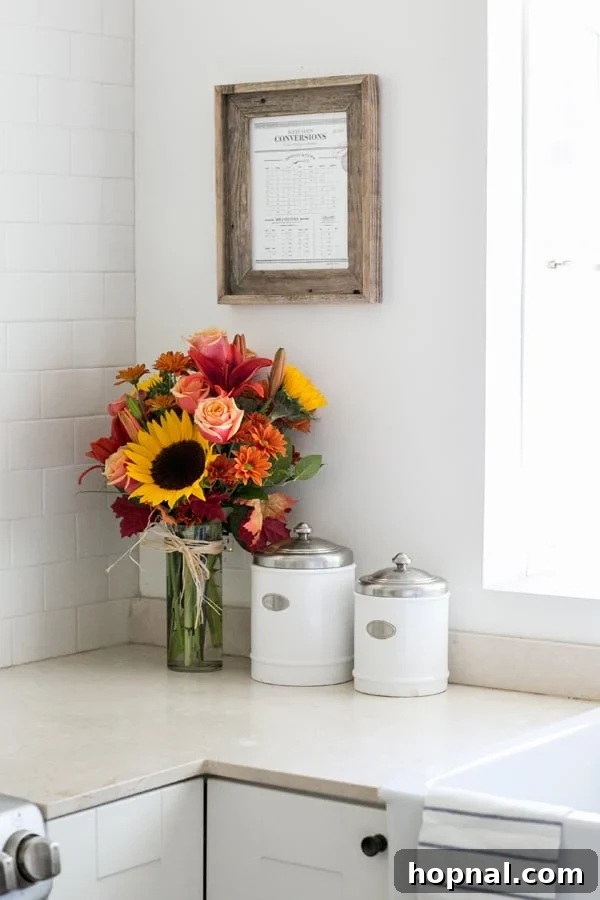
Our beautiful kitchen conversion chart is more than just a list of numbers; it’s a piece of functional art for your home. Its charming design makes it suitable for display, bringing a touch of elegance and unparalleled utility to any kitchen decor. Print it out, frame it, or simply tape it inside a pantry door or on the fridge – wherever it’s most convenient for you for quick glances during your cooking sessions. We genuinely believe it will become one of your most used and cherished kitchen helpers.
I personally rely on this chart constantly for quick answers to common questions, saving precious time by avoiding endless phone searches or complicated calculations during a busy baking session. It truly transforms the efficiency of your cooking and baking process, turning potential measurement headaches into effortless tasks. We hope this printable kitchen conversion chart brings as much ease and joy to your culinary adventures as it has to ours, becoming an essential part of your kitchen routine!
A Framed Kitchen Conversion Chart – The Perfect Gift for Any Baker!
Looking for a thoughtful and practical gift for the baker or home cook in your life? This elegant kitchen conversion chart, especially when tastefully framed or durable laminated, makes an exceptional present. It’s ideal for housewarmings, holidays, birthdays, or just as a token of appreciation for someone who loves to spend time creating culinary delights in the kitchen.
Framing elevates this useful chart into a truly special item, transforming it into a lovely piece of wall art that’s both decorative and highly functional. Consider the recipient’s kitchen decor: do they prefer ornate, classic wood frames, or sleek, contemporary metal or white finishes? The frame style can significantly complement the artwork and the overall aesthetic of their home, making the gift even more personal and appreciated.
If you’re unsure of their preference, a versatile, no-fuss flat frame in a neutral color like black or white is always a safe bet. This ensures the artwork itself shines through, offering a clean, modern aesthetic that blends seamlessly with various kitchen styles and allows the practical information to remain the focal point, without overwhelming the space.
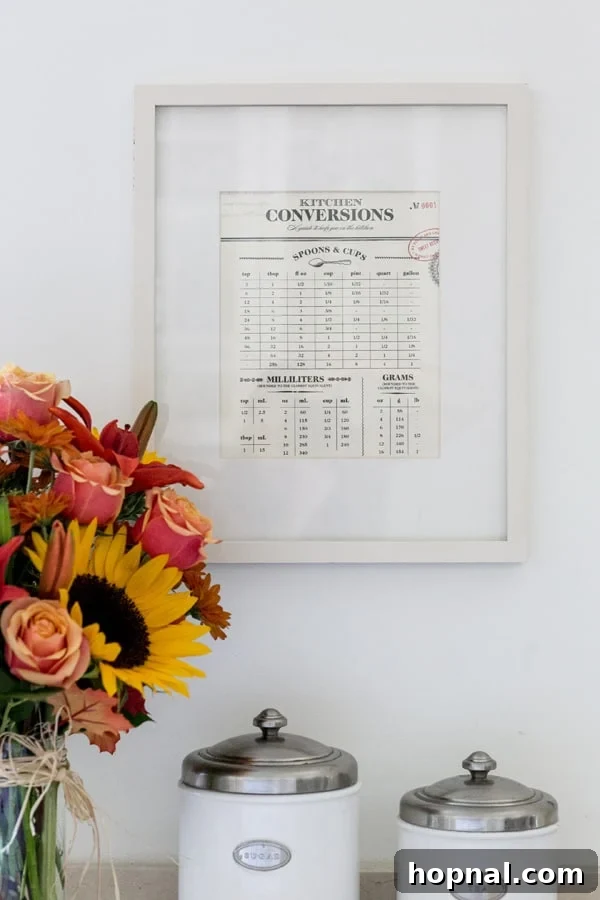
Printing Your Beautiful Kitchen Conversion Chart
Ready to bring this essential tool into your kitchen? We’ve made it easy with two convenient sizes for download, ensuring you can find the perfect fit for your space or frame. You can print it at home on quality paper, or for the best possible results and enhanced durability, we highly recommend taking the file to a professional office supply store to print on sturdy card stock. Card stock will give it a premium feel, make it resistant to splashes, and stand up to frequent kitchen use much better than standard paper.
Consider printing a few copies! This way, you’ll have extras for trimming edges, for different areas of your home (perhaps one for the pantry and one for the baking station), or to generously share with friends and fellow cooking enthusiasts. We’re always here to help with any questions you might have about downloading or printing – just reach out to us!
Download Your Free Kitchen Conversion Chart:
Click on your preferred size to download the high-resolution file:
- 8×10 inch (perfect for most standard frames and kitchen walls)
- 5×7 inch (ideal for smaller spaces, magnetic attachment to a fridge, or tucked into a recipe binder)
We sincerely hope this comprehensive guide has thoroughly answered all your measuring and conversion questions, from “How many quarts in a gallon?” to “How many cups in a pint?” Your culinary journey just got a whole lot smoother, more precise, and more enjoyable!
If you have any further questions about these measuring conversions or need additional assistance, please don’t hesitate to leave a comment below. We love hearing from our readers and are always happy to help you achieve your best results in the kitchen!
For more delightful recipes, creative cocktails, decadent desserts, and inspiring party ideas, be sure to FOLLOW US on FACEBOOK, INSTAGRAM, and PINTEREST. Join our community and let’s create something wonderful together, one perfectly measured ingredient at a time!