
Unforgettable Celebrations: Crafting DIY Photo Birthday Party Hats
Planning a memorable birthday party doesn’t have to break the bank or involve endless hours of searching for unique decor. Imagine the delight on your guests’ faces when they see personalized party hats adorned with cherished photos! These DIY photo birthday party hats are an incredibly easy and wonderfully inexpensive way to inject a unique touch of personality into any celebration, transforming ordinary gatherings into extraordinary, photo-filled events that entertain everyone.
I absolutely adore the charm and individuality these picture-perfect photo birthday party hats bring to any occasion! There’s something truly special about personalizing birthdays and making them unforgettable with thoughtful, small details. Just recently, I received a heartwarming request from a sweet five-year-old who desperately wanted a birthday hat just like the one I had crafted for her brother. The enthusiasm of children (and adults!) for these hats is simply infectious.
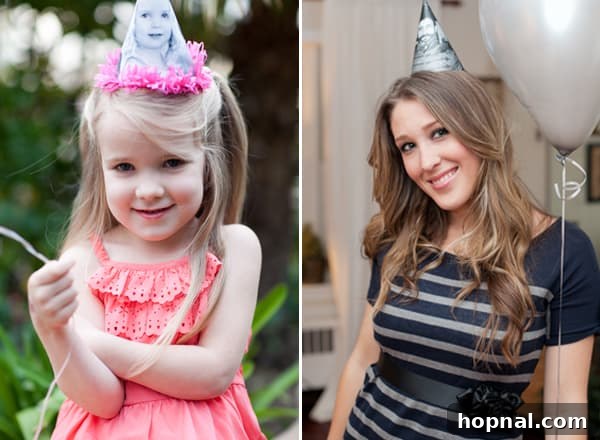
Believe me when I say, people genuinely fall in love with these custom photo party hats! I even created a batch for my father-in-law’s milestone 60th birthday, and they were an absolute sensation, sparking conversations and laughter throughout the evening. They’re not just for kids; they look adorable on children and bring a nostalgic, often hilarious, touch to adult parties too. From tiny tots to seasoned seniors, these hats transcend age, proving to be a universal hit.
The inspiration for this fantastic DIY project came from a brilliant idea I stumbled upon in Martha Stewart Living last year. I’ve continued to use her original template as a foundation, making only a few minor adjustments to streamline the process and enhance the final product. Dive into the detailed “how-to” guide below to discover my refined method for creating these charming keepsakes.
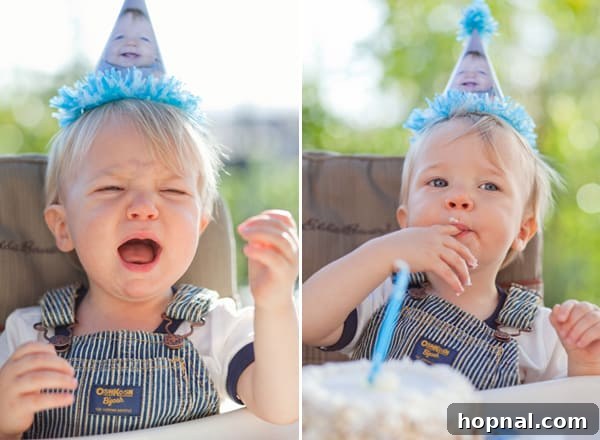
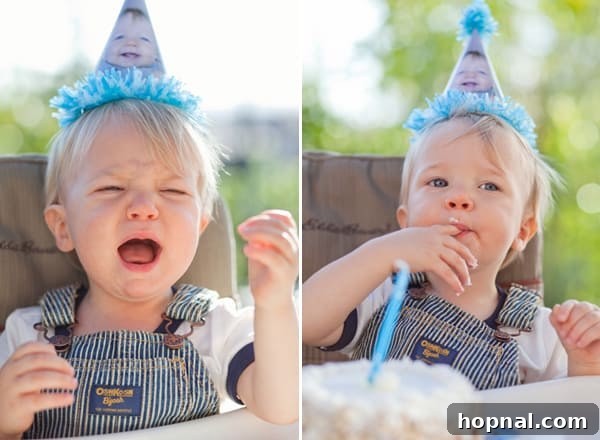
How incredibly delightful are these pictures Zan captured of our best friend’s little boy? It was his very first birthday, and looking back, I know these adorable hats and the memories they helped create will be cherished and memorable for him and his family for years to come. They serve as a wonderful visual reminder of joyful moments.
Below, you’ll find a heartwarming shot of the beautiful birthday girl, who proudly wore her hat ALL evening long! Her refusal to take it off is a testament to how much children adore these personalized creations. And yes, that’s also a glimpse of the hat I meticulously crafted for my father-in-law’s joyous 60th birthday celebration, showcasing the versatility and broad appeal of this simple craft.
Crafting Your Custom Photo Party Hats: A Step-by-Step Guide
Transforming ordinary cardstock and personal photos into these delightful party hats is a straightforward and rewarding process. Follow these detailed steps to bring your personalized party hats to life, ensuring each one is a unique expression of celebration.
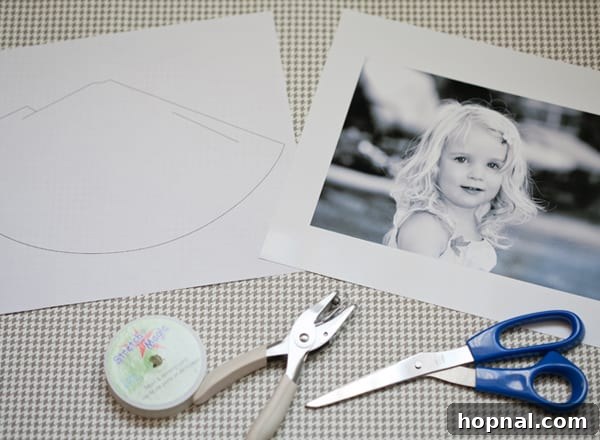
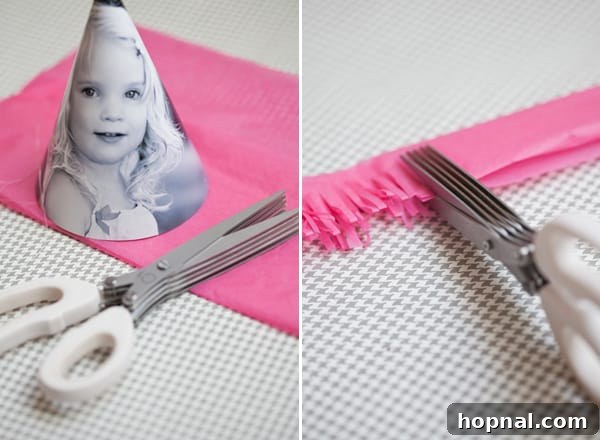
- Prepare Your Template and Photo: Begin by carefully cutting out the party hat template. Then, position the template over your chosen photo. For perfect alignment, hold both the template and the photo up to a bright light source. This allows you to see through the template and precisely adjust the photo underneath, ensuring the most flattering or amusing part of the image will be perfectly centered and visible on your finished hat. Consider using a photo printed on standard 8×11 paper to give you ample room for positioning.
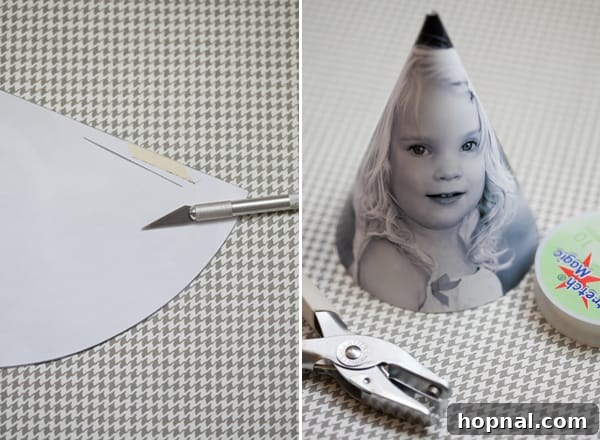
- Precise Cutting: Once your photo is perfectly aligned under the template, secure it gently with a small piece of removable tape if needed. Carefully cut around the outer edge of the template, making sure to cut through both the template and the photo simultaneously. Next, using an X-acto knife or a sharp craft knife, meticulously cut along the designated straight line on the template. This line is crucial for the hat’s assembly.
- Assembling the Hat Base: This straight cut line marks where you will fold the hat to bring its edges together. The template includes cleverly designed flaps on one side. Once folded, these flaps will insert into corresponding slots or slide under the opposite edge, allowing the hat to securely stay put without the need for additional adhesive at this stage. Press firmly along the folded seam to create a crisp, defined conical shape.
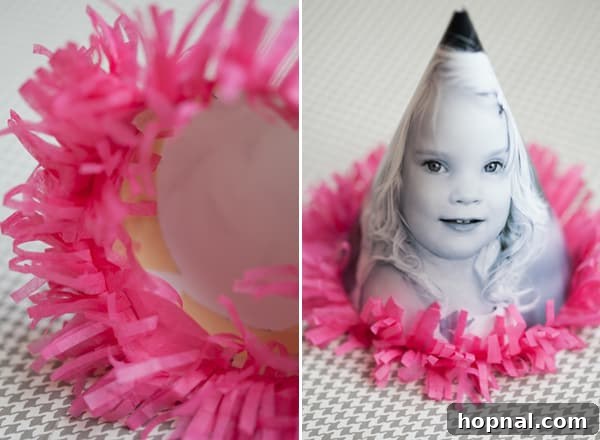
- Adding Decorative Fringe (Optional): For an extra touch of flair and festive movement, consider adding a fringe. Take a long piece of vibrant tissue paper (or any thin, decorative paper). Fold it lengthwise multiple times until it forms a manageable strip. Using Martha Stewart fringe scissors (or standard scissors for careful, narrow cuts), snip along the bottom edge of one side, creating a beautiful, uniform fringe effect. Experiment with different colors to match your party theme!
- Final Touches: To attach the fringe, unroll your fringed tissue paper and carefully tape it to the inside rim of the hat, ensuring the fringe peeks out charmingly from the bottom edge. Use a strong, double-sided tape or a thin line of craft glue for a secure hold. And just like that, with a few simple steps, your personalized photo party hat is complete and ready to dazzign!
Mastering the Template: Your Key to Perfect DIY Photo Party Hats
The secret to the perfect shape and size of these charming hats lies in using the right template. You can easily download the essential party hat template from here. When printing, I highly recommend scaling it to fit a standard letter-sized piece of paper (8.5 x 11 inches) rather than legal size. This adjustment not only results in a more appealing and manageable hat size but also makes the entire crafting process considerably easier and more economical.
Once you have your template printed, the next crucial step is selecting and printing your chosen photographs. For optimal flexibility and ease of positioning the template, it’s best to have your pictures printed on 8×11-inch paper. This generous size provides ample room to move the template around, allowing you to perfectly frame the most expressive or humorous part of the photo, ensuring each hat captures the celebrant’s personality beautifully.
Elevate Any Event: The Power of Personalized Party Hats
These photo party hats offer a truly unparalleled way to add a personal and memorable touch to any celebration. Their versatility is astounding, making them perfect for a wide spectrum of events – from boisterous kids’ birthday parties filled with laughter to dignified retirement celebrations, casual backyard barbecues, or even engagement parties. They effortlessly transcend all age ranges and party themes, promising to be a highlight of your decor.
When selecting photos, you have complete creative freedom! You might opt for a hilariously funny snapshot that guarantees chuckles, or perhaps a more flattering, heartwarming portrait. The choice is entirely yours and depends on the specific tone and atmosphere you wish to cultivate for your event. Whatever image you choose, these personalized hats invariably become fantastic photo opportunities, encouraging guests to strike a pose and capture even more delightful memories. Imagine a group photo where everyone is wearing a hat featuring a funny moment from the guest of honor’s past!
A Breeze to Make: An Easy Craft Project for All Skill Levels!
Don’t let the custom look intimidate you – these photo party hats are an absolute cinch to create! Even if you consider yourself a novice crafter, you’ll find this project incredibly approachable, especially with the user-friendly downloadable template at your disposal. Each hat can be completed in just a few minutes, making it an ideal last-minute addition to your party preparations or a fun group activity for a pre-party get-together.
Beyond the simple fringe, there are endless opportunities to unleash your creativity with hat decorations. Why stop at just tissue paper? Consider adding a sprinkle of shimmering glitter for a touch of sparkle, attaching playful mini pom-poms around the brim, or even using fabric paint pens to draw unique patterns. The sky truly is the limit when it comes to customizing these hats, allowing you to perfectly match them to your party’s theme and color scheme. Get imaginative with sequins, ribbons, feathers, or even small themed embellishments like mini flowers for a garden party or tiny stars for a space theme!
Pro Tips for Crafting the Perfect DIY Photo Party Hats
To ensure your personalized party hats turn out flawlessly and impress all your guests, keep these expert tips in mind:
- Always Use the Provided Template: While it might be tempting to freehand, the downloadable template is specifically designed for the ideal hat shape and size. Using it ensures consistency and ease of assembly for all your hats.
- Utilize Light for Perfect Photo Placement: This is a game-changer! Holding the photo and template up to a bright light source allows you to precisely align the photo, ensuring the best part of the image is perfectly centered within the hat’s visible area. This simple trick prevents awkward crops and highlights the best features.
- Embrace Creative Customization: Don’t be afraid to experiment! Beyond the suggested fringe, personalize your hats with glitter, self-adhesive gems, colorful ribbons, metallic markers, or any other crafting materials that align with your party’s theme or the celebrant’s personality. The more unique, the better!
- Quality Photo Prints Matter: For the best results, use high-resolution photos. Prints on semi-gloss or matte photo paper will resist smudges and offer vibrant colors, making your hats truly pop.
- Consider Elastic Chin Straps: While the hats are designed to stay on, for very active parties or younger children, consider attaching a small piece of elastic string (from craft stores) to keep the hats securely in place.
Discover More Charming Party Ideas for Every Occasion
If you loved creating these personalized photo hats, you’re likely a fan of making every celebration special. Explore these other fantastic party ideas to inspire your next gathering, ensuring it’s filled with charm, fun, and unforgettable moments:
15 Super Amazing and Fun Halloween Party Ideas
How to Throw a Last Minute Birthday Party with Style!
Your Ultimate Guide to Hosting a Vibrant Tropical Summer Party!
How to Host a Charming Oscar Party at Home for Movie Night
10 Great Birthday Party Favor Ideas for Kids (Beyond the Goody Bag!) by Mommy Poppins
Creative DIY Party Decorations On A Budget by That Sweet Gift
We hope you feel inspired to create your own DIY Photo Party Hats and add that special, personal touch to your next celebration! If you have tried this fun and creative project, we would absolutely love to hear about it. Please take a moment to rate it and share your experiences, tips, and how it turned out in the comments section below. Your feedback helps our community of crafters!
To stay updated with even more delightful recipes, innovative cocktail ideas, decadent desserts, and inspiring party planning tips, make sure to FOLLOW US on FACEBOOK, INSTAGRAM, and PINTEREST. Join our community and never miss out on charming ways to celebrate life’s special moments!